Table of Contents
Advertisement
Quick Links
Advertisement
Table of Contents

Summary of Contents for Grundig SC 990
- Page 1 CLOCK RADIO SC 990...
- Page 2 _ ___________________________________________________________________________ ENGLISH 03-18 2...
-
Page 3: Packing Contents
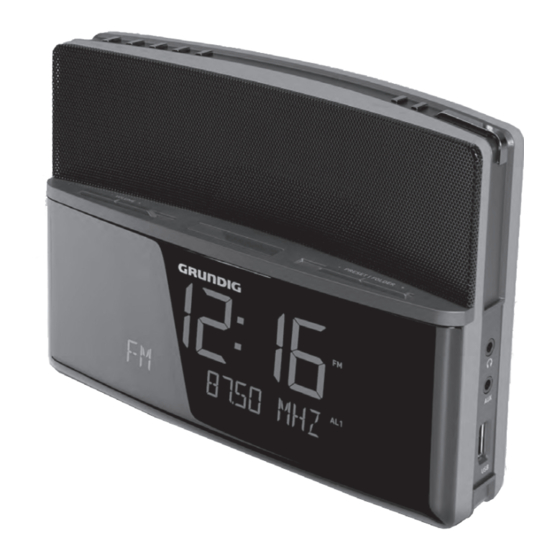
SC990 - ------------------------------------------------------------------------------------------------------------------------------------------------- Packingcontents Specialfeatures SC 990 The device receives FM radio stations. Remote control The MP3 music data format can played back via the USB input using a MP3 Player, an USB 1 battery (Lithium CR2032) memory stick or a card reader. - Page 4 OVERVIEW - --------------------------------------------------------------------------------------------------------------------------------- Thedevicecontrols Thefront,therightandtheleftsideofthedevice SNOOZE/DIMMER Opticalindicator ON/OFF -VOLUME+ -PRESET/ALBUM+ DISPL DISPLAY Back-upbattery compartment ON/OFF Switches the device to and from In FM mode: Selects the presets. –PRESET/ stand-by mode. In USB mode: Selects the file ALBUM+ folders. DISPL Displays information about the FM radio stations as well as...
- Page 5 OVERVIEW - --------------------------------------------------------------------------------------------------------------------------------- Thetopandthebackofthedevice ANTENNA PROG SLEEP § $ -VOLUME+ /BACK DCIN PROG Starts and pauses playback (in In FM radio mode: Press for acti- USB mode). vating the memory function and confirming the selected station. Selects the different audio sourc- In stand by mode: Press and hold es for USB, FM and AUX modes.
-
Page 6: The Remote Control
OVERVIEW - --------------------------------------------------------------------------------------------------------------------------------- Theremotecontrol PROG In FM radio mode: Press for activat- ing the memory function and con- firming the selected station. In stand by mode: Press and hold down to start setting the time and date. BACK No function. In FM radio mode: Select presets. - Page 7 OVERVIEW - --------------------------------------------------------------------------------------------------------------------------------- Thedisplay In stand-by: Displays the current Pauses playback. 87.65 time and date. PROG The programmed presets. Displays the volume setting. In FM radio mode: Displays the The current album is repeated frequency, the station name or (flashing).
-
Page 8: Connection And Preparation
CONNECTIONANDPREPARATION --------------------------------------- Connectingexternaldevices Connectingtheheadphones Insert the headphone plug (ø 3.5 mm) into Note: the » « socket on the right side of the de- Switch the device off before you connect vice. external devices. – The loudspeaker of the device is switched Use a standard audio cable to connect the off. -
Page 9: Installingbatteryinthere- Motecontrol
CONNECTIONANDPREPARATION --------------------------------------- Installingbatteryinthere- Installingback-upbatteryin motecontrol thedevice During mains operation, the back-up battery en- sures that the stored settings are not lost in the case of a power failure or when the device is briefly disconnected from the mains. 1Open the back-up battery compartment on the left side of the device by pushing the small latch upwards and at the same time sliding the battery tray out. -
Page 10: Initial Setup
SETTINGS - -------------------------------------------------------------------------------------------------------------------------------------- Initialsetup Settingthetimeanddate When the device is connected to the mains Switch off the device by pressing » « on the for the first time, »0:00« starts flashing and remote control or »ON/OFF« on the device. »WELCOME TO ...« appears on the display. Press and hold down »PROG«. -
Page 11: Adjusting The Display Brightness
SETTINGS - -------------------------------------------------------------------------------------------------------------------------------------- Adjustingthedisplaybright- ness Press repeatedly »SNOOZE/DIMMER« on the device or »S« on the remote control to change the brightness of the display in three levels (high, medium, low). Notes: Minimum power consumption in stand-by mode is only achieved if the backlight in the display is switched to minimum. -
Page 12: Usb Mode
USBMODE - --------------------------------------------------------------------------------------------------------------------------------- Displayinginformation Playingthecontentsofan USBdatamedium During playback, press »DISPL« on the re- mote control. Switch off the device from stand-by mode – Display: The album and file numbers, the by pressing » « on the remote control or ID3 Tag, the title, the artist, the album is »ON/OFF«... - Page 13 USBMODE - --------------------------------------------------------------------------------------------------------------------------------- RepeatingAlbum Notes: The USB socket on the device does not sup- During playback press » /WEC« once on port a connection for a USB extension cable the remote control. and is not designed for direct connection to –...
-
Page 14: Displayingrdsstationinfor- Mation
FMMODE -------------------------------------------------------------------------------------------------------------------------------------- Selectingthetunerinput Settingstereoormonorecep- source tion(onlyinFMradiomode) Press »M« repeatedly on the remote control Press » « on the remote control to switch or on the device until »FM« appears on the between stereo and mono modes. display. DisplayingRDSstationinfor- Selectingstations–frompre- mation sets If the device is receiving a RDS station, the sta- In the »FM«... -
Page 15: Timer Mode
TIMERMODE -------------------------------------------------------------------------------------------------------------------------- Your device has 2 timer modes: Press » « or » « briefly to set the volume – The alarm timer, which switches the device step by step or hold down to run through on at the set time and wakes you with the »10-31«... -
Page 16: Setting The Sleep Timer
TIMERMODE -------------------------------------------------------------------------------------------------------------------------- Sleeptimer Deactivatingandactivatingthe alarmfortheweekend Settingthesleeptimer In stand-by, press »WEC« on the remote con- Switch on the device by pressing » « on the trol or on the device. remote control or »ON/OFF« on the device – Display: »WEC«. The alarm function is deac- and select the preferred sound source. -
Page 17: Cleaning The Device
INFORMATION - ----------------------------------------------------------------------------------------------------------------- Cleaningthedevice Technicaldata Pull out the power cord from the wall socket. This device is noise–suppressed ac- Clean the device by using a soft cloth slightly cording to the applicable EU direc- moistened with a mild detergent solution. Do not tives. -
Page 18: Troubleshooting
If the following measures do not resolve the problem satisfactorily, please visit www.grundig.com, product range:audio, inter- net radios or contact your specialist dealer. GeneralFaults Problem Possiblecause/remedy... - Page 19 Grundig Intermedia GmbH Beuthener Strasse 41 90471 Nürnberg www.grundig.com 72011 411 5400 14/16...


Need help?
Do you have a question about the SC 990 and is the answer not in the manual?
Questions and answers