Advertisement
SAFETY INSTRUCTIONS

For your safety and the safety of others, as well as to avoid any damage to the product and your vehicle, carefully read and make sure you fully understand this manual's safety instructions in its entirety. You must read the vehicle's service manual, the battery manufacturer's specific safeguards, and observe the stated precautions or instructions before and during any test or service procedure.

ONLY OPERATE TESTS IN A WELL-VENTILATED AREA since the vehicle produces carbon monoxide (a toxic, poisonous gas, and particulate matter) when the engine is running.

ALWAYS WEAR APPROVED SAFETY EYE PROTECTION to prevent damage from sharp objects and caustic liquids.

ALWAYS BE AWARE OF MOVING PARTS (such as coolant fans, pulleys, belts) since they spin or turn at high speeds when the engine is running.

DO NOT TOUCH HOT ENGINE PARTS to prevent severe burns. The motor parts can get extremely hot when the engine is running.

TURN THE IGNITION OFF BEFORE CONNECTING OR DISCONNECTING THE TOOL FROM THE BATTERY to prevent damage to the tester or the vehicle's electronic components.

DON'T SMOKE NEAR THE VEHICLE when testing. Fuel and battery vapors are highly flammable.

DO NOT WEAR LOOSE CLOTHING OR JEWELRY WHEN WORKING ON AN ENGINE. Loose clothing can easily be caught in the engine's fan, pulleys, belts, etc., and jewelry is highly conductive, which may cause severe burn or electric shock if it contacts electricity.

DO NOT CUT THE PRODUCTS CORDS OR SUBMERGE THEM IN WATER. The product is an electrical device that can cause shock and severe burns.


Battery acid is extremely corrosive. If acid gets into your eyes, RINSE THEM THOROUGHLY WITH COLD RUNNING WATER FOR AT LEAST 20 MINUTES AND SEEK MEDICAL ATTENTION IMMEDIATELY.
If battery acid contacts your skin or clothing, WASH IT IMMEDIATELY WITH A SOLUTION OF WATER AND BAKING SODA.
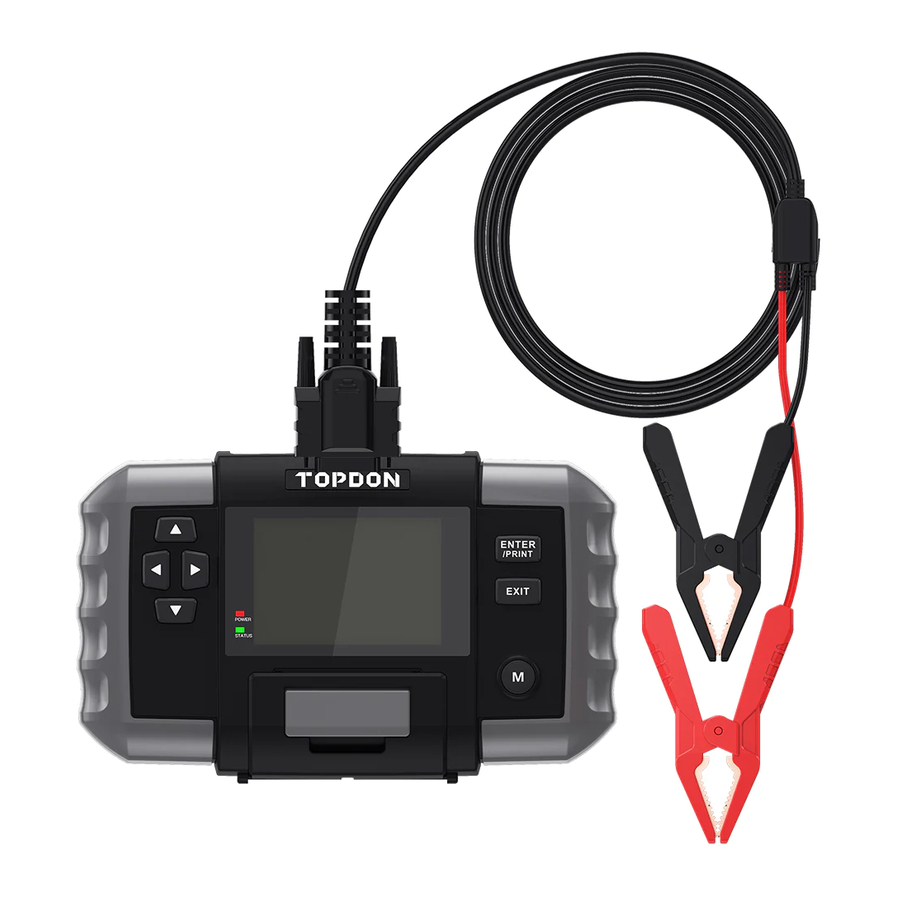
WHAT'S IN THE BOX
BT600
Battery Test Cable with Clamps
Mini USB to USB Cable
3 Rolls of Printer Paper
Carrying Bag
User Manual
PRODUCT OVERVIEW


GETTING STARTED
Let's take the following picture as a reference:
- Most models hold the battery in the engine bay, under the hood, in one of the front corners. See battery location ① and ② in Figure 3.1.1.

- To balance uneven weight distribution, some manufacturers hold the engine in the trunk. See battery location ⑤, ⑥, and ⑦ in Figure 3.1.1. In this case, the battery may have a plastic cover that should be removed prior to any testing.
- For some models, the battery might be stored underneath the rear seat. See battery location ④ in Figure 3.1.1.
- For other vehicles, the battery can be located underneath the passenger seat. See battery location ③ in Figure 3.1.1.


DO NOT TEST THROUGH THE JUMPSTART POSTS. For models that hold the battery under the seat or in the trunk, the manufacturer usually includes jumpstart connector conductor posts under the hood (see Figure 3.1.2) to make jumpstarting easier. However, to ensure data accuracy and operation safety, DO NOT CONNECT THE BATTERY TESTER TO THE JUMPSTART POSTS.
How to Identify What Type of Battery You Have
Let's take the following picture as an example:

- Reserve Capacity: 80Ah
The Reserve Capacity is a time measurement that explains how long a fully-charged battery can deliver a 25 amps current in an 80°F- environment before the battery is discharged and drops to 10.5 volts. - Battery Type: AGM
Please refer to this list to check the most commonly seen leadacid battery types for your reference.
| Flooded Lead Acid Battery (Wet): | This is the oldest/most common car battery type, also known as "SLI battery." The Flooded Battery is usually made of 6 cells with a liquid electrolyte solution of sulfuric acid and water that needs to be topped off periodically. This battery typically supplies a voltage of 12.6V at full charge. |
| This battery type also uses a liquid electrolyte solution. Enhanced Flooded Battery (EFB): | However, differently than the Wet Flooded Lead Acid, it is sealed and maintenance-free. The Enhanced Flooded, usually seen in cars with simple start-stop technology, can provide up to 85,000 engine cranks. |
| Gel Cell Battery (Gel) for this type, calcium replaces the antimony in the lead & VRLA Battery: | Gel batteries are similar to flooded batteries. Although plates, and silica is added to the electrolyte solution, turning the liquid into a gel. |
| Absorbent Glass Mat Battery (AGM): | AGM batteries are designed to deliver powerful bursts of starting amps and run for a long time. "Absorbed Glass Mats" are used to cushion the ultra-thin lead plates, allowing manufacturers to include more leads into one battery and provide more power. AGM batteries are divided into two categories according to the cell structure. They can be AGM FLAT PLATE and AGM SPIRAL. This type of battery is ideal for vehicles with automatic start-stop applications and braking energy recovery. |
- Voltage: 12V
When fully charged, automotive batteries should measure at 12.6 volts. However, this measurement should be from 13.7 to 14.7 when the engine is running. If the battery tester reads less than this standard, it means that the battery's resting voltage is weak. In this case, typically, the battery needs to be charged or replaced. - CCA: 650A (SAE)
The CCA rating refers to how many amps a 12-volt battery can deliver at 0°F in 30 seconds while maintaining at least a 7.2V voltage. This means that the higher the CCA rating is, the easier the engine can be cranked in cold temperatures.
Connect the Clamps to the Battery Terminals
- Before connecting the clamps to the terminals, please use sandpaper to polish off the corrosion on the battery terminals. With this, you can avoid inaccurate test values.
- Attach the red clamp to the positive (+) terminal, and connect the black clamp to the negative (-).
- ALWAYS KEEP THE RED & BLACK CLAMPS FROM TOUCHING.
- ALWAYS DISCONNECT THE NEGATIVE CABLE FROM THE BATTERY FIRST AND RECONNECT IT LAST.
- Once the clamps are properly connected, the battery tester will power on automatically and be ready to conduct tests.


HOW TO USE
Battery Test
Before the test, the engine and all other accessory loads must be off to ensure accurate results. The battery testing function only applies to 12V lead-acid batteries (24V batteries are not supported).
- Select BATTERY TEST and press [ENTER / PRINT].

- Select the corresponding battery type and press [ENTER / PRINT]. The specific battery type is usually listed on the battery label.

- Select the corresponding battery standard and press [ENTER / PRINT]. The specific battery standard will also be listed on the battery label.


Please refer to the following table for specific battery standards and test ranges.
| Measurement Standard | Description | Measurement Range |
| CCA | Cold Cranking Amps, specified by SAE & BCI, most frequently used value for starting battery at 0°F(-18°C) | 100-2000 |
| BCI | Battery Council International standard | 100-2000 |
| CA | Cranking Amps standard, effective starting current value at 0°C | 100-2000 |
| MCA | Marine Cranking Amps standard, effective starting current value at 0°C | 100-2000 |
| JIS | Japan Industrial Standard, displayed on the battery as combination of the numbers and letters, e.g., 55D23,80D26 | 26A17-245H52 |
| DIN | German Auto Industry Committee Standard | 100-1400 |
| IEC | International Electrotechnical Commission Standard | 100-1400 |
| EN | European Automobile Industry Association Standard | 100-2000 |
| SAE | Society of Automotive Engineers Standard | 100-2000 |
| GB | China National Standard | 30Ah-220Ah |
- Input the CCA by using the arrow keys (Up & Down) and press [ENTER / PRINT] to start the test.
Note:
You can short press the Up & Down keys to increase or decrease the value by 5 each time. Press and hold the Up & Down keys to continuously increase or decrease the value.

- The test result will appear soon on the tool's display.


Battery Test Terminology:
| HEALTH (SOH) | The state of health shows the difference between the battery being tested and a new battery, considering cell aging. The SOH is defined according to the maximum battery charge ratio and its capacity. |
| CHARGE (SOC) to the battery's remaining charge ratio, divided by the | The state of charge describes the difference between a fully charged battery and the same battery in use. It analyses the remaining quantity of electricity available in the cell. The SOC is established according maximum charge that the battery can deliver. |
| INTERNAL R (Internal Resistance) | The internal resistance is the opposition to the current flow presented by the cells and the battery itself, generating heat. Its electronic resistance and ionic resistance directly impact this indicator. |
| RATED | The CCA value you entered in the previous step, that is, the CCA value listed on the battery label. The difference of the rated CCA between the actual CCA determines the test result to a certain extent. |
Cranking Test
Before the cranking test, the engine and all other accessory loads must be off in order to ensure accurate results. This test applies to both 12V & 24V lead-acid batteries.
- Select CRANKING TEST and press [ENTER / PRINT].

- The test will start by prompting you to crank the engine. Follow the instructions and start the engine.

- The test results will appear on the display.


Cranking Time and Cranking Voltage:
- The Cranking Time refers to the time it takes for a vehicle to start the engine.
- The Cranking Voltage refers to the battery voltage while the engine is starting. Cranking Voltage should always be higher than 9.6V for passenger vehicles and 19.2V for commercial vehicles.
Charging Test
Always start the engine before performing the charging test. This test applies to both 12V & 24V lead-acid batteries.
- Select CHARGING TEST and press [ENTER / PRINT].

- Confirm the engine has been started and press [ENTER / PRINT].

- Ripple test will be conducted before the charging test starts, the test result will be displayed in graph and will jump to the next step after 5 seconds.

- The tool will prompt you to increase the RPM to 2500 and keep it for 5 seconds. Do as requested and press [ENTER / PRINT] to continue.

- The test result will appear on the display.


Loaded/Unloaded Voltage and Ripple:
- The Loaded Voltage means the voltage measured when turning on the on-board electrical appliances.
- Unloaded Voltage refers to the voltage measured when turning off the on-board electrical appliances.
- Ripple:: A vehicle's battery operates on one-way direct current (DC) electricity, while alternators output alternating current (AC) electricity. In this process, the power needs to go through the diode rectifier to turn into a direct current - that's when the ripple occurs.
REVIEW DATA
This function saves the test results automatically. This way, you can go back and check previous data at any time.
- Select REVIEW DATA and press [ENTER / PRINT].

- The test result of battery test, cranking test or charging test will be shown on the display. You can press arrow keys (Left & Right) to switch between them.


NOTE:
This tool will only save the last result of each test (battery test, cranking test or charging test).
LANGUAGE
This function provides language setup for the tester.
- Select LANGUAGE and press [ENTER / PRINT].

- Select your preferred language. This tool offers 8 languages (English, French, Spanish, German, Italian, Portuguese, Russian and Japanese).


PRINT TEST REPORT
This function is designed to print the test reports.
Option 1:
After you finish a test, press [ENTER / PRINT] in the test result interface to print the report instantly.
Option 2:
Enter REVIEW DATA and view the last test result. Then press [ENTER / PRINT] to print the report.
NOTE:
- Only the last test result can be viewed and printed.
- If your battery voltage is under 9.5V, the printing function will be unavailable.
UPDATE
A computer with Windows XP/7/8/10 system is required.
- Go to www.topdon.com/products/bt600, click "DOWNLOADS" of the page, and select "Update Tool" to download the update tool to your computer.
- Install the Update Tool and log in.
NOTE:
Any TOPDON account is able to log in. If you don't have an account, register an account with your email address first. - Connect the tester to the computer via the USB cable included with the package.
- Register the tester, the information of the tester will be shown on the My Device interface. Confirm the serial number is correct. (This step is not necessary if you've already registered the decive.)
- Select "Upgrade", the newest firmware version will show up.
Tap "Upgrade", the software will start to upgrade the tester.
Wait until it prompts successful.


NOTE:
The tester will be initialized automatically the first time you use the tester after the upgrade.
REPLACE PRINTER PAPER

This battery tester comes with three rolls of printer paper, of which one is installed in the tester and the other two are in the box. Please follow the diagram below to replace the paper roll.
NOTE:
The direction of the printer paper must be followed in order, otherwise it will not be able to print the content.
FAQ
Q: Can the BT600 test the battery installed in the vehicle?
A: Yes, it supports in-vehicle and out-of-vehicle testing.
Q: Are the test results accurate?
A: Yes. Our BT600 features advanced conductance detection, able to give you accurate test results in seconds.
Q: What batteries can the BT600 work on?
A: It works on 12V regular flooded, AGM Flat plate, AGM Spiral, GEL and Deep Cycle batteries, with CCA between 100 to 2000.
Q: Is the BT600 designed with any built-in protections?
A: Yes. It offers peace of mind with extra-safe Reverse Polarity and Spark protection. It offers easy operations even if you're new to battery testing.
Q: How do I confirm if my vehicle battery is bad or good?
A: The battery tester will display SOH (State of Health), SOC (State of Charge), CCA (Cold Cranking Ampere), Voltage, Internal Resistance, and Rating, with an intuitive test result of "GOOD" or "BAD" for your reference. If the internal resistance is too large, it indicates a broken battery.
Q: Can this battery tester estimate the remaining capacity of my battery?
A: Yes. The battery tester will display SOC (State of Charge) to express as a percentage of your battery's rated capacity, a measure of its condition to assess the potential energy. Note that a decent SOC (State of Charge) doesn't mean the battery is in good condition. Be sure to refer to your battery's actual CCA Value and Internal Resistance for further analysis.
TECHNICAL SPECIFICATION
| Working Temperature | -10°C~55°C (14°F~131°F) |
| Storage Temperature | -20°C~75°C (-4°F~167°F) |
| Operating Voltage | DC 9~30V |
| Dimensions | 218 x 134 x 57mm (8.58 x 5.27 x 2.24") |
| Cable Length | 1800mm (70.9") |
| Testing Range | 100~2000 A |

Documents / Resources
References
Download manual
Here you can download full pdf version of manual, it may contain additional safety instructions, warranty information, FCC rules, etc.
Advertisement


Need help?
Do you have a question about the BT600 and is the answer not in the manual?
Questions and answers