Table of Contents
Advertisement
Quick Links
Advertisement
Table of Contents

Related Manuals for Gaggenau EB 333 411


Summary of Contents for Gaggenau EB 333 411
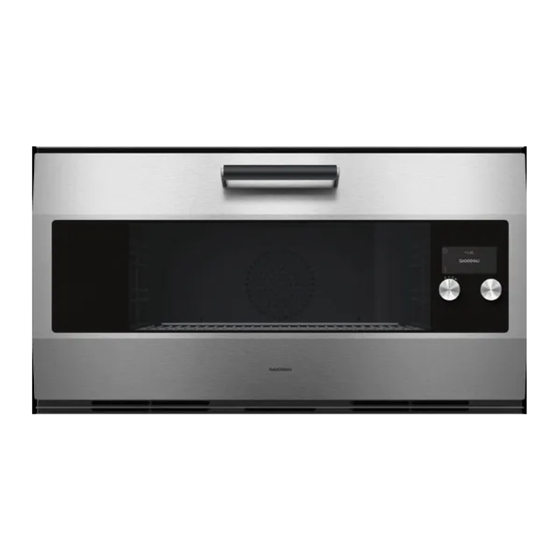
- Page 1 Instruction manual EB 333 411 Oven...
-
Page 2: Table Of Contents
Table of contents Instruction manual Applying settings for a dish I ntended use Calling up the last automatic programmes used I mportant safety information I ndividual recipes Ž Recording a recipe C auses of damage Programming a recipe Entering names Starting recipes E nvironmental protection Change recipe... -
Page 3: I Ntended Use
Additional information on products, accessories, replacement parts and services can be found at Keep children below the age of 8 years old at a www.gaggenau.com and in the online shop www.gaggenau.com/zz/store safe distance from the appliance and power cable. -
Page 4: I Mportant Safety Information
Important safety information I mportant safety information T his appliance may be used by children over Risk of scalding!! I m p o r t a n t s a f e t y i n f o r m a t i o n The inside of the appliance door becomes ▯... - Page 5 Important safety information Warning – Risk of injury! Scratched glass in the appliance door may develop into a crack. Do not use a glass scraper, sharp or abrasive cleaning aids or detergents. Warning – Risk of electric shock! Incorrect repairs are dangerous. Repairs ▯...
-
Page 6: C Auses Of Damage
Causes of damage C auses of damage E nvironmental protection C aution! T he sections below list a number of energy-saving tips C a u s e s o f d a m a g e E n v i r o n m e n t a l p r o t e c t i o n and provide information on disposing of your appliance. -
Page 7: F Amiliarising Yourself With Your Appliance
Familiarising yourself with your appliance F amiliarising yourself with your appliance U se this section to familiarise yourself with your new F a m i l i a r i s i n g y o u r s e l f w i t h y o u r a p p l i a n c e appliance. -
Page 8: Display And Operating Controls
Familiarising yourself with your appliance Display and operating controls Child lock Call up timer menu Call up long-term timer ° Demo mode Call up core temperature probe Start rotisserie spit Stop rotisserie spit ¤ Start roasting function £ End roasting function Network connection (Home Connect) -------- Colours and display... -
Page 9: Standby
– Different things can be displayed in standby mode. After removing your food from the appliance, keep the The default setting is the GAGGENAU logo and the door closed until the appliance has cooled down. The time. appliance door must not be left half open as this may damage adjacent kitchen units. -
Page 10: Function Selector Positions
Familiarising yourself with your appliance Function selector positions Position Function/heating function Temperature range Application Default temperature "Off" position ž Light Hot air 50 - 300 °C Hot air: For cakes, biscuits and bakes on more than one level. 170 °C The fan in the back panel of the oven distributes the heat evenly throughout the cooking compartment. -
Page 11: Accessories
Familiarising yourself with your appliance Position Function/heating function Temperature range Application Default temperature Roasting dish function 50 - 220 °C Only with the roasting dish (optional accessory) 180 °C Heatable cast iron roasting dish for large joints of meat, bakes or festive roasts. Dough proving 30 - 50 °C Proving: For yeast dough and sourdough. -
Page 12: B Efore Using The Appliance For The First Time
Once the appliance has been connected to a power Setting the temperature unit supply, the GAGGENAU logo will appear first for approximately 30 seconds. The "Initial settings" The two possible units °C and °F will appear on the menu will then appear automatically. -
Page 13: O Perating The Appliance
Operating the appliance Switching on O perating the appliance Set the required heating mode using the function selector. The chosen heating mode and the default C ooking compartment temperature are displayed. O p e r a t i n g t h e a p p l i a n c e If you want to change the default temperature: The cooking compartment has three rack levels. -
Page 14: T Imer Functions
Timer functions The timer menu closes and the time begins to count T imer functions down. The Š symbol and the countdown appear in the display. Y ou use the timer menu to make the following settings: T i m e r f u n c t i o n s Š... -
Page 15: Cooking Time
Timer functions The timer menu is closed and the timing begins. The Set the desired cooking time using the rotary symbol and the elapsed time are shown in the display. selector. Press I to start. Pausing and restarting the stopwatch The appliance starts. -
Page 16: End Of Cooking Time
Timer functions End of cooking time To terminate the whole procedure: Set the function selector to 0. You can delay the cooking time end to a later time. Example: it is 14:00. The dish requires a cooking time of 40 minutes. You want it to be ready at 15:30. Enter the cooking time and delay the cooking time end until 15:30. -
Page 17: L Ong-Term Timer
Long-term timer L ong-term timer A utomatic programmes W ith the appliance in hot air mode, this function keeps Y ou can prepare a wide range of food using the L o n g - t e r m t i m e r A u t o m a t i c p r o g r a m m e s the temperature between 50 and 230 °C. -
Page 18: Applying Settings For A Dish
Automatic programmes Applying settings for a dish Calling up the last automatic programmes used You are guided through the entire setting process. Follow the instructions in the display. The last five dishes with the selected settings are saved. You have the option of saving these dishes with the Use the rotary selector to scroll through the individual "Individual selected settings as individual recipes. -
Page 19: I Ndividual Recipes
Individual recipes Programming a recipe I ndividual recipes Ž You can program and save up to 5 preparation phases. Set the function selector to ž. I t is possible to save up to 50 individual recipes. You I n d i v i d u a l r e c i p e s can record a recipe. -
Page 20: Starting Recipes
Individual recipes Change recipe Rotary Select letters selector You can change the settings of a recorded or A new word always begins with a capital programmed recipe. letter. Press briefly: moves the cursor right Set the function selector to ž. Press and hold: shifts to umlauts and Touch the symbol. -
Page 21: C Ore Temperature Probe
Core temperature probe Meat: Insert the core temperature probe at the thickest C ore temperature probe point on the side as far as it will go into the meat. If there is more than one piece of meat, insert the core temperature probe into the middle of the thickest piece. -
Page 22: Setting The Core Temperature
Core temperature probe Setting the core temperature Estimated cooking time After preheating, if the appliance has a temperature Caution! setting above 100 °C, when the core temperature probe Damage to the core temperature probe: is inserted, the display shows an estimated cooking time The core temperature probe may be damaged if the approx. -
Page 23: Suggested Values For The Core Temperature
Core temperature probe Suggested values for the core Food Suggested value for the core temperature temperature Lamb Only use fresh food that has not been frozen. The Leg of lamb figures in the table are given as a guide. They will Medium rare 60–65 °C depend on the quality and composition of the food. -
Page 24: R Otary Spit
Rotary spit If you want to cook two small chickens (max. 1.5 kg/ R otary spit chicken) at the same time, use retaining prongs either side of each chicken and screw them in to secure the chickens in place. U se the rotisserie spit to grill large roasts or poultry. R o t a r y s p i t Grilling with the rotisserie spit produces a crispy crust and even browning all-round. -
Page 25: Switching On The Rotisserie Spit
Roasting function Switching on the rotisserie spit R oasting function Set the required temperature and heating mode. Touch the symbol. The rotisserie spit begins to O nly when set to the "Roaster function" type of heating: R o a s t i n g f u n c t i o n turn. -
Page 26: C Hildproof Lock
Childproof lock C hildproof lock H ome Connect T he appliance has a childproof lock to prevent children T his appliance can be networked and controlled C h i l d p r o o f l o c k H o m e C o n n e c t operating it accidentally. -
Page 27: Remote Start
Home Connect Select the Home Connect app and install it on your If the display shows "Network connection successful", mobile device. the connection process is complete. Follow the instructions in the app. Launch the app and set up Home Connect access. The app will guide you through the registration process. -
Page 28: Home Connect Settings
Home Connect Home Connect settings Home Connect can be adapted to your specific needs at Note: You will find the Home Connect settings in the any time. basic settings for your appliance. Which settings the display shows will depend on whether Home Connect has been set up and whether the appliance is connected to your home network. -
Page 29: About Data Protection
A detailed RED Declaration of Conformity can be found ▯ Unique appliance identification (consisting of online at www.gaggenau.com on the product page for appliance codes as well as the MAC address of the appliance in the additional documents. installed WiFi communication module). -
Page 30: B Asic Settings
- Date + GAGGENAU logo the desired display. - Clock + date The selection is displayed. - Clock + date + GAGGENAU logo Display Reduced*/Standard If the 'Reduced' setting has been selected, only the most important information will be shown on the display after a short time. - Page 31 Basic settings Date Current date Sets the date. You can switch between year/ month/day using the symbol C. Temperature unit °C* / °F Setting the temperature unit Weight unit kg*/oz. Set the weight unit Language German* / French [...] / English Select the language for the text display Note: The system will restart if the language is...
-
Page 32: C Leaning And Maintenance
Cleaning and maintenance Area Cleaning product(s) C leaning and maintenance Stainless steel Hot soapy water: Clean using a dishcloth and then dry with a soft cloth. Remove limescale, grease, starch and albumin W ith thorough care and cleaning your appliance will C l e a n i n g a n d m a i n t e n a n c e (e.g. -
Page 33: Removing The Shelf Supports
Cleaning and maintenance Area Cleaning product(s) Baking stone Remove burnt-on remnants with a brush. (optional acces- Never clean the baking stone with water. sory) Roaster Hot soapy water: Soak and clean with a (optional acces- dishcloth or brush. sory) Do not clean the roaster in the dish- washer. -
Page 34: Catalytic Cleaning (Cleaning Aid)
Cleaning and maintenance Press I to start. The cleaning time elapses on the Catalytic cleaning (cleaning aid) display. If the switch-off time has been shifted, the time up to the start of catalytic cleaning elapses in the display. The lamp in the oven interior stays off. The rear and top interior panels in the oven are coated with catalytic special enamel. -
Page 35: W Hat To Do In The Event Of A Fault
What to do in the event of a fault Warning – Risk of electric shock! W hat to do in the event of a fault Incorrect repairs are dangerous. Repairs may only be carried out and damaged power cables replaced by one of our trained after-sales technicians. -
Page 36: Replacing The Oven Light Bulb
After-sales service Replacing the oven light bulb A fter-sales service The oven light bulbs can be replaced. Heat-resistant halogen bulbs can be obtained from the After-sales service or from a specialist retailer. Always use halogen O ur after-sales service is there for you if your appliance A f t e r - s a l e s s e r v i c e bulbs of the same type. -
Page 37: T Ables And Tips
Tables and tips – Full surface grill and full surface grill + T ables and tips circulated air: In these operating modes, there may be a temperature difference between the temperature N otes you have set and the actual temperature inside the T a b l e s a n d t i p s oven. -
Page 38: Vegetables
Tables and tips Vegetables ▯ ▯ Oven-roasted or oven-baked vegetables are a good Vegetables are good as a hot or cold starter or alternative to pan-fried vegetables. The different vegetarian main course, or as an accompaniment to flavours become more concentrated and, because meat and fish. -
Page 39: Side Dishes And Meals
Tables and tips Side dishes and meals ▯ ▯ The best known oven-cooked side dishes are Grilled dishes such as bakes and gratins are potato-based, such as potato gratin. However, you particularly well suited to being prepared in the can also obtain excellent results when oven-cooking oven. - Page 40 Tables and tips Dish Accessory Level Tempera- Type of Cooking Comments ture heating time in °C in min. Feta Ovenproof Recipe tip: Place feta cubes in a dish with dish + wire oil, tomatoes, onion, garlic and rosemary rack and season with salt and pepper. Oven-baked cheese, Baking tray After 10 minutes, cut a cross into the soft...
-
Page 41: Fish
Tables and tips Fish ▯ ▯ For food hygiene reasons, fish should have a core Shorten the wooden skewers or, before skewering temperature of at least 62-70 °C after cooking. This the ingredients, leave the skewers to soak in water is also the ideal cooking temperature. -
Page 42: Meat
Tables and tips Meat ▯ ▯ Use the core temperature probe so that you can For small portions (2 - 3 people), it is a good idea to monitor the core temperature more easily. use a heat-resistant baking dish or tin so that the food does not begin to burn or dry out. - Page 43 Tables and tips Dish Accessory Level Tempera- Type of Cooking Comments ture heating time in °C in min. Knuckle of pork Wire rack + 150 / 200 50*** Score the skin diagonally in both directions grill tray so that it is cross-hatched. This will make it nice and crispy.
-
Page 44: Poultry
Tables and tips Poultry ▯ ▯ Use the core temperature probe so that you can Use a roasting dish or another heat-resistant baking monitor the core temperature more easily. Insert dish or tin for dishes that require a lot of liquid to this between the belly and the thigh, rather than in be added to the roast. -
Page 45: Grilling And Roasting
Tables and tips Grilling and roasting ▯ ▯ Do not grill food with the oven door open. If you use wooden skewers, they may char. To prevent this, shorten them as far as possible, leave ▯ For grilling, use the grill tray with the wire insert them to soak in water overnight before skewering (depending on the model, this may be an accessory the ingredients or use metal skewers. -
Page 46: Baked Items
Tables and tips Baked items ▯ ▯ We recommend using dark-coloured metal baking If the cake is too dry, set the temperature a little tins, as these absorb heat more effectively. Place higher and reduce the cooking time. If the cake the baking tin in the centre of the wire rack. - Page 47 Tables and tips Dish Accessory Level Tempera- Type of Cooking Comments ture heating time in °C in min. Yeast tray bakes Baking tray 30 - 40 Recipe tip: Top with plums, figs or onion and bacon. Lightly grease the baking tray or line it with greaseproof paper.
- Page 48 Tables and tips Dish Accessory Level Tempera- Type of Cooking Comments ture heating time in °C in min. Muffins Muffin tray/ With chocolate, nuts or raisins. Grease the paper muffin tray well. cases Cupcakes Cupcake Grease the cupcake tray well. tray/ paper cases Small cakes...
-
Page 49: Dough Proving (Leaving To Rise)
Tables and tips Dish Accessory Level Tempera- Type of Cooking Comments ture heating time in °C in min. Baked items made Baking tray 12 - 15 from lye-dipped yeast dough, greaseproof frozen paper Croissants, Baking tray 25 - 30 frozen greaseproof paper Preheat the appliance to the specified temperature. -
Page 50: Desserts
Tables and tips Desserts ▯ ▯ Oven-cooked desserts are very easy to prepare – Oven-cooked desserts are generally eaten warm, you just have to put it in the oven. This preparation and are particularly enjoyable during the cooler method is useful for relatively large quantities, for months. -
Page 51: Defrosting
Tables and tips Defrosting ▯ The oven is not suitable for defrosting whole chickens or joints of meat as this takes a very long ▯ time. Steam ovens and combination steam ovens To defrost food, use the "Defrost" heating function. can be used to defrost this kind of food much more ▯... -
Page 52: Preserving
Tables and tips Preserving ▯ ▯ Cook food as soon as possible after purchase or Place the preserving jars in a heat-resistant vessel after it has been harvested. Prolonged storage containing water. Make sure that they do not touch. reduces the vitamin content and means that food is The water level must reach at least three quarters of on the verge of fermenting. -
Page 53: Drying
Tables and tips Drying ▯ ▯ Drying is a method of preserving food in which up Place the prepared food onto a wire rack or baking to 50% of the moisture contained in the food is tray covered with greaseproof paper. Turn the food removed by exposing it to dry heat. -
Page 54: Roasting Dish
Tables and tips Dish Accessory Level Tempera- Type of Cooking Comments ture heating time in °C in min. Multigrain bread Baking 35 - 45 stone Sourdough bread Baking 250 / 200* 50 - 60 stone Pizza, fresh Baking 5 - 8 The cooking time varies depending on the stone type and thickness of the dough and top-... -
Page 55: Acrylamide In Foodstuffs
Tables and tips Dish Accessory Level Tempera- Type of Cooking Comments ture heating time in °C in min. Viennese boiled beef Roasting 220 / 130* Searing Roast the onion halves for a short time, dish + 200 - 220 add the vegetables and roast briefly, then fill the dish with liquid. - Page 56 BSH Hausgeräte GmbH Carl-Wery-Straße 34 81739 München, GERMANY www.gaggenau.com Valid within Great Britain: Imported to Great Britain by BSH Home Appliances Ltd. Grand Union House Old Wolverton Road Wolverton, Milton Keynes MK12 5PT United Kingdom...
Need help?
Do you have a question about the EB 333 411 and is the answer not in the manual?
Questions and answers