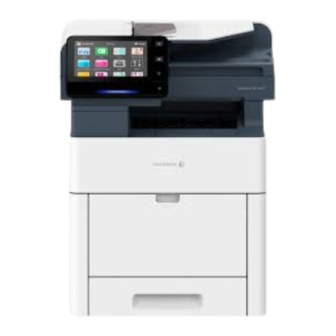
Summary of Contents for FujiFilm ApeosPort-VII C4421
- Page 1 Quick Reference Notes - Fax ApeosPort ® -VII C4421 / C3321 Prepared by Customer Training Team © FUJIFILM Business Innovation Hong Kong Limited...
-
Page 2: Table Of Contents
CONTENTS Fax Procedure Loading Document 1.1.1 Document Feeder 1.1.2 Document Glass Specifying Destinations 1.2.1 Using the Numeric Keypad 1.2.2 Using the Address Book 1.2.3 Removing Specified Recipient Confirming the Fax Job in Job Status General Settings Lighten/Darken 2 Sided Scanning Original Type Resolution Acknowledgement Report... -
Page 3: Loading Document
OADING OCUMENT 1.1.1 Document Feeder Remove any paper clips and staples before loading a document. 1. Adjust the document guides to match the size of the document loaded. Raise the document stopper. 2. Load the document face up (when the document is 2- sided, place the front side up) in the center of the document feeder. -
Page 4: Specifying Destinations
1.2 S PECIFYING ESTINATIONS 1. Press the Home button. 2. Select [Fax]. -
Page 5: Using The Numeric Keypad
1.2.1 Using the Numeric Keypad 1. Select [Enter Fax Number]. 2. You can specify recipients using keyboard input. 3. If you enter an incorrect number, press the button and re-enter the correct value. 4. To specify multiple recipients, select [Add] on the touch screen after each entry. -
Page 6: Using The Address Book
1.2.2 Using the Address Book 1. Select 2. Select the recipient numbers from [All Contacts]. Press [OK]. Note: You can select multiple numbers at Step 2. 3. Press [Send] to start the fax job. -
Page 7: Removing Specified Recipient
1.2.3 Removing Specified Recipient Select the recipient to delete. Press [Remove]. -
Page 8: Confirming The Fax Job In Job Status
1.3 C ONFIRMING THE OB IN TATUS 1. Press the [Jobs] button. 2. Confirm the job status. -
Page 9: Lighten/Darken
2.1 L IGHTEN ARKEN You can adjust fax density. -
Page 10: Sided Scanning
IDED CANNING 1 Sided Select to transmit 1-sided documents. 2 Sided (Head to Head) Select to transmit 2-sided documents (head to head). 2 Sided (Head to Toe) Select to transmit 2-sided documents (head to toe). 2 Sided (First Page 1 Sided) Select this option to scan the front side of the first page and both sides of the remaining pages. -
Page 11: Original Type
2.3 O RIGINAL Text Transmitting a document that contains only text. Photo & Text Transmitting a document that contains both text and photos. Photo Transmitting a document that contains only photos. -
Page 12: Resolution
2.4 R ESOLUTION Standard (200 x 100 dpi) Transmitting standard documents Fine (200dpi) Transmitting documents with small text or detailed images. Superfine (400dpi) (400 dpi) Transmitting documents with fine images Superfine (600dpi) (600 dpi) Transmitting documents with extremely fine images... -
Page 13: Acknowledgement Report
CKNOWLEDGEMENT EPORT No Transmission Report is printed. A Transmission Report is automatically printed. -
Page 14: Transmission Header Text
RANSMISSION EADER No header information is attached. Display Header Header information is attached. -
Page 15: On-Hook
2.7 O HOOK Use this feature when using Manual Send. Entering a destination Use alphanumeric characters to specify a destination. Then, Press the [Start] to start the fax job. Line Cut Cuts the line connected. -
Page 16: Stopping The Fax Job
3.1 S TOPPING THE 1. Press [Pause] on the touch screen. 2. Select [Delete]. 3. If the screen in step 1 or 2 does not appear, press the [Jobs] button. - Page 17 4. Select the job to cancel. 5. Select [Pause]. 6. Select [Delete].
- Page 20 Fuji Xerox has changed its name to FUJIFILM Business Innovation as of April 1, 2021. FUJIFILM Business Innovation continues to provide maintenance services with respect to products sold under the Xerox and Fuji Xerox brands. Xerox, Xerox and Design, as well as Fuji Xerox, Fuji Xerox and Design are registered trademarks or trademarks of Xerox Corporation in Japan and/or other countries.


Need help?
Do you have a question about the ApeosPort-VII C4421 and is the answer not in the manual?
Questions and answers