Advertisement
SAFETY REGULATIONS
Attention! This user manual is an essential part of this product.
The user manual should be read carefully before you use the product for the first time. If the product is given to someone for temporary use, be sure to enclose user manual to it.
- Do not misuse the product.
- It is prohibited to disassemble or repair the product yourself. Entrust product repair to qualified personnel and use original spare parts only.
- Store the product beyond reach of children and unauthorized people.
- Do not use the product in explosive environment, close to flammable materials.
FUNCTIONS/APPLICATIONS
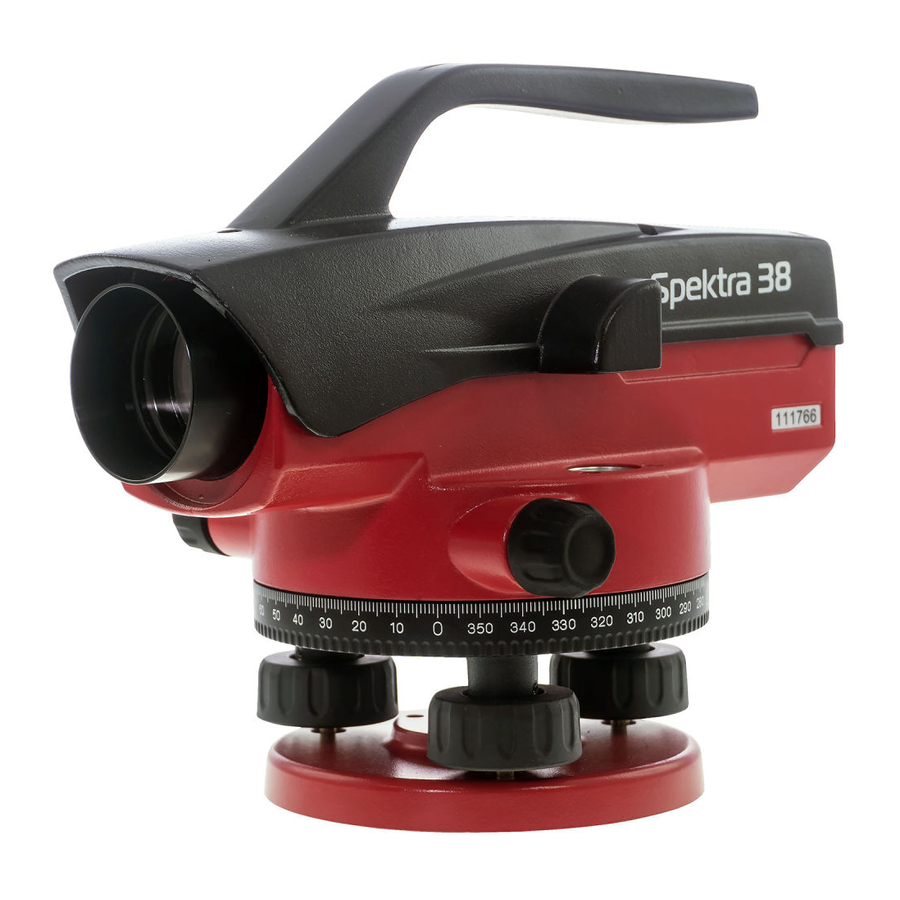
Optical level Spektra 38 CONDTROL is a professional measuring instrument. It is equipped with a compensator with a magnetic damping system with working range ± 15'. It allows to make high-precision measurements quickly and correctly.
Optical level Spektra 38 has a 38X magnification telescope with coated optics, which significantly improves visibility and makes aiming to remote objects easier. It has a horizontal limb with 1° graduation marks and lifting screws, as well as an optical sight on the telescope for convenient target search.
PRODUCT DESCRIPTION


- Objective lens
- Circular vial mirror
- Eyepiece cover
- Eyepiece
- Circular bubble vial
- Horizontal circle
- Adjusting screws of circular bubble vial
- Lifting screws
- Tripod mount 5/8" (on the rear side)
- Horizontal drive screws
- Focusing screw
- Base
TECHNICAL SPECIFICATIONS
| Standard deviation for 1 km double line | 1 mm |
| Image | Erect |
| Magnification | 38X |
| Objective aperture | 38 38 mm |
| Field of view | 1° 20´ |
| Minimal viewing distance | 0,3 m |
| Stadia Ratio | 100 |
| Level vial Sensitivity | 8'/2 mm |
| Horizontal Circle Graduation | 1° |
| Type of compensator | magnetic |
| Range | 15' |
| Setting Accuracy | 0,5" |
| Protection rate | IP54 |
| Dimensions | 230 x 140 x 170 mm |
| Weight | 1.5 kg |
| Thread | 5/8" |
DELIVERY PACKAGE
- Optical level – 1 pc.
- 2-mm hex wrench - 1 pc.
- Adjusting pin - 1 pc.
- Plumb – 1 pc.
- User manual – 1 pc.
- Hard case – 1 pc.
OPERATION
Instrument set-up and leveling
- Set desired height of the tripod and place it on the ground. Use the attachment screw to tightly fix the optical level on the tripod.

- Rotate the lifting screws A, B, C to install the bubble vial in the center. By rotating the A and B screws simultaneously, move the bubble to the right. Rotation of the screw C will move the bubble back.


Aiming and focusing
- Grid:
Point the telescope on a bright surface or leveling staff, using the sight. Rotate the eyepiece until you achieve a clear and bright image of the grid. - Aiming:
Rotate the focusing screw forward to focus on the staff standing at longer distance or back to focus on the staff standing at closer distance until a clear image appears on the screen. Rotate the horizontal drive screw to position the image of the staff at the center of the field of view.
Measurements
- Exceedence:
After pointing on the staff take the readings of the middle line, as shown on Figure 4. (the reading is 1.195 m).
![]()
- Distance:
Take the readings of the upper and bottom stadia lines. Distance between the instrument and the staff will be the following:
(Reading of the upper line – reading of the bottom line) х100, As shown on the Figure 4:
(1.352 m - 1.038 m) х 100 = 31.4 m - Angle:
Point the vertical line of the grid to the target A and take the angle reading α on the limb. Point to the target B and take the angle reading β on the limb. The angle between A and B will be - α-β.
![]()


ACCURACY CHECK AND ADJUSTMENT
Despite the fact that all optical levels with compensator are adjusted at the factory, it is necessary to carry out accuracy check before use.
Checking the circular bubble vial
- Adjust the lifting screws to center the bubble vial and rotate the telescope by 180°. The bubble vial should remain in the center.

- If the bubble vial is not in the center, it is necessary to perform adjustment.
- Rotate the lifting screws to move the bubble vial halfway to the center (Figure 7).

- Turn 2 adjusting screws to adjust the position of the bubble vial (Figure 7).
- Repeat steps from A to D until the bubble vial doesn't deviate from the center (Figure 8).


Check the position of the sighting axis
- Set leveling staffs А and В at distance 50 m from each other. Set the instrument right in the middle between the staffs. Level the instrument and take the readings on the staffs А and B accordingly. Exceedence between them dh = a1-b1.

- Move the instrument and set it at distance 1-2 m from the staff A (Figure 10). Level the instrument and take the readings а2 and b2 on the staffs А and В accordingly. If I(a2-b2) - (a1-b1)I < 3 mm, further adjustment is not needed.


Otherwise, you perform the following actions:
- Aim the instrument at the staff B and remove the eyepiece cover.
![]()
- Using the adjusting pin turn the adjusting screw, until the reading b3 on the staff B becomes b3=a2-Δh.


Repeat all of the above steps until the result satisfies the conditions:
|(a2-b2)-(a1-b1)| ≤ 3 mm.
CARE AND MAINTETANCE
Attention! This device is a precision instrument and requires careful handling. Maintenance of the following recommendations will extend the life of the instrument:
- Store and transport the instrument and its accessories only in the hard case included in the delivery package.
- Protect the instrument from bumps, falling and intense vibration, as it can lead to loss of accuracy.
- Do not expose the instrument to extreme high or low temperatures, as well as temperature change, as it can lead to loss of accuracy. If there is huge temperature difference, allow the instrument to level its temperature with the ambient temperature first before start operation.
- Protect the instrument from moisture, as well as exposure to direct sunlight.
- There is a bag with a moisture absorber inside the hard case. Replace it regularly.
- Clean the instrument with a dry and soft cloth. Do not use cleaning agents or solvents.
- Do not touch the lens of the objective and eyepiece. Wipe the optical surfaces with a soft cloth regularly.
- After working with the instrument, wipe it dry and put it back in the hard case.

Documents / ResourcesDownload manual
Here you can download full pdf version of manual, it may contain additional safety instructions, warranty information, FCC rules, etc.
Advertisement


Need help?
Do you have a question about the Spektra 38 and is the answer not in the manual?
Questions and answers