Table of Contents
Advertisement
Quick Links
Advertisement
Table of Contents

Subscribe to Our Youtube Channel
Related Manuals for SHERCO 125 SE FACTORY


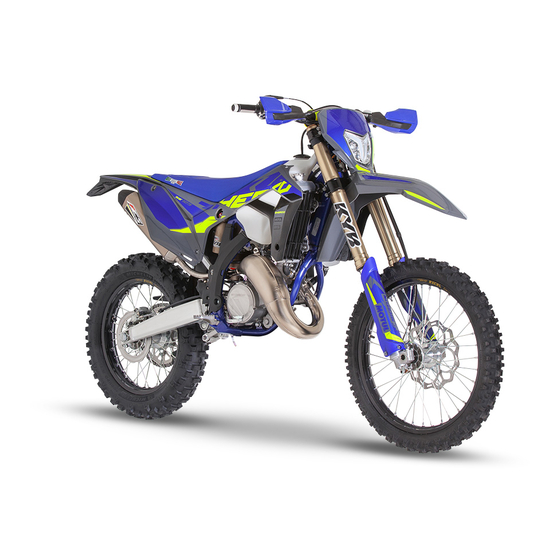
Summary of Contents for SHERCO 125 SE FACTORY
-
Page 2: Table Of Contents
TABLE FORWARD .............................. 4 TOOLS LIST 125SE-R ..........................5 TECHNICAL SPECIFICATION ......................... 6 ENGINE ..............................6 CARBURETOR ............................6 CYCLE PART ............................7 FORK ..............................7 SHOCK ABSORBER ..........................8 OPERATIONS REQUIRING DISASSEMBLY OR NOT ENGINE ............... 9 REMOVING / REISTALLING THE ENGINE .................. - Page 3 ❱❘ Verification of the state of cylinder wear / Piston ................. 20 ❱❘ Disassemble the exhaust valve system ......................21 ❱❘ Assemble the exhaust valve system ......................... 23 ❱❘ Exhaust valve setting ............................24 ❱❘ Clapper box pipe, Pipe intake sleeve ....................... 25 ❱❘...
- Page 4 1.2- Description Exxodiag diagnostic Tools Ref: kit 8561 ................41 1.3- Diagnostic tool kit contents........................42 1.4- Installation of the diagnostic tool......................42 PRESENTATION OF THE SOFTWARE ....................46 2.1- Connection with keyless system ....................... 46 2.2- Software settings .............................. 48 2.3- Update menu and synchronization ......................
-
Page 5: Forward
Performing the various operations requires both a solid knowledge in mechanics and the set of SHERCO tools specific to the 125 SE-R engines. This workshop manual serves as a complement to the SHERCO 125 SE-R user’s manual... -
Page 6: Tools List 125Se-R
TOOLS LIST 125SE-R Tooling reference Designation 1814 Clutch drum block 1815 Ignition block 10480 125 SBS Valve tool control 2067 Oscillating arm shaft tool 2072 Right-hand casing primary shaft bearing tool 2074 Secondary shaft bearing tool R467 Out-of-gearbox shaft bearing tool 2069 Out-of-gearbox gasket tool 2071... -
Page 7: Technical Specification
TECHNICAL SPECIFICATION ENGINE Type Liquidcooled,2-strokesinglecylinder Displacement 124.81CC Bore diameter/Stroke 54/54.5mm Gasoline Unleadedwithanoctaneindexofatleast95mixedwithtwo-stroke oil (2%) Coolant With forced circulation Ignition system ADC-CDI without a contact breaker, digital advance Sparkplug NGKBR9ECMIX Distance between spark plug 0.7mm electrodes Piston Forge aluminum Motor oil 500ml SAE 5W40 Main transmission 20x72... -
Page 8: Cycle Part
TECHNICAL SPECIFICATION CYCLE PART Semi-perimeter CrMo steel with aluminum sub frame Frame KAYABA USD Ø48mm Closed cartridge Fork KAYABA suspension with separate cylinder Rear suspension Aluminum swing arm Travel Front/Rear FACTORY 330/330mm RACING 300/330mm Front brake rotor Ø 260mm Rear brake rotor Ø... -
Page 9: Shock Absorber
STANDARD ADJUSTMENT SHOCK ABSORBER Factory Settings – KAYABA shock absorber Low-speed compression Comfort 20 clicks back Standard 14 clicks back Sport 12 clicks back High-speed compression Comfort 2,5 turns back Standard 1.5 turns back Sport 1 turn back Rebound Comfort 15 clicks back Standard 13 clicks back... -
Page 10: Operations Requiring Disassembly Or Not Engine
OPERATIONS REQUIRING DISASSEMBLY OR NOT ENGINE Operation requiring engine removal Operation not requiring engine removal Crankshaft (including the crank kit) • Complete gearbox • • Crankshaft bearing Gearbox bearing • Piston • • Cylinder Cylinder head • Ignition • Starter gear set •... -
Page 11: Removing / Reistalling The Engine
REMOVING / REISTALLING THE ENGINE REMOVING THE ENGINE WARNING To remove the engine, you must remove the swing arm axle, the swing arm and the rear wheel. To keep the bike from falling, remember to support the chassis with an appropriate jack. Drain (refer to the owner’s manual) •... -
Page 12: Engine Disassembly
ENGINE DISASSEMBLY ❱❘ Gear box drainage [2], • Remove drainage plugs the oil flow out. ❱❘ Gear box drainage • Unfold the safety washer tab using a pushing device. [4]. • Remove the gearbox output pinion • Remove the screw first first and then the selector. -
Page 13: Removal Of The Cylinder Head / The Cylinder / The Piston
ENGINE DISASSEMBLY ❱❘ Removal of the cylinder head / the cylinder / the piston • Remove the shoulder screws release both the cylinder head and the two O-rings • Remove all four nuts and the cylinder • Cover the casing. •... -
Page 14: Disassemble The Clutch Cover
ENGINE DISASSEMBLY ❱❘ Disassemble the clutch cover Unscrew the water pump screws and cover. • Remove the form joint Remove the screws first and then the clutch • casing. Extract the joint. ❱❘ Removal of both the pressure tray and discs •... -
Page 15: Removal Of The Electric Starter
ENGINE DISASSEMBLY ❱❘ Removal of the electric starter • Unscrew both screws ❱❘ Removal of the main transmission • Block the pinion at the end of the crankshaft [3]. using tool reference 1817 • Unscrew the main transmission nut [4] and then remove it with the tapered washer. -
Page 16: Removal Of The Locking Mechanism
ENGINE DISASSEMBLY ❱❘ Removal of the locking mechanism With a screwdriver, push back on the scorpion so • that it no longer makes contact with the selection star; next, remove the selection shaft CAUTION Be extremely careful with the washer left at the casing bottom. -
Page 17: Removal Of The Starter
ENGINE DISASSEMBLY ❱❘ Removal of the starter • Take out the starter ❱❘ Intake pipe and clapper box Remove all 4 screws • Remove the pipe clapper box and the gasket • ❱❘ Separate out the half casings • Reposition the engine so that the ignition side is facing you. -
Page 18: Removal Of The Speed Selection
ENGINE DISASSEMBLY ❱❘ Removal of the speed selection • Remove the transmission gearbox lubrication [1]. tube • Remove the two selector fork shafts push them to the side to free the drum. • Now disengage the selection drum from its bearing. -
Page 19: Engine Parts Control
ENGINE PARTS CONTROL ❱❘ Connecting rod assembly • If the roller bearings have been changed, then the internal ring that sits against the balance weight must also be changed. Heat the R464 tool to roughly 150°C, then • immediately insert it onto the internal ring. Ensure that the tool sits squarely on the ring in order to more effectively transmit the heat and extract the ring... -
Page 20: Crank Head Lateral Clearance
ENGINE PARTS CONTROL ❱❘ Crank head lateral clearance • Measuring the lateral clearance of the crank [A]. head Crank head lateral clearance: Standard: 0.7 mm - 0.9 mm Tolerance limit: 1.15 mm If the clearance exceeds the tolerance limit, replace the crankshaft. ❱❘... -
Page 21: Cross Sectional Clearance
ENGINE PARTS CONTROL ❱❘ Cross sectional clearance • Insert the segment into the cylinder and install it with the piston (at approx. 10 mm from the upper edge of the cylinder). • With a shim, it is possible to measure the cross- sectional clearance. Cross-sectional clearance: max. -
Page 22: Disassemble The Exhaust Valve System
ENGINE PARTS CONTROL ❱❘ Disassemble the exhaust valve system Disassemble all parts, clean them, and verify their condition and state of wear. For this step, follow the disassembly and control procedure. • Remove the M10 [1] nut from the valve shaft using a 13mm wrench •... - Page 23 ENGINE PARTS CONTROL • Remove the washers [3] from the axle. • Remove the connecting screw [4]. • Remove the M5 screw [5] and remove the right valve cover. • Disassemble the half valves on either side of the cylinder. CAUTION Before to reassemble the valve, clean all the parts and making sure that there is no trace...
-
Page 24: Assemble The Exhaust Valve System
ENGINE PARTS CONTROL ❱❘ Assemble the exhaust valve system Refit the two half valves then fit the right • valve cover making sure that it is in the up position. • Install the M5 screw without tightening it. • Fit the connecting screw of the half-valves and tighten to 6 Nm. -
Page 25: Exhaust Valve Setting
ENGINE PARTS CONTROL ❱❘ Exhaust valve setting Position the valve motor bracket and tighten the M5 screws to 8 Nm. Install the valve adjustment tool ref 10480 as indicated on the drawing. Position the exhaust valve against the stop on tool 8028 then tighten the valve shaft nut to 20 Nm. -
Page 26: Clapper Box Pipe, Pipe Intake Sleeve
ENGINE PARTS CONTROL ❱❘ Clapper box pipe, Pipe intake sleeve • Over time, the carbon tabs gradually lose their elasticity, which in turn causes a loss in power. • Replace the worn or damaged gearbox. • Verifier the condition of the intake sleeve, especially if it is not split. -
Page 27: Connecting Rod Assembly
ENGINE REASSEMBLY For the blow-up drawings, please refer to the 125SE-R spare parts catalogue ❱❘ Connecting Rod Assembly Insert the connecting rod assembly into the • ball bearing by the top, in exercising precaution, until reaching the sto CAUTION The crank must be positioned on the cylinder side. -
Page 28: Assembly Of The Half Casings
ENGINE REASSEMBLY ❱❘ Assembly of the half casings • Install the transmission gearbox lubrication tube on the right-hand half-casing. • Install the O-ring on the gearbox lubrication tube. CAUTION Beware of the tube indexation, flat spot on the oil plug rivet side •... -
Page 29: Selection Mechanism
ENGINE REASSEMBLY ❱❘ Selection mechanism • Place the spring into the casing with the curved strand pointing upwards. • Insert the spacer, the locking finger and the washer, then coat the CHC M6 x 20 screw with blue brake fluid and assemble all the parts. -
Page 30: Main Transmission And Clutch
ENGINE REASSEMBLY ❱❘ Main transmission and clutch • Lubricate the connecting rod assembly gasket. • Install the half-moon wedge in its housing. • Insert the pinion with the shoulder in a downward position onto the crankshaft shank. [1], • Insert the washer housing spacer and pre- lubricated needle cage on the main shaft. -
Page 31: Clutch Discs Pressure Plate
ENGINE REASSEMBLY ❱❘ Clutch discs pressure plate • Oil the push finger and insert it onto the main shaft. • Prior to the assembly step, oil the lined discs. • Begin with a lined disc. The 8 lined discs and the 7 smooth discs are positioned in an alternating pattern. -
Page 32: Piston And Cylinder
ENGINE REASSEMBLY ❱❘ Piston and cylinder • Oil the parts well before lifting. • Insert the needle bearing into the foot crank, position the piston (the arrow on top of the piston is pointed toward the exhaust). • Place the shaft and clips with the open side downward. -
Page 33: Clapper Box And Pipe Intake
ENGINE REASSEMBLY ❱❘ Clapper box and pipe intake • Install a gearbox joint with new clappers. • Place the complete clapper box into the intake pipe. Assemble the intake pipe with the four M6 • screws and its metal collar. ❱❘... -
Page 34: Ignition Assembly And Its Cover
ENGINE REASSEMBLY ❱❘ Ignition assembly and its cover • Place the half-moon wedge in its housing on the connecting rod assembly. • Insert the rotor on the connecting rod assembly. • Apply blue brake fluid on the threading. • Insert tool 1815, install the nut and tighten to 80 N-m. •... -
Page 35: Table Of Tightening Torques
TABLE OF TIGHTENING TORQUES Standard tightening torque Brake fluid 6 Nm 10 Nm 24 Nm Chassis tightening torque Brake fluid Rear wheel nut 100 Nm Rear cradle fastening screw 24 Nm • Front wheel nut 40 Nm Yoke foot clamping screw 15 Nm Brake pad axis screw 8 Nm... -
Page 36: Table Of Carburetor Settings
TABLE OF CARBURETOR SETTINGS ALTITUDE TEMPÉRATURE -20°C -6°C 6°C 16°C 25°C 37°C ↓ → -7°C 5°C 15°C 24°C 36°C 49°C 3000 m Air screw 2301 m Idle jet 1,5 T 1,5 T 1,75 T 1,75 T Needle Needle position N1EE N1EE N1EF N1EF... -
Page 37: Electrical Part
ELECTRICAL PART ❱❘ Electrical components Position Designation Position Designation Coil Temperature sensor Hall sensor Battery Starter Regulator Alternator Relays Valve motor... -
Page 38: 1- Fan Control
ELECTRICAL PART ❱❘ 1- Fan control Disconnect the fan from the harness. • Connect a 12v battery directly to the fan • as shown in the diagram. Check to make sure the fan run • smoothly without any excessive noise. ❱❘... -
Page 39: 4-Battery Check
ELECTRICAL PART ❱❘ 4-Battery check – Connect a multimeter to the battery • terminals and check its voltage la Value read: 12.8V Battery charged 12.7V or less Charge battery Less than 12V Replace battery ❱❘ 5-starter check Remove the starter and position it in a •...
Need help?
Do you have a question about the 125 SE FACTORY and is the answer not in the manual?
Questions and answers