Advertisement
Quick Links
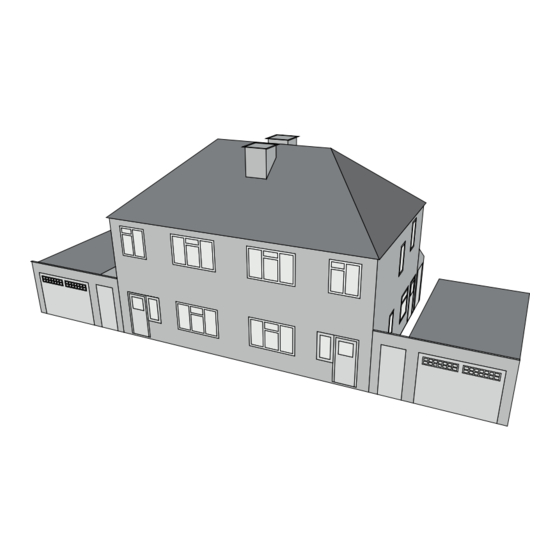
ATD002 - OO (1:76 Scale) 1950's Semi Detached House
- Instruction Manual
Tools Required
Modellers Knife (with a fresh blade)
Cutting Mat
Modelling Glue (we recommend roket card glue)
Fine Tip Applicator
Low-tac Masking Tape
Clips / Clamps
Tips
Prior to starting your build, we recommend reading through the instructions to familiarise
yourself with the build style of the kit.
We recommend painting any white edges as you remove the components from the sheet to
improve the finished look. We advise watercolour paints for the best finish.
Each component is held in the sheet using score lines, indicated by a scissor symbol. To remove
the component from the sheet, carefully run the tip of your modelling knife through the score line.
Remove each component as it is required to prevent losing or mixing it up with another component.
Ensure that glue is distributed evenly and not too close to the edge as it may ooze out when
pressure is applied.
Use low-tac masking tape, clamps and weights to aid the assembly process.
Advertisement

Related Manuals for atd models ATD002


Summary of Contents for atd models ATD002
- Page 1 ATD002 - OO (1:76 Scale) 1950’s Semi Detached House - Instruction Manual Tools Required Modellers Knife (with a fresh blade) Cutting Mat Modelling Glue (we recommend roket card glue) Fine Tip Applicator Low-tac Masking Tape Clips / Clamps Tips Prior to starting your build, we recommend reading through the instructions to familiarise yourself with the build style of the kit.
- Page 2 Detach component A and place it face down on your work surface. Locate the crease line on the left hand side, fold it over on itself and glue. Then fold the remaining crease lines by 90 degrees. Repeat this step for component B. Apply firm pressure until the glue is semi cured to stop the tabs from lifting.
- Page 3 3b. Glue both of the front doors and one of the rear doors to component A. Then glue the remaining door to component B. 4. Glue the tab on Wall A to Wall B. Then glue Detach component C and place it within the the remaining tab on Wall B to Wall A.
- Page 4 6c. Now glue the internal walls to the inside of 7a. Detach component G (x2) and fold along each the main walls, ensuring that the tabs sit in of the crease lines (x4) and glue. This will the notches within the floor. create a chimney breast.
- Page 5 9a. Similarly to step 6a, detach x4 component E, 9b. Glue the packers into position on the side pair them and glue together to create two walls (the packer on the left hand side as you look from the front of the house should not overlap more sets of packers.
- Page 6 13a. Detach component K (x2) and fold along each 13b. Detach the capping stones (located next to of the crease lines and glue. This will create component K) and place them face down on your work surface. Then glue one of the smaller peices a chimney.
- Page 7 14c. Next, glue both outbuildings to the rear of 14d. Apply a bead of glue around the top of each the houses, as per the illustration below. outhouse. Then, detach component M (x2) and position them on the top of the outhouses. The doors on the outbuilding should be next We recommend using ATD low-tac masking to the rear door on the house.
- Page 8 To view our other card kits, more products and find your local stockist, visit www.atdmodels.co.uk We’d love to see photos of your finished models. Please send them to enquiries@atdmodels.co.uk for a chance to be featured on our social media pages. © Copyright ATD Models | All Rights Reserved...
Need help?
Do you have a question about the ATD002 and is the answer not in the manual?
Questions and answers