Table of Contents
Advertisement
Quick Links
USER MANUAL
Pellet Stove
EN
©2018 CADEL srl | All rights reserved - Tutti i diritti riservati
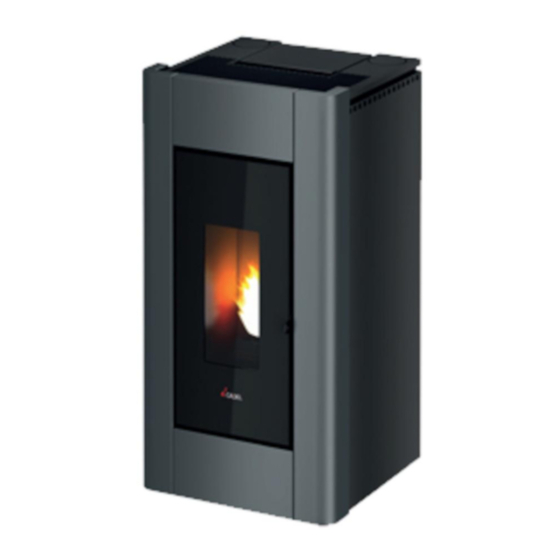
SFERA
11KW - PRINCE
11KW- GLOBE AIRTIGHT
3
3
SFERA
PLUS 11KW - SIRE
PLUS 11KW - DOGE
PLUS 11KW -
3
3
3
PRINCE
PLUS 11KW - ELISE
PLUS 11KW - VEGA AIRTIGHT - TREND AIRTIGHT
3
3
VENUS
PLUS 12,5KW - JOY AIRTIGHT
3
Advertisement
Table of Contents

Related Manuals for Cadel VEGA AIRTIGHT


Summary of Contents for Cadel VEGA AIRTIGHT
- Page 1 USER MANUAL Pellet Stove ©2018 CADEL srl | All rights reserved - Tutti i diritti riservati SFERA 11KW - PRINCE 11KW- GLOBE AIRTIGHT SFERA PLUS 11KW - SIRE PLUS 11KW - DOGE PLUS 11KW - PRINCE PLUS 11KW - ELISE...
- Page 2 89CD220001EN CADEL SRL - Via Foresto Sud, 7 - 31025 Santa Lucia di Piave (TV) - ITALY - Tel. +39 0438 738669 - Fax +39 0438 73343 - customercare@cadelsrl.com - www.cadelsrl.com Iscr. registro imprese / Partiva Iva IT 03202180265 - R.E.A. TV 227665 - Capitale Sociale i.v. € 30.000,00...
- Page 3 89CD220004EN CADEL SRL - Via Foresto Sud, 7 - 31025 Santa Lucia di Piave (TV) - ITALY - Tel. +39 0438 738669 - Fax +39 0438 73343 - customercare@cadelsrl.com - www.cadelsrl.com Iscr. registro imprese / Partiva Iva IT 03202180265 - R.E.A. TV 227665 - Capitale Sociale i.v. € 30.000,00...
- Page 4 890220017EN CADEL SRL - Via Foresto Sud, 7 - 31025 Santa Lucia di Piave (TV) - ITALY - Tel. +39 0438 738669 - Fax +39 0438 73343 - customercare@cadelsrl.com - www.cadelsrl.com Iscr. registro imprese / Partiva Iva IT 03202180265 - R.E.A. TV 227665 - Capitale Sociale i.v. € 30.000,00...
- Page 5 DISPOSAL OF MATERIALS WARNINGS FOR THE CORRECT DISPOSAL OF THE PRODUCT The owner is the sole party responsible for demolishing and disposing of the product. This must be performed in compliance with laws related to safety and environmental protection in force in his/her country. At the end of its working life, the product must not be disposed of as urban waste.
- Page 6 LEGENDA WHERE TO DISPOSE MATERIALS To be disposed of separately in authorised centres, as D. ELECTRIC AND ELECTRO- Wiring, motors, fans, circulators, display panels, sen- indicated in the WEEE directive 2012/19/EU and the NIC COMPONENTS sors ignition plug, electronic cards, batteries. relative national transposition.
-
Page 7: Table Of Contents
10.5 REMOTE CONTROL ..........19 SUMMARY 11 SAFETY DEVICES AND ALARMS ....20 1 MANUAL SIMBOLOGY ........3 11.1 SAFETY DEVICES ...........20 2 DEAR CUSTOMER ..........3 11.2 PRESSURE SWITCH ..........20 3 CAUTIONS ............3 11.3 SMOKE TEMPERATURE PROBE ......20 SAFETY REQUIREMENTS ......4 11.4 CONTACT THERMOSTAT IN THE FUEL HOPPER..20 5 WARRANTY CONDITIONS .......5 11.5 ELECTRICAL SAFETY ..........21 6 SPARE PARTS ..........6... -
Page 8: Manual Simbology
MANUAL SIMBOLOGY USER AUTHORISED TECHNICIAN (ONLY to interpret or the Stove-manufacturer or the Authorized Techni- cian of Technical Assistance Service approved by the Stove-manufacturer) SPECIALIZED STOVE-REPAIRER CAUTION: READ CAREFULLY THE NOTE CAUTION: DANGER OR IRREVERSIBLE DAMAGE POSSIBILITY • The icons with the stylized figures indicates whom the subject dealt in the paragraph is addressed to (between the User and/ or the Authorized Technician and/or the Specialized Stove-repairer). -
Page 9: Safety Requirements
SAFETY REQUIREMENTS • Installation, electrical connection, functional verification and maintenance must only be performed by qualified or authorised personnel. • Live electrical parts: disconnect the product from the 230V power supply before perfor- ming any maintenance operation. Only power the product after completing assembly. •... -
Page 10: Warranty Conditions
experience and knowledge must be kept away from packaging. The stove is not a toy. • Childreen must be constantly overseen in order to assure that they do not play with the appliance. • During its running, the stove reaches high temperatures: keep away childreen and animals and for your safety please use appropriate fireproof devices, such as heat-protecting gloves. -
Page 11: Spare Parts
faults in the electric and/or hydraulic system. • Failure to have the stove cleaned on an annual basis by an authorised technician or qualified personnel will result in the loss of the warranty. Also excluded from this guarantee are: • Parts subject to normal wear such as gaskets, glass, claddings and cast iron grids, painted, chrome-plated or gilded parts, handles and electric cables, bulbs, indicator lights, knobs, all parts which can be removed from the hearth. -
Page 12: Wifi - Bluetooth Connection
useful life, this product, the batteries and the accumulators included must not be collected, recycled or disposed of together with domestic waste. Improper management of electric or electronic waste or batteries or accumulators can lead to the leakage of hazardous substances contained in the product. -
Page 13: Navel Stand Alone
NAVEL STAND ALONE Procedure if only valid for models with NAVEL STAND ALONE Wi-Fi technology. ATTENTION! Installation must ONLY be carried out by specialised personnel. The manufacturer will not be held responsible for injury to persons or damage to property or in the event of failed operation. -
Page 14: Control Panel Display
Oily plant waste and lacquers can cause smells and smoke during the first working hours: it is advisable to ventilate the room because they could be noxious to people and animals. Set values from 1 to 5 are defined by the manufacturer and they can be changed only by an authorized tech- nician. -
Page 15: Settings Menu
Timer setting (see relative chapter) Sleep setting (see relative chapter) SETTINGS MENU The SETTINGS menu allows to act on the boiler operating mode: a - Language b - Cleaning (displayed only when the boiler is switched off) c - Screw Loading (displayed only when the boiler is switched off) d - Tone e - Ext.Thermostat (activation) f - Auto-Eco (activation) - Page 16 e - Ext.Thermostat (see relative chapter) f - Auto-Eco activation To select the Auto-Eco function act as follows: • Press the “menu” button. • Scroll to “Settings” using the arrows • Press “menu” to confirm. • Scroll to “Auto-Eco activation" using the arrows. •...
-
Page 17: Info Menu
• Press “menu” to confirm. • Select “On” with the + - keys (Off by default) • Press “menu” to confirm and “esc” to exit l - Technical Menu To access the technical menu one must contact an assistance centre as one needs a password to enter. To intervene on the “Technical Menu”... -
Page 18: Start Up
• Fire START UP We remind you that the first ignition must be carried out by a specialized and authorixed technician who will check that all is installed in compliance with current regulations and checks the efficiency. • If inside the combustion chamber there are booklets, manuals, etc..., remove them. •... -
Page 19: Adjustments Menu
9.10 ADJUSTMENTS MENU To access the adjustments menu act as follows: • Press the + - keys • Scroll with the <> arrows and select “Set Room T ” or “Air Fan Speed 1” or “Air Fan Speed 2” or “Comfort Mode” or "Fire" •... -
Page 20: Programmed Mode (Timer) - Main Menu
Fig. 14 - Display Fig. 15 - Power levels 9.11 PROGRAMMED MODE (TIMER) - MAIN MENU Setting the current day and time is essential for the proper operation of the timer. There are six TIMER programmes, for each one the user can decide the start-up and shutdown time as well as the day of the week in which it is active. -
Page 21: Notes For Timer Operation
Boiler on from 17:00 on monday to 06:00 on tuesday 9.13 NOTES FOR TIMER OPERATION • Start-up with the timer always takes place with the last temperature and ventilation settings (or with default 20°C and V3 settings in the event they have never been changed). •... -
Page 22: Pellets Recipe
Fig. 19 - Sleep If the SLEEP function is active with the TIMER active the first has priority over the latter, therefore the boiler will not switch off at the time set on the timer but instead by the time established by the sleep function, even if later than the time set on the timer. 9.16 PELLETS RECIPE (SEE SECTION J SETTINGS MENU A PAG. -
Page 23: Fuel
FUEL 10.1 FUEL • Use top-quality pellets because they have influence in the calorific value and in ash remains. • Pellets features are: dimension Ø6-7mm (D06 Class), maximum lenght 40 mm, calorific value 5kWh/kg, humidity ≤ 10%, ash remains ≤ 0,7%, they must be correctly pressed and not much mealy, without sizing agents, resins and other additives (class A1 pellets according to ISO 17225-2 (type ENplus-A1) are recommended). -
Page 24: Ventilation
Fig. 22 - Door open Fig. 23 - deteriorated gasket Fig. 24 - Timer: 90 seconds To operate correctly, the stove must work with the pellet hopper door always closed; should it remain open for more than 90 seconds, the stove switches off. •... -
Page 25: Safety Devices And Alarms
Used batteries contain metals which are harmful for the environment; they must therefore be disposed of separately in the special containers. Fig. 26 - Remote control LEGEND Fig. 26 Button 1 Increase the desired temperature (5÷35 °C) Button 2 Decrease the desired temperature (35÷5 °C) Button 3 On / off Button 4... -
Page 26: Electrical Safety
11.5 ELECTRICAL SAFETY The product is protected against sudden current surges by a main fuse in the power supply panel on the rear part of the product. Other fuses that protect the electronic boards are found on the latter. 11.6 SMOKE FAN If the fan stops, the electronic board promptly shuts off the pellets supply and an alarm message is displayed. -
Page 27: Alarm Reset
PANEL ALERT TYPE OF PROBLEM SOLUTION Wait for the cooling stage to end, cancel the alarm and restart the boiler setting the fuel loading at minimum (SETTINGS menu - Pellet Recipe). The temperature of the pellets hopper or the A03 Thermostat water temperature exceed the envisioned Check that dust does not clog the aeration grid on the alarms... -
Page 28: Hopper And Auger Cleaning
Fig. 27 - Burning pot extraction Fig. 28 - Ash tray extraction Fig. 29 - Burning pot cleaning • Extract the burning pot (see Fig. 27) from its seat and empty it from the ash. • Extract the ash tray (see Fig. 28) and empty it from the ash. •... -
Page 29: Fume Pipes Annual Cleaning
12.4 FUME PIPES ANNUAL CLEANING Clean annually from soot with brushes. The cleaning operation must be executed by a specialized stove-repairer who will provide for the cleaning of fume pipe, chimney flue and chimney pot. He will also check their eficiency and will release a written declaration of the safety of the appliance. This operation must be executed at least once a year. - Page 30 PROBLEM CAUSE SOLUTION INTERVENTION The stove is without power Check if the plug is connected. supply Burned protection Replace the protection fuses in the electric socket (3.15A- fuse in the electric 250V). socket The control display Faulty control Replace the control display. does not switch on display Faulty flat cable...
- Page 31 PROBLEM CAUSE SOLUTION INTERVENTION Empty hopper Full the hopper. Auger blocked by a foreign object (for Clean the auger. example nails) The fire extinguish Bad quality pellets Try other types of pellets. and the stove stops Pellet drop value Adjust the pellet loading. too low "phase 1"...
- Page 32 PROBLEM CAUSE SOLUTION INTERVENTION The stove is at its Ambient tempera- The stove is at its minimum value. Increase the desired am- highest power but ture reached. bient temperature. does not heat up. Stove running and Reached fume display showing outlet limit tempe- The stove runs at minimum.
- Page 33 NOTE...
- Page 34 NOTE...
- Page 35 NOTE...
- Page 36 Rev. 00 - 2022 CADEL srl www.cadelsrl.com 31025 S. Lucia di Piave - TV www.free-point.it Via Foresto sud, 7 - Italy www.pegasoheating.com Tel. +39.0438.738669 Fax +39.0438.73343...
Need help?
Do you have a question about the VEGA AIRTIGHT and is the answer not in the manual?
Questions and answers