Table of Contents
Advertisement
Quick Links
Thank you very much for purchasing this product.
• To ensure correct and safe usage with a full understanding of this product's performance, please be sure to read through this manual com-
pletely and store it in a safe location.
• Unauthorized copying or transferal, in whole or in part, of this manual is prohibited.
• The specifications of this product and the contents of this operation manual are subject to change without notice.
• The operation manual and the product have been prepared and tested as much as possible. If you find any misprints or errors, please
inform us.
• Roland DG Corporation assumes no responsibility for any direct or indirect loss or damage that may occur through use of this product,
regardless of any failure to perform on the part of this product.
• Roland DG Corporation assumes no responsibility for any direct or indirect loss or damage that may occur with respect to any article made
using this product.
FA03468
R1-230118
https://www.rolanddg.com/
Copyright © 2023 Roland DG Corporation
Advertisement
Table of Contents

Subscribe to Our Youtube Channel
Related Manuals for Roland VersaSTUDIO BN-20D


Summary of Contents for Roland VersaSTUDIO BN-20D
- Page 1 • Roland DG Corporation assumes no responsibility for any direct or indirect loss or damage that may occur through use of this product, regardless of any failure to perform on the part of this product. • Roland DG Corporation assumes no responsibility for any direct or indirect loss or damage that may occur with respect to any article made using this product.
-
Page 2: Table Of Contents
Contents Before Installation ..................... 2 Checking the Included Items ...................... 3 Temperature and Humidity......................4 Emplacement and Installation ....................5 Installation Space ........................6 Installing the Machine ....................7 Removing the Retainers......................8 Connecting the Cables ......................9 Proceeding to Software Installation ....................10... -
Page 3: Before Installation
Before Installation Checking the Included Items................3 Temperature and Humidity ................4 Emplacement and Installation ................. 5 Installation Space..................6 Before Installation... -
Page 4: Checking The Included Items
Checking the Included Items The following items are included with the machine. Make sure they are all present and accounted for. Power cord/power plug adapt- USB cable Dummy cartridges (4) Blade holder/blade/pin Wiper Felt wiper Cleaning sticks Media flanges (2)/media bar/ mounting pin Tweezers Quick Access Guide... -
Page 5: Temperature And Humidity
Temperature and Humidity Maintain the specified temperature and humidity even when the machine is not in use. Failure to do so may result in malfunction. Temperature 20°C to 32°C (68°F to 89.6°F) (During non-operation: 5°C to 40°C [41°F to 104°F]) Humidity 35%RH to 80%RH (During non-operation: 20%RH to 80%RH) -
Page 6: Emplacement And Installation
Emplacement and Installation Install the machine in a level, stable location offering good operating conditions. An unsuitable location can cause accidents, fire, faulty operation, or breakdown. CAUTION Install in a level and stable location. Failure to do so may result in falling of the machine, leading to injury. Environments or locations where installation is not possible •... -
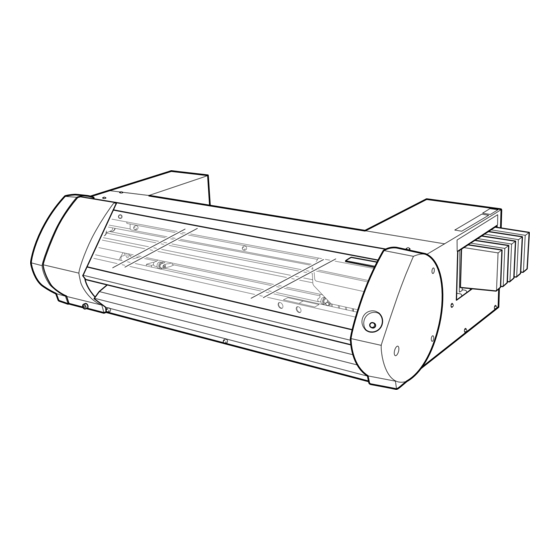
Page 7: Installation Space
Installation Space The space shown in the figure is required in order to use this machine. IMPORTANT Install the machine so that it is at least 0.6 m (23.6 in.) above the work floor. This machine is desktop type. Install the machine in a location that allows easy access to areas such as the power switch and other controls during operation. -
Page 8: Installing The Machine
Installing the Machine Removing the Retainers ................8 Connecting the Cables .................. 9 Proceeding to Software Installation ..............10 Installing the Machine... -
Page 9: Removing The Retainers
Removing the Retainers WARNING This work must be performed before connecting the power cord. The power turning on inadvertently during these operations may result in pinched hands or other injury. Be sure to remove the retainers. Any that remain may cause faulty operation or breakdown when the power is switched on. Store the retainers carefully because they are needed again when transporting the machine. -
Page 10: Connecting The Cables
Connecting the Cables WARNING Perform this task with all power switches left switched off. Otherwise sudden movement of the machine may cause injury. *1: Included only with 100 V specifications Installing the Machine... -
Page 11: Proceeding To Software Installation
Proceeding to Software Installation After installing this machine, install the software. MEMO The software installation must be performed on a computer. If you are viewing this manual on your computer • Click the following URL to check the software installation method. https://downloadcenter.rolanddg.com/contents/manuals/BN-20D_INS2_JP/index.html If you are viewing this manual on your mobile device •...
Need help?
Do you have a question about the VersaSTUDIO BN-20D and is the answer not in the manual?
Questions and answers