Table of Contents
Advertisement
Quick Links
Thank you very much for purchasing this product.
• To ensure correct and safe usage with a full understanding of this product's performance, please be sure to read through this manual com-
pletely.
• Unauthorized copying or transferal, in whole or in part, of this manual is prohibited.
• The specifications of this product and the contents of this operation manual are subject to change without notice.
• The operation manual and the product have been prepared and tested as much as possible. If you find any misprints or errors, please
inform us.
• Roland DG Corporation assumes no responsibility for any direct or indirect loss or damage that may occur through use of this product,
regardless of any failure to perform on the part of this product.
• Roland DG Corporation assumes no responsibility for any direct or indirect loss or damage that may occur with respect to any article made
using this product.
FA03822
R2-230217
Copyright © 2023 Roland DG Corporation
https://www.rolanddg.com/
Advertisement
Table of Contents

Related Manuals for Roland VersaSTUDIO BN-20D


Summary of Contents for Roland VersaSTUDIO BN-20D
- Page 1 • Roland DG Corporation assumes no responsibility for any direct or indirect loss or damage that may occur through use of this product, regardless of any failure to perform on the part of this product. • Roland DG Corporation assumes no responsibility for any direct or indirect loss or damage that may occur with respect to any article made using this product.
-
Page 2: Table Of Contents
Contents Installing the Software ....................2 Important Notes........................3 System Requirements ......................4 Software to Install ........................5 Downloading Software ......................6 Downloading the BN-20D Driver and Utility Installer ..............6 Downloading the VersaWorks 6 Installer .................. 6 Installing the Software ......................7 Installing BN-20D Driver and Utility .................. -
Page 3: Installing The Software
Installing the Software Important Notes ..................3 System Requirements ................... 4 Software to Install..................5 Downloading Software .................. 6 Downloading the BN-20D Driver and Utility Installer ........6 Downloading the VersaWorks 6 Installer ............6 Installing the Software.................. 7 Installing BN-20D Driver and Utility ............7 Installing VersaWorks 6 ................ -
Page 4: Important Notes
Important Notes IMPORTANT Do not connect this machine and the computer with a USB cable before installing the BN-20D driver. If you order these operations incorrectly, you may not be able to install the BN-20D driver. IMPORTANT Do not connect multiple instances of this machine to one computer. The utilities cannot control multiple machines at the same time. -
Page 5: System Requirements
• This software is a 32-bit application and therefore runs in WOW64 (Windows-On-Windows 64) when running on 64-bit editions of Windows operating systems. For the latest information, visit the Roland DG Corporation website (https://www.rolanddg.com/). VersaWorks 6 For details, see the VersaWorks 6 Installation Guide. -
Page 6: Software To Install
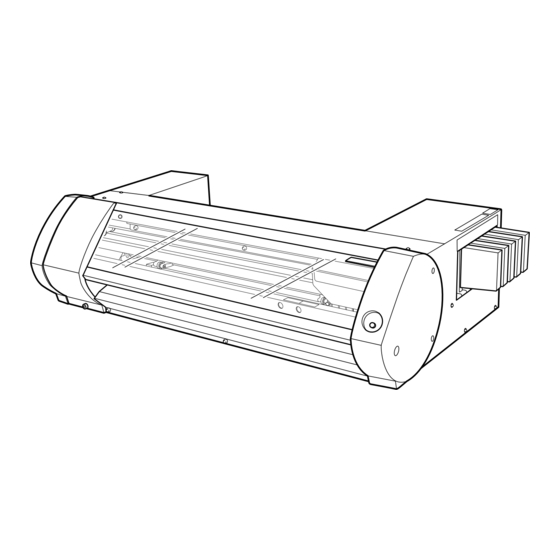
Software to Install BN-20D Driver Driver required for sending data from a computer to the machine. BN-20D Utility Software that performs operations such as operating the machine, checking its status, and per- forming maintenance on it. VersaWorks 6 Software that creates the output data. Installing the Software... -
Page 7: Downloading Software
Downloading Software Download the software on the computer to connect to the machine. Follow the procedure below to download the following software. • Roland_DG_Software_Package_for_BN-20D.zip • VW_Installer.exe Procedure Start the computer, and then log on with an account with "Administrator" rights. If you do not have these rights, ask the administrator to perform this work. -
Page 8: Installing The Software
When the [User Account Control] window appears, click [Yes] (or [Allow]). The setup menu screen appears automatically. Select the model name and the port to start setup. Select [Install]. Select [Roland BN-20D] for [Model Name]. Select [USB] for [Port]. Click [Start]. Click [Next]. -
Page 9: Installing Versaworks 6
Installing the Software Installing VersaWorks 6 Procedure Double-click [VW_Installer.exe]. When the [User Account Control] window appears, click [Yes] (or [Allow]). The top menu of the installer appears automatically. Install the software according to the on-screen instructions. For the detailed installation procedure, see the VersaWorks Installation Guide. RELATED LINKS ・... -
Page 10: Initial Printer Settings
Initial Printer Settings Setting up the Printer..................10 Installing the Blade..................12 Loading Roll Media ..................15 Adjustments before Output ................20 Starting Adjustments ................20 Checking for Nozzle Drop-out ..............21 Performing Bidirectional Adjustment ............23 Correcting Media Feeding...............24 Outputting Printing Data ................25 Initial Printer Settings... -
Page 11: Setting Up The Printer
Setting up the Printer Procedure Perform the following operations in order. Close the front cover. Turn on the main power switch. Select the [POWER] check box. When the [POWER] key indicator changes from flashing to steady, startup is finished. Connect the machine to the computer using the USB cable. MEMO •... - Page 12 Setting up the Printer Follow the instructions on the [InkFill] screen to start filling the machine with ink. MEMO Before inserting ink cartridges, shake each of them 50 times (about 20 seconds). The precipitation of the ingredients in the ink disables printing in normal color. So that the ink mixes well, shake the ink cartridge horizontally with a stroke length of around 5 cm (2 in.) from each end of the ink car- tridge.
-
Page 13: Installing The Blade
Installing the Blade MEMO Use the following link to view a reference video for this procedure. We recommend that you view this video to under- stand the overall flow of work. https://youtu.be/Es4lmS4Yy3I Procedure Insert a blade into the blade holder. Insert the pin into the blade holder. - Page 14 Installing the Blade Support the screw from below and insert the blade holder into the cutting carriage. Failing to support the screw from below may compromise cutting quality. Tighten the screw. Check that the screw does not come loose even when it is pulled up. Initial Printer Settings...
- Page 15 Installing the Blade IMPORTANT Tighten the cutting carriage screw lightly when no blade holder is installed. Keeping the screw firmly tight- ened causes the blade holder insertion hole to become gradually smaller, making installation difficult. Initial Printer Settings...
-
Page 16: Loading Roll Media
Loading Roll Media Prepare roll media for printing and cutting and that meets the following conditions. • Width: 150 to 515 mm (5.91 to 20.27 in.) • Paper tube inner diameter: 3 or 2 in. In this manual, the media wound around a paper tube is called "roll media." For information about pur- chasing media, contact your authorized dealer. - Page 17 Loading Roll Media Attach the media bar ( ) to the media flange ( ). Insert the side of the media bar with a hole ( ) into the media flange. When loading roll media with a 3-inch paper tube inner diameter, attach the media flange with on the inside.
- Page 18 Loading Roll Media Load the roll media on the printer. Insert the media bar ( ) into the guide ( ). Adjust the loaded position of the roll media. Move the roll media to the right so the media flange ( ) touches the right media guide ( ). Slide the left media guide ( ) and press it against the media flange ( ).
- Page 19 Loading Roll Media Pull the media out straight so it does not sag. Pass the media ( ) under the media clamps ( ). Not OK IMPORTANT The pinch rollers cannot be moved directly by hand. Move them with the media guide. Attempting to forcibly move these rollers may result in injury.
- Page 20 Loading Roll Media Start initial operation. Check that the left media guide ( ) is pressed against the media flange. Close the front cover ( ). Pull the loading lever ( ) forward. Pulling the loading lever forward starts initial operation. When the [POWER] key changes from flashing to steady, initial operation is complete.
-
Page 21: Adjustments Before Output
Adjustments before Output Before output, perform a printing test and a cutting test and make various adjustments. This work is required to obtain this machine's proper printing and cutting performance. Carry out this work before daily operations, when the media type is changed, and in similar situations. MEMO Use the following link to view a reference video for this procedure. -
Page 22: Checking For Nozzle Drop-Out
Adjustments before Output Checking for Nozzle Drop-out Procedure Click [Test Print]. A test pattern is printed. Read the on-screen description and check for nozzle drop-out. • If there is nozzle drop-out, proceed to step 2. • If there is no nozzle drop-out, click [Close] and proceed to step 4. Select the [Normal Cleaning], and then click [Go]. - Page 23 Adjustments before Output Click [Next] on the screen that is displayed. RELATED LINKS ・ https://downloadcenter.rolanddg.com/BN-20D Initial Printer Settings...
-
Page 24: Performing Bidirectional Adjustment
Adjustments before Output Performing Bidirectional Adjustment Procedure Click [Test Print]. A test pattern is printed. Follow the on-screen instructions and enter the value for [New Value]. Click [Apply]. The value in [Present Value] changes to the entered value. Click [Close]. Click [Next] on the screen that is displayed. -
Page 25: Correcting Media Feeding
Adjustments before Output Correcting Media Feeding Procedure Click [Test Print]. A test pattern is printed. Follow the on-screen instructions and enter the value for [New Value]. The current correction value (A) is that of the figure indicated by " ." Select the value to make the gap (B) and overlap (C) between the upper/lower squares smallest. -
Page 26: Outputting Printing Data
Outputting Printing Data Try using VersaWorks 6 to output printing data. For the VersaWorks 6 installation procedure, see the Versa- Works 6 Installation Guide. Procedure Start VersaWorks 6. • Windows 11 a. Click the [Start] menu on the computer. b. Click [VersaWorks]>[VersaWorks]. •... -
Page 27: About The Documentation For This Machine
About the Documentation for This Machine The following manuals are included with the machine: Paper manuals • Safety Precautions This manual contains important precautions for using the machine. • Quick Access Guide This guide contains the setup flow for this machine as well as links to representative details in the user's manual.
Need help?
Do you have a question about the VersaSTUDIO BN-20D and is the answer not in the manual?
Questions and answers