Table of Contents
Advertisement
Quick Links
We advise you to read this manual carefully, which contains all the instructions for maintaining the
appliance's aesthetic and functional qualities. For further information on the product: www.smeg.com
These instructions apply only to the destination countries listed on the appliance's data plate.
This is a class 3 built-in hob.
PRECAUTIONS
General safety instructions
Risk of personal injury
• During use the appliance and
its accessible parts become
very hot. Keep children well
away from the appliance.
• Protect hands with heat resistant
gloves during use.
• Never try to put out a fire or
flames with water: Turn off the
appliance and smother the
flames with a fire blanket or
other appropriate cover.
• This appliance may only be
used by children aged 8 years
and over, and by people of
reduced physical, sensory or
mental capacity, or lacking in
22 - PRECAUTIONS
22
22
25
26
27
27
27
27
27
27
27
28
28
28
28
experience in the use of
electrical appliances, provided
that they are supervised or
have been given instructions on
the safe use of the appliance
and of the hazards associated
with it.
• Children must not play with the
appliance.
• Keep children under the age of
eight at a safe distance unless
they are constantly supervised.
• Keep children under the age of
8 away from the appliance
when it is in use.
• Cleaning and maintenance
must not be carried out by
unsupervised children.
• Make sure that the flame-
29
30
30
30
31
31
32
32
35
35
36
36
37
38
38
91477A884/A
Advertisement
Table of Contents

Related Manuals for Smeg PV264B


Summary of Contents for Smeg PV264B
-
Page 1: Table Of Contents
We advise you to read this manual carefully, which contains all the instructions for maintaining the appliance’s aesthetic and functional qualities. For further information on the product: www.smeg.com These instructions apply only to the destination countries listed on the appliance's data plate. - Page 2 spreader crowns are correctly • Do not insert pointed metal positioned in their housings with objects (cutlery or utensils) into their respective burner caps. the slots in the appliance. • Do not touch or clean the • Do not use or store flammable surface of the hob while it is in materials near the appliance or use.
- Page 3 immediately. Disconnect the support surface. power supply and call • Do not obstruct ventilation Technical Support. openings and heat dispersal • WARNING: A gas cooking slots. appliance produces heat, • Do not use the hob if the humidity and combustion pyrolytic cycle is taking place products in the room where it is inside any oven installed...
-
Page 4: Installation
the burners. compatible. • Do not put empty pans or frying • This appliance is not connected pans on burners that are lit. to a system for extracting • Do not use rough or abrasive combustion products. It should materials or sharp metal be installed and connected in scrapers. -
Page 5: Appliance Purpose
and 15 Nm. avoid possible hazards. • At the end of the installation, • Always use any necessary/ check for any leaks with a required personal protective soapy solution, never with a equipment (PPE) before flame. performing any work on the •... -
Page 6: This User Manual
• in farms/farmhouses. To dispose of the appliance: • Cut the power cable and remove it. • by guests in hotels, motels and • Deliver the appliance to the appropriate residential environments. recycling centre for electrical and electronic • In bed and breakfast equipment waste, or return it to the retailer when purchasing an equivalent product, on accommodation. -
Page 7: Description
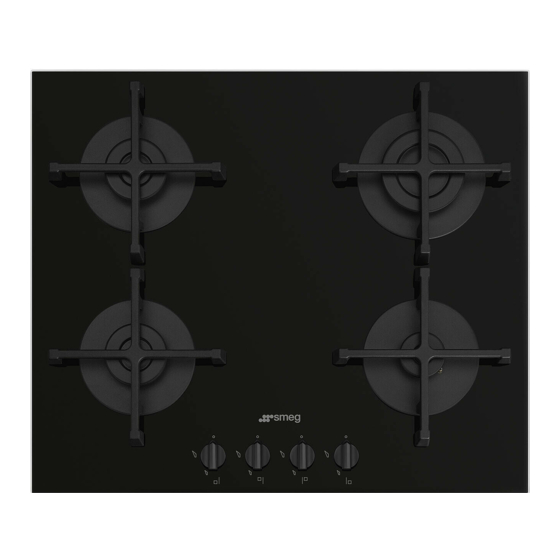
conventions: Information/Advice Warning/Caution DESCRIPTION General description Front right cooking zone AUX: Auxiliary burner SR: Semi-rapid burner Centre cooking zone RR: Rapid burner reduced Burner knobs R: Rapid burner For lighting and adjusting the hob burners. Press UR2: Ultra-rapid burner and turn the knobs anti-clockwise to Cooking zones order to light the relative burners. -
Page 8: Preliminary Operations
power sockets. Do not use phones or A few precautions are necessary if you wish to mobile phones inside the building. use a griddle: • Open the window in order to ventilate the • On 60 cm models, the dimensions of the room. -
Page 9: Using The Hob
• Do not place the griddle over more than Correct positioning of the flame-spreader one burner at the same time. crowns and burner caps Using the hob All the appliance’s control and monitoring devices are located together on the front panel. The burner controlled by each knob is shown next to the knob. -
Page 10: Cleaning The Hob
surface with a clean cloth. Make sure that there Flame-spreader crown and burner caps is no detergent left on the cooking surface as it For easier cleaning, the flame-spreader crowns might undergo an aggressive reaction when and the burner caps can be removed. Wash heated up and could modify the structure of the them in hot water and non-abrasive detergent. -
Page 11: Installation
The fuses blow or the circuit breaker of the There are cracks or fissures in the hob: residential electrical system trips repeatedly. • Turn off the appliance immediately, • Call Technical Support or an electrician. disconnect the power supply and contact Technical Support. - Page 12 onto the connector 3. issue a certificate of conformity. Connection to LPG Use a pressure regulator and make the connection on the gas cylinder following the guidelines set out in the standards in force. The supply pressure must comply with the values indicated in the “Burner and nozzle characteristics table”.
- Page 13 2. Remove the flame-spreader crowns and 2. Remove the screws (1), the plate (2) and the relative burner caps. underlying seal (3) in succession. 3. Replace the nozzle using a 7 mm spanner according to the gas to be used. 3.
-
Page 14: Gas Types And Countries
Over time the gas cocks may become difficult to replace the lubrication grease. turn and get blocked. Clean them internally and Lubrication of the gas cocks should be performed by a specialised technician. Gas types and Countries Gas types 1 Natural Gas G20 20 mbar •... -
Page 15: Electrical Connection
5 LPG G30/31 - 30/37 mbar Rated heating capacity (kW) 1.00 1.70 2.60 2.90 4.00 Nozzle diameter (1/100 mm) Pre-chamber (printed on nozzle) (S4) Reduced flow rate (W) 1600 Rated flow rate G30 (g/h) Rated flow rate G31 (g/h) 6 LPG G30/31 - 37 mbar Rated heating capacity (kW) 1.10 1.80... -
Page 16: Mounting
competent technician. Hob seal • The minimum clearance between exhaust To prevent leakage of liquid between the frame hoods and the cooking surface must be at of the hob and the countertop, place the least the distance indicated in the exhaust adhesive seal provided along the entire outer hood installation instructions. -
Page 17: Fixing To The Built-In Cabinet
base using suitable equipment. Instructions for the installer • If you use a plug to connect to the power supply, the plug must be accessible after installation. • Do not bend or trap the power cable. • The appliance must be installed according to the installation diagrams.
Need help?
Do you have a question about the PV264B and is the answer not in the manual?
Questions and answers