Advertisement
Quick Links
Advertisement

Related Manuals for Snow Peak Amenity Dome M


Summary of Contents for Snow Peak Amenity Dome M
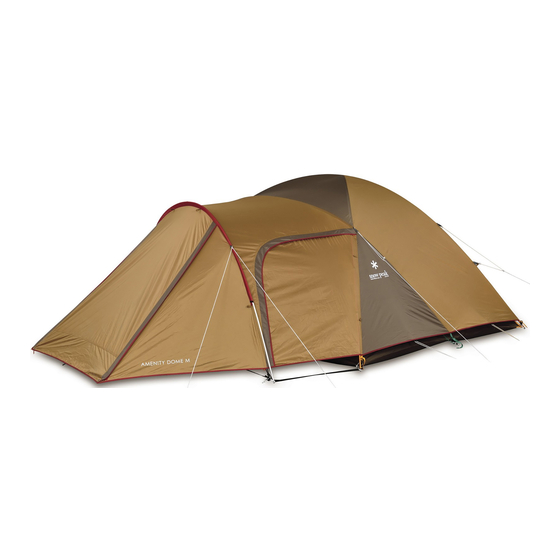
- Page 1 Instruction Manual Ver 1.00 SDE-001RH Amenity Dome M...
- Page 2 Thank you very much for purchasing a Snow Peak product. To use this product safely and correctly, please read these instructions carefully. After reading these instructions, keep this manual in a safe place for future reference. Although this product is expected to be complete and safe, please check that all accessory items are included before attempting to assemble the product.
- Page 3 Before use: please read thoroughly to ensure safety and to avoid accidents. DANGER Misuse could easily result in a serious accident or death. WARNING Misuse could result in serious injury to the user. CAUTION Misuse could result in injury to the user and/or damage to property. Important Information DANGER Misuse could easily result in a serious accident or death.
- Page 4 We have thoroughly checked this product for quality, however, please do a trial set up before actual use to ensure full understanding of the correct usage of the accessories and instructions. If any defects are found, please contact the dealer where the product was purchased or Snow Peak Customer Service.
- Page 5 Set-up Procedure 0) Make sure that two or more people take part in the set-up. 1) Spread the Inner Tent on a flat area. There are two entrances to the Inner Tent; the side that has the Building Tape is the Vestibule side and will become the main entrance.
- Page 6 6) Insert a pin into one end of the X Pole (the corner tape for the X Pole is yellow) (fig. D). Fig. D X Pole Triangular Reinforcing Cloth on the bottom Yellow Corner Tape 7) Insert the additional pin to the other end of the X Pole, which is located diagonally opposite the first end (fig.
- Page 7 10) Attach all the Plastic Hooks to the corresponding Fig. I Poles (fig. I). 11) Close both door panels, front and back. Insert the pegs into the loops at the six ends of each the corner. Peg down the Inner Tent by following the numbers, and by pulling lightly to stretch out any slack at the bottom of the tent (fig.
- Page 8 14) Slowly insert the Vestibule Pole into the sleeve of the Vestibule Fly, then insert the pins into both ends of the Pole (fig. L). 15) Connect the six Buckles on the edge of the Fly to the Buckles on the Bottom Rings.
- Page 9 Fig. P *Do not pull the rope too much. If pulled too far, the Fly may be overloaded or damaged. Fig. O While moving the Guy Line in the direction of the arrow, slide the Rope tensioner to increase the tension.
- Page 10 Water-Repellent and Waterproof Functions ● A combination of Polyester fabric is used in this product. Both materials are treated with a high-quality, water-repellent finish. However, the level of water-repellent capacity and durability may vary slightly due to the characteristics of each material. ● ...
- Page 11 finish. Regarding Warranty The specifications of Snow Peak products are determined based on field testing and quality control, ensuring proper function and longevity of every product. If apparent defects in the manufacturing of the product are found, the defective product will be repaired or exchanged free of charge.
- Page 12 Inner Depth Inner Width 55cm (1.8’) 80cm (2.6’) Specifications SDE-001RH Amenity Dome M ● Material: Fly / 75D Polyester Taffeta, PU coating, Waterproof rating: 1,800mm minimum, Teflon water-repellent finish, UV protection treatment; Inner Wall / 68D Polyester Taffeta; Bottom / 210D Polyester Oxford・PU coating,...
Need help?
Do you have a question about the Amenity Dome M and is the answer not in the manual?
Questions and answers