Advertisement
Advertisement
Table of Contents

Subscribe to Our Youtube Channel
Related Manuals for Polaris RANGER 1000 2023


Summary of Contents for Polaris RANGER 1000 2023
- Page 1 2023 For Maintenance and Safety OWNER’S MANUAL RANGER 1000 RANGER CREW 1000...
- Page 2 For more information go to www.P65Warnings.ca.gov/passenger-vehicle. For videos and more information about a safe riding experience with your Polaris vehicle, scan this QR Code® with your smartphone or visit: www.polaris.com/en-us/safety...
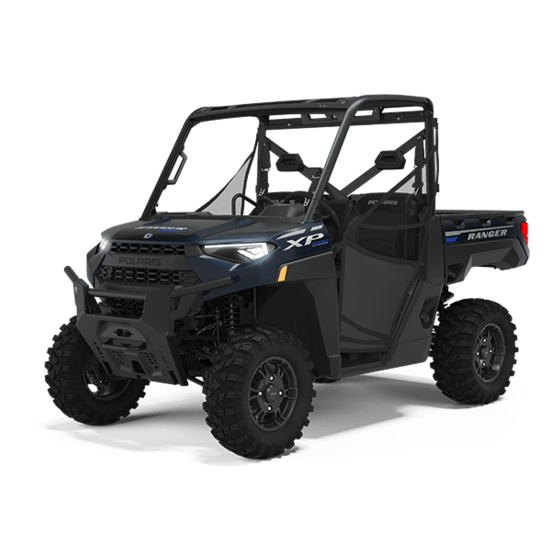
- Page 3 2023 Owner’s Manual RANGER 1000 RANGER 1000 - EPS RANGER 1000 Premium RANGER CREW 1000 RANGER CREW 1000 Premium...
- Page 4 Unless noted, trademarks are the property of Polaris Industries Inc. Loctite® is a registered trademark of Henkel Corporation. Recreational Off-Highway Vehicle Association℠ and ROHVA℠ are service trademarks of Recreational Off-Highway Vehicle Association. WD-40® is registered to WD-40 Manufacturing Company. QR Code® is a registered trademark of DENSO WAVE INCORPORATED.
- Page 5 WELCOME Thank you for purchasing a POLARIS vehicle, and welcome to our world-wide family of POLARIS enthusiasts. Be sure to visit us online at www.polaris.com for the latest news, new product introductions, upcoming events, career opportunities and more. Here at POLARIS we proudly produce an exciting line of utility and recreational products.
- Page 6 WELCOME...
-
Page 7: Table Of Contents
Specifications ....137 POLARIS Products ....145 Troubleshooting ....147 Warranty . -
Page 9: Introduction
Failure to heed the warnings and safety precautions contained in this manual can result in severe injury or death. Your POLARIS vehicle is not a toy and can be hazardous to operate. This vehicle handles differently than cars, trucks or other off-road vehicles. - Page 10 INTRODUCTION SAFETY SYMBOLS AND SIGNAL WORDS The following signal words and symbols appear throughout this manual and on your vehicle. Your safety is involved when these words and symbols are used. Become familiar with their meanings before reading the manual. DANGER DANGER indicates a hazardous situation which, if not avoided, WILL result in death or serious injury.
- Page 11 (IF EQUIPPED) Some Polaris vehicles come equipped with a near-field communication (NFC) chip. The NFC chip is embedded in the Polaris emblem located at the front of the vehicle and seamlessly connects you to a digital platform of vehicle information and tools. See your dealer for more information.
- Page 12 INTRODUCTION...
- Page 13 Remove the spare key and store it in a safe place. An ignition key can be duplicated only by ordering a POLARIS key blank (using your key number) and mating it with one of your existing keys. The ignition switch must be replaced if all keys are lost.
-
Page 15: Safety
• Reduce the effectiveness of occupant protection systems, including the seatbelts and the Rollover Protective Structure (ROPS). • Make it illegal to own or operate your vehicle. POLARIS-authorized spark arresters, mufflers, and emissions control components are mandatory for ownership or operation in many areas. - Page 16 POLARIS recommends that you supervise younger drivers. Set rules and put limits on how, when, and where they are allowed to use this vehicle. For example, young drivers may need to have an adult in the vehicle with them and not be allowed to drive with their friends in the vehicle.
- Page 17 SAFETY PREPARE VEHICLE FOR THE RIDE Before starting off, always perform the Pre-Ride Inspection. Failure to inspect and verify that the vehicle is in safe operating condition increases the risk of an accident, which can lead to serious injury or death. ITEM REMARK REFERENCE...
- Page 18 Improper tire maintenance can lead to loss of control and an accident, which could result in serious injury or death. To reduce your risk of injury: • Maintain POLARIS recommended tire pressure. Check pressure before operating. Even if your vehicle has only been driven a short distance, the tire pressure readings can become higher.
- Page 19 SAFETY MEASUREMENT SPECIFICATION Maximum Cargo Box Load 1000 lbs (454 kg) US Models Only Maximum Cargo Box Load 600 lbs (272 kg) CA Models Only Tire Pressure in PSI (kPa) Standard Models Front: 10 PSI (69 kPa) Standard Models Only Rear: 14 PSI (96 kPa) Tire Pressure in PSI (kPa) Premium Models...
- Page 20 Use shatterproof goggles or a shatterproof helmet face shield. Such protective eyewear may reduce the risk of foreign material getting in your eyes and help prevent loss of vision. POLARIS recommends wearing approved Personal Protective Equipment (PPE) that have markings indicating they are designed to standards such as: •...
- Page 21 SAFETY Riding in this vehicle without closed and latched cab doors increases the risk of serious injury or death in the event of an accident or rollover. Always make sure all cab doors are closed and latched while riding in this vehicle. Be sure riders pay attention and plan ahead.
- Page 22 SAFETY DRIVING GUIDELINES Drive Responsibly. This vehicle has higher ground clearance and other features to handle rugged terrain. It can be overturned in situations where some other vehicles may not. Abrupt maneuvers or aggressive driving, even on flat, open areas, can cause loss of control, rollovers, severe injury or death.
- Page 23 Watching someone else go over a jump or go airborne does not mean you can safely do so. Polaris cannot determine whether any jump you may encounter is appropriate for this vehicle. Any jump, even a small one, could be poorly maintained, designed, or not suitable for this vehicle and may cause serious injury or death.
- Page 24 SAFETY Improperly operating on hills can cause loss of control, rollover, or accident, which can lead to serious injury or death. Use extra care when operating on hills. Plan for rough terrain, ruts, and other changes in traction and terrain. Driving up hills Check the terrain before ascending a hill and make sure it is not too slippery or loose.
- Page 25 SAFETY Riding in water / Falling into water Operating through deep or fast-flowing water can cause loss of traction, loss of control, overturning, or being swept away in water. You can be seriously injured or killed from entrapment and drowning. Never operate the vehicle in fast-flowing water or in water that exceeds the floor level of the vehicle.
- Page 26 After any crash, rollover, or other accident, have a POLARIS dealer inspect the vehicle for possible damage, including seat belts, ROPS, brakes, suspension, and steering systems.
- Page 27 Only recover a vehicle of equal or lesser size and weight. When recovering a disabled vehicle, place the disabled vehicle’s transmission in neutral. Do not move a disabled POLARIS vehicle faster than 10 mph (16 km/h). Operating, Idling, Or Parking Near Combustible Materials Engine, exhaust, and other vehicle components can be very hot during and after use.
- Page 28 SAFETY After operation, inspect the vehicle for damage and debris to make sure the vehicle can be safely stored and operated again. Some things to inspect include: • Debris that could catch fire, such as mud/grass near the engine or exhaust system •...
- Page 29 If any label becomes illegible or comes off, contact your POLARIS dealer to purchase a replacement. Replacement safety labels are provided by POLARIS at no charge.
- Page 30 SAFETY FUEL TRANSPORT WARNING The Fuel Transport Warning label is located in the cargo box. WARNING NEVER carry fuel or other flammable liquids on this vehicle Failure to follow this instruction could lead to serious burn injuries or death. Part number: 7186122 (English), 7186122–F (French Canadian) PROPER USE WARNING The Proper Use Warning label is located on the ROPS.
- Page 31 SAFETY SEAT BELT/ DRIVER RESPONSIBLY WARNING The Seat Belt/ Driver Responsibility Warning label is located on the console. WARNING Improper vehicle use can result in SEVERE INJURY or DEATH Be Prepared • Fasten seat belts. • Wear an approved helmet and protective gear. •...
- Page 32 SAFETY MAXIMUM PAYLOAD WARNING WARNING The Maximum Payload Warning label is located on the ROPS. Part number: 7300067 (English), 7300067–F (French Canadian) IF TOTAL PAYLOAD RANGER NEVER EXCEED EXCEEDS 40 mph (64 kph) 550 lbs (250 kg) 1000 25 mph (40kph) 1050 lbs (476 kg) 1000 40 mph (64 kph)
- Page 33 SAFETY PASSENGER/ TIRE PRESSURE WARNING Standard/ Standard — EPS Models The Passenger/ Tire Pressure Warning is located on the cargo box. WARNING • Never carry passengers in cargo box. • Passengers can be thrown off. This can cause serious injury or death. •...
- Page 34 SAFETY PASSENGER/ TIRE PRESSURE WARNING Premium Models The Passenger/ Tire Pressure Warning is located on the cargo box. WARNING • Never carry passengers in cargo box. • Passengers can be thrown off. This can cause serious injury or death. • If total payload is greater that 500 lbs, the vehicle must be operated in LOW range.
- Page 35 AIR FILTER CAUTION The Air Filter Caution label is located on the air filter housing. CAUTION Use a Polaris approved air filter. The use of a non-Polaris approved air filter may cause engine damage. Before installing filter, ensure there is no dirt or debris in the clean side of the intake tube.
- Page 36 If any label becomes illegible or comes off, contact your POLARIS dealer to purchase a replacement. Replacement safety labels are provided by POLARIS at no charge.
- Page 37 SAFETY FUEL TRANSPORT WARNING The Fuel Transport Warning label is located in the cargo box. WARNING NEVER carry fuel or other flammable liquids on this vehicle Failure to follow this instruction could lead to serious burn injuries or death. Part number: 7186122 (English), 7186122–F (French Canadian) SEAT BELT/ DRIVER RESPONSIBLY WARNING The Seat Belt/ Driver Responsibility Warning label is located on the console.
- Page 38 SAFETY Be Sure Riders Pay Attention and Plan Ahead If you think or feel the vehicle may tip or roll, reduce your risk to injury: • Keep a firm grip on the steering wheel or handholds and brace yourself. • Do not put any part of your body outside of the vehicle for any reason. Rollovers have caused severe injuries and death, even on flat, open areas.
- Page 39 SAFETY MAXIMUM PAYLOAD WARNING WARNING The Maximum Payload Warning label is located on the ROPS. Part number: 7300067 (English), 7300067–F (French Canadian) IF TOTAL PAYLOAD RANGER NEVER EXCEED EXCEEDS 40 mph (64 kph) 550 lbs (250 kg) 1000 25 mph (40kph) 1050 lbs (476 kg) 1000 40 mph (64 kph)
- Page 40 SAFETY WARNING • Never carry passengers in cargo box. • Passengers can be thrown off. This can cause serious injury or death. • If total payload is greater than 500 lbs, the vehicle must be operated in LOW range. WARNING IMPROPER TIRE PRESSURE OR OVERLOADING CAN CAUSE LOSS OF CONTROL RESULTING IN...
- Page 41 SAFETY PASSENGER/ TIRE PRESSURE WARNING Premium Models The Passenger/ Tire Pressure Warning is located on the cargo box. WARNING • Never carry passengers in cargo box. • Passengers can be thrown off. This can cause serious injury or death. • If total payload is greater than 500 lbs, the vehicle must be operated in LOW range.
- Page 42 AIR FILTER CAUTION The Air Filter Caution label is located on the air filter housing. CAUTION Use a Polaris approved air filter. The use of a non-Polaris approved air filter may cause engine damage. Before installing filter, ensure there is no dirt or debris in the clean side of the intake tube.
-
Page 43: Features And Controls
FEATURES AND CONTROLS FEATURES AND CONTROLS RANGER 1000 COMPONENT LOCATIONS Console Air Filter Headlights ROPS Cab Frame Bumper Cargo Box Radiator Fuel Cap Tailgate Brake Fluid Reservoir Taillights Fuse Block (under seat) Receiver Hitch... - Page 44 FEATURES AND CONTROLS RANGER CREW 1000 COMPONENT LOCATIONS Console Air Filter Headlights ROPS Cab Frame Bumper Cargo Box Radiator Fuel Cap Tailgate Brake Fluid Reservoir Taillights Fuse Block (under seat) Receiver Hitch...
- Page 45 FEATURES AND CONTROLS CONSOLE Instrument Cluster Battery Trickle-Charging Outlet Gear Selector (Shifter) 12V Auxiliary Outlet AWD Switch Ignition Switch Storage Compartment Steering Wheel Adjustment Lever 12V Auxiliary Outlet Light Switch...
- Page 46 FEATURES AND CONTROLS STEERING WHEEL The steering wheel can be tilted upward or downward for rider preference. Lift and hold the steering wheel adjustment lever while moving the steering wheel upward or downward. Release the lever when the steering wheel is at the desired position.
- Page 47 FEATURES AND CONTROLS Maintaining shift linkage adjustment is important to assure proper transmission function. Your POLARIS dealer can assist in resolving any shifting problems. NOTICE Do not attempt to shift the transmission while the vehicle is moving or damage to the transmission could result. Always shift when the vehicle is stationary and the engine is at idle.
- Page 48 FEATURES AND CONTROLS The engine is off. Electrical circuits are off. Electrical circuits are on. Electrical equipment can be used. START Turn the key to the START position to engage the electric starter. The key returns to the ON position when released. LIGHT SWITCH The ignition switch key must be in the ON/RUN position to operate the headlights.
- Page 49 FEATURES AND CONTROLS WINCH SWITCH Press the top of the rocker switch to spool line out from the winch. Press the bottom of the rocker switch to spool line in to the winch. Move the rocker switch to the center position to stop spooling. WIRELESS WINCH REMOTE (IF EQUIPPED) Press and hold the OUT button on the switch to spool line out from the winch.
- Page 50 WEEKS, Polaris recommends using a BatteryMINDer® 2012 AGM - 2 AMP charger, which can be ordered through your dealer. Polaris provides a charging accessory with your vehicle that allows easy connection to the battery through the Battery Trickle-Charging Outlet, located on the dash. While charging, place the charger outside of the vehicle and protect it from moisture.
- Page 51 FEATURES AND CONTROLS FOOT PEDALS BRAKE PEDAL Depress the brake pedal to slow or stop the vehicle. Apply the brakes while starting the engine. When the brake pedal is depressed, the brake light comes on. Check the brake light before each ride. 1.
- Page 52 FEATURES AND CONTROLS SEATING - STANDARD/ STANDARD - EPS MODELS SEAT REMOVAL To access the under-seat area, pull the rear edge of a seat upward to release the latch pins from the grommets. Then roll the seat forward. To completely remove a seat, roll the seat forward and lift the seat tabs from the seat base mounts.
- Page 53 FEATURES AND CONTROLS SEAT BELTS This vehicle is equipped with three-point lap and diagonal seat belts for the operator and any passengers. Always make sure the seat belts are secured for all riders before operating. The driver’s seat belt is equipped with a seat belt interlock.
- Page 54 FEATURES AND CONTROLS SEAT AND STORAGE COMPARTMENTS The electrical compartment is located under the center rear-most seat. Never use this area for storage. Storage compartments are located under all other seats. Remove the storage bin under the right rear-most passenger seat to access the battery.
- Page 55 FEATURES AND CONTROLS SEATING - PREMIUM MODELS SEAT REMOVAL To remove the driver’s seat, lift up on the rear of the seat and rotate the seat base up and forward. For the passenger seat, pull the rear edge of the seat upward to release the latch pins from the grommets.
- Page 56 FEATURES AND CONTROLS SEAT BELTS This vehicle is equipped with three-point lap and diagonal seat belts for the operator and any passengers. Always make sure the seat belts are secured for all riders before operating. The driver’s seat belt is equipped with a seat belt interlock.
- Page 57 FEATURES AND CONTROLS SEAT AND STORAGE COMPARTMENTS The electrical compartment is located under the center rear-most seat. Never use this area for storage. Storage compartments are located under all other seats. Remove the storage bin under the right rear-most passenger seat to access the battery.
- Page 58 EPS has shut down. Turn the key off and on to reset the unit. If the light remains on after starting the engine, the EPS system is inoperative. See your POLARIS dealer, or other qualified person, as soon as possible for repair. Continued operation could result in permanent damage to the EPS unit and increased steering effort.
- Page 59 FEATURES AND CONTROLS SECURING THE NET 1. Position the lower net rod into the mount at floor level. 2. Connect the latch at the top edge of the net to the receiver latch mounted on the front frame. OPENING THE NET 1.
- Page 60 FEATURES AND CONTROLS TRAILER HITCH BRACKET This vehicle is equipped with a receiver hitch bracket for a trailer hitch. Trailer towing equipment is not supplied with this vehicle. To avoid injury and property damage, always heed the warnings and towing capacities.
- Page 61 FEATURES AND CONTROLS INSTRUMENT CLUSTER OVERVIEW NOTICE Features and telltales vary by model. DISPLAY AREA FUNCTION H = High Gear Gear Indicator L = Low Gear N = Neutral R = Reverse Gear P = Park – = Gear Signal Error (or shifter between gears) This area displays odometer, trip meter, trip meter 2, Display Area 2 voltage, engine temperature, engine hour meter,...
- Page 62 DISPLAY AREA FUNCTION A flashing wrench symbol alerts the operator that the Service Indicator preset service interval has been reached. Your POLARIS dealer can provide scheduled maintenance. The clock displays time in a 12-hour or 24-hour Clock format. Segments of the indicator illuminate based on Driveline Mode driveline mode engaged.
- Page 63 FEATURES AND CONTROLS INDICATOR ICON FUNCTION High Beam This lamp illuminates when the headlamp switch is set to high beam. Brake Failure (if Lamp illuminates when Brake System (if equipped) Brake Failure Alarm is equipped) detects low fluid level in brake hydraulic system. Verify brake fluid in reservoir.
- Page 64 FEATURES AND CONTROLS DISPLAY AREA 1 Pressing the MODE button will change the information displayed in Area 1 DISPLAY AREA 1 FUNCTION Speed The vehicle’s speed will be displayed in mph, or km/h. Engine The vehicle’s current engine temperature will be Temperature displayed.
- Page 65 FEATURES AND CONTROLS DISPLAY AREA 2 Toggle the Up/Down buttons to change the information displayed in Area 2 DISPLAY AREA 2 FUNCTION Odometer The vehicle’s odometer reading will be displayed. Engine The vehicle Engine Temperature will be displayed. Temperature Trip 1 The vehicle Trip 1 mileage will be displayed.
- Page 66 FEATURES AND CONTROLS OPTIONS MENU From the options menu you can view diagnostic codes, access the advanced menu, set the clock, and much more. For a full list of available options see below. To enter the Options Menu, press and hold the MODE button.
- Page 67 FEATURES AND CONTROLS DIAGNOSTIC CODE Diagnostic Code Screen will show available MIL that has come on during that ignition cycle. To access the Diagnostic Code Screen, do the following: 1. Press and hold the MODE button to enter the Options Menu.
- Page 68 FEATURES AND CONTROLS NOTICE When the gauge is displaying a fault code, the warning telltale (check engine or EPS) will blink to indicate which controller set the fault code. 3. To exit the Options Menu the user can select Exit Menu function from Options Menu, can hold Mode Button and exit out of Options Menu, or not press any button for 10 seconds, which will exit out of the Options Menu.
- Page 69 FEATURES AND CONTROLS DIAGNOSTIC CODES COMPONENT CONDITION Crankshaft Position Circuit Fault Sensor Plausibility Fault Vehicle Speed Signal Speed Too High Plausibility Fault Gear Sensor Signal Voltage Too Low Voltage Too High Signal Fault Injector 1 (MAG) (SDI Driver Circuit Part Load) Open/Grounded Driver Circuit Short to Driver Circuit...
- Page 70 FEATURES AND CONTROLS DIAGNOSTIC CODES COMPONENT CONDITION Driver Circuit 1071 Grounded Idle Air Control Driver Circuit Open/Grounded Driver Circuit Short to Driver Circuit Grounded Position Out of Range Starter Enable Circuit Driver Circuit 1321 Open/Grounded Driver Circuit Short to 1321 Driver Circuit 1321 Grounded...
- Page 71 FEATURES AND CONTROLS DIAGNOSTIC CODES COMPONENT CONDITION Idle Speed Speed Too High 520211 Speed Too Low 520211 DIAGNOSTIC CODES COMPONENT CONDITION EPS MODELS ONLY Vehicle Speed Sensor Data Valid But Above Normal Operational Range - Most Severe Level Data Erratic, Intermittent Or Incorrect Abnormal Rate Of...
- Page 72 FEATURES AND CONTROLS DIAGNOSTIC CODES COMPONENT CONDITION EPS MODELS ONLY Calibration Out Of Calibration Steering Over Current Current Above Normal 520221 Shut Down Or Grounded Circuit Steering Excessive Current Above Normal 520222 Current Error Or Grounded Circuit Steering Torque Condition Exists 520223 Partial Failure Steering Torque Full...
- Page 73 FEATURES AND CONTROLS UNIT SELECTION DISTANCE 1. Press and hold the MODE button to enter the Options Menu. NOTICE “OPTIONS” will display on the screen for 3 seconds before showing first menu item. 2. Select “Units-Distance” from the Options Menu by pressing the MODE button.
- Page 74 FEATURES AND CONTROLS 1. Press and hold the MODE button to enter the Options Menu. NOTICE “OPTIONS” will display on the screen for 3 seconds before showing first menu item. 2. Select “Units - Temp” from the Options Menu by pressing the MODE button. Reference the image shown above: Press the MODE button.
- Page 75 FEATURES AND CONTROLS CLOCK 1. Press and hold the MODE button to enter the Options Menu. NOTICE “OPTIONS” will display on the screen for 3 seconds before showing first menu item. 2. Select “Clock” from the Options Menu by pressing the MODE button. Reference the image shown above: Press the MODE button.
- Page 76 FEATURES AND CONTROLS BACK LIGHT COLOR 1. Press and hold the MODE button to enter the Options Menu. NOTICE “OPTIONS” will display on the screen for 3 seconds before showing first menu item. 2. Select “Backlight Color” from the Options Menu by pressing the MODE button.
- Page 77 FEATURES AND CONTROLS BACK LIGHT LEVEL 1. Press and hold the MODE button to enter the Options Menu. NOTICE “OPTIONS” will display on the screen for 3 seconds before showing first menu item. 2. Select “Backlight Level” from the Options Menu by pressing the MODE button.
- Page 78 FEATURES AND CONTROLS SERVICE HOURS 1. Press and hold the MODE button to enter the Options Menu. NOTICE “OPTIONS” will display on the screen for 3 seconds before showing first menu item. 2. Select “Service Hours” from the Options Menu by pressing the MODE button. Reference the image shown above: Press the MODE button.
-
Page 79: Operation
OPERATION OPERATION IMPORTANT INFORMATION WARNING Failure to operate the vehicle properly can result in a collision, loss of control, accident or rollover, which may result in serious injury or death. Read and understand all safety warnings outlined in the safety section of this owner’s manual. - Page 80 OPERATION BRAKE BURNISHING It is recommended that a burnishing procedure be performed on new vehicles or after installation of new brake pads or rotors. This helps to conform the pads to the rotor surface and achieve optimum braking performance. Test drive the machine and gradually accelerate to more than 20 mph. Apply light to moderate pressure to the brake pedal to slow the vehicle to roughly 5 mph.
- Page 81 OPERATION...
- Page 82 OPERATION STARTING THE ENGINE 1. Position the vehicle on a level surface outdoors or in a well ventilated area. 2. Sit in the driver's seat and fasten the seat belt. Secure the cab doors (if equipped). 3. Place the transmission in PARK. 4.
- Page 83 OPERATION FUEL RECOMMENDATIONS Most Polaris Off-Road Vehicles require unleaded gasoline with a minimum pump octane number of 87. Do not use fuel with an ethanol content greater than 10 percent. Octane in excess of 87 will not damage the engine but typically will not result in performance gains.
- Page 84 OPERATION BRAKING 1. Release the throttle pedal completely. NOTICE When the throttle pedal is released completely and engine speed slows to near idle, the vehicle has no engine braking. 2. Press on the brake pedal evenly and firmly. Practice starting and stopping (using the brakes) until you're familiar with the controls.
- Page 85 OPERATION HAULING CARGO WARNING Overloading the vehicle or carrying or towing cargo improperly can alter vehicle handling and may cause loss of control or brake instability. Always follow these precautions when hauling cargo: Never exceed the stated load capacity for this vehicle. REDUCE SPEED AND ALLOW GREATER DISTANCES FOR BRAKING WHEN HAULING CARGO.
- Page 86 OPERATION WARNING If the vehicle is capable, never exceed: 40 mph (64 kph) if total payload exceeds 550 lbs. (250 kg) or 25 mph (40 kph) if total RANGER 1000 payload exceeds 1050 lbs. (476 kg). 40 mph (64 kph) if total payload exceeds 550 lbs.
- Page 87 OPERATION 3. Towing a trailer increases braking distance. Do not operate the vehicle faster than 10 MPH (16 km/h) when towing. 4. Do not tow more than the recommended weight for the vehicle. 5. Attach a trailer to the trailer hitch bracket only. Do not attach a trailer to any other location, which could result in loss of control of the vehicle.
- Page 88 OPERATION DUMPING THE CARGO BOX To dump the cargo box, do the following: 1. Select a level site to dump the cargo box. Do not attempt to dump or unload the vehicle while parked on an incline. 2. Apply the brakes. 3.
- Page 89 OPERATION ALL WHEEL DRIVE/REAR DIFFERENTIAL SYSTEM If your model is equipped with a lockable differential, you can choose to operate with an open differential or a closed differential. ENGAGING AWD NOTICE Switching to AWD while the rear wheels are spinning may cause severe drive shaft and clutch damage.
- Page 90 OPERATION DISENGAGING AWD Move the driveline mode switch to the center or bottom position to disengage AWD. If the switch is turned off while the front hubs are driving, they will not release until the rear wheels regain traction. In some situations, the front gearcase may remain locked after turning the AWD switch off.
- Page 91 OPERATION NOTICE Damage to the differential can occur if it is engaged while the vehicle is traveling at high speeds or while the rear wheels are spinning. Slow the vehicle to nearly stopped before engaging the differential. WARNING Never operate in TURF mode (if equipped) while operating on a hill or other irregular terrain.
-
Page 93: Emission Control Systems
EMISSION CONTROL SYSTEMS EMISSION CONTROL SYSTEMS NOISE EMISSION CONTROL SYSTEM Do not modify the engine, intake or exhaust components, as doing so may affect compliance with U.S.A. EPA noise control requirements (40 CFR 205) and local noise level requirements. OPERATION ON PUBLIC LANDS IN THE U.S.A. Your vehicle has a spark arrester that was tested and qualified to be in accordance with the USFS standard 5100-1a. -
Page 95: Maintenance
MAINTENANCE MAINTENANCE POLARIS MAINTENANCE SCHEDULE The intervals shown in this table are based on vehicles operated under normal conditions. Each interval is given in hours and miles (kilometers). Items should be serviced at whichever interval comes first. Continue to reference the following maintenance schedules at the given intervals as hours and miles (kilometers) increase on the vehicle. - Page 96 MAINTENANCE Vehicles subjected to severe use must be serviced at 50% of the stated interval. Examples of Severe Use: Frequent immersion in mud, water, or sand, constant high RPM use, prolonged low-speed heavy load operation, extended idle, and short trip cold weather operation. EVERY 100 HOURS / 1000 MILES (1600 KM) OR YEARLY Replace air filter.
- Page 97 Transmission Fluid Wiring Inspect for wear, routing, and retention. * It is recommended to have an authorized Polaris dealer perform these services. Vehicles subjected to severe use must be serviced at 50% of the stated interval. Examples of Severe Use: Frequent immersion in mud, water, or sand, constant high RPM use, prolonged low-speed heavy load operation, extended idle, and short trip cold weather operation.
- Page 98 MAINTENANCE LUBRICATION RECOMMENDATIONS Check and lubricate all components at the intervals outlined in the Periodic Maintenance Chart, or more often under severe use, such as wet or dusty conditions. Items not listed in the chart should be lubricated at the general lubrication interval.
- Page 99 POLARIS recommends the use of POLARIS PS-4 5W-50 4-Cycle Oil or a similar oil. Refer to the Specifications section for capacities. Oil may need to be changed more frequently if POLARIS PS-4 engine oil is not used. Follow the manufacturer's recommendations for ambient temperature operation.
- Page 100 MAINTENANCE OIL CHECK The oil dipstick is located on the engine. Access the dipstick through the right rear wheel well. To check the oil, do the following: 1. Position vehicle on a level surface and place the transmission in PARK. 2.
- Page 101 MAINTENANCE ENGINE OIL AND FILTER REPLACEMENT Always change engine oil and filter at the intervals outlined in the Periodic Maintenance Chart. Always change the oil filter whenever changing the engine oil. The engine oil dipstick is located on the right front side of the engine. The engine oil fill cap is located on top of the valve cover.
- Page 102 MAINTENANCE 8. Using a clean dry cloth, clean the filter sealing surface on the engine crankcase. 9. Lubricate the O-ring on the new oil filter with a film of fresh engine oil. Check to make sure the O-ring is in good condition. Install it to specification. TORQUE Oil Filter: Turn by hand until filter O-ring contacts sealing surface, then turn an additional 3/4 turn.
- Page 103 MAINTENANCE GEARCASES GEARCASE SPECIFICATION CHART DRAIN PLUG/ FILL PLUG LEVEL GEARCASE LUBRICANT CAPACITY TORQUE CHECK PLUG TORQUE AGL Gearcase Transmission 41 fl oz 10–14 ft-lbs 10–14 ft-lbs Lubricant & (Main (1200 mL) (14–19 N·m) (14–19 N·m) Transmission Gearcase) Fluid Demand Drive 9.3 fl oz 8–10 ft-lbs 11 ft-lbs...
- Page 104 MAINTENANCE TRANSMISSION OIL CHANGE The drain plug is located on the bottom of the gearcase. Access the drain plug through the hole in the skid plate. 1. Remove the fill plug 2. Place a drain pan under the drain plug 3.
- Page 105 MAINTENANCE DEMAND DRIVE OIL CHANGE 1. Support the vehicle securely with a jackstand. 2. Remove the front tire on the passenger's side for ease of access (optional). 3. Remove the fill plug. 4. Place a drain pan under the drain plug on the bottom right-hand side.
- Page 106 Refer to the Specifications section for the recommended spark plug type for your vehicle. Always torque spark plugs to specification. NOTICE Using non-recommended spark plugs can result in serious engine damage. Always use POLARIS-recommended spark plugs or their equivalent. SPARK PLUG GAP/TORQUE ELECTRODE GAP NEW OR USED PLUG TORQUE 0.03 in (0.85 mm)
- Page 107 ADDING OR CHANGING COOLANT POLARIS recommends the use of POLARIS Antifreeze 50/50 Premix. This antifreeze is already premixed and ready to use. Do not dilute with water. To ensure that the coolant maintains its ability to protect the engine, we recommend that the system be completely drained every five (5) years and fresh Antifreeze 50/50 Premix added.
- Page 108 5. Reinstall the pressure cap. Use of a non-standard pressure cap will not allow the recovery system to function properly. Your POLARIS dealer can provide the correct replacement part. OVERFLOW BOTTLE COOLANT LEVEL Always check and change the coolant at the intervals outlined in the Periodic Maintenance Chart.
- Page 109 MAINTENANCE 1. Position the vehicle on a level surface. 2. Lift the hood. View the coolant level in the overflow bottle 3. If the coolant level is below the safe operating range, lift the hood and locate the overflow bottle lid. Remove the cap and use a funnel to add coolant through the filler opening.
- Page 110 • See your dealer or other qualified service person as outlined in the owner's manual. • This PVT system is intended for use on POLARIS products only. Do not install it in any other product. • Always make sure the PVT housing is securely in place during operation.
- Page 111 MAINTENANCE 1. Remove the eight fasteners that retain the outer clutch cover. NOTE Removal of left rear wheel or left rear shock is NOT necessary for belt replacement. 2. To remove the clutch cover, pull the cover (starting at the bottom), lift up over the suspension, and then out of the vehicle.
- Page 112 MAINTENANCE 4. Insert clutch spreader tool into threaded hole on driven clutch as shown and turn clockwise to spread clutch. NOTE Clutch spreader tool part number 2875911 is found in vehicle tool kit. 5. Walk the belt out of the driven clutch and drive clutch. Remove the belt from the vehicle.
- Page 113 MAINTENANCE BELT INSPECTION To inspect the drive belt, do the following: 1. Inspect belt for hour-glassing (extreme circular wear in at least one spot and on both sides of the belt). Hour glassing occurs when the drive train does not move and the drive clutch engages the belt.
- Page 114 If your vehicle becomes immersed, major engine damage can result if the machine is not thoroughly inspected. Take the vehicle in for service before starting the engine. Your POLARIS dealer can provide this service. If it's impossible to take your RANGER to a dealer before starting it, follow the steps outlined below: 1.
- Page 115 6. Take the vehicle in for service as soon as possible, whether you succeed in starting it or not. Your POLARIS dealer can provide the required service. 7. If water has been ingested into the PVT follow the procedure for drying.
- Page 116 MAINTENANCE FILTER SYSTEMS AIR FILTER REPLACEMENT Inspect the air filter at the intervals outlined in the Periodic Maintenance Chart. In extremely dusty conditions, air filter replacement will be required more often. 1. Tilt the rear cargo box to access the airbox. 2.
- Page 117 MAINTENANCE SPARK ARRESTER WARNING • Never operate the vehicle without the spark arrester. • Remove any combustible materials from the area. Failure to heed the following warnings while servicing the spark arrestor could result in serious injury or death. • Never run the engine in an enclosed area. Exhaust contains poisonous carbon monoxide gas that can cause loss of consciousness or death in a very short time.
- Page 118 MAINTENANCE BRAKES The front and rear brakes are hydraulic disc type brakes. Press down on the brake pedal to engage the brakes. BRAKE FLUID Inspect the brake system routinely. Inspect the level of the brake fluid before each operation. WARNING After opening a bottle of brake fluid, always discard any unused portion.
- Page 119 MAINTENANCE BRAKE INSPECTION WARNING Do not apply WD-40®or any petroleum product to brake discs. These types of products are flammable and may also reduce the friction between the brake pad and caliper. 1. Check the brake system for fluid leaks. 2.
- Page 120 MAINTENANCE FRONT SUSPENSION ADJUSTMENT The front suspension can be adjusted to provide a stiffer suspension, if necessary. 1. Remove the top shock mounting bolts from the inside mounting positions 2. Reposition the shocks to the outside mounting holes 3. Reinstall the shock mounting bolts. Torque to 40 ft-lbs (54.2 Nm).
- Page 121 MAINTENANCE REAR CAM ADJUSTMENTS The rear suspension cams can be adjusted to provide a stiffer suspension, if necessary. Adjust the front and rear shock absorber springs by rotating the adjustment cam either clockwise or counter-clockwise to increase or decrease spring tension. Always heed the following rules if you make adjustments to this suspension.
- Page 122 Improper tire inflation or the use of non-standard size or type of tires may adversely affect vehicle handling, which could result in vehicle damage or personal injury. Always maintain proper tire pressure. Always use POLARIS approved size and type of tires for this vehicle when replacing tires.
- Page 123 MAINTENANCE WHEEL REMOVAL 1. Position the vehicle on a level surface. 2. Apply the brakes. Put the vehicle in PARK, and set the park brake (if equipped). Turn the key off. 3. Loosen the wheel nuts slightly. 4. Elevate the side of the vehicle by placing a suitable stand under the frame. 5.
- Page 124 MAINTENANCE LIGHTS Poor lighting can result in reduced visibility when driving. Headlight and taillight lenses become dirty during normal operation. Clean lights frequently and replace burned out lamps promptly. Do not operate this vehicle at night or in low light conditions until the headlight is replaced. Always make sure lights are adjusted properly for best visibility.
- Page 125 MAINTENANCE HEADLIGHT ADJUSTMENT The headlight beams are adjustable. 1. Place the vehicle on a level surface with the headlight approximately 25 ft. (7.6 m) from a wall. ITEM DESCRIPTION Measure Distance = 7.5 in (19.0 cm) Measure Distance = 25 ft (7.6 m) Headlight Center of Bulb 2.
- Page 126 MAINTENANCE 5. Adjust the beam to the desired position by loosening or tightening the bottom screw and moving the lamp to the appropriate height. 6. Adjust the beam to desired position. Repeat the procedure to adjust the other headlight. WARNING Due to the nature of light utility vehicles and where they are operated, headlight lenses become dirty.
- Page 127 MAINTENANCE FUSE SIZE FEATURE SUPPORTED Chassis Lights Key Switch Trickle Charge Drive Accessory 7.5A Winch Plug and Power 7.5A Display 200A (Non-Servicable)
- Page 128 MAINTENANCE BATTERY WARNING Battery electrolyte is poisonous. It contains sulfuric acid. Serious burns can result from contact with skin, eyes or clothing. Antidote: External: Flush with water. Internal: Drink large quantities of water or milk. Follow with milk of magnesia, beaten egg, or vegetable oil.
- Page 129 If you do not drive the vehicle for more than TWO WEEKS, Polaris recommends using a BatteryMINDer® 2012 AGM - 2 AMP charger (PN 2830438), which can be ordered through your dealer.
- Page 130 MAINTENANCE STATE OF VOLTAGE (DC) ACTION CHARGE TIME* CHARGE 100% 12.8-13.0 volts None, check None required monthly 75%-100% 12.6-12.8 volts May need slight 3-6 hours charge, if no charge given, check in 2 weeks 50%-75% 12.3-12.6 volts Needs charge 5-11 hours 25%-50% 12.0-12.3 volts Needs charge...
- Page 131 Check battery voltage each month during storage and recharge as needed to maintain a full charge. Battery charge can be maintained by using a Polaris battery trickle charger or by charging about once a month to make up for normal self discharge. The...
- Page 132 Certain products, including insect repellents and chemicals, will damage plastic surfaces. Do not allow these types of products to contact the vehicle. The best and safest way to clean your POLARIS vehicle is with a garden hose and a pail of mild soap and water.
- Page 133 • Never use lubricant on any seat belt component. • Do not use a pressure washer to clean the seat belts. If warning and safety labels are damaged, contact your POLARIS dealer for free replacement. Grease all zerk fittings (if applicable) immediately after washing. Allow the engine to run for a while to evaporate any water that may have entered the engine or exhaust system.
- Page 134 STABILIZE THE FUEL 1. Fill the fuel tank. 2. Add POLARIS Carbon Clean Fuel Treatment or POLARIS Fuel Stabilizer or equivalent fuel treatments or stabilizers. Follow the instructions on the container for the recommended amount. Carbon Clean removes water from fuel systems, stabilizes fuel and removes carbon deposits from pistons, rings, valves and exhaust systems.
- Page 135 6. Reinstall the spark plug caps. 7. If POLARIS fuel system additive is not used, fuel tank, fuel lines, and injectors should be completely drained of gasoline. STORAGE AREA / COVERS Be sure the storage area is well ventilated.
- Page 136 MAINTENANCE REMOVAL FROM STORAGE WARNING Engine exhaust contains poisonous carbon monoxide and can cause loss of consciousness or death. Never run an engine in an enclosed area. 1. Check the battery electrolyte level and charge the battery if necessary. Install it in the vehicle.
- Page 137 MAINTENANCE FRONT TIE-DOWN LOCATION Front tie-down points, one or both...
- Page 138 MAINTENANCE REAR TIE-DOWN LOCATION Rear tie-down points...
-
Page 139: Specifications
SPECIFICATIONS SPECIFICATIONS RANGER 1000 Maximum Weight Standard Models : 1500 lb (680 kg) Capacity (includes CA Models: 1100 lb (499 kg) weight of operator, EPS Models: 1500 lb (680 kg) passenger, cargo, Premium Models: 1500 lb (680 kg) accessories) Dry Weight* Standard Models : 1437 lb (652 kg) EPS Models: 1485 lb (674 kg) Premium Models: 1485 lb (674 kg) - Page 140 SPECIFICATIONS Max. Cargo Box 1,000 lbs (454 kg) Load 600 lbs (272 kg) (Models sold in California) Engine 4-Stroke SOHC Twin Cylinder Displacement 999 cc Bore x Stroke (mm) 93 mm x 73.5 mm Vehicle Charging 660 W @ 3000 RPM or System Output 900 W @ 3000 RPM (if equipped) Compression Ratio...
- Page 141 SPECIFICATIONS Premium Models: 26 x 9-12; PXT 2.0 Tire Size - Rear Standard Models: 25 x 11-12; 489 Premium Models: 26 x 11-12; PXT 2.0 Tire Pressure - Standard Models: 10 psi (69 kPa) Front Premium Models: 12 psi (83 kPa) Tire Pressure - Rear 14 psi (97 kPa) Brakes, Front/Rear...
- Page 142 SPECIFICATIONS Overall Height 75 in. (191 cm) Wheelbase 113 in (287 cm) Cargo Box 36.5 x 54 x 11.5 in. (93 x 137 x 29 cm) Dimensions (Inside) Ground Clearance 12 in (30.5 cm) Min. Turning Radius 200 in. (508 cm) Towing Capacity 2500 lbs.
- Page 143 SPECIFICATIONS Shift Type Single Lever (H/L/N/R/P) Gear Reduction - Front 8.56:1/ Rear 25.59:1 Gear Reduction - Front 7.67:1 / Rear 22.92:1 Reverse Gear Reduction - Front 4.03:1 / Rear 12.05:1 High Drive Ratio - Front 3.25:1 (EPS) Tire Size - Front Standard Models: 25 x 10-12 NHS;...
- Page 144 SPECIFICATIONS...
- Page 145 SPECIFICATIONS CLUTCHING (GENERAL) See your POLARIS dealer or qualified person for clutching specifications. For operation at high elevation, different clutching parts may be needed. See you POLARIS dealer for more information.
-
Page 147: Polaris Products
POLARIS PRODUCTS POLARIS PRODUCTS LUBRICANTS / SERVICE PRODUCTS SIZE (QUANTITY) PRODUCT PART NUMBER 12 fl oz (355 mL) aerosol 2870791 Fogging Oil 1 qt (0.95 L) 2871517 1 qt (0.95 L) 2876244 2 qt (1.90 L) PS-4 2877490 1 gal (3.8 L) 2876245 1 qt (0.95 L) - Page 148 POLARIS PRODUCTS SIZE (QUANTITY) PRODUCT PART NUMBER DOT 4 Brake Fluid — 2872189 Loctite® 565 Thread Sealant — 2871956 BatteryMINDer® 2012 AGM - 2 — 2830438 AMP Charger...
-
Page 149: Troubleshooting
TROUBLESHOOTING TROUBLESHOOTING DRIVE BELT WEAR/BURN POSSIBLE CAUSE SOLUTION Driving onto a pickup or tall Use low range during loading. trailer in high range Starting out going up a steep Use low range. incline Driving at low RPM or ground Drive at a higher speed or use low range more frequently. speed –... - Page 150 TROUBLESHOOTING ENGINE DOESN'T TURN OVER POSSIBLE CAUSE SOLUTION Low battery voltage Recharge the battery. Loose battery Check all connections and tighten. connections Loose solenoid Check all connections and tighten. connections Loose electronic control Inspect, clean, reinstall connectors. box connections ENGINE TURNS OVER, FAILS TO START POSSIBLE CAUSE SOLUTION Out of fuel...
- Page 151 TROUBLESHOOTING POSSIBLE CAUSE SOLUTION Mechanical failure Your authorized dealer can assist Loose ignition connections Check all connections and tighten Water present in fuel Replace with fresh recommended fuel...
- Page 152 TROUBLESHOOTING ENGINE PINGS OR KNOCKS POSSIBLE CAUSE SOLUTION Poor quality or low octane fuel Replace with recommended fuel Incorrect spark plug gap or Set gap to specs or replace plug heat range ENGINE RUNS IRREGULARLY, STALLS OR MISFIRES POSSIBLE CAUSE SOLUTION Fouled or defective spark plug Inspect, clean and/or replace spark plug...
- Page 153 TROUBLESHOOTING POSSIBLE CAUSE SOLUTION Loose ignition connections Check all connections and tighten Low battery voltage Recharge the battery to 12.8 VDC Incorrect fuel Replace with fresh recommended fuel Clogged air filter Inspect and clean or replace Clogged intake pre-filter Inspect and clean (with soapy water) or replace Other mechanical failure Your authorized dealer can assist Overheated engine...
-
Page 155: Warranty
This warranty is transferable to another owner during the warranty period through a POLARIS dealer, but any such transfer will not extend the original term of the warranty. The duration of this warranty may vary by international region based upon local laws and regulations. - Page 156 WARRANTY COVERAGE AND EXCLUSIONS LIMITATIONS OF WARRANTIES AND REMEDIES This POLARIS limited warranty excludes any failures that are not caused by a defect in material or workmanship. THIS WARRANTY DOES NOT COVER CLAIMS OF DEFECTIVE DESIGN. This warranty also does not cover acts of God, accidental damage, normal wear and tear, abuse or improper handling.
- Page 157 MATERIALS, COMPONENTS, OR PRODUCTS. THE REMEDIES SET FORTH IN THIS WARRANTY ARE THE ONLY REMEDIES AVAILABLE TO ANY PERSON FOR BREACH OF THIS WARRANTY. POLARIS SHALL HAVE NO LIABILITY TO ANY PERSON FOR INCIDENTAL, CONSEQUENTIAL OR SPECIAL DAMAGES OF ANY DESCRIPTION, WHETHER ARISING OUT OF EXPRESS OR IMPLIED WARRANTY OR ANY OTHER CONTRACT, NEGLIGENCE, OR OTHER TORT OR OTHERWISE.
- Page 158 IF YOU PURCHASE FROM A PRIVATE PARTY: If you purchase a POLARIS product from a private party, to be kept and used outside of the country in which the product was originally purchased, all warranty coverage will be denied. You must nonetheless register your product under your name and address with a local POLARIS dealer in your country to ensure that you receive safety information and notices regarding your product.
- Page 159 IS SOLD OUTSIDE THE COUNTRY OF THE SELLING DEALER'S AUTHORIZED LOCATION. This policy does not apply to products that have received authorization for export from POLARIS. Dealers may not give authorization for export. You should consult an authorized dealer to determine this product's warranty or service coverage if you have any questions.
- Page 160 U.S.A. EPA EMISSIONS LIMITED WARRANTY This emissions limited warranty is in addition to the POLARIS standard limited warranty for your vehicle. Polaris Industries Inc. warrants that at the time it is first purchased, this emissions-certified vehicle is designed, built and equipped so it conforms with applicable U.S.
- Page 161 The exclusive remedy for breach of this limited warranty shall be, at the exclusive option of POLARIS, repair or replacement of any defective materials, components or products. THE...
- Page 162 California regulations and may void this limited emissions warranty offered by the manufacturer. POLARIS Inc. warrants that at the time is first purchased, this vehicle is: 1. Designed, built, and equipped so as to conform, at the time of sale, with all applicable California evaporative emissions regulations.
- Page 163 As an owner you are responsible for presenting your OHRV-EVAP to a Polaris dealer as soon as a problem exists. The warranty repairs should be completed in a reasonable amount of time, not to exceed 30 days.
- Page 164 WARRANTY United States & Canada: 1-800-POLARIS (1-800-765-2747) French: 1-800-268-6334...
-
Page 165: Maintenance Log
MAINTENANCE LOG MAINTENANCE LOG MAINTENANCE LOG Use the following chart to record periodic maintenance. DATE MILES (KM) TECHNICIAN SERVICE PERFORMED / OR HOURS COMMENTS... - Page 167 Adding or Changing Coolant ..105 Demand Change Oil Change ..103 Air Filter / Air Box..... 132 Demand Drive Oil Check ... 102 Air Intake Maintenance Diagnostic Display Code Air Filter Replacement ....114 Definitions ......66 All Wheel Drive/Rear Drive Belt Wear/Burn....
- Page 168 Unit Selection Temperature..71 Parking the Vehicle ....82 Part Numbers ......145 Plugs, Spark......104 Labels Polaris Products ...... 145 Air Filter Caution ....33, 40 POLARIS Variable Belt Warning..... 27, 34 Transmission System....108 Fuel Transport Warning..28, 35 Power Steering ......
- Page 169 Radiator Coolant Lever ..... 106 Tires ........120 Rear Cam Adjustments ....119 Towing Loads ......84 Registration, Warranty ....153 Trailer Hitch Bracket....58 Removal from Storage ....134 Transmission Oil Change ..102 Rollover Protective Structure Transmission Oil Check .... 101 (ROPS)........
- Page 171 For your nearest Polaris dealer, call 1-800-POLARIS (765-2747) or visit www.polaris.com Polaris Inc. 2100 Highway 55 Part No. 9941209 Rev 01 Medina, MN 55340 Printed in USA...
Need help?
Do you have a question about the RANGER 1000 2023 and is the answer not in the manual?
Questions and answers
What is the tire pressure for a 2023 Polaris Ranger xp1000
The recommended tire pressure for a 2023 Polaris Ranger XP 1000 is:
- Front: 12 PSI (83 KPa)
- Rear: 14 PSI (97 KPa)
This answer is automatically generated
what gear should you drive your 2023 Premium 1000 cc on level ground hard pack