Table of Contents
Advertisement
Quick Links
Advertisement
Table of Contents

Related Manuals for Whirlpool AKZM 6670


Summary of Contents for Whirlpool AKZM 6670
- Page 1 AKZM 6670 User and maintenance manual Manuel d'utilisation et d'entretien...
-
Page 3: Important Safety Instructions
IMPORTANT SAFETY INSTRUCTIONS These instructions shall also be available on website: www.whirlpool.eu YOUR SAFETY AND THAT OF OTHERS IS VERY IMPORTANT This manual and the appliance itself provide important safety warnings, to be read and observed at all times. This is the danger symbol, pertaining to safety, which alerts users to potential risks to themselves and others. - Page 4 - If the surface of the induction plate is cracked, do not use it and switch off the appliance to avoid the possibility of electric shock (only for models with induction function). - Do not touch the appliance with any wet part of the body and do not operate it when barefoot.
-
Page 5: Installation
- Do not use containers made of synthetic materials. - Overheated oils and fats catch fire easily. Always remain vigilant when cooking foods rich in fat and oil. - Never leave the appliance unattended during food drying. - If alcoholic beverages are used when cooking foods (e.g. rum, cognac, wine), remember that alcohol evaporates at high temperatures. -
Page 6: Electrical Connection
ELECTRICAL CONNECTION Make sure the power voltage specified on the appliance dataplate is the same as the mains voltage. The dataplate is on the front edge of the oven (visible when the door is open). • Power cable replacement (type H05 RR-F 3 x 1.5 mm ) must be carried out by a qualified electrician. -
Page 7: After Sales Service
The door will not open: • Turn off the oven and restart it to see if the fault persists. • Important: during self-cleaning, the oven door will not open. Wait until it unlocks automatically (see paragraph “Cleaning cycle of ovens with pyrolysis function”). The electronic programmer does not work: •... -
Page 8: Maintenance
Accessories: • Soak the accessories in water with washing up detergent immediately after use, handling them with oven gloves if still hot. • Food residues can be easily removed using a brush or sponge. Cleaning the rear wall and catalytic side panels of the oven (if present): IMPORTANT: do not use corrosive or abrasive detergents, coarse brushes, pot scourers or oven sprays which could damage the catalytic surface and ruin its self-cleaning properties. -
Page 9: Moving The Top Heating Element (Some Models Only)
MOVING THE TOP HEATING ELEMENT (SOME MODELS ONLY) Remove the side accessory holder grilles (Fig. 3). Pull the heating element out a little (Fig. 4) and lower it (Fig. 5). To reposition the heating element, lift it up, pulling it slightly towards you, making sure it comes to rest on the lateral supports. -
Page 10: Instructions For Oven Use
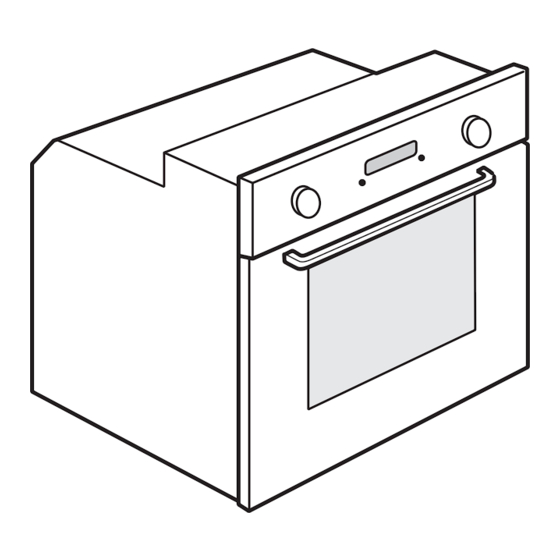
INSTRUCTIONS FOR OVEN USE FOR ELECTRICAL CONNECTION, SEE THE PARAGRAPH ON INSTALLATION Control panel Upper heating element/grill Cooling fan (not visible) Dataplate (not to be removed) Light Circular heating element (not visible) Turnspit (if present) Lower heating element (hidden) 10. Door 11. -
Page 11: Control Panel Description
INSERTING WIRE SHELVES AND OTHER ACCESSORIES IN THE OVEN Insert the wire shelf horizontally, with the raised part “A” upwards (Fig. 1). The other accessories, like the drip tray and baking tray, are inserted with the raised part on the flat section “B”... -
Page 12: Setting The Time
SETTING THE TIME After setting the language, the time must be set on the clock. The two hour digits flash on the display. Turn the “Browse” knob to display the correct hour. Press the button to confirm; the two minute digits flash on the display. Turn the “Browse”... -
Page 13: Selecting Special Functions
SETTING END OF COOKING TIME / DELAYED START IMPORTANT: the start delayed setting is not available for the following functions: FAST PREHEATING, BREAD/PIZZA. N.B.: with this setting, the selected temperature is reached in a more gradual way, so cooking times will be slightly longer than stated in the cooking table. The end of cooking time can be set, delaying the start of cooking by up to a maximum of 23 hours and 59 minutes. - Page 14 BREAD/PIZZA FUNCTION SELECTION Turn the “Function” knob pointer to the symbol to access a submenu containing the automatic baking functions for “bread” and “pizza”. Bread Turn the “Function” knob to the symbol : the display shows “BREAD” and AUTO alongside. Press to select the function.
- Page 15 If the meat probe is inserted and detected at the start of a function (quick preheating, grill, special functions, browning) without probe enabling, cooking will not start until the probe is removed. An alarm signal occurs and the following message is displayed: Since the end of cooking depends on the temperature set for the meat probe, a countdown timer cannot be set for the function, and therefore a cooking function with delayed start cannot be set.
-
Page 16: Automatic Oven Cleaning
AUTOMATIC OVEN CLEANING For the description of this function, see the chapter CLEANING and the functions table at page 15. To activate the oven’s automatic cleaning cycle (pyro-cleaning), proceed as follows: Turn the “Functions” knob to symbol : the word PYRO appears on the display. Press button to confirm your choice and start the pyro-cleaning cycle. -
Page 17: Function Description Table
FUNCTION DESCRIPTION TABLE FUNCTION SELECTOR KNOB To halt cooking and switch off the oven. LAMP To switch the oven interior light on/off. To speed up defrosting of food. Place food on the middle shelf. Leave food in its packaging in order to prevent it from drying out on the outside. DEFROST For keeping just-cooked food hot and crisp (e.g: meat, fried or flans). - Page 18 FUNCTION SELECTOR KNOB (Continued) To bake different types and sizes of pizza and bread. This function contains two programmes with predefined settings. Simply indicate the values required BREAD/PIZZA (temperature and time) and the oven will manage the cooking cycle automatically. Place the dough on the 2nd shelf after preheating the oven. To burn off spatters produced during cooking with an extremely high AUTOMATIC temperature cycle (approx.
-
Page 19: Cooking Tables
COOKING TABLES Recipe Function Pre- Shelf (from Temp. Time Accessories and notes heating bottom) (°C) (min) 160-180 30-90 Cake tin on wire shelf Leavened cakes Shelf 4: cake tin on wire shelf 160-180 30-90 Shelf 1: cake tin on wire shelf Drip tray/baking tray or cake 160-200 30-85... - Page 20 Recipe Function Pre- Shelf (from Temp. Time Accessories and notes heating bottom) (°C) (min) 190-200 20-30 Drip tray / baking tray Shelf 4: oven tray on wire Vols-au-vent / Puff shelf pastry crackers 180-190 20-40 Shelf 1: drip tray / baking tray Lasagna / Baked Drip tray or oven tray on...
- Page 21 Recipe Function Pre- Shelf (from Temp. Time Accessories and notes heating bottom) (°C) (min) Shelf 4: oven tray on wire shelf Lasagna & Meat 50-100* Shelf 1: drip tray or oven tray on wire shelf Shelf 4: oven tray on wire shelf Meat &...
- Page 22 TESTED RECIPES (in compliance with IEC 60350-1:2011-12 and DIN 3360-12:07:07) Recipe Function Pre- Shelf (from Temp. Time Accessories and notes heating bottom) (°C) (min) IEC 60350-1:2011-12 § 7.5.2 15-25 Drip tray / baking tray Shortbread Shelf 4: baking tray 25-40 Shelf 1: drip tray/baking tray IEC 60350-1:2011-12 §...
-
Page 23: Recommended Use And Tips
RECOMMENDED USE AND TIPS How to read the cooking table The table indicates the best function to use for any given food, to be cooked on one or more shelves at the same time. Cooking times start from the moment food is placed in the oven, excluding pre-heating (where required). - Page 27 Printed in Italy 02/2012 5019 300 02824...
Need help?
Do you have a question about the AKZM 6670 and is the answer not in the manual?
Questions and answers