Akuvox A05 Series Administrator's Manual
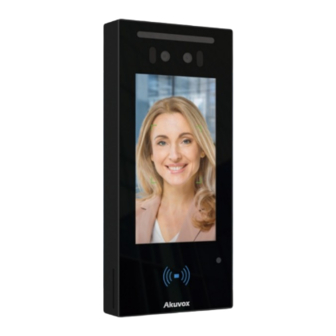
Access control terminal
Hide thumbs
Also See for A05 Series:
- Administrator's manual (77 pages) ,
- Quick manual (9 pages) ,
- Administrator's manual (68 pages)

Subscribe to Our Youtube Channel
Related Manuals for Akuvox A05 Series


Summary of Contents for Akuvox A05 Series
- Page 1 Table of Contents Table of Contents Access Control > Product Access Control > Product Akuvox A05 Series Access Control Terminal Administrator Guide_V1.0 Page: 1 of 49...
- Page 2 Akuvox A05 Series Access Control Terminal Akuvox A05 Series Access Control Terminal Administrator Guide_V1.0 Administrator Guide_V1.0 Version: 1.0 | Date: Jan.2021 Page: 2 of 49...
-
Page 3: Product Overview
About T his Manual About T his Manual Thank you for choosing Akuvox A05 series access control terminal. This manual is intended for the administrators who need to properly configure the access control terminal. This manual applies to 105.30.1.17 version, and it provides all the configurations for the functions and features of A05 series access control terminals. -
Page 4: Change Log
Akuvox A05 series is a Linux-based access control door phone with a display screen. It incorporates access control and video surveillance. Its finely tuned SmartPlus and AI-based communication technology allow featured customization to better suit your operation habit. A05 series has multiple... - Page 5 Wi-Fi Bluetooth Optional IP Rating IP65 Temperature Detection Optional Face recognition √ External SD Card Wall Mounting √ Flush Mounting Desk Mounting POE Stand by P 5.5W ower POE Full Load C 9.8W onsumption Power Adapter S 5.5W tandby Power Power Adapter F ull Load Consu mption...
-
Page 6: Access The Device
Before configuring Akuvox A05, please make sure the device is installed correctly and connect a normal network. Using Akuvox IP scanner tool to search the device IP address in the same LAN. Then use the IP address to login in the web browser by user name and password admin admin and admin admin. - Page 7 Note: Note: Google Chrome browser is strongly recommended. The Initial user's name and password are “admin admin” and please be case-sensitive to the user names and passwords entered. 6.Time and Language Setting 6.Time and Language Setting 6.1. Language Setting 6.1. Language Setting When you first set up the device, you might need to set the language to your need.
-
Page 8: Led Setting
Parameter Set-up: Parameter Set-up: Time Zone: select the specific time zone depending on where the device is used and then Time Zone: press Confirm Confirm tab for the confirmation. The default time zone is GMT+0.00. Primary Server: enter the primary NTP server you obtained in the NT P Server Primary Server NT P Server field. -
Page 9: Screen Display Configuration
QR code scan. 6.4. Screen Display configuration 6.4. Screen Display configuration A05 series access control terminals allow you to enjoy a variety of screen displays to enrich your visual and operational experience through the customized setting to your preference. 6.4.1. Configure Screensaver 6.4.1. - Page 10 Await screen is mainly a function for the screen protection. You can make the device to go into idle status for a predefined time span when there is no operation on the device, or no one is detected approaching. To configure the configuration on web Device > LCD > Standby Interface Display Device >...
- Page 11 6.6. Configure Access Screen Display Mode 6.6. Configure Access Screen Display Mode You can select two types of access screen display mode on the home screen, namely, Default mode for facial recognition and QR code. To configure the configuration on web Device > LCD > T heme Device >...
-
Page 12: Network Setting
Ring Volume: set the ring volume from 0-15 according to your need. The default volume is 8 8 . Ring Volume: Tamper Alarm Volume: set the tamper alarm volume from 0-15 according to your need. The Tamper Alarm Volume: default volume is 8 8 . 6.7.2. - Page 13 You can configure the default DHCP mode (Dynamic Host Configuration Protocol Dynamic Host Configuration Protocol) and static IP connection. Moreover, you can set up IP address, Subnet Mask, Default Gateway, LAN DNS1 & LAN DNS2. To configure the configuration on web Network > Ethernet > LAN Port Network >...
-
Page 14: Relay Setting
Server Mode: specific server in the network such as SDMC SDMC or Akuvox SmartPlus Akuvox SmartPlus and None. None None. None is the default factory setting indicating the device is not in any server type, therefore you are allowed to choose Cloud, SMDC in discovery mode. - Page 15 Parameter Set-up: Parameter Set-up: Trigger Delay (Sec): set the relay trigger delay timing (Ranging from 1-10 Sec.) For Trigger Delay (Sec): example, if you set the delay time as “5 5 ” sec. then the relay will not be triggered until 5 seconds after you press “unlock unlock”...
- Page 16 Parameter Set-up: Parameter Set-up: Type: select among three options Disabled, Type: Disabled,WebRelay WebRelay and Both Both. Select WebRelay WebRelay to enable the web relay. Select Disable Disable to disable the web relay. Select Both Both to enable both local relay and web relay. IP Address: enter the web relay IP address provided by the web relay manufacturer.
- Page 17 8.1. Configure Door Access Schedule 8.1. Configure Door Access Schedule You can create door access schedules so that they can be later conveniently applied to the door access control intended for individual user or a group of users created. Moreover, you can edit your door access schedule if needed.
- Page 18 8.1.2. Import and Export Door Access Schedule 8.1.2. Import and Export Door Access Schedule In addition to creating door access schedule separately, you can also conveniently import or export the schedules in order to maximize your door access schedule management efficiency. To configure the configuration on web Access Control >...
- Page 19 A05 series access control terminal offer you three types of door access via QR code, RF card and Facial recognition. You can configure them on web interface. Moreover, you can import or exporting the configured files to maximize your RF card configuration efficiency.
- Page 20 Parameter Set-up: Parameter Set-up: IC-Card Display Mode: select the card format for the ID Card IC-Card Display Mode ID Card for the door access among five format options: 8H10D; 6H3D5D(W26); 6H8D; 8HN; 8HR. 8H10D; 6H3D5D(W26); 6H8D; 8HN; 8HR. The card code format is 8HN by default in the access control terminal.
- Page 21 A05 series access control terminals allow you to speedily configure user(s)-specific door access in batch by importing the configured all-in-one door access control files incorporating user information, door access type, door access schedule etc., thus all the door access setting can be done at one stop, saving your time and effort from configuring the door access for users separately when users are large in number.
- Page 22 9.3.2. Unlock by Bluetooth 9.3.2. Unlock by Bluetooth You can also gain the door access by mobile phone with Bluetooth which is used together with Akuvox SmartPlus. You can shake the mobile phone closer to the access control terminal for the door access.
- Page 23 You can unlock the door remotely without approaching the device physically for the door access by typing in the created the HTTP command (URL) on the web browser to trigger the relay when you are not available by the door for the door access. To configure the configuration on web Access Control Access Control >...
- Page 24 Optional) ) 9.3.5. Body Temperature Measurement for Door Access A05 series provide you with an optional body temperature measurement function designed to be applied in the situation where the measurement becomes necessary for the safety of the residents and visitors etc. Residents and visitors are required to go through temperature measurement along with optional mask detection check before they are allowed for the door access.
- Page 25 Parameter Set-up: Parameter Set-up: Mode: select either “Disabled” Mode Disabled” Mode or “Wrist Wrist” Mode for temperature measurement according to your need. The device can be installed with digital forehead temperature detector therefore you are required to set the mode properly according to your application. Mask Detection: select “Enable”...
- Page 26 Parameter Set-up: Parameter Set-up: Start Time/End Time: select the start time and end time temperature by referring to the Start Time/End Time: actual temperature measured at the time segments ranging from 10- 40℃degree Celsius. For example, when you divide the time into four-time segments, then each of the time segments will be six hours (24 hours a day), while the end time of one segment should be the start time of the next time segment.
- Page 27 10.2. Security Notification Setting 10.2. Security Notification Setting 10.2.1. Email Notification Setting 10.2.1. Email Notification Setting If you want to receive the security notification via email, you can configure the Email notification on the web interface properly. To configure the configuration on web Setting > Action > Email Setting >...
- Page 28 11.1. MJPEG Image Capturing 11.1. MJPEG Image Capturing A05 series allow you to capture the Mjpeg format monitoring image if needed. You can enable the MJPEG function and set the image quality on the web interface. To configure the configuration on web Surveillance >...
-
Page 29: Live Stream
11.2. Live Stream If you want to check the real-time video from the A05 series access control terminal, you can go to the device web interface to obtain the real-time video or you can also enter the correct URL on the web browser to obtain it directly. - Page 30 11.3. RTSP Stream Monitoring 11.3. RTSP Stream Monitoring A05 series access control terminal support RTSP stream that allows intercom devices such as indoor monitor or the monitoring unit from the third party to monitor or obtain the the real time audio/ video (RTSP stream) from the access control terminal using the correct URL.
- Page 31 Enabled: tick the check box to turn on or turn off the RTSP function. Enabled: Authorization Enabled: tick the check box to enable the RTSP authorization. If you enable Authorization Enabled the RTSP Authorization, you are required to enter RTSP Authentication Type, RTSP Username, RTSP Password on the intercom device such as indoor monitor for authorization.
- Page 32 A05 series supports two video stream channels for H.264 codec video stream. 14.ONVIF 14.ONVIF Real-time video from the A05 series access control terminal camera can be searched and obtained by the Akuvox indoor monitor or by the third-party devices such as NVR (Network Video Recorder Network Video Recorder) you can configure the ONVIF function in the access control terminal so that other device will be able to see the video from the access control terminal.
- Page 33 If you want to search and check on door access history, you can search and check the door logs on the device web Access > Door log Access > Door log interface. Parameter Set-up: Parameter Set-up: Save Door Log Enabled: Tick the check box to turn on or turn off the door log function. Save Door Log Enabled: Status: select between “...
-
Page 34: Firmware Upgrade
13.2. PCAP for Debugging PCAP in A05 series access control terminal is used to capture the data package going in and out of the devices for debugging and troubleshooting purpose. You can set up the PCAP on the device web Upgrade >... - Page 35 DHCP, PNP, T FT P, FT P, HT T PS DHCP, PNP, T FT P, FT P, HT T PS are the protocols used by the Akuvox intercom devices to access the URL of the address of the third-party server which stores configuration files and firmware, which will then be used to update the firmware and the corresponding parameters on the access control terminal.
- Page 36 16.3. AutoP Schedule 16.3. AutoP Schedule Akuvox provides you with different Autop methods that enable the access control terminal to perform provisioning for itself in a specific time according to your schedule. To configure the configuration on web Upgrade > Advanced > Automatic Autop Upgrade >...
- Page 37 Parameter Set-up: Parameter Set-up: Power On: select “Power on Power On: Power on”, if you want the device to perform Autop every time it boots up. Repeatedly: select “Repeatedly Repeatedly: Repeatedly”, if you want the device to perform autop according to the schedule you set up.
- Page 38 Note: Note: The custom Option type must be a string. The value is the URL of TFTP server. Parameter Set-up Parameter Set-up: Custom Option: enter the DHCP code that matched with corresponding URL so that device Custom Option will find the configuration file server for the configuration or upgrading. DHCP Option 66: If none of the above is set, the device will automatically use DHCP Option DHCP Option 66: 66 for getting the upgrade server URL.
- Page 39 You can manually set up a specific server URL for downloading the firmware or configuration file. If an autop schedule is set up, the access control terminal will perform the auto provisioning on a specific timing according to autop schedule you set up. In addition, TFTP, FTP, HTTP, and HTTPS are the protocols that can be used for upgrading the device firmware and configuration.
- Page 40 17.1. Integration via Wiegand 17.1. Integration via Wiegand If you want to integrate the A05 series access control terminal with the third-party devices via Wiegand, you can configure the Wiegand on the web Device > Wiegand > Wiegand Device > Wiegand > Wiegand interface.
- Page 41 If you Select OSDP Mode, then the integration co OSDP mmunication between the A05 series access contro l terminal and the third-party device is via OSDP pr otocol. You are required to check for the device int egration protocol and make sure if that they use the same integration protocol.
-
Page 42: Password Modification
Parameter Set-up: Parameter Set-up: Connect Status: indicate OSDP based communication status. Connect Status: Send by: select in what way you want to send out the card number among three options: Send by: OSDP, Wiegand and None OSDP, Wiegand None. if you select OSDP OSDP then the card number will be sent out to the third-party devices via RS485. - Page 43 Parameters Set-up: Parameters Set-up: Session Time Out Value: if there is no operation over the time, you need to login the Session Time Out Value: website again. 19.System Reboot and Reset 19.System Reboot and Reset 19.1. Reboot 19.1. Reboot If you want to restart the device, you can operate it on the device web Upgrade > Basic Upgrade >...
- Page 44 20.Abbreviations 20.Abbreviations Page: 44 of 49...
- Page 45 Page: 45 of 49...
- Page 46 21.FAQ 21.FAQ Q1: How to obtain IP address of R2X A1: ✔ For devices with single button - E21/ R20/ R23/ R26: While E21/ R20/ R23/ R26 power up normally, hold the call button for 5 seconds after the statue LED turns blue and it will enter IP announcement mode.
- Page 47 Using Akuvox IP Scanner to search Akuvox devices in the same LAN network. Q2: Do Akuvox devices support opus codec? A2: For now, only Akuvox Android video IP phone R48G can support Opus audio codec. Q3: What is the supported temperature range for akuvox door phone? A3: R20/E21/R26/R23/Standard R27/Standard R29 -- 14°...
- Page 48 Hardware version 2 Hardware version 2 Firmware Version Firmware Version The firmware is different between hardware version1 and hardware version 2. Go to Web-Status -Firmware Version. 20.X.X.X is hardware version 1. 220.X.X.X is hardware version 2. Hardware version Hardware version The firmware is different between hardware version1 and hardware version 2.
- Page 49 22.Contact Us 22.Contact Us For more information about the product, please visit us at www.akuvox.com or feel free to contact us Sales email: sales@akuvox.com Technical support email: support@akuvox.com Telephone: +86-592-2133061 ext.7694/8162 We highly appreciate your feedback about our products. Powered by Document360...
Need help?
Do you have a question about the A05 Series and is the answer not in the manual?
Questions and answers