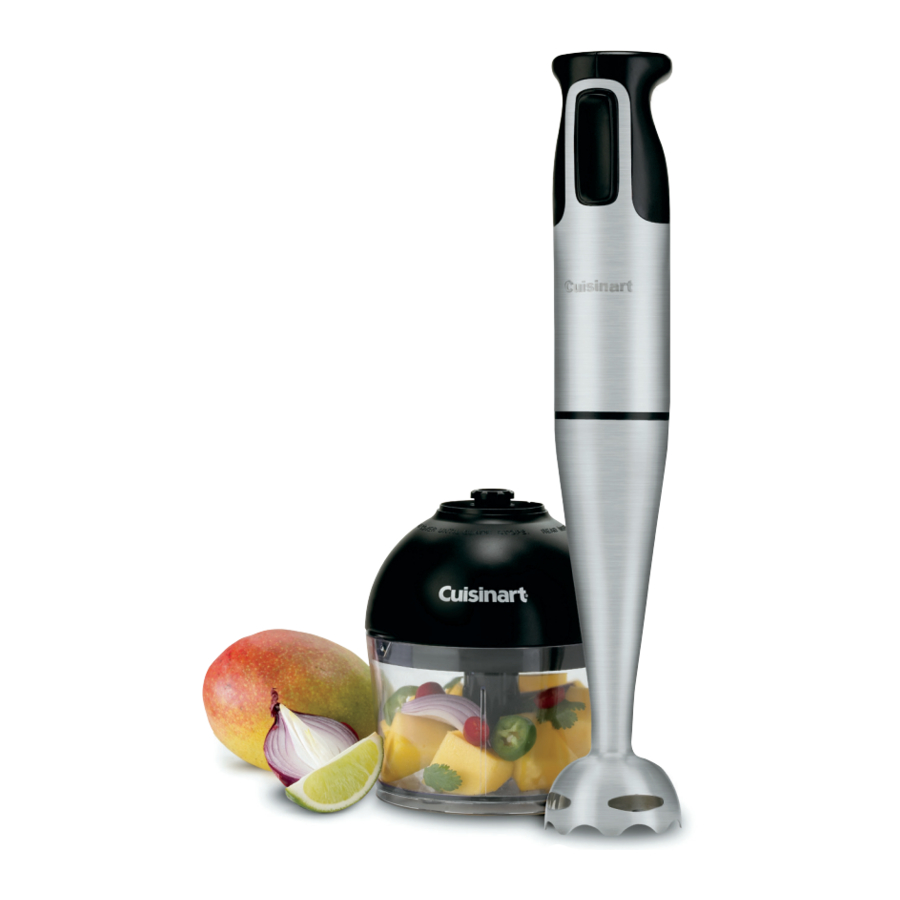
Cuisinart CSB-77 - Hand Blender Manual
- Instruction/recipe booklet (33 pages) ,
- Instruction and recipe booklet (32 pages)
Advertisement
IMPORTANT SAFEGUARDS
When using an electrical appliance, basic safety precautions should always be followed including the following:
- READ ALL INSTRUCTIONS.
![shock hazard]() To protect against electrical shock, do not put the motor body, cord or electrical plug of this hand blender in water or other liquid. The detachable blending shaft of this appliance has been designed for immersion into water or other liquids. Never submerge any other portion of this unit. If hand blender falls into liquid, remove immediately. Do not reach into the liquid without unplugging the unit first.
To protect against electrical shock, do not put the motor body, cord or electrical plug of this hand blender in water or other liquid. The detachable blending shaft of this appliance has been designed for immersion into water or other liquids. Never submerge any other portion of this unit. If hand blender falls into liquid, remove immediately. Do not reach into the liquid without unplugging the unit first.- This appliance should not be used by children. To avoid possible accidental injury, close supervision is necessary when any appliance is used by or near children.
- Unplug from outlet when not in use, before putting on or taking off parts, and before cleaning. To unplug, grasp plug and pull from electrical outlet. Never pull cord.
- Avoid contacting with moving parts.
- During operation keep hands, hair, clothing, as well as spatulas and other utensils away from attachments and any mixing container, to reduce risk of injury to persons, and/or damage to the appliance. A spatula may be used, but must be used only when the unit is not operating.
- Do not operate any appliance with a damaged cord or plug, or after the appliance has malfunctioned or has been dropped or damaged in any way or is not operating properly. Return the appliance to the nearest Cuisinart Repair Center for examination, repair, or mechanical or electrical adjustment.
- Remove detachable shaft from the blender before washing the blades or shaft.
- Blades are SHARP. Handle carefully when removing, inserting or cleaning. Exercise the same care when removing, inserting or reversing the cutting blade for the chopper attachment.
- When mixing liquids, especially hot liquids, use a tall container or make small quantities at a time to reduce spillage, splattering and possibility of injury from burning.
- To reduce the risk of injury, never place chopper/grinder attachment cutting blade on base without first putting prep bowl properly in place.
- Be certain the chopper/grinder attachment cover is securely locked in place before operating appliance. Do not attempt to remove cover until blade has stopped rotating.
- Check prep bowl for presence of foreign objects before using.
![burn hazard]()
![shock hazard]()
The use of attachments or accessories not recommended by Cuisinart may cause fire, electrical shock, or risk of injury.- Do not use outdoors, or use for other than intended use.
- Do not let any cord hang over the edge of the table or counter. Do not let cord contact hot surfaces, including stovetop.
- Make sure the appliance is off, the motor has stopped completely, and the appliance is unplugged from outlet before putting on or taking off attachments, and before cleaning.
![burn hazard]()
![shock hazard]()
To reduce the risk of fire or electrical shock, do not operate any heating appliance beneath the mounting unit.- Maximum rating of 200W is based on the chopper/grinder attachment that draws the greatest power.
![burn hazard]() Do not operate your appliance in an appliance garage or under a wall cabinet. When storing in an appliance garage always unplug the unit from the electrical outlet. Not doing so could create a risk of fire, especially if the appliance touches the walls of the garage or the door touches the unit as it closes.
Do not operate your appliance in an appliance garage or under a wall cabinet. When storing in an appliance garage always unplug the unit from the electrical outlet. Not doing so could create a risk of fire, especially if the appliance touches the walls of the garage or the door touches the unit as it closes.
 To protect against electrical shock, do not put the motor body, cord or electrical plug of this hand blender in water or other liquid. The detachable blending shaft of this appliance has been designed for immersion into water or other liquids. Never submerge any other portion of this unit. If hand blender falls into liquid, remove immediately. Do not reach into the liquid without unplugging the unit first.
SAVE THESE INSTRUCTIONS
FOR HOUSEHOLD USE ONLY
NOTICE
This appliance has a polarized plug (one blade is wider than the other). As a safety feature, this plug will fit in a polarized outlet only one way. If the plug does not fit fully in the outlet, reverse the plug. If it still does not fit, contact a qualified electrician. Do not attempt to defeat this safety feature.
UNPACKING INSTRUCTIONS
Place the package containing the Cuisinart Smart Stick Hand Blender on a sturdy surface. Unpack the Smart Stick Hand Blender from its box by removing the upper protective insert. Gently slide the unit from the box. Remove all support materials from the box and replace the upper insert. Save packaging for possible repacking of the unit.
Note: The blending blade is extremely sharp. Use caution when removing and unpacking the storage stand.
Before using the Cuisinart Smart Stick Hand Blender for the first time, we recommend that you wipe the unit with a clean, damp cloth to remove any dirt or dust. Dry it thoroughly with a soft absorbent cloth. Handle carefully; wash each individual blade assembly, mixing container and detachable shaft by hand or in the dishwasher. Dry thoroughly before use. Read all instructions completely for detailed operating procedures.
FEATURES AND BENEFITS

- One-Touch On/Off Button: Allows you to activate the hand blender at the touch of a button. Simply press and hold down on the toggle switch to blend or pulse. Once the button is released, blending will stop.
- Comfort Handle: The handle allows you to control the hand blender with ease.
- Motor Body Housing
- Detachable Shaft: Pressing the release button on the back of the unit will detach the shaft for easy cleaning.
- Blending Attachment with Stainless Steel Blade and Blade guard: This attachment easily snaps into the motor body housing. The permanently mounted stainless blade is partially covered by a stainless housing that keeps splashing to a minimum.
- Whisk Attachment: Whisk attachment snaps into the motor body housing. This attachment is great for whipping cream, egg whites and other delectable treats.
- Chopper/grinder Attachment with reversible blade: Chop, mince and grind with the Cuisinart Chopper/Grinder attachment. Chopper/Grinder attaches to the blender motor body in place of the blender shaft or whisk attachment.
- Mixing Beaker: 2-cup mixing beaker is microwave - and dishwasher safe. Use this container to blend drinks, shakes, salad dressings and more. Designed for easy gripping and drip-free pouring.
WHISK TIPS
Use the whisk attachment for beating heavy cream or egg whites. It may also be used for whisking eggs for scrambled eggs or fluffy omelets.
BEATING EGG WHITES
When beating egg whites use a very clean metal or glass bowl, never plastic. Plastic can contain hidden oils and fats that can ruin the delicate egg white foam. To help stabilize the egg whites add 1/8 teaspoon of cream of tartar per egg white prior to beating them. (If using a copper bowl omit the cream of tartar.) Beat the egg whites until soft peaks form that do not droop. Beating the egg whites longer causes them to dry out and become even less stable. When adding sugar to beaten egg whites add it slowly when soft peaks just begin to form and then continue beating to form soft peaks that don't droop.
BEATING HEAVY CREAM
When beating heavy cream, if possible and if time allows, use a chilled bowl, and chill the whisk attachment. The best shaped bowl for whipping cream is one that is deep with a rounded bottom. The cream should come out of the refrigerator just before whipping. Hold the whisk attachment so that it is just skimming the surface, and whip until the cream begins to thicken and develop some body; then immerse the whisk totally into the cream. Whipped cream may be used at either soft or firm peaks depending on preference. It may be flavored as desired. For best results, whip cream just before using.
If it must be whipped ahead, add a whipped cream stabilizer such as Oetker Whip It.
ASSEMBLY
BLENDING ATTACHMENT
- Align the motor body with the blending attachment and slide the pieces together until you hear and feel the pieces click together. It may be helpful to press the release button when assembling.
![]()

CHOPPER/GRINDER ATTACHMENT

- Chopper/grinder Prep Bowl
- Cover Slots (3) for Attaching Cover
- Metal Blade Assembly Shaft
- Rubber Feet
- Blade Assembly
- Blade Ring with Reversible Blade
- Plastic Blade Sheath
- Chopper/grinder Cover
- Lift Tabs
- Chopper/grinder Spline
REVERSIBLE BLADE
The Cuisinart Smart Stick Hand Blender chopper/grinder attachment is equipped with a reversible blade. This blade is sharp on one side and blunt on the other. The blade is attached to a plastic ring which slides over the plastic blade sheath, so it can be easily turned over to select the appropriate blade. To reverse the blade: see detailed instructions below. Frequent Uses for Chopper/Grinder.
Before you process any food, assemble the blender parts.
- Put the prep bowl on a flat, dry, stable surface. It should be close to an electrical outlet of the same voltage as stated on the rating plate on the Smart Stick Blender.
- The metal blade assembly shaft (C) is attached to the bottom of the prep bowl. If not already in place, slide the fully assembled blade assembly (E) over the top of the metal blade assembly shaft.

- Putting together the blade assembly: Connect the blade ring (F) to the plastic blade sheath (G). Line up the blade ring opening with the plastic sheath. Let the blade ring slide to the bottom of the plastic sheath. HOLD THE BLADE RING BY THE CENTRAL HUB HOLDING RIBS (grips) (K) ONLY. DO NOT TOUCH THE RAZOR-SHARP BLADES.
Note these important features of the blade ring. The blade ring can be placed over the plastic blade sheath in two different ways: If you hold it this way (A), you will see the word "Sharp" on the blade. Assemble the blade this side up to use the sharp edge. (See the section on processing food for information about when to use the sharp edge.)
If you hold it this way (B), you will see no writing on the blade. Assemble the blade this side up to use the blunt edge. (See the section on processing food, for information about when to use the blunt edge.)
There are notches (C) on opposite sides of the interior of the hub.
These fit over ridges on the sides of the plastic blade sheath.
Pick up the blade ring by its hub holding ribs (grips) and turn it very slightly clockwise. This locks it in place on the plastic blade sheath and prevents it from sliding up during processing.
![]()
- Putting together the blade assembly: Connect the blade ring (F) to the plastic blade sheath (G). Line up the blade ring opening with the plastic sheath. Let the blade ring slide to the bottom of the plastic sheath. HOLD THE BLADE RING BY THE CENTRAL HUB HOLDING RIBS (grips) (K) ONLY. DO NOT TOUCH THE RAZOR-SHARP BLADES.
- Connect the Smart Stick Hand Blender motor body to the top of the chopper/grinder attachment cover. Align the spline in the chopper/grinder cover's drive shaft with the ribbed opening on the underside of the motor body. When aligned properly, slide the two pieces together until they mate. You will feel and hear a slight click. It may be helpful to press the rubber release button when sliding these pieces together.

- With the hand blender in place, locate the chopper/grinder cover and put it on top of the prep bowl.
- Be sure that the 3 ridges (cover slots) at the top of the prep bowl line up with the 3- knotches in the underside of the chopper/grinder cover, and that the cover is seated all around the top of the prep bowl.
![]()
- Rotate cover clockwise to secure it to the prep bowl.

- Be sure that the 3 ridges (cover slots) at the top of the prep bowl line up with the 3- knotches in the underside of the chopper/grinder cover, and that the cover is seated all around the top of the prep bowl.
- Plug the power cord of the Smart Stick Hand Blender into an electrical outlet.
- Put one hand on the cover of the chopper/grinder attachment, while gripping the Smart Stick Hand Blender motor body handle with the other. Press the High or Low button with your fingers to start the motor and run the chopper/grinder.
To turn the unit off, remove your fingers from the selected button. - WHEN THE BLADE STOPS MOVING, unplug the Smart Stick Hand Blender, remove the motor body from the chopper/grinder cover, and remove the cover from the prep bowl.


WHISK ATTACHMENT
- Align the end of the whisk (A) with the small opening of the whisk gearbox (B).
- Push end into opening until it locks into position (C).
- Align the motor body with the assembled whisk attachment and slide the pieces together until you hear and feel the pieces click together.
It may be helpful to press the release button when assembling.
![]()

OPERATION
BLENDING & MIXING
The specially designed blade is for mixing and stirring all kinds of foods, including salad dressings, powdered drink products, and sauces. It is ideal for combining dry ingredients, and can be used to emulsify mayonnaise, too.
This blade mixes and stirs while adding only a minimum of air to your mixture. A gentle up-and-down motion is all you need to make the most flavorful, full-bodied liquid recipes. Be careful never to remove the Cuisinart Smart Stick Hand Blender from the liquid while in operation.
- Insert the blending attachment into the motor body. (See Assembly for Blending Attachment)
- Plug electrical cord into an electrical wall socket.
- Insert blending shaft into mixture to be blended.
- Press and hold the ON/OFF button. The hand blender will continue to run as long as the switch is pressed in. To turn hand blender OFF, release the ON/OFF button and the motor will stop.
- Do not hold the button ON for longer than 50 seconds at a time.
- Unplug immediately after use.
WHISKING
- Insert the whisk attachment into the motor body. (See Assembly for Whisk Attachment)
- Plug electrical cord into an electrical wall socket.
- Insert the whisk into mixture to be blended.
- Press and hold the ON/OFF button. The hand blender will continue to run as long as the switch is pressed in. To turn hand blender OFF, release the ON/OFF button and the motor will stop.
- Do not hold the button ON for longer than 20 seconds at a time. See Recipes.
- Unplug immediately after use.
CHOPPING AND GRINDING
Processing Food
- Put the prep bowl firmly on a flat sturdy surface like a countertop. Be sure the blade is assembled to use the blade edge that is appropriate for the food to be processed.
- Put food into the prep bowl. Be sure the food is cut into small pieces, and the bowl is not overloaded.
- Put the chopper/grinder cover on top of the prep bowl. Be sure the cover is properly seated.
- Press the ON/OFF button on the Smart Stick Hand Blender.
- Do not operate the chopper/grinder attachment for longer than 15 seconds at a time.
Note: Due to the powerful motor provided with this unit, Cuisinart recommends using one hand to support the chopper/grinder during operation. - When you have finished processing the food, stop the machine by taking your fingers off the ON/OFF button.
- WHEN THE BLADE STOPS MOVING, remove the Smart Stick Hand Blender motor body from the chopper/grinder cover, and remove the cover from the chopper/grinder.
- Unplug the unit.
- Carefully remove the blade assembly, holding it by the gripping ridges on the plastic sheath. NEVER TOUCH THE BLADE ITSELF.
- Remove food with the spatula.
Note: Do not operate the Smart Stick Chopper/grinder attachment without food in the prep bowl.
CLEANING AND MAINTENANCE
SMART STICK HAND BLENDER
Always clean the Smart Stick motor body and blending shaft thoroughly after using.
Remove the blending shaft from the motor body. Clean the motor body only with a sponge or damp cloth. Do not use abrasive cleaners which could scratch the surface. To clean the blending shaft, wash by hand in hot water using mild detergent. Be mindful of the permanently mounted razor sharp edges.
Never immerse the motor body in water.
When the appliance has malfunctioned or has been dropped or damaged in any way or is not operating properly, return the appliance to the nearest Cuisinart Repair Center for examination, repair or mechanical or electrical adjustment.
Any other servicing should be performed by an authorized service representative.
CHOPPER/GRINDER ATTACHMENT
To simplify cleaning, rinse the prep bowl, cover, and blade immediately after use, so that food won't dry onto them. Wash blade ring, plastic sheath, and prep bowl in warm soapy water. Rinse and dry. Wipe the underside of the chopper/grinder cover with a sponge or damp cloth to remove any food. Do not submerge the cover in water or put in the dishwasher. Wash the blade carefully. Avoid leaving it in soapy water where it could disappear from sight.
If you have a dishwasher, you can wash the prep bowl blade assembly on the upper shelf. Insert the prep bowl upside down. Put the blade in the cutlery basket. Unload the dishwasher carefully to avoid contact with the sharp blade. Wipe the motor body and top of the cover with a damp sponge or cloth. Dry it immediately. Never submerge the motor body or the cover in water or other liquid.
The Smart Stick chopper/grinder attachment is intended for HOUSEHOLD USE ONLY. Any service, other than cleaning and normal user maintenance, should be performed by an authorized Cuisinart Service Representative.
WHISK ATTACHMENT
To clean your whisk attachment, simply release the attachment from the motor body housing. Once the whisk is removed, detach the metal whisk from the gearbox by pulling pieces apart.
To clean the gearbox, simply wipe with a damp cloth.
To clean the metal whisk, wash with warm, soapy water or in the dishwasher.
Do not submerge the gearbox in water or any other liquid.
TIPS AND HINTS
- Liquid should come within an inch of where the shaft attaches to the motor housing.
- Some spices may scratch the chopper/grinder attachment.
- When using with a nonstick cooking surface, be careful not to scratch the coating with the hand blender.
- Do not immerse motor body housing, chopper/grinder cover, or whisk gearbox in water or any other liquid.
- Cut most solid foods into ½-inch cubes for easy blending. Suggestion: use chopper/grinder for chopping and grinding solid foods.
- Pour liquid ingredients into the mixing container first, unless recipe instructs otherwise.
- To avoid splashing, don't turn the hand blender on until the blade is beneath the surface of the mixture and do not pull the hand blender out of the mixture while blender is running.
- Do not let hand blender stand in a hot pot on stove while not in use.
- Do not put fruit pits, bones, or other hard material into the blending mixture, as these are liable to damage the blades.
- Do not fill mixing containers too full. The level of mixture will rise when blending, and can overflow.
- Adding liquids that are warm, not cold, facilitates blending solids with liquids.
- For recipes calling for ice, use crushed ice (not whole cubes) for best results.
- Using a gentle up-and-down motion is the best way to blend and incorporate ingredients uniformly.
- To avoid spatter, turn the hand blender off and let the blade stop completely before lifting the unit out of the mixture you are processing.
- To whip air into a mixture, always hold the blade just under the surface.
- To make a soup creamy in texture, use the hand blender to purée the soup solids to the desired consistency using a gentle up-anddown motion right in the saucepan. You can quickly change your soup into a thick and creamy blend.
- If you are making a dip or spread, it is not necessary to process completely into a smooth purée; leave some texture for interest.
- When making compound butters, remove the butter from the refrigerator and let it come to room temperature before blending in the ingredients.
FREQUENT USES FOR CHOPPER/GRINDER
| Ingredient | Suggested Blade | Comments |
| Baby foods (always consult a pediatrician or family physician for appropriate food recommendations | Sharp Blade | Place small amounts of cooked foods into chopper/grinder bowl. Add small amount of appropriate liquid. Pulse to chop, then hold to blend |
| Bread Crumbs - fresh or dry (day old) | Sharp Blade | Pulse to chop, then process until desired consistency is reached |
| Hard Cheese (Asiago, Locatelli, Parmesan, Romano, etc.) ( Not recommended for softer cheeses unless making a dip or dressing) | Dull Blade | Cut into.25 inch pieces. Pulse to chop then process until desired consistency is reached |
| Chocolate | Dull Blade | Cut into.5 inch pieces; may chill in freezer for 3 minutes before chopping. Pulse to chop, then process, no more than 1 ounce at a time, until desired texture is reached. |
| Creamy Dressing and Dips | Sharp Blade | Place ingredients in chopper/grinder bowl; do not cover or spill on stem. Use pulse action to chop, then continuous - hold action to blend to desired consistency. |
| Garlic | Sharp Blade | Peel up to six cloves. Pulse to chop |
| Root ginger (fresh) | Sharp Blade | Peel, cut into.5 inch pieces. Pulse to chop .5 ounce at a time |
| General Spices (dill, poppy, star anise, etc.) | Dull Blade | Pulse to chop until desired consistency. Pulse with sharp blade to get a fine chop |
| Herbs (fresh) | Sharp Blade | .5 cup; must be clean/dry. Pulse to chop |
| Nuts | Dull Blade | Shelled, toast first for best flavor. Pulse to chop, process up to.5 cup at a time, until desired consistency is reached. May be processed to nut-butter stage. |
| Onion | Sharp Blade | Peel, cut into 1/2 inch pieces. Pulse to chop, up to 1/2 cup at a time, until desired chop is reached. |
| Vegetables (cooked) | Sharp Blade | Cut into.5 inch pieces; pulse to chop, up to 1/2 cup at a time. Add cooking liquid, stock or milk to process to a puree. It is not recommended for making mashed potatoes. |
| Vegetables (uncooked) | Sharp Blade | Peel as needed, cut into 1/2 inch pieces. Peel celery with peeler to remove tough strings. Chop/process up to a 1/2 cup at a time. |
| Meat | Sharp Blade | 6 oz. or 175g, cut into.5 inch pieces |
| Simple Blending | Dull Blade |

Documents / ResourcesDownload manual
Here you can download full pdf version of manual, it may contain additional safety instructions, warranty information, FCC rules, etc.
Advertisement


Need help?
Do you have a question about the CSB-77 and is the answer not in the manual?
Questions and answers