Advertisement
Quick Links
PELTDV1029
This product has been manufactured and sold under the responsibility of CURTIS INTERNATIONAL LTD.
PROSCAN, and the PROSCAN logo are trademarks used under license by CURTIS INTERNATIONAL LTD.
– further information at www.proscan-brand.com.
All other products, services, companies, trademarks, trade or product names and logos referenced herein
are the property of their respective owners.
Advertisement

Related Manuals for ProScan ELITE PELTDV1029


Summary of Contents for ProScan ELITE PELTDV1029
- Page 1 PELTDV1029 This product has been manufactured and sold under the responsibility of CURTIS INTERNATIONAL LTD. PROSCAN, and the PROSCAN logo are trademarks used under license by CURTIS INTERNATIONAL LTD. – further information at www.proscan-brand.com. All other products, services, companies, trademarks, trade or product names and logos referenced herein...
- Page 2 Safety Precaution Package Main Features Overview Charge the Battery Start the device DVD Playback Camera Function Wi-Fi Connection Bluetooth connection Screen Cast Connection Text Input Battery Use Trouble shooting Reset Your Tablet to Factory Default LIMITED PRODUCT WARRANTY...
- Page 3 Caution---use of controls or adjustments or performance of procedures other 1) Please read the instruction manual carefully and follow all the requirements of safe operation to operate the device. 2) Do not use or leave the device in direct sunlight or a hot environment such as a vehicle etc.
- Page 4 11) Do not install near any heat sources such as radiators, heat registers, stoves, 12) Unplug this unit during lightning storms or when unused for long time. 13) About Cleaning: Unplug the system, use only wet cloth to clean. Do not use liquid detergent or aerosol.
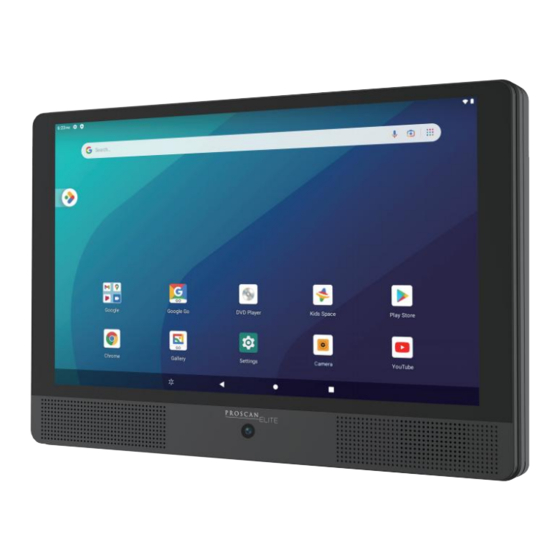
- Page 6 DVD Player with tablet combo Car adapter AC/DC adapter USB cable (cable length: 100cm) User manual * 10.1” panel of 800X1280 resolution * Built-in rechargeable Lithium-ion battery * Built-in two HIFI speakers * Support playback CD/CD-R/CD-RW/DVD/DVD-R/DVD+R/ DVD-RW/VCD/MP3 Note:This unit is NOT compatible with Blu-ray. MT8168 * Built-in internal memory of 32GB * Support Wireless connection (Tablet mode)
- Page 7 TYPE-C USB PORT Micro SD Earphone Reset Camera Bracket :Press it to open the unit and put the disc on the loading tray. To record if recording function turned on. Long press 2-3 seconds,screen will light up and pictures will show up until the interface page.
- Page 8 a) Connect the USB cable to the device. b) Connect the other end of the USB cable to the USB power adapter (wall charger), then plug the adapter into a power outlet. It takes about 5 hours to fully charge the device.The device can be charged while it's using as well. Caution: Use only the included power adapter to charge the battery.
- Page 9 d) Turn on the device, you will see the main page which has a lot of app icons. or swipe up to go to app page where all the pre-installed apps can be found. No matter what you’re looking for, Google Play has it all. Get your music, movies, TV, books, magazines, apps and games all in one place.
- Page 10 If you want to close recent apps, touch ■ to show recent items, wipe it up to close the corresponding item. If you want to close all recent used items, please slide right, "CLEAR ALL" will show up at the left, then touch it, the system will close all recent items.
- Page 11 Exit Exit DVD mode Select to go to previous chapter or track during playing. Select to playback fast backward at 2,4,8,16 or 32 times Select to Play/Pause Select to playback fast forward at 2,4,8,16 or 32 times Select to go to next chapter or track during playing. Select once to stop playback, then press to resume playback from the point where you stopped;...
- Page 12 This device has a front camera, located at the bottom of the screen. The camera is 2Million pixels, for basic use only. a) Touch on the app page to activate camera function. b) Select “Picture” to take pictures and select “Video” to take videos. c) Select at the lower left corner to enter the parameter settings.
- Page 13 a) Touch Settings icon on the app list page, select Network&internet , slide the switch to the right to activate Wi-Fi connection. b) Press Wi-Fi to enter the Wi-Fi page, the tablet will scan for available Wi-Fi networks within range. c)Select the Wi-Fi you want to connect, enter the password, once you have successfully entered your information, the tablet will remember your settings.
- Page 14 The device can send its audio to an external bluetooth speaker by Bluetooth connection, steps as below: 1.Touch “Settings” on the app list page, choose “Connected devices “,”Connection preferences”,“bluetooth”, then set Bluetooth as “ON” and choose “Pair new device”, available bluetooth devices will be shown, choose the one you want to connect, once connected ,the audio can be heard on the Bluetooth headphone.
- Page 15 a) Only to output signal to external device under this feature. b) Make sure both the unit and the external device to be connected by same Wi-Fi or same hotspot. c) Then turn on Screen Cast connection from the external device. d) Screen Cast connection setting unit is as below: Settings -->Connected devices-->...
- Page 16 ?123 c) You can locate the tablet on your PC as a removable disk.
- Page 18 9.9"*7"*1.46" (25.12*17.76*3.72cm) Approx 1.88lb (0.85kg) 10.1" 800X1280 Android 11(Go edition) 2.0GHz Quad Core 2GB DDR RAM, 32GB internal memory USB Type-C, Micro-SD(up to 32GB), Earphone jack 3.7V 5000mAh 18650 Li-ion battery...
- Page 19 Google, Android, Google Play and other marks are trademarks of Google LLC.
- Page 20 Reset Your Tablet to Factory Default Method #1 Using System Settings Menu: Enter the Settings from main menu as shown below Swipe up to choose System Choose Advanced...
- Page 21 Choose Reset Options (Make sure Multiple users is set as “OWNER”, you can set it by the following steps : Settings--System---Advanced---Multiple Users--- Owner---Switch to owner ) Then choose Erase all data (factory reset) Choose Erase all data (factory reset)
- Page 22 Confirm you wish to erase your personal data by tapping the Erase all data button All of your personal data will be deleted from the tablet. Reset Your Tablet to Factory Default Method #2 Using the Android Recovery Method (Use this method when you have forgotten your PIN &/or Password) Hold the Power and Volume + buttons simultaneously until the Boot Menu is displayed.
- Page 23 The following screen will be displayed: Press both the Power and Volume + buttons simultaneously repeatedly (DO NOT HOLD THEM DOWN). When you see the Android “NO COMMAND” screen,press the Power and Volume + buttons (Simultaneously) once or twice (Note: if the tablet hangs at the “No Command”...
- Page 24 Choose Wipe data/factory reset. Choose Factory data reset and press the Power button The User Data and Stored Data will be wiped from the tablet (You will see a confirmation screen)
- Page 25 The tablet will return to the Android Recovery Menu. Choose Reboot system now by pressing the Power button. The tablet will reboot to the initial User Setup screen. You can set up your tablet or Press the Power button to turn the tablet off.
-
Page 26: Limited Product Warranty
LIMITED PRODUCT WARRANTY To make a warranty claim, please email support2@curtiscs.com or call 1-800-968-9853. 90 day Warranty Walmart Inc.Bentonville, AR 72716 Walmart.com ATTACH YOUR PROOF OF PURCHASE HERE, PROOF OF PURCHASE IS REQUIRED TO OBTAIN WARRANTY SERVICE. Please have the following information available when you contact the Support Team: Name, address and telephone number.
Need help?
Do you have a question about the ELITE PELTDV1029 and is the answer not in the manual?
Questions and answers
I left my device on the charger for longer than 24 hours. Now it will not turn on.
Your ProScan ELITE PELTDV1029 may not turn on after being left on the charger for over 24 hours because overcharging can damage the battery. The manual advises not to leave the device on the charger for very long after it's fully charged, as this may cause battery failure. Additionally, if the device has not been used for a long time, it may show no charging indication when powered up. In that case, keep it connected to power and wait 5–10 minutes.
This answer is automatically generated
@Mr. Anderson
@Mr. Anderson , so what can I do to make it turn on after being overcharged?
Fastboot mode stays on. Can't start unit.
To resolve the Fastboot mode issue on the ProScan PELTDV1029, follow these steps:
1. Press and hold the power button until the device turns off.
2. Turn the device back on and see if it boots normally.
3. If the "Fastboot" or "Reboot system now" message still appears, a factory reset may be required.
4. Note: A factory reset does not fully erase the device. You will need the previously used PIN, Google account, password, or phone number to complete setup.
5. If the issue continues, the device may need professional repair or support.
Be aware that user data may still remain on the device after a reset.
This answer is automatically generated
I need a replacement power cord for the Proscan Elite PELTDV1029. I can order online if you tell me what to ask for. Thank you!
The ProScan Elite PELTDV1029 uses a USB power adapter and USB cable for charging. The manual specifies to use only the included power adapter. An incompatible adapter may cause damage. A replacement should match the original included power adapter.
This answer is automatically generated
What button do I push to play dvd
To play a DVD on the ProScan ELITE PELTDV1029, press the "Open" button on the top of the unit to open it, load a disc, then close the unit. The disc will start loading, and you can choose to play.
This answer is automatically generated
Tried turning on proscan elite it lights up for a second I have charged it is there anything I can do to fix problem
If the ProScan ELITE PELTDV1029 lights up for a second but does not turn on, follow these steps:
1. Charge the Device – Connect the USB cable to the device and use the included power adapter to plug it into a power outlet.
2. Wait for Charging – Allow the device to charge for at least 5 minutes.
3. Check for Response – If the screen still does not light up, continue charging for a longer period.
4. Seek Assistance – If there is still no response after charging, contact after-sales service for help.
Use only the provided power adapter to avoid damage.
This answer is automatically generated
after a factory reset internet will not open
After a factory reset, the ProScan ELITE PELTDV1029 may not open the internet because the Wi-Fi connection needs to be reconfigured. The device requires reconnecting to a Wi-Fi network and entering the correct credentials. Additionally, if the reset erased network settings, the user must set up Wi-Fi again in the device settings.
This answer is automatically generated
I have a proscan elite tablet and dvd combo I set it up in a hurry and didn't write down the password and email for my tablet which was stolen but I got it back after 3 months I tried to factory reset as instructed holding the power button and volume up button at the same time but it never went to a screen that would give me that option it just turned back on is all so is there a different way that I can access the tablet using a different password so I can finally enjoy my tablet? Please someone help
I have forgotten my password and unable to start my Proscan Elite. How can I retrive it Ken Stafford-Brown
I have forgotten my password is there a genetic password availability that i can use to start again to use my proscan Elite tablet
How do I take a photo with the camera