IBM System x3850 Installation Manual
Hide thumbs
Also See for System x3850:
- Configuration and options manual (548 pages) ,
- Service manual (192 pages) ,
- User manual (100 pages)
Table of Contents
Advertisement
Quick Links
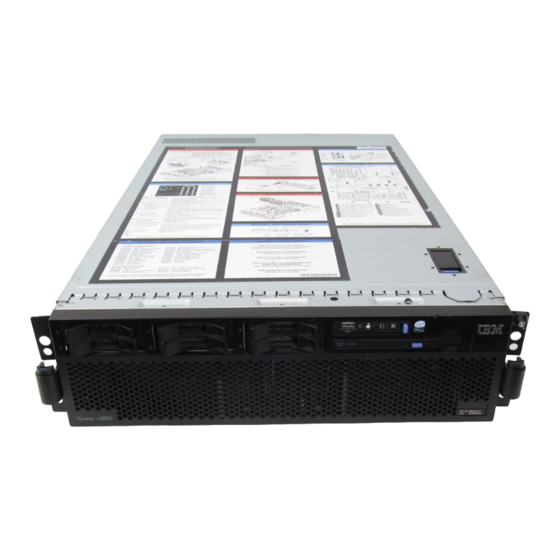
System x3850
Type 8864
Installation Guide
Welcome.
Thank you for buying an
IBM server.
Your server
is based on the X-Architecture
technology, and it features
superior performance, availability,
and affordability.
Installation Guide
This server
contains information for setting
up and configuring your server.
For detailed information about
your server, view the publications
on the
Documentation CD.
You can also find the most
current information about
your server at http://www.ibm.com/
support/
servers/eserver/support/
xseries/index.html
.
Start the server.
Did the server
start correctly?
Yes
Turn off the server
and install options.
Install the server in the rack cabinet
and cable the server and options;
then, restart the server.
Did the server
start correctly?
Yes
Use the IBM
ServerGuide program
to set up and
configure hardware.
Was the
server setup
completed?
Yes
Use
ServerGuide to
install the operating
system?
Yes
Install applications,
such as IBM systems
management software
and IBM ServeRAID
programs
The server is ready to use.
Go to
http://www.ibm.com/support/mysupport/
to register the server.
No
Go to the Server Support
flow chart on the reverse
side of this page.
No
Go to the Server Support
flow chart on the reverse
side of this page.
No
Go to the Web for instructions:
No
http://www.ibm.com/support/
servers/eserver/support/
xseries/index.html
Advertisement
Table of Contents

Related Manuals for IBM System x3850


Summary of Contents for IBM System x3850
- Page 1 Was the server setup on the Documentation CD. completed? You can also find the most current information about Go to the Web for instructions: your server at http://www.ibm.com/ ServerGuide to http://www.ibm.com/support/ support/ servers/eserver/support/ install the operating servers/eserver/support/ system? xseries/index.html xseries/index.html...
- Page 2 Check all cables for loose connections and verify that all optional devices you installed are on the ServerProven list at http://www.ibm.com/servers/eserver/ serverproven/compat/us/. View information about IBM Support Line at http://www.ibm.com/services/sl/products/ or view support telephone numbers at Is the problem http://www.ibm.com/planetwide/.
- Page 3 IBM System x3850 Type 8864 Installation Guide...
- Page 4 Note: Before using this information and the product it supports, read the general information in “Notices” on page 69, and the Warranty and Support Information document on the IBM System x Documentation CD. Fifth Edition (September 2006) © Copyright International Business Machines Corporation 2006. All rights reserved.
-
Page 5: Table Of Contents
Chapter 1. Introduction ..... . 1 The IBM System x Documentation CD ....2 Hardware and software requirements . - Page 6 Hardware service and support ....68 IBM Taiwan product service ....68 Notices .
-
Page 7: Safety
Vor der Installation dieses Produkts die Sicherheitshinweise lesen. Prima di installare questo prodotto, leggere le Informazioni sulla Sicurezza. Les sikkerhetsinformasjonen (Safety Information) før du installerer dette produktet. Antes de instalar este produto, leia as Informações sobre Segurança. © Copyright IBM Corp. 2006... - Page 8 All caution and danger statements in this documentation begin with a number. This number is used to cross reference an English caution or danger statement with translated versions of the caution or danger statement in the IBM Safety Information book.
- Page 9 Statement 1: DANGER Electrical current from power, telephone, and communication cables is hazardous. To avoid a shock hazard: v Do not connect or disconnect any cables or perform installation, maintenance, or reconfiguration of this product during an electrical storm. v Connect all power cords to a properly wired and grounded electrical outlet.
- Page 10 Statement 2: CAUTION: When replacing the lithium battery, use only IBM Part Number 33F8354 or an equivalent type battery recommended by the manufacturer. If your system has a module containing a lithium battery, replace it only with the same module type made by the same manufacturer.
- Page 11 Statement 4: ≥ 18 kg (39.7 lb) ≥ 32 kg (70.5 lb) ≥ 55 kg (121.2 lb) CAUTION: Use safe practices when lifting. Statement 5: CAUTION: The power control button on the device and the power switch on the power supply do not turn off the electrical current supplied to the device.
- Page 12 There are no serviceable parts inside these components. If you suspect a problem with one of these parts, contact a service technician. Statement 26: CAUTION: Do not place any object on top of rack-mounted devices. IBM System x3850 Type 8864: Installation Guide...
-
Page 13: Chapter 1. Introduction
Solving problems If firmware and documentation updates are available, you can download them from the IBM Web site. The server might have features that are not described in the documentation that comes with the server, and the documentation might be updated... -
Page 14: The Ibm System X Documentation Cd
See the Rack Installation Instructions document for complete rack installation and removal instructions. The IBM System x Documentation CD The IBM System x Documentation CD contains documentation for the server in Portable Document Format (PDF) and includes the IBM Documentation Browser to help you find information quickly. -
Page 15: Notices And Statements Used In This Document
Notices and statements used in this document The caution and danger statements that appear in this document are also in the multilingual Safety Information document, which is on the IBM System x Documentation CD. Each statement is numbered for reference to the corresponding statement in the Safety Information document. -
Page 16: Features And Specifications
Sound power, idle: 6.6 bel declared processor, BMC, and SAS microcode sources. The declared sound-power v Sound power, operating: 6.6 bel levels indicate an upper limit, below declared which a large number of computers will operate. IBM System x3850 Type 8864: Installation Guide... -
Page 17: Major Components Of The System X3850 Server
Major components of the System x3850 server Blue on a component indicates touch points, where you can grip the component to remove it from or install it in the server, open or close a latch, and so on. Orange on a component or an orange label on or near a component indicates that... - Page 18 IBM System x3850 Type 8864: Installation Guide...
-
Page 19: Chapter 2. Installing Options
Chapter 2. Installing options This chapter provides basic instructions for installing hardware options in the server. These instructions are intended for users who are experienced with setting up IBM server hardware. If you need more detailed instructions, see the User’s Guide on the IBM System x Documentation CD. -
Page 20: System Reliability Guidelines
When you are finished working on the server, reinstall all safety shields, guards, labels, and ground wires. v For a list of supported optional devices for the server, see http://www.ibm.com/ servers/eserver/serverproven/compat/us/. System reliability guidelines To help ensure proper cooling and system reliability, make sure that: v Each of the drive bays has a drive or a filler panel installed in it. -
Page 21: Handling Static-Sensitive Devices
v Avoid dropping any metallic objects, such as paper clips, hairpins, and screws, into the server. Handling static-sensitive devices Attention: Static electricity can damage the server and other electronic devices. To avoid damage, keep static-sensitive devices in their static-protective packages until you are ready to install them. -
Page 22: Installing A Hot-Swap Hard Disk Drive
™ ServeRAID controller, you must configure the disk arrays before installing the operating system. See the ServeRAID documentation on the IBM ServeRAID Support CD for additional information about RAID operation and complete instructions for using ServeRAID Manager. IBM System x3850 Type 8864: Installation Guide... -
Page 23: Installing Additional Memory Modules
Install the DIMMs on each memory card in the order shown in the following table. You must install at least one pair of DIMMs on each memory card. See the User’s Guide on the IBM System x Documentation CD for additional memory configuration installation sequences. -
Page 24: Installing A Memory Module
When moving the memory card, do not allow it to impact any components or structures inside the server. If you are hot swapping a DIMM, make sure that the Memory Hot-Swap Enabled LED is lit. IBM System x3850 Type 8864: Installation Guide... - Page 25 3. Remove the memory card. a. Open the memory card retention levers ( 1 and 2 ) on the top of the memory card. b. While holding the retention levers open, lift the memory card out of the server. 4. Place the memory card on a flat non-conductive surface with the DIMM connectors facing up.
-
Page 26: Installing A Memory Card
1. Read the safety information beginning on page v and “Installation guidelines” on page 7. 2. Make sure that the locking levers on the edge of the memory card are fully open. Insert the memory card into the memory card connector. IBM System x3850 Type 8864: Installation Guide... - Page 27 3. Press the memory card into the connector and close the locking levers. If you have other options to install or remove, do so now; otherwise, go to “Completing the installation” on page 23. Chapter 2. Installing options...
-
Page 28: Installing An Additional Microprocessor
Remove the server cover and bezel. Attention: When you handle static-sensitive devices, take precautions to avoid damage from static electricity. For details about handling these devices, see “Handling static-sensitive devices” on page 9. IBM System x3850 Type 8864: Installation Guide... - Page 29 3. Remove all fans from the server 4. Remove all memory cards from the server. 5. Remove the microprocessor tray: a. Open the microprocessor-tray release latch ( 1 ). Microprocessor-tray release latch Air baffle Microprocessor-tray lever Microprocessor-tray retention latch (both sides of tray) Microprocessor-tray lever Chapter 2.
- Page 30 8. Open the heat sink retention clip. a. Press down on one side of the heat sink retention clip to release it from the side of the socket; then, repeat the process on the opposite side. IBM System x3850 Type 8864: Installation Guide...
- Page 31 b. Rotate the heat sink retention clip forward to its fully open position. 9. Remove the protective cover, tape, or label from the surface of the microprocessor socket, if any is present. 10. Lift the microprocessor-release lever to the fully-open position (approximately 135°...
-
Page 32: Installing An Adapter
The following describes how to install adapters in the server. Installing the Remote Supervisor Adapter II SlimLine The optional IBM Remote Supervisor Adapter II SlimLine must be installed in its dedicated connector on the I/O board. The following illustration shows how to install the Remote Supervisor Adapter II SlimLine. -
Page 33: Installing A Hot-Plug Adapter
The following illustration shows how to install a ServeRAID-8i adapter. ServeRAID-8i adapter ServeRAID-8i slot For more detailed instructions or information, see the User’s Guide on the IBM System x Documentation CD. Installing a hot-plug adapter Attention: Static electricity that is released to internal server components when the server is powered-on might cause the server to halt, which could result in the loss of data. - Page 34 5. Connect any required cables to the adapter. If you have other options to install or remove, do so now; otherwise, go to “Completing the installation” on page 23. IBM System x3850 Type 8864: Installation Guide...
-
Page 35: Completing The Installation
Completing the installation Wire cable clip (open) Wire cable clip (closed) Complete the following steps to complete the installation: 1. Make sure all internal cables are properly routed and are held in place by the wire cable clip in the center of the server. 2. -
Page 36: Updating The Server Configuration
Adapter II SlimLine, see the Remote Supervisor Adapter II SlimLine User’s Guide that comes with the adapter. For information about configuring the integrated Gigabit Ethernet controller, see the User’s Guide on the IBM System x Documentation CD. IBM System x3850 Type 8864: Installation Guide... -
Page 37: Chapter 3. Server Controls, Connectors, Leds, And Power
Information LED: When this LED is lit, it indicates that an error or warning message has been written to the system event log. v Release latch: Slide this latch to the left to access the light path diagnostics panel. © Copyright IBM Corp. 2006... -
Page 38: Rear View
The following illustration shows the connectors and LEDs on the rear of the server. Power-supply connector: Connect the power cord to this connector. Video connector: Connect a monitor to this connector. USB 1 connector: Connect a USB device to this connector. IBM System x3850 Type 8864: Installation Guide... - Page 39 SP Ethernet 10/100 connector: Use this connector to connect the service processor to a network. SP Ethernet 10/100 activity LED: This LED is on the SP Ethernet 10/100 connector. When this LED is lit, it indicates that there is activity between the server and the network.
-
Page 40: Server Power Features
To remove all power from the server, you must disconnect it from the power source. Some operating systems require an orderly shutdown before you turn off the server. See your operating-system documentation for information about shutting down the operating system. IBM System x3850 Type 8864: Installation Guide... - Page 41 Statement 5: CAUTION: The power control button on the device and the power switch on the power supply do not turn off the electrical current supplied to the device. The device also might have more than one power cord. To remove all electrical current from the device, ensure that all power cords are disconnected from the power source.
- Page 42 IBM System x3850 Type 8864: Installation Guide...
-
Page 43: Chapter 4. Configuring The Server
Chapter 4. Configuring the server The ServerGuide Setup and Installation CD provides software setup tools and installation tools that are specifically designed for your IBM server. Use this CD during the initial installation of the server to configure basic hardware features and to simplify the operating-system installation. -
Page 44: Installing And Using The Baseboard Management Controller Utility Programs
Updating and configuring the BIOS To update and configure the BIOS code to enable SOL, complete the following steps. 1. Update the BIOS code: a. Download the latest version of the BIOS code from http://www.ibm.com/ servers/eserver/support/xseries/index.html. IBM System x3850 Type 8864: Installation Guide... - Page 45 b. Update the BIOS code, following the instructions that come with the update file that you downloaded. 2. Configure the BIOS settings: a. Restart the server and press F1 when prompted to start the Configuration/Setup Utility program. b. Select Devices and I/O Ports; then, make sure that the values are set as follows: v Serial Port A: Auto-configure v Serial Port B: Auto-configure...
- Page 46 # This will allow you to Interact with the OS boot via SOL image=/boot/vmlinuz-2.4.9-e.12smp label=linux-Interact initrd=/boot/initrd-2.4.9-e.12smp.img read-only root=/dev/hda6 append="console=tty1 console=ttyS1,19200n8 " The following examples show the original content of the /etc/lilo.conf file and the content of this file after modification. IBM System x3850 Type 8864: Installation Guide...
- Page 47 Original /etc/lilo.conf contents prompt timeout=50 default=linux boot=/dev/hda map=/boot/map install=/boot/boot.b message=/boot/message linear image=/boot/vmlinuz-2.4.9-e.12smp label=linux initrd=/boot/initrd-2.4.9-e.12smp.img read-only root=/dev/hda6 image=/boot/vmlinuz-2.4.9-e.12 label=linux-up initrd=/boot/initrd-2.4.9-e.12.img read-only root=/dev/hda6 Chapter 4. Configuring the server...
- Page 48 5. Add the following five lines between the two title= sections: # This will allow you to Interact with the OS boot via SOL title Red Hat Linux (2.4.9-e.12smp) SOL Interactive root (hd0,0) IBM System x3850 Type 8864: Installation Guide...
- Page 49 kernel /vmlinuz-2.4.9-e.12smp ro root=/dev/hda6 console=tty1 console=ttyS1,19200 initrd /initrd-2.4.9-e.12smp.img Note: The entry that begins with kernel /vmlinuz is shown with a line break after console=tty1. In your file, the entire entry must all be on one line. The following examples show the original content of the /boot/grub/grub.conf file and the content of this file after modification.
- Page 50 2. Add the following line after the tty6 line at the bottom of the /etc/securetty file to enable a user to log in as the root user through the SOL console: ttyS1 3. Complete the following steps to modify the /boot/grub/menu.lst file: IBM System x3850 Type 8864: Installation Guide...
- Page 51 a. Comment out the gfxmenu line by adding a # in front of the word gfxmenu. b. Add the following line before the first title line: # This will allow you to only Monitor the OS boot via SOL c. Append the following text to the first title line: SOL Monitor d.
- Page 52 Original bootcfg program output Boot Loader Settings ---------------------------- timeout: 30 default: multi(0)disk(0)rdisk(0)partition(1)\WINDOWS Boot Entries ---------------- Boot entry ID: 1 OS Friendly Name: Windows Server 2003, Standard Path: multi(0)disk(0)rdisk(0)partition(1)\WINDOWS OS Load Options: /fastdetect IBM System x3850 Type 8864: Installation Guide...
-
Page 53: Installing The Osa Smbridge Management Utility Program
Complete the following steps to install the OSA SMBridge management utility program on a server running a Windows operating system: 1. Go to http://www.ibm.com/servers/eserver/support/xseries/index.html, download the utility program, and create the OSA BMC Management Utility CD. 2. Insert the OSA BMC Management Utility CD into the drive. The InstallShield wizard starts, and a window similar to that shown in the following illustration opens. -
Page 54: Using The Baseboard Management Controller Utility Programs
Go to http://www.ibm.com/servers/eserver/support/xseries/index.html to download the utility program; then, copy the bmc_cfg.exe file to a configuration utility diskette on a USB diskette drive. To start the baseboard management controller configuration utility program, complete the following steps: IBM System x3850 Type 8864: Installation Guide... - Page 55 To update the firmware, download the Linux or Windows operating-system update package that is available from http://www.ibm.com/servers/eserver/support/xseries/ index.html. If you have installed the OSA device driver and IBM Mapping layer, the update can be done without a reboot. Otherwise, extract to a firmware update diskette on a USB diskette drive and reboot.
-
Page 56: Using The Sas/Sata Configuration Utility Program
ServeRAID controller. For information about these programs, see the documentation that comes with the ServeRAID controller and the User’s Guide on the IBM System x Documentation CD. If your server comes with an operating system installed, such as Microsoft Windows 2000 Datacenter Server, see the software documentation that comes with the server for configuration information. - Page 57 4. Follow the instructions on the screen to change the settings of the selected items; then, press Enter. Chapter 4. Configuring the server...
- Page 58 IBM System x3850 Type 8864: Installation Guide...
-
Page 59: Chapter 5. Updating Ibm Director
Chapter 5. Updating IBM Director If you plan to use IBM Director to manage the server, you must check for the latest applicable IBM Director updates and interim fixes. To install the IBM Director updates and any other applicable updates and interim fixes, complete the following steps: 1. - Page 60 IBM System x3850 Type 8864: Installation Guide...
-
Page 61: Chapter 6. Solving Problems
If you cannot locate and correct the problem using the information in this chapter, see “Getting help and technical assistance,” on page 67, the Problem Determination and Service Guide on the IBM System x Documentation CD, and the “Server Support” flowchart in the front of this document. -
Page 62: Post Error Codes
The following table provides an abbreviated list of the error codes and messages that might appear during POST. See the Problem Determination and Service Guide on the IBM System x Documentation CD for more information about the POST error codes and messages. Go to http://www.ibm.com/servers/eserver/support/xseries/ index.html to check for updated technical information. - Page 63 v Follow the suggested actions in the order in which they are listed in the Action column until the problem is solved. v See the parts listing in the Problem Determination and Service Guide to determine which components are customer replaceable units (CRU) and which components are field replaceable units (FRU). v If an action step is preceded by “(Trained service technician only),”...
-
Page 64: Serverguide Problems
(RAID systems) or the available. ServerGuide System Partition is not present. Run the ServerGuide program and make sure that setup is complete. IBM System x3850 Type 8864: Installation Guide... -
Page 65: Troubleshooting Charts
Troubleshooting charts The following tables list problem symptoms and suggested solutions. See the Problem Determination and Service Guide on the IBM System x Documentation CD for more detailed troubleshooting charts. If you cannot find the problem in these charts, run the diagnostic programs. If you have run the diagnostic programs, or if running the tests does not reveal the problem, call for service. -
Page 66: Intermittent Problems
Make sure that the server and the monitor are turned on. v Try using another keyboard. If the problem remains, call for service. IBM System x3850 Type 8864: Installation Guide... -
Page 67: Memory Problems
v Follow the suggested actions in the order in which they are listed in the Action column until the problem is solved. v See the parts listing in the Problem Determination and Service Guide to determine which components are customer replaceable units (CRU) and which components are field replaceable units (FRU). v If an action step is preceded by “(Trained service technician only),”... -
Page 68: Microprocessor Problems
If the startup microprocessor must be replaced, call for service. Monitor problems Some IBM monitors have their own self-tests. If you suspect a problem with your monitor, see the information that comes with the monitor for instructions for testing and adjusting the monitor. If you cannot diagnose the problem, call for service. -
Page 69: Option Problems
Move the device and the monitor at least 300 mm (12 in.) apart, and turn on the monitor. Note: Non-IBM monitor cables might cause unpredictable problems. If the problem remains, call for service. Wrong characters appear on the If the wrong language is displayed, update the BIOS code with the correct screen. -
Page 70: Power Problems
If the problem remains or if you are using an ACPI operating system, call for service. Serial port problems For more information about the serial port, see the User’s Guide on the IBM System x Documentation CD. IBM System x3850 Type 8864: Installation Guide... -
Page 71: Software Problems
v Follow the suggested actions in the order in which they are listed in the Action column until the problem is solved. v See the parts listing in the Problem Determination and Service Guide to determine which components are customer replaceable units (CRU) and which components are field replaceable units (FRU). v If an action step is preceded by “(Trained service technician only),”... -
Page 72: Universal Serial Bus Device Problems
When the server is in remind mode, the system-error LED on the front of the server flashes. If a new failure occurs, the system-error LED is lit again. IBM System x3850 Type 8864: Installation Guide... -
Page 73: Diagnosing Problems Using Light Path Diagnostics
Press the reset button to reset the server and run the power-on self-test (POST). You might have to use a pen or the end of a straightened paper clip to press the button. The server is designed so that LEDs remain lit when the server is connected to an ac power source but is not turned on, provided that the power supply is operating correctly. - Page 74 Microprocessor tray 4. Replace the following components one at a time, in the order shown, restarting the server each time. a. (Trained service technician only) Failing microprocessor b. (Trained service technician only) Microprocessor tray IBM System x3850 Type 8864: Installation Guide...
- Page 75 v Follow the suggested actions in the order in which they are listed in the Action column until the problem is solved. v See the parts listing in the Problem Determination and Service Guide to determine which components are customer replaceable units (CRU) and which components are field replaceable units (FRU). v If an action step is preceded by “(Trained service technician only),”...
- Page 76 2. Replace the failing power supply. the system will be over spec. 3. Remove optional devices. Note: The LOG LED might also be lit. 4. Use 220 V ac instead of 110 V ac. IBM System x3850 Type 8864: Installation Guide...
- Page 77 v Follow the suggested actions in the order in which they are listed in the Action column until the problem is solved. v See the parts listing in the Problem Determination and Service Guide to determine which components are customer replaceable units (CRU) and which components are field replaceable units (FRU). v If an action step is preceded by “(Trained service technician only),”...
- Page 78 IBM System x3850 Type 8864: Installation Guide...
-
Page 79: Appendix. Getting Help And Technical Assistance
If you need help, service, or technical assistance or just want more information about IBM products, you will find a wide variety of sources available from IBM to assist you. This appendix contains information about where to go for additional information about IBM and IBM products, what to do if you experience a problem with your system or optional device, and whom to call for service, if it is necessary. -
Page 80: Getting Help And Information From The World Wide Web
Getting help and information from the World Wide Web On the World Wide Web, the IBM Web site has up-to-date information about IBM systems, optional devices, services, and support. The address for IBM System x and xSeries information is http://www.ibm.com/systems/x/. The address for IBM IntelliStation information is http://www.ibm.com/intellistation/. -
Page 81: Notices
Web sites. The materials at those Web sites are not part of the materials for this IBM product, and use of those Web sites is at your own risk. IBM may use or distribute any of the information you supply in any way it believes appropriate without incurring any obligation to you. -
Page 82: Important Notes
IBM. Maximum memory may require replacement of the standard memory with an optional memory module. IBM System x3850 Type 8864: Installation Guide... -
Page 83: Product Recycling And Disposal
IBM makes no representations or warranties with respect to non-IBM products. Support (if any) for the non-IBM products is provided by the third party, not IBM. Some software may differ from its retail version (if available), and may not include user manuals or all program functionality. -
Page 84: Battery Return Program
United States, go to http://www.ibm.com/ibm/environment/ products/batteryrecycle.shtml or contact your local waste disposal facility. In the United States, IBM has established a return process for reuse, recycling, or proper disposal of used IBM sealed lead acid, nickel cadmium, nickel metal hydride, and battery packs from IBM equipment. -
Page 85: Electronic Emission Notices
Properly shielded and grounded cables and connectors must be used in order to meet FCC emission limits. IBM is not responsible for any radio or television interference caused by using other than recommended cables and connectors or by unauthorized changes or modifications to this equipment. -
Page 86: European Union Emc Directive Conformance Statement
IBM cannot accept responsibility for any failure to satisfy the protection requirements resulting from a nonrecommended modification of the product, including the fitting of non-IBM option cards. This product has been tested and found to comply with the limits for Class A Information Technology Equipment according to CISPR 22/European Standard EN 55022. -
Page 87: Index
10 drive memory 11 installing 10 microprocessor 16 drives 4 integrated DVD drive baseboard management controller utility activity LED 26 programs 42 eject button 26 integrated functions 4 problems 53 intermittent problems 54 © Copyright IBM Corp. 2006... - Page 88 RAID configuration programs 44 notices RAID controller 20 electronic emission 73 RAID LED 64 FCC, Class A 73 Remote Supervisor Adapter II SlimLine error LED 27 notices and statements 3 reset button 61 IBM System x3850 Type 8864: Installation Guide...
- Page 89 weight 4 activity LED 26 SAS/SATA Configuration Utility program 44 serial connector 27 serial over LAN commands connect 43 identify 43 power 43 reboot 44 sel get 44 sol 44 sysinfo 44 serial port problems 59 ServeRAID configuration programs 44 ServerGuide 31 error symptoms 52 ServerGuide CD 1...
- Page 90 IBM System x3850 Type 8864: Installation Guide...
- Page 92 Part Number: 31R1882 Printed in USA (1P) P/N: 31R1882...
Need help?
Do you have a question about the System x3850 and is the answer not in the manual?
Questions and answers