Table of Contents
Advertisement
Quick Links
Advertisement
Table of Contents

Related Manuals for FKG Rooter X3000


Summary of Contents for FKG Rooter X3000
- Page 1 User Manual...
-
Page 2: Table Of Contents
Power ON and power OFF the device ....................... 11 Select User Programs ..........................11 Set User Program parameters ........................12 Select FKG File Systems ..........................14 Set device parameters ..........................16 Torque overload protec�on ........................16 Apex locator limita�ons ..........................16 Troubleshoo�ng ...................... - Page 3 Maintenance ......................20 Calibra�on ..............................20 Lubrifica�on of the contra-angle ....................... 20 Charging of the ba�ery ..........................20 Replacement of the ba�ery ........................20 Storage ........................21 Transporta�on ......................21 10. Environmental protec�on ..................21 11. A�er sales service ...................... 21 12.
-
Page 4: Product Introduc�On
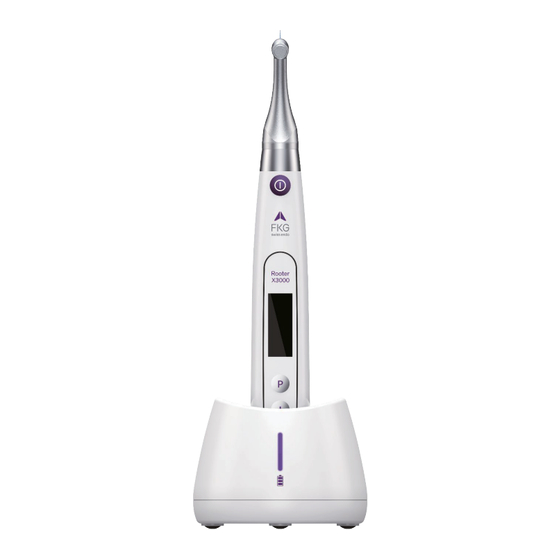
Product introduc�on Descrip�on of the device The Rooter ® X3000 device is a cordless endo motor with an integrated root canal apex locator. It can be used as an endo motor for prepara�on of tooth root canals, or as an apex locator device to help to determine the root canal working length. -
Page 5: Components And Accessories
Components and accessories Designa�on Reference FKG 08.971.00.001.FK Motor handpiece 08.971.00.002.FK Charging base 08.971.00.003.FK Contra-angle [4.7/1] 08.971.00.004.FK Spray noozle 08.971.00.005.FK Measuring wire 08.971.00.006.FK File clip 08.971.00.007.FK Lip hook 08.971.00.008.FK Touch probe 08.971.00.009.FK Protec�ve silicone cover 08.971.00.010.FK "O"-ring 08.971.00.011.FK Universal AC-Adapter 08.971.00.013.FK Lithium-ion ba�ery... -
Page 6: Technical Specifica�Ons
Technical specifica�ons a) Motor handpiece lithium ba�ery specifica�on 3.7V / 2000mAh b) Power adapter specifica�on Input: ~100V-240V 50Hz/60Hz 400mA Output: DC5V/1A c) Motor handpiece mechanical specifica�on Torque range: 0.4Ncm-4.0Ncm Speed range: 100rpm-3’300rpm d) Wireless charging specifica�on Frequency range: 112-205KHz Maximum RF output power of the product: 9.46dBuA/m@3m Warnings Please carefully read this Instruc�on Manual before first opera�on. -
Page 7: Important Precau�Ons
Important precau�ons These precau�ons are critical to insure safe opera�on and use. a) Do not use this device on pa�ents who have implanted pacemakers, defibrillators, or any other implantable devices. b) Do not use this device on pa�ents suffering from Hemophilia. c) Use with cau�on on pa�ents with heart disease, pregnant women, and young children. -
Page 8: File Setup
2. Push the contra-angle horizontally. A “click” sound indicates that the installa�on is in place. 3. The contra-angle must rotate 360° freely. Disconnec�ng the contra-angle 2.1.4 Pull out the contra-angle horizontally. File setup Warnings 2.2.1 a) Make sure the instruments are compliant to ISO1797 standard (Shanks for rotary and oscilla�ng instruments). -
Page 9: Apex Locator Setup
Disconnec�ng a file 2.2.3 Hold down the Push bu�on and pull out the file. Apex locator setup Warnings 2.3.1 a) In Apex locator mode, the file clip must properly hold the file. b) In case of bad or wrong connec�on signal, replace the measuring wire. c) In apex locator mode it is suggested to install the motor handpiece in the charging base to get be�er visual angle. - Page 10 d) The Apex locator detects the canal apical foramen, not the tooth anatomical apex. This could explain some differences between the apex locator signal and an X-ray image. e) Not all condi�ons are ideal for working length determina�on. To be informed about the Apex locator limita�ons, refer to Chapter 4.8.
-
Page 11: Device Opera�On Modes And Display Interface
Connec�on tes�ng 2.3.3 It is strongly recommended to check the connec�on quality before every use. 1. In Apex locator mode, clip the holder on lip hook and check that all the indicator bars light up, as shown below: 2. In combined Motor and Apex locator mode, touch the lip hook with the file and check that all the indicator bars light up, as shown below: Device Opera�on modes and display interface Motor modes... -
Page 12: Apex Locator Opera�On Mode
ATR Opera�on Mode (Adap�ve Torque Reverse mode) 3.1.4 In this mode, the motor handpiece rotates in clockwise direc�on and generates reciproca�ng mo�on when the torque load on the file is higher than the set torque limit. Apex locator Opera�on mode EAL Opera�on Mode (Electronic Apex Locator) 3.2.1 This mode is intended for working length determina�on only. -
Page 13: Display Interface
Display interface Stand-by interfaces While the motor is not running, the display shows the actual se�ngs of the motor. User Program (M0-M9) Manufacturer preset program (refer to Chapter 4.5) b. Ba�ery level Set speed (rpm) XP-endo T. Shaper d. Set torque limit (Ncm) e. -
Page 14: Device Opera�Ng Instruc�Ons
In stand-by state, the device will automa�cally shut down a�er 5 minutes. Select User Programs The device contains 10 memorized User Programs (M0-M9) and 7 preset FKG File Systems available directly from the stand-by state. 1. To select a program from the stand-by state, press the Adjus�ng bu�on “+”/”-“. -
Page 15: Set User Program Parameters
Make sure all the parameters are verified before to start the motor handpiece. d) M0-M9 User Programs parameters modified by the user are memorized. e) FKG File Systems parameters cannot be modified by the user (refer to Chapter 4.5). Parameter se�ng 4.4.2... - Page 16 Set Apical Ac�on The Apical ac�on applies when the file reaches the set apical reference point (refer to Flash Bar Posi�on) OFF: Disable Apical Ac�on STOP: The motor stops automa�cally when the file reaches the reference point. The motor restarts automa�cally when the file is pulled away from the reference point. REVERSE: The motor automa�cally reverses the rota�on direc�on when the file reaches the reference point.
-
Page 17: Select Fkg File Systems
To help the user set the file parameters according to FKG recommenda�on, the most popular FKG File Systems are already preset in the device. 1. To select a preset FKG File System from the stand-by state, long press the Se�ng bu�on “P”. - Page 18 File systems selec�on File selec�on Stand-by interface Opera�on interface R-Motion F: auto All files All files auto R: auto auto FKG File Systems parameters availability table 4.5.2 Parameter Set Flash Set Auto Set Auto Apical Working Torque Apical Forward Reverse...
-
Page 19: Set Device Parameters
Calibra�on Make sure the original contra-angle is installed before to launch the motor calibra�on. OFF: No ac�on. ON: Start motor calibra�on The motor must be calibrated before the first use and a�er lubrifica�on. Beeper volume The device sound volume can be adjusted from Vol. 0 to Vol. 4. Vol.0: Mute. - Page 20 Root canal with a large apical foramen Root canal with excep�onally large apical foramen due to a lesion or incomplete development might disturb the electrical signal. Root canal with liquid overflowing from the opening Root canal with blood or any other liquid overflowing from the opening and in contact with the gingival �ssue might disturb the electrical signal.
-
Page 21: Troubleshoo�Ng
Extremely dry root canal A dry canal might disturb the electrical signal. Troubleshoo�ng Failure Possible cause Solu�ons The motor handpiece does not Device in EAL mode Changing to CW, CCW, REC or ATR rotate. mode. EAL mode is only for canal measurement. -
Page 22: Step-By-Step Procedure
c) Do not immerge the contra-angle in a disinfectant solu�on or in an ultrasonic bath. d) Do not use chloride detergent materials. e) Do not use bleach or chloride disinfectant materials. f) For your own safety, please wear personal protec�ve equipment (gloves, glasses, mask). g) The user is responsible for the sterility of the product and of the instruments. -
Page 23: Maintenance
Storage Keep the accessories (contra- - Sterility cannot be guaranteed if packaging is angle, lip hook, file clip, touch open, damaged, or wet. probe, protec�ve silicon cover) - Check the packaging and the contra-angle in steriliza�on packaging in a before use (packaging integrity, no humidity and dry and clean environment. -
Page 24: Storage
Warnings 7.4.1 a) Use original ba�ery only. b) It is recommended to contact local distributors to replace the ba�ery. Storage a) The device and accessories should be stored in a room where the rela�ve humidity is 10% ~ 93%, atmospheric pressure is 70kPa ~ 106kPa, and the temperature is -20°C ~ +55°C. b) Remove the ba�ery of the device in case of long period storage. -
Page 25: Statement
13. Statement All rights of modifying the product are reserved to the manufacturer without further no�ce. The pictures are only for reference. The final interpreta�on rights belong to GUILIN WOODPECKER MEDICAL INSTRUMENT CO., LTD. The industrial design, inner structure, etc. have claimed for several patents by WOODPECKER, any copy or fake product must undertake legal responsibili�es. -
Page 26: Emc-Declara�On Of Conformity
14. EMC-Declara�on of conformity The device has been tested and homologated in accordance with EN 60601-1-2 for EMC. This does not guarantee in any way that this device will not be affected by electromagne�c interference Avoid using the device in high electromagne�c environment. 14.1 Technical Descrip�on Concerning Electromagne�c Emission Table 1: Guidance &... - Page 27 interrup�ons, it is recommended that IEC 61000-4-11 <5 % UT <5 % UT the models Rooter ® X3000 be powered (>95% dip in UT.) (>95% dip in UT.) from an uninterrup�ble power supply or a ba�ery. for 1 cycle for 1 cycle 70% UT 70% UT (30% dip in UT)
- Page 28 NOTE 2: These guidelines may not apply in all situa�ons. Electromagne�c propaga�on is affected by absorp�on and reflec�on from structures, objects and people. Field strengths from fixed transmi�ers, such as base sta�ons for radio (cellular/ cordless) telephones and land mobile radios, amateur radio, AM and FM radio broadcast and TV broadcast cannot be predicted theore�cally with accuracy.
- Page 29 Table 4: Recommended separa�on distances between portable and mobile RF communica�ons equipment and the model Rooter ® X3000 The model Rooter X3000 is intended for use in electromagne�c environment in which radiated RF disturbances ® is controlled. The customer or the user of the model Rooter ®...
- Page 30 www.�g.ch Guilin Woodpecker Medical Instrument Co., Ltd. Informa�on Industrial Park, Guilin Na�onal High-Tech Zone, Guilin, Guangxi, 541004 P. R. China Sales Dept.: +86-773-5873196 H�p://www.glwoodpecker.com E-mail: woodpecker@glwoodpecker.com MedNet EC-Rep GmbH Borkstrasse 10 – 48163 Muenster - Germany ZMN-SM-027 Version 1.4 / 28.06.2023...
Need help?
Do you have a question about the Rooter X3000 and is the answer not in the manual?
Questions and answers