Table of Contents
Advertisement
Quick Links
Advertisement
Table of Contents

Related Manuals for Denon DVD-1940


Summary of Contents for Denon DVD-1940
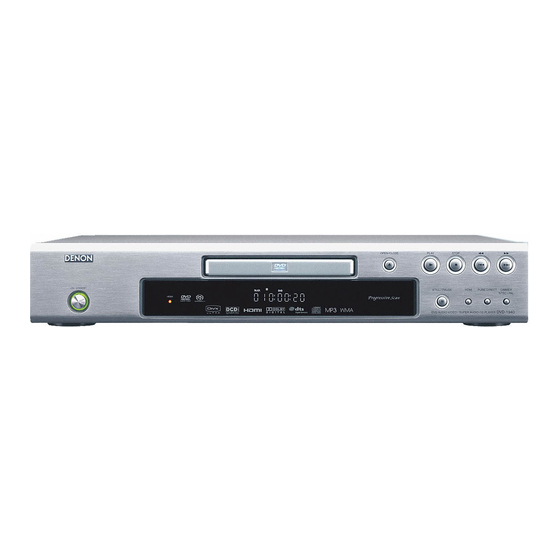
- Page 1 DVD AUDIO-VIDEO / SUPER AUDIO CD PLAYER DVD-1940...
-
Page 2: C Precautions
WARNING: TO REDUCE THE RISK OF FIRE OR ELECTRIC SHOCK, DO NOT EXPOSE THIS APPLIANCE TO RAIN OR MOISTURE. The lightning flash with arrowhead symbol, within an CAUTION equilateral triangle, is intended to alert the user to the presence of uninsulated “dangerous voltage” within the RISK OF ELECTRIC SHOCK product’s enclosure that may be of sufficient magnitude DO NOT OPEN... -
Page 3: Warning
PRECAUTIONS Warning Caution To avoid fire or electric shock, do not expose this unit to rain 1) Do not attempt to open the cabinet. There are no parts or moisture. you can service inside. Refer all servicing to qualified service personnel. WARNING: 2) Slot and openings in the cabinet and at the side or LIVE PARTS INSIDE. -
Page 4: Table Of Contents
TABLE OF CONTENTS C PRECAUTIONS ......2 Still / Pause ........19 Resume . -
Page 5: C Introduction
INTRODUCTION The serial number of this product may be found on the back of the DVD player. No others have the same serial number as yours. You should record the number and other vital information here and retain this book as a permanent record of your purchase to aid identification in case of theft. -
Page 6: C About The Discs
ABOUT THE DISCS Playable Discs Playable Recorded Mark (logo) Region code Disc size Disc types discs signals Digital audio Example 12 cm GROUP 1 GROUP 2 DVD-Audio − * 1, 2, 4 Digital video Track 1 Track 2 Track 3 Track 4 Track 1 Track 2... -
Page 7: C Features
FEATURES • • Progressive Scan system On-screen display The progressive scan system provides less flickering and Information about the current operation can be displayed images in higher resolution than that of traditional 480i on the TV screen, allowing you to confirm the currently (525i), 576i (625i) or multi television signals through the active functions (such as programme playback), using the interlace scan system. -
Page 8: C Functional Overview
FUNCTIONAL OVERVIEW 1. POWER ON/OFF (ON/STANDBY) Buttons [page 17] FRONT PANEL 6/25 2. Disc loading tray 7/29 3. OPEN/CLOSE Button [page 17] 4. PLAY Button [page 17] 5. STOP Button [page 17] 6. H (SKIP DOWN) Button [page 20] 7. G (SKIP UP) Button [page 20] 8. -
Page 9: Tour Of The Remote Control
FUNCTIONAL OVERVIEW Tour of the Remote Control Buttons on remote control work in different ways for DVD-Video, DVD-Audio, Video CD, Super Audio CD, Audio CD, MP3, JPEG, WMA and DivX ® Refer to the following table for correct use. Super Audio CD, CD, DVD-Video, DVD-Audio Video CD DivX... - Page 10 FUNCTIONAL OVERVIEW Tour of the Remote Control Super Audio CD, CD, DVD-Video, DVD-Audio Video CD DivX ® MP3, JPEG, WMA • To clear the markers. • To clear the markers. (Super Audio CD, CD) • To clear the most • To clear the most recently entered track •...
-
Page 11: Front Panel Display
FUNCTIONAL OVERVIEW Front Panel Display Lights up when the progressive scan system is activated. Displays a type of the disc which is on the tray. • DVD: DVD-Video, MP3, JPEG, WMA, DivX ® on DVD-R/RW Lights up when the disc playback comes to a pause. •... -
Page 12: C Connections
CONNECTIONS Description - Rear Panel 1. AC IN Terminal Connects the AC cord to supply the power. 2. DIGITAL OUT Jacks (OPTICAL, COAXIAL) Use either an optical or coaxial digital cable (commercially available) to connect to an AV amplifier with a built-in decoder (AV control centre). -
Page 13: Connection To An Audio System
CONNECTIONS The following shows examples of connections commonly used to connect the DVD player to TV and other components. If using this DVD player to play back a DVD in a Dolby Digital Multi-channel surround or DTS surround format, the DVD player outputs a Dolby Digital or DTS data stream from its OPTICAL or COAXIAL DIGITAL OUT jacks. -
Page 14: Connection To 5.1-Channel Surround Sound System
CONNECTIONS Connection to 5.1-channel Surround Sound System Analogue 5.1-channel audio signals can be output from the DVD player. The multichannel audio signals recorded in packed PCM and the multichannel Super Audio CD can be played back when an AV amplifier equipped with analogue 5.1-channel audio inputs is connected. Centre speaker Front speaker (left) -
Page 15: Connection To A Tv (For Video)
CONNECTIONS Connection to a TV (for video) Method 1 Method 2 Method 3 Method 4 Basic Basic Good Better Best Connection Audio picture picture picture COMPONENT 21-pin Scart jack VIDEO IN VIDEO IN S-VIDEO IN Component Scart Cable Audio Cable Video Cable S-Video Cable Video Cable... -
Page 16: Connection To A Tv With An Hdmi Compatible Port
CONNECTIONS Connection to a TV with an HDMI Compatible Port A simple 1-cable connection (using a commercially available cable) with a device having an HDMI (High- Definition Multimedia Interface) connector allows digital transfer of the digital images of DVD-Video and other sources, DVD-Video, and the multi-channel sound of DVD-Audio. -
Page 17: C Disc Playback
DISC PLAYBACK NOTES: Basic Playback • Video and audio signals may be distorted temporarily 1 2 3 4 5 6 when switching to/from the HDMI output mode. • Use a display equipment with an HDMI-compatible port. 7 8 9 • The HDMI indicator on the front panel fl ashes when you select the HDMI output mode but there is no HDMI Getting started cable. -
Page 18: General Features
DISC PLAYBACK 3 Press the DIMMER NTSC/PAL button within 5 CALLING UP A MENU SCREEN DURING PLAYBACK seconds, and select the desired video system. The 1 2 9 video system will be changed as follows every time the DIMMER NTSC/PAL button is pressed. •... -
Page 19: Still / Pause
DISC PLAYBACK Still / Pause Slow Forward / Slow Reverse 1 2 3 4 5 6 1 2 3 9 7 8 9 Only Moving Picture 1 During playback, press the Button 1 During playback, press the STILL/PAUSE button. STILL/PAUSE button. 2 Press the h or g button. -
Page 20: Dialog Speed
DISC PLAYBACK 2 Press the ZOOM button repeatedly to select a Slide Show Mode desired zoom factor: x2, x4 or off. • Only x2 zoom is available on Video CDs, JPEG and DivX ® You can switch to slide show mode during playback. 1 Press the MODE button once during playback. -
Page 21: By Using The Skip Buttons H G
DISC PLAYBACK • For discs with 100 or more tracks, to play back a single- NOTES: or a double-digit track, press 0 fi rst, then the track • Opening the disc tray, turning off the power, or selecting number (e.g. for track 3, press 0, 0, 3, and for track 26, AC at step 2 and pressing the ENTER button will erase press 0, 2, 6). -
Page 22: A-B Repeat
DISC PLAYBACK 6 7 8 A-B REPEAT 1 2 3 4 5 9 1 In stop mode, press the MODE button. PROGRAM MY COLLECTION • The programme screen will appear. 1 Press the A-B REPEAT 2 Press the Cursor buttons button at your desired starting ALL CLEAR (K or L) to select a group, then... -
Page 23: Mp3 / Jpeg / Wma Playback
DISC PLAYBACK 4 5 6 7 8 This player recommends the use of fi les recorded at the following specifi cations: 1 In stop mode, press the Applicable MP3 fi le Remarks RANDOM button. RANDOM CD-DA TOTAL 0:45:55 • It is prohibited to record •... -
Page 24: Divx ® Playback
DISC PLAYBACK • If a track is selected, press the PLAY or ENTER button 1 When Kodak Picture CD is to start playing back tracks. The selected track and the inserted in the DVD player, Picture1 Picture2 Picture3 subsequent tracks will be played back. Kodak Picture CD menu •... -
Page 25: Divx ® Subtitle
DISC PLAYBACK • Press the TOP MENU button to call up the Playback • If “DivX SUBTITLE” is set to “OFF” in LANGUAGE Media Selection screen in stop mode. menu, the SUBTITLE LIST will not be displayed even if • If you select Audio & Pictures, instead of Video on the you select a DivX ®... - Page 26 DISC PLAYBACK 3 4 5 • Current repeat setting appears only when the Repeat setting is active. 1 Press the DISPLAY button during playback. (@T: Track repeat/@A: All (disc) repeat/@G: Group • Current track number/total tracks, elapsed time and (folder) repeat). remaining time of the current track, and current •...
-
Page 27: Audio Language
DISC PLAYBACK Audio Language Subtitle Language The DVD player allows you to select an audio language The DVD player allows you to select a subtitle language (if (if multiple language options are available) during DVD or multiple language options are available) during DVD or DivX ®... -
Page 28: Camera Angle
DISC PLAYBACK Camera Angle Stereo Sound Mode Some DVD discs contain scenes which have been shot 1 Press the AUDIO button repeatedly during simultaneously from various angles. You can change the playback to select your desired sound mode. camera angle when the (:) icon appears on the screen. STEREO - both right and left channels are active (stereo) 1 Press the ANGLE button during playback. -
Page 29: C Dvd Setup
DVD SETUP In setup menu, QUICK mode, CUSTOM mode and INITIALIZE mode are available (refer to pages 29-34). QUICK mode consists of items of which the setting menus are frequently used, and they are accompanied with QUICK mark. You can make all settings in CUSTOM mode. TV ASPECT (Default: 4:3 LETTER BOX) QUICK Language Setting •... -
Page 30: Audio Setting
DVD SETUP • When your TV’s video format does not match the Audio Setting setting for the TV TYPE, the image of on-screen You can change some Audio settings. It only affects during display will be distorted or will not be displayed at the playback of DVD discs. -
Page 31: Speaker Setting For Analog Audio
DVD SETUP MPEG (Default: PCM) QUICK Speaker Setting for ANALOG AUDIO • Set to BITSTREAM when the When MULTI CHANNEL is selected for ANALOG AUDIO, unit is connected to an MPEG AUDIO some speaker settings will be required. decoder. • Set AUDIO MODE to ANALOG beforehand to perform this BITSTREAM: Output MPEG sound. -
Page 32: Speaker Setting For Hdmi Audio
DVD SETUP FRONT(L/R), CENTER, SURROUND(L/R) Speaker Setting for HDMI AUDIO (Default: 3.6m) When HDMI AUDIO is selected FRONT(L/R): for MULTI CHANNEL, the bass The distance can be set within AUDIO DELAY TIME management setting menu will appear. AUDIO the range of 0 to 18.0m. MULTI CHANNEL DISTANCE METERS... -
Page 33: If You Forget The Password
DVD SETUP 6 Press the Cursor buttons AUTO POWER OFF (Default: ON) • Press the ENTER button (K or L) to select a desired RATINGS repeatedly to turn AUTO level, then press the ENTER RATING LEVEL POWER OFF ON or OFF. OTHERS button. -
Page 34: Reset To The Default Settings (Except For Ratings And Video Out)
DVD SETUP Reset to the Default Settings (except for RATINGS and VIDEO OUT) This allows you to return all selections of SETUP (except for RATINGS and VIDEO OUT) to their default settings. 1 Press the SETUP button in stop mode. 2 Press the Cursor buttons (s or B) to select INITIALIZE, then press the ENTER button. -
Page 35: C Troubleshooting Guide
TROUBLESHOOTING GUIDE If the DVD player does not perform properly when operated as instructed in these Operating Instructions, check the player, consulting the following checklist. Problem Solution Page No power –Check if the AC power cord is properly connected. – –Unplug the AC cord once, and wait for 5-10 seconds and then plug –... - Page 36 TROUBLESHOOTING GUIDE Problem Solution Page Buttons do not work or the player –To completely reset the player, unplug the AC cord from the AC – stops responding outlet for 5-10 seconds. The DVD player does not respond to –Operations may not be permitted by the disc. some operating commands during Refer to the instructions of the disc.
-
Page 37: C Specifications
SPECIFICATIONS PIN CONNECTION (AV1) SIGNAL SYSTEM NTSC/PAL colour APPLICABLE DISCS (1) DVD-Video/DVD-Audio Discs 1-layer 12 cm single-sided discs, 2-layer 12 cm single- sided discs, 2-layer 12 cm double-sided discs (1 layer per side) Contacts, signal levels and impedances 1-layer 8 cm single-sided discs, 2-layer 8 cm single- sided discs, 2-layer 8 cm double-sided discs (1 layer per Contact Audio Output (Right):... - Page 38 TOKYO, JAPAN www.denon.com Denon Brand Company, D&M Holdings Inc. 1VMN23657 Printed in China E6GG0ED/E6GG1ED ***** 00D 511 4659 009...
Need help?
Do you have a question about the DVD-1940 and is the answer not in the manual?
Questions and answers