Advertisement
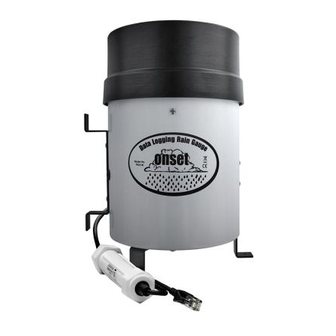
Rain Gauge Smart Sensor (S-RGx-M002) Quick Start
Connecting to a Station
1. Stop the station if it is logging.
2. Plug the smart sensor jack into an open smart sensor port on the station.
3. Start logging. See the station manual at www.onsetcomp.com/resources for details on operating stations with smart sensors.
Mounting the Smart Sensor
WARNING: The black powder-coated aluminum knife-edged ring is extremely sharp and can cause injury if not handled properly. Do not press
edge against any body parts as severe cuts and bleeding may occur.
1. The tipping assembly has been secured during the shipment. Unscrew the thumbscrews from the housing. Lift the collector ring,
screen, and funnel off the housing and remove the rubber band from inside to release the tipping-bucket mechanism before
installation. If the rain gauge has slots in the housing, align the thumbscrews with the slots when reassembling. Screw the
thumbscrews in, making sure they go through the slots.
2. Mount the sensor on a tripod near the top of the mast on the side opposite the cross arm using the
two hose clamps. Open each hose clamp and place it around the mast. Close the hose clamps until the
rain gauge side bracket easily slides into the clamp.
3. Hold the bracket against the mast with the top of the sensor above the mast. Slip the upper clamp
over the side bracket and tighten the clamp until the rain gauge is secure. Be sure the collector is
above the top of the mast to prevent splashing, wind, shedding, or shadow effects.
4. Install the lower clamp and check that the top of the bucket is level. Use the bubble level below the
tipping-bucket mechanism to confirm the rain gauge is level.
Refer to the logger manual at www.onsetcomp.com/resources/documentation/14091-c-man-srgx for alternate mounting instructions.
Deployment Guidelines
• Tall objects can interfere with accurate rain measurements. Place the rain bucket away from the obstruction at a distance greater
than three times the height of the obstruction. If that is not possible, raise the rain bucket as high as possible to avoid shedding.
• Avoid splashing and puddles. Be sure the gauge is high enough above any surface that rain will not
splash into the top of the collector.
• If the sensor is not being mounted on a tripod mast then mount the sensor upslope about 3 meters
(10 feet) away from the tripod on a 1.5 meter mounting pole (M-MPB) for the most accurate
rainfall measurements.
• Vibration can significantly degrade accuracy of the tipping bucket mechanism. In windy locations
make sure that the bucket will be vibration-free. Use the guy wire kit (M-GWA) to secure a pole or
tower-mounted bucket.
• To provide long-term protection from moisture entry, the smart sensor adapter must be mounted
horizontally and with the cable wires routed with drip loops so that water drains away from the
cable entry point as shown in the example at right. When mounted properly, the housing is
weatherproof (but not waterproof).
For more information about this smart sensor, refer to the full product manual. Scan the code at left or go to
www.onsetcomp.com/resources/documentation/14091-c-man-srgx.
© 2017–2023 Onset Computer Corporation. All rights reserved. Onset and HOBO are registered trademarks of Onset
Computer Corporation. All other trademarks are the property of their respective companies.
Smart sensor adapter
mounted horizontally
Drip loop
Drip loop
21832-C MAN-S-RGAB-QSG
Advertisement
Table of Contents

Subscribe to Our Youtube Channel
Related Manuals for Hobo S-RGx-M002


Summary of Contents for Hobo S-RGx-M002
- Page 1 For more information about this smart sensor, refer to the full product manual. Scan the code at left or go to www.onsetcomp.com/resources/documentation/14091-c-man-srgx. © 2017–2023 Onset Computer Corporation. All rights reserved. Onset and HOBO are registered trademarks of Onset Computer Corporation. All other trademarks are the property of their respective companies.
- Page 2 For more information about this smart sensor, refer to the full product manual. Scan the code at left or go to www.onsetcomp.com/resources/documentation/14091-c-man-srgx. © 2017–2023 Onset Computer Corporation. All rights reserved. Onset and HOBO are registered trademarks of Onset Computer Corporation. All other trademarks are the property of their respective companies.
Need help?
Do you have a question about the S-RGx-M002 and is the answer not in the manual?
Questions and answers