Advertisement
Quick Links
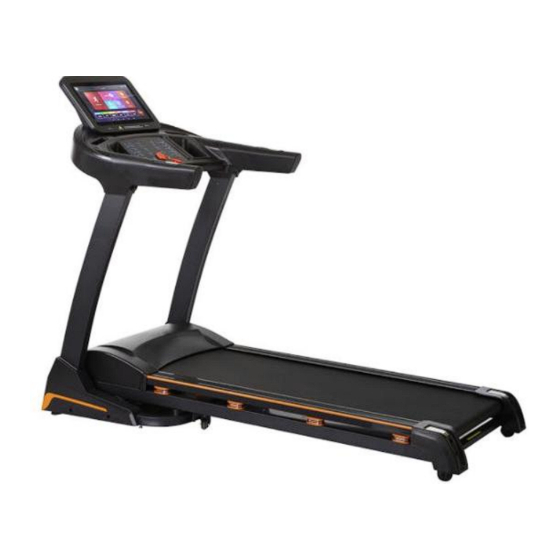
MOTORIZED TREADMILL – MODEL V1100
INSTRUCTION MANUAL
Please read these instructions carefully before use and keep for future reference
FOR DOMESTIC INDOOR USE ONLY
WARNING: Keep young children away from this machine at all times. Contact with
the moving surface may result in severe friction burns.
(Instructions cover multiple versions of the product and some features detailed herein may not be relevant to your model
1
Advertisement

Related Manuals for Powertrain V1100


Summary of Contents for Powertrain V1100
- Page 1 MOTORIZED TREADMILL – MODEL V1100 INSTRUCTION MANUAL Please read these instructions carefully before use and keep for future reference FOR DOMESTIC INDOOR USE ONLY WARNING: Keep young children away from this machine at all times. Contact with the moving surface may result in severe friction burns.
-
Page 2: Safety Notice
1. CAUTION To avoid injuries please read this manual carefully before using the treadmill. Before starting any exercise program you should consult your doctor to determine if you have any physical or health conditions which could create a risk to your health and safety, or prevent you from using the equipment properly. -
Page 3: Product Specifications
Be careful of children or other objects while folding and unfolding the machine. Do not put machine near wet objects to avoid slippery surfaces and damage to machine 3. CAUTION PRIOR TO USE Do not use the machine if you are unwell and immediately stop using the machine if you start feeling unwell whilst using it. - Page 4 Main Specifications and Parts List Main Specifications Parameters Names Description Input power voltage AC220-240V(50/60Hz) Motor power 3.0HP Speed 1-20Km/h Packing list Name Units Treadmill Unit Accessory Bag Screws bag list Name Name Inner hexagon spanner 6mm MP3 cable Inner hexagon spanner 5mm Base Corner Cover 1 Set Combination wrench...
- Page 5 Use the inner hexagon spanner (#5) and insert screws M8*52 and screws M8*22 to attach the columns to the base of the treadmill (as shown in the diagram below. Use an inner hexagon spanner (#5) and screw M8*25 to fix the console to the columns. ...
- Page 6 Remove the console and connect the cables as shown in Diagram A. CAUTION: Ensure cables are not pinched or jammed as it will damage the unit and void warranty. Place the exposed surplus cabling inside the case and mount the console on to the console slot.
-
Page 7: Safety Key Function
Safety Key Function o Disconnecting the safety key will immediately stop the running track and the screen will display “E7”, and the treadmill will emit a beep. o Placing the safety key back on the designated area on the console will clear all data in 2 seconds. - Page 8 o In standby mode, pressing the Program key will cycle through the options, ranging from P1 to P12 (automatic programs) – FAT - P0 (Standby). o In standby mode, holding down this button will set the parameter values (refer below) ...
- Page 9 FAT Function In standby mode, press program button to enter the FAT test. o F1--Gender, screen displays 01 stand for male, 02 stand for female. Press SPEED+ or Speed- to select gender. Press MODE to confirm. o F2--Age, the value range for age is 10-99 years, Press SPEED+ or Speed- to select age.
- Page 10 Display Function Main Interface (Due to constant improvements, not all features may be present and some settings may differ) As shown in the image above, interface options are Smart Run, Multimedia, Users, Scene, Apps and Settings - six functions in total. ...
- Page 11 the time and date on the internet. However, when is treadmill is not connected to WIFI, users can manually enter the time and date setting. Start Functionality After the treadmill has been started, SMART RUN will show the current running mode, and users cannot enter SMART RUN until the treadmill stops.
- Page 12 Incline Functionality Operating instructions are the same as the speed functionality above. Intelligent Running Interface – Calorie Mode Calories default value is 50 kilocalories. To manually select the required value – press the + or – keys. ...
- Page 13 Post Exercise After concluding the run in any mode, users can share the running data with other users via QQ, WeChat or Weibo (applications need to be installed prior to use). Smart Run-Time Mode Press to enter smart run setting. ...
- Page 14 SMART RUN-DISTANCE MODE Default setting is 1km. User can use -/+ buttons to set the target distance. Alternatively, the shortcut buttons on the right can be used to select pre-set distances. Pressing the Back button will return the user to the homepage. ...
- Page 15 SMART RUN-CUSTOMIZED MODE Equipped with 5 preset customized programs, with each program divided into 10 segments. Users can set the speed and incline value with the use of the corresponding column. Once selected please press Save to save the data and then Start to start the treadmill with the saved values.
- Page 16 Default target heart rate (THR): (220-AGE)*0.6 Target heart rate value can be selected, the range is 80-180 Set time - Default setting is 30 minutes. Range: 5 - 99 minutes. Speed change information o Change frequency: HRC detects heart at 30 second intervals (heart rate is displayed).
- Page 17 Selecting Music, Video or Picture, will display the respective files in storage and external drive. The system will play the files with android system’s music player, video player and gallery. Music Status bar positioned at the bottom of the screen will display the running data. ...
- Page 18 Gallery User Center Press to enter the user center (must first login) User’s information is displayed in the left column, and user’s history is displayed on the right section of the screen.
- Page 19 Editing User Information Press Edit to update the information. Press Save to save the updated information. Ensure the unit is connected to the internet, for the updated information to be stored. Scenes To access the included 3 HD exercise scenes, users need to select ...
- Page 20 Scenes after Start If the user starts with another mode, when entering the scene option, the displayed scene will default to the scene which played previously. User can press the Back button, to change the scene. Applications Touch to enter the above mode.
- Page 21 Settings Press to enter the settings mode, with 10 modules. Network setting: o For optimum connection, the router needs to be located within 10m from the treadmill. Should the distance be longer, it may result in a poor connection with the treadmill.
- Page 22 Bluetooth: Search & connect Bluetooth devices Brightness: Set the brightness of the screen Languages...
- Page 23 Prompt to add lubricant (manually) Prompt Tone: Turn on/off the prompt tone. Prompt tone on. Prompt tone off. Units of Distance: km/h and m/h Settings cannot be changed whilst the treadmill is in use, only when the running belt has stopped, as the icons will be grayed out...
- Page 24 System and version information Main functions Fast start (manual mode): In standby mode, position the safety key, press the Start button and the treadmill will start operating after a 3 second countdown, at the slowest speed option. Countdown Touch speed +/- or press speed shortcut keys to adjust the speed, and touch incline +- or press incline shortcut keys to adjust the incline.
-
Page 25: Error Codes
Error Codes Error code Description Solution Erroneous Connection: Possible Cause: the communication between the lower controller when the power is on, the and console is blocked, check each joint between the controller and connection between lower console, make sure that each core is fully plugged in. Check the controller and the console is connection line, replace it if is damaged. - Page 26 Warning: Make sure power plug disconnect before moving motor cover away, clean the motor at least once a year. Maintenance of the Running Board and Belt - Lubrication and Cooling Your treadmill's running board and running belt had been lubricated at the factory. ...
- Page 27 Running Belt alignment Place treadmill flat on the floor but do not stand on it. Turn on treadmill and set the speed at 6-8km/hour . If the running belt is shifting to the right, rotate the right adjusting bolt with 1/2 turn clockwise, then rotate the left adjusting bolt with 1/2 turn counter-clockwise.
-
Page 28: Exercise Instructions
Exercise Instructions Using your Powertrain treadmill provides you with several benefits such improving your physical fitness, toning muscles and together with a calorie controlled diet may help you lose weight. Warm-up Phase This stage helps get the blood flowing around the body and the muscles working properly. It will also reduce the risk of cramp and muscle injury. - Page 29 If the product is modified without authorisation from Kmate Pty Ltd in writing; If you are unable to supply a certificate of compliance for installation of any type as required by State & Territory Laws Contact Details Powertrain Sports PO Box 133, Braeside VIC 3195 Email: warranty@powertrain.com.au Phone: 03 9790 0055...
- Page 30 PLEASE CHECK THE BELOW LINK FOR THE LATEST VERSION OF THIS MANUAL...
Need help?
Do you have a question about the V1100 and is the answer not in the manual?
Questions and answers