Table of Contents
Advertisement
Quick Links
Advertisement
Table of Contents

Related Manuals for Powertrain MX1


Summary of Contents for Powertrain MX1
- Page 1 MOTORIZED TREADMILL – MODEL MX1 INSTRUCTION MANUAL Please read these instructions carefully before use and keep for future reference FOR DOMESTIC INDOOR USE ONLY WARNING: Keep young children away from this machine at all times. Contact with the moving surface may result in severe friction burns.
- Page 2 1. CAUTION To avoid injuries please read this manual carefully before using the treadmill. Before starting any exercise program you should consult your doctor to determine if you have any physical or health conditions which could create a risk to your health and safety, or prevent you from using the equipment properly.
-
Page 3: Safety Notice
2. SAFETY NOTICE Please place the machine on flat ground. It is unsuitable to use the machine in the following situations: o Outdoors. (The machine is specially designed for indoor use only) o Slant ground or slant places on balcony. o Sunlit area or near heater. -
Page 4: Product Specifications
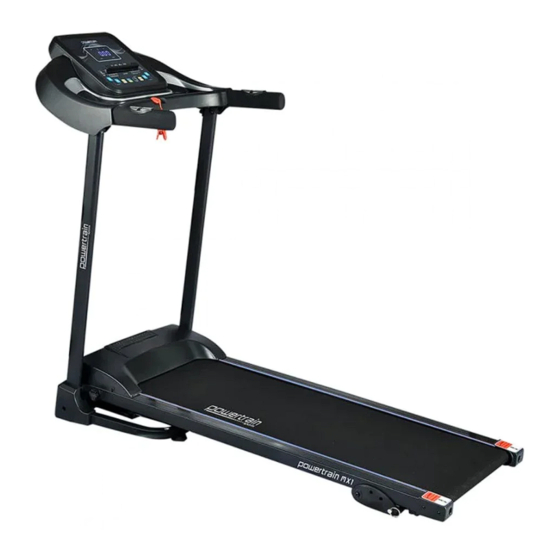
4. PRODUCT SPECIFICATIONS Main parameters and parts list Main technical parameters Parameters Names Description Input power voltage AC 220-50/60Hz Motor power 1.0HP Speed 1.0-10 Km/h Running surface 400 x 1100 mm Packing list Name units Treadmill Unit Accessories Base cover Accessory list Name Name... - Page 5 Combination wrench MP3 cable 5. ASSEMBLY INSTRUCTIONS WARNING: THIS PRODUCT IS HEAVY. ENSURE TWO PEOPLE ARE ASSEMBLING IT AT ALL TIMES During assembly, first insert and moderately tighten screws and when the frame has been fully assembled, inspect all the screws and tighten them completely. ...
- Page 6 Using the combination wrench remove the two M5*14 screws pre-installed on the base. Remove base cover and use the screws M5*14 to lock them to the base. M5*14 Position the safety key in the correct position as shown below. Locate the red color safety key with accessories...
-
Page 7: Using The Treadmill
Folding instructions Folding: When the treadmill is not in use, you can lift the running deck and use plum knob to lock the running deck and base, as shown in diagram A below. Diagram A: Folding the treadmill Diagram B: Unfolding the treadmill Unfolding instructions ... -
Page 8: Program Button
o Disconnecting the safety key will immediately stop the running track and the screen will display “E7”, and the treadmill will emit a beep. o Placing the safety key back on the designated area on the console will clear all data in 2 seconds. ... - Page 9 Volume +/- - When playing music, use these keys to adjust the volume. Automatic program MX1 Treadmill features 12 automatic training programs. Each program is divided into 10 segments and the running time of each segment is evenly distributed.
-
Page 10: Error Codes
Error Codes Error code Description Solution Possible Cause: the communication between the lower controller Erroneous Connection: when the power is on, the and console is blocked, check each joint between the controller and connection between lower console, make sure that each core is fully plugged in. Check the controller and the console is connection line, replace it if is damaged. - Page 11 Maintenance of the Running Board and Belt - Lubrication and Cooling Your treadmill's running board and running belt had been lubricated at the factory. Friction between the running belt and running board has a great impact on the life and performance of your treadmill.
- Page 12 Turn on treadmill and set the speed at 6-8km/hour . If the running belt is shifting to the right, rotate the right adjusting bolt with 1/2 turn clockwise, then rotate the left adjusting bolt with 1/2 turn counter-clockwise. (Diagram A) ...
- Page 13 Warranty and Contact Details Kmate Pty Ltd provides a 12 month warranty for this product when used for domestic purposes. This product is not intended for commercial use and any such use will void all warranty. The benefits of this warranty are provided in addition to other rights and remedies you may have under a law in relation to the goods and services to which this warranty relates.
- Page 14 State & Territory Laws Contact Details Kmate Pty Ltd PO Box 133, Braeside VIC 3195 Email: warranty@klika.com.au Phone: 03 9790 0055 PLEASE CHECK THE LATEST VERSION AT: https://kmate.com.au/MX1 PAGE \* MERGEFORMAT 2...
Need help?
Do you have a question about the MX1 and is the answer not in the manual?
Questions and answers