Table of Contents
Advertisement
Quick Links
Advertisement
Table of Contents

Related Manuals for CAME G2080I


Summary of Contents for CAME G2080I
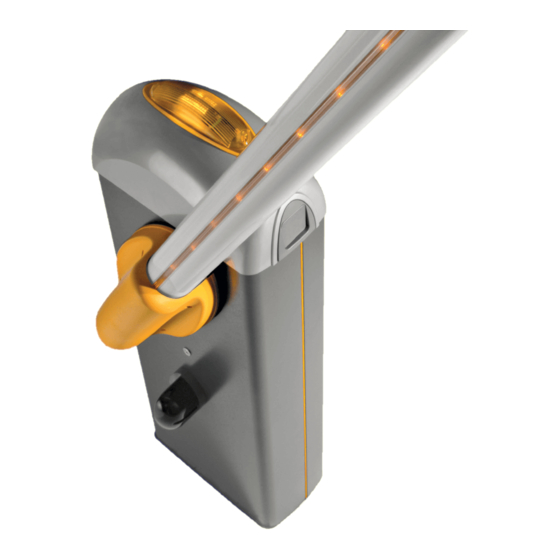
- Page 1 AUTOMATION FOR STREET BARRIERS GARD 8 SERIES INSTALLATION MANUAL G2080 - G2080I...
- Page 2 G2080 - painted galvanized steel automatic barrier with a 24V DC gearmotor and container for board and transformer; G2080I - satin-finish AISI 304 stainless steel automatic barrier with 24V DC gearmotor and container for board and transformer; The GARD 8 automation system is supplied with the following accessories: 001 G02000 - white-painted tubular aluminium rod, 2m (Ø...
-
Page 3: Support Bracket
G02802 - Support for DIR photoelectric cells G02803 - Luminous cord G02807 - Fixed barrier support G02808 - Mobile barrier support G02809 - Adhesive reflector strips CAME CAME G02801 - Flashing dome lamp CAME CAME G02805 - Emergency battery housing support... -
Page 4: Installation
4.4 Size measurements Measurements in mm 5 Installation Installation must be carried out by expert qualified personnel and in full observance of regulations in force. 5.1 Preliminary checks Before proceeding with the installation, it is necessary to: • Make sure the area selected for the mounting of the base and for the unit itself presents no hazards; •... - Page 5 5.3 Cable list and minimun thickness Connections Type of cable Length of cable 1 < 10 m Length of cable 10 < 20 m Length of cable 20 < 30 m 230V 2F power supply 3G x 1,5 mm 3G x 2,5 mm 3G x 4 mm 24V motor power supply 2 x 1 mm...
- Page 6 5.4 Fitting for unit base The following applications are only examples, as the space required for unit installation and the accessories vary depending on dimensions and therefore it is up to the installer to select the best solution. - Prepare a hole to house the fixing base and prepare sheath tubes from the branch pit for the connections.
-
Page 7: Installation Of The Unit
5.5 Installation of the Unit - Open the door with the proper key, remove the top dome and take out the inspection door. - The barrier is designed to be installed on the left of the gateway as seen from inside. Lever arm Transmission - Should installation on the right be... - Page 8 - Position the middle plate between the fitting plate and the Bar beam plate bar-fitting cover, and put in one UNI 5931 M8x20 screw Bar fi tting inter- without tightening it to facilitate bar assembly. mediate plate Bar fi tting cover UNI5931 M8x12 - Insert the bar in the fitting cover and secure it with screws.
- Page 9 - Tighten the anti-shearing protection cover to the bar fitting with UNI6954 Ø3.9x19 screws. UNI6954 Ø3.9x19x12 5.6 Bar balancing - Prior to bar balancing, select a suitable spring depending on the situation at hand. See table below. 400 mm PASSAGE CLEARANCE LAMP (max. 7.60 m) G02040 spring Ø...
- Page 10 - Release the gearmotor and position the bar vertically, and then refasten the gearmotor. - Insert the UNI5739 M12X70 screw into the spring securing bracket and tighten the UNI5588 M12 nut to the screw (1-2). Tighten the screw to spring (2) and the tie rod to the part underneath (3-4).
- Page 11 - Release the gearmotor and manually turn the spring to increase or decrease traction until the bar rests at 45°. - Tighten the blocking nut and refasten the gearmotor. Note: make sure the spring functions properly: - the spring is loose when the bar is in the vertical position (at rest) - the spring is tight when the bar is in the horizontal position (tense).
- Page 12 5.8 End stop adjustment Power up the electric board, carry out a series of steps to make sure of the bar’s correct opening and closing positions, and then, if necessary, proceed to the adjustment of the dampers. Warning! For greater safety and better unit performance, the bar’s opening and closing operations should be carried out with the inspection hatch closed! - Execute the closing operation, adjust the open bar’s position by turning the free damper clockwise...
- Page 13 - After bar opening and closing adjustment, tighten the locking nuts under the dampers. - After making adjustments and settings from the control panel, put the container lid in place and secure with screws. -…place back the inspection door (1) and the upper dome (2). - Lock the door with the key.
-
Page 14: Maintenance
5.9 Manual release of the barrier - Manually raise the bar - Insert the key into the lock and WARNING! The release and block it again by turn it clockwise. procedure may constitute a turning the key counter- hazard for the user when, clockwise. -
Page 15: Demolition And Disposal
UNI EN ISO 14001 standard to ensure environmental protection. Please continue our efforts to protect the environment—which CAME considers one of the cardinal elements in the development of its operational and market strategies—simply by observing brief recommendations as regards disposal: DISPOSAL OF PACKAGING –... - Page 16 CAME UNITED KINGDOM LTD UNIT 3, ORCHARD BUSINESS PARK TOWN STREET, SANDIACRE NOTTINGHAM - NG10 5BP - U.K. Tel 0044 115 9210430 Fax 0044 115 9210431...
Need help?
Do you have a question about the G2080I and is the answer not in the manual?
Questions and answers