CAME GARD 4 SERIES Installation Manual
Operator
for street barriers
Hide thumbs
Also See for GARD 4 SERIES:
- Installation manual (16 pages) ,
- Instruction manual (16 pages)

Related Manuals for CAME GARD 4 SERIES


Summary of Contents for CAME GARD 4 SERIES
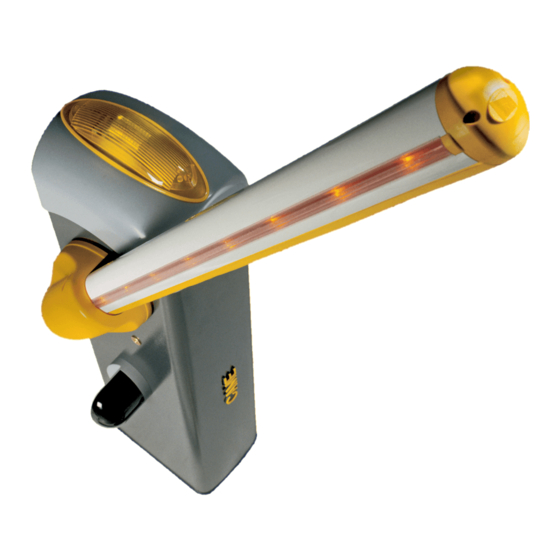
- Page 1 OPERATOR 119 GU55EN FOR STREET BARRIERS INSTALLATION MANUAL G4040Z - G4040IZ English...
-
Page 2: Table Of Contents
Index Legend of symbols p. 4 Intended use and limits to use p. 4 Intended use p. 4 Limits to use p. 4 Legislative references p. 4 Description p. 4 Technical data p. 5 Parts list p. 5 Installation p. 6 Dimensions p. - Page 3 Any other use is to be considered dangerous. La Keep gate-operating are free of any obstacles. Keep the photocells' CAME cancelli automatici s.p.a. is not liable for any damage due range of operation free of vegetation. Do not allow children to play with to improper, errouneous and unreasonable use •...
-
Page 4: Legend Of Symbols
001G02807 For passage width wider than 3.5 m use of the fixed support is mandatory. 001G0465 - 001G02808 Cannot be used together. Important! Make sure that the command and safety equipment and accessories are CAME originals; this will ensure easy installation and maintenance of your system. -
Page 5: Technical Data
G02040 - Balancing spring Ø40 (yellow) G04060 - Balancing spring Ø50 (green) G06080 - Balancing spring Ø55 (red) G0465 - Swing skirt G02802 - Support for DIR photocells G028401 - Luminous cord CAME CAME G02807 - Fixed support CAME CAME G02808 - Swing rest Red refl... -
Page 6: Installation
Dimensions Measurements in mm Installation Installation must be carried by skilled, qualified technicians in accordance with current regulations. Preliminary checks Before beginning to install, do the following: • Check that installing the operator does not create any hazardous situations; Set up a suitable omnipolar cut-off device, with distances greater than 3 mm between contacts, with sectioned power source;... -
Page 7: Type Of Cable And Minimum Thicknesses
Type of cable and minimum thicknesses Type of Cable length Cable length Cable length Connection cable 1 < 10 m 10 < 20 m 20 < 30 m Powered by 230 V AC 3G x 1.5 mm 3G x 2.5 mm 3G x 4 mm FROR CEI Photocell transmitters... -
Page 8: Preparing The Automation Base
Preparing the automation base The following illustrations are just examples, in that the space for securing the operator and accessories depends on the overall measurements. It is up to the installer to choose the most suited solution. - Dig a pit for the anchoring base and set up the required corrugated tubes for the connections coming out of the junction pit. -
Page 9: Installing The Unit
Installing the unit - Remove the two top bolts from the upper dome, insert key into lock and turn counter-clockwise. - Lift up the dome and remove the cabinet hatch. - the barrier is set up to be left- hand (SX) installed. - When installing on the right-hand side (DX), you need to invert the barrier-arm's direction of opening, by doing the following: - remove spring-hooking pin from the transmission arm (1);... - Page 10 - Position the mid-plate and arm-attachment cover using just Note: if installing with the G03750 barrier arm, fi t the G03756 one (M8x20) screw. Leave the creww loosened to facilitate reinforcement. subsequent arm insertion. Attachment plate Mid plate Arm-attachment cover - Insert the arm into the attachment cover and fasten using the M8x20 and M8x21 screws.
-
Page 11: Balancing The Barrier Arm
- Insert the protective anti-shearing casing onto the arm attachment cover and fasten it using the screws. UNI6954 ø3,9x19 Balancing the barrier arm - Before balancing the barrier-arm, check the table below, to see congruences among the chosen spring, any accessories and passage width: SPRING TYPES G02040 Ø... - Page 12 - Release the gearmotor and position the arm vertically, then lock it back into place. - Prepare the spring by tightening the ring-bolt below. Thee screw should then be fi tted onto the lug which is hooked to the transmission arm.
- Page 13 - Attach the ring-bolt to the anchoring bracket release the gearmotor and manually turn the spring to increase or decrease traction. The barrier arm must stabilise at 45°. - Fit the counter nut and block the gearmotor back into place. Note: Check proper working order of the spring: - with barrier arm in vertical position, the spring is not under tension.
-
Page 14: Adjusting The Limit Switches
Adjusting the limit switches N.B.: procedure to carry out after making electrical connections to the control panel. Close the inspection hatch and power up the system. Activate the arm to check whether it is parallel to the road surface when close and at about 89°... - Page 15 - After checking the barrier-arm's opening and closing settings, defi nitively tighten the locking couter-nuts under the bolts. - Once all of the mechanical and electrical installation operations are completed fi t the cover over the control panel, ... - ...replace the inspection hatch and upper dome. - Turn the key clockwise and lock the protective dome using the supplied Ø3.9x13 bolts.
-
Page 16: Control Panel Description
Control panel description Engineered and built entirely by Came Cancelli Automatici S.p.A. - the working time for automatic closing; - the amperometric device's detection sensitivity; The control panel is powered at 230V a.c., with 50/60Hz of maxi- mum frequency. -
Page 17: Main Component Parts
Main component parts Accessories fuse 10 - Code memorising button 2 - Line fuse 11 - Warning LED for radio code/automatic closing 3 - Line control unit 12 - Adjusting connectors for speed and slow-downs 4 - Motor fuse 13 - Connectors for connecting the (LB38) battery charger 5 - Acessories terminals 14 - Selection jumper for command type for button on 2-7 6 - Radio-requency card socket (see table on p. - Page 18 Power supply Terminals for powering accessories: - normally at 24V A.C; - when emergency batteries are operating; Overall allowed power: 40 W Power supply 230V (a..C.)Frequency 50/60 Hz Eyelet terminal with screw and washer for ground connection Command devices Stop button (N.C. contact) - Button to stop barrier arm Excludes automatic closing. To resu- me movement press the command button or trasmitter key.
-
Page 19: Adjusting Manoeuvring And Braking Speeds
Warning devices Flashing dome light and/ir luminous cord (Contact rating: 24 V - 32 W Max.) - Flashes while door opens and closes. Flashing light for open barrier Contact rated for: 24 V - 3 W Max.) - Signals that barrier-arm is raised, and switches of when the barrier-arm is lowered. -
Page 20: Selecting Functions
Selecting functions Default setting 1 ON - Automatic closing - The automatic closing timer activates at the closing endpoint. The preset time is adjustabel, but it's in any case subject to any safety device intervention and does not activated after a Total Stop or in case of power failure (1 OFF - deactivated);... -
Page 21: Activating The Radio Command
Activating the radio command Antenna Connect RG58 antenna cable to the apposite terminals. Radio frequency card Plug in the radio-frequency card onto the electronic board AFTER CUTTING OFF THE MAIN POWER SUPPLY (and disconnecting the emer- gency batteries). N.B.: The electronic card recognises the radio-frequency card only when it is powered up. AF card Frequency-MHz Card... - Page 22 see instructions on box TOUCH TOP-432A • TOP-434A TOP- TOP-432NA • TOP-434NA TCH 4024 • TCH 4048 302A • TOP-304A TOP-862NA • TOP-864NA TOP-432S TWIN T432 • T434 • T438 T132 • T134 • T138 TWIN 2 • TWIN 4 TAM-432SA T152 •...
-
Page 23: Connecting Two Barriers Joined By A Single Command
Connecting two barriers joined by a single command - Establish which barrier will be Master and which the Slave . - command card COMMAND CARD MA- Master, all I con- STER nection (electrical connections), proce- dure v installation " for command a. -
Page 24: Safety Instructions
Safety instructions Important general safety instructions This product is only intended to be used for the purpose it was designed. Any other use is therefore improper and dangerous. The ma- nufacturer is not liable for any damage caused by improper, wrongful or unreasonable use. Stay away from working mechanical parts. - Page 25 Periodic maintenance log to be done by users (every 6 months) Date Notes Signature...
-
Page 26: Extraordinary Maintenance
Extraordinary maintenance The following table is used to log extraordinary maintenance, repair and improvement jobs done by the specialised external firms. N.B. All extraordinary maintenance jobs must be carried out by skilled technicians. Registro manutenzione straordinaria Timbro installatore Nome operatore Data intervento Firma tecnico Firma committente... -
Page 27: Dismantling And Disposal
UNI EN ISO 14001 standard to ensure environmental protection. Please help us to safeguard the environment. At CAME we believe this to be one of the fundamentals in its market operations and deve- lopment strategies. Just follow these short disposal instructions:... -
Page 28: Ce Compliance Statement
CE Compliance statement... - Page 30 (+34) 91 52 85 009 127273, Moscow Moscow (+34) 91 46 85 442 (+7) 495 739 00 69 (+7) 495 739 00 69 (ext. 226) CAME United Kingdom Ltd. CAME United Kingdom Ltd. GREAT BRITAIN PORTUGAL CAME Portugal CAME Portugal...
Need help?
Do you have a question about the GARD 4 SERIES and is the answer not in the manual?
Questions and answers