Table of Contents
Advertisement
Quick Links
Advertisement
Table of Contents

Subscribe to Our Youtube Channel
Related Manuals for ADJ MOD QA60


Summary of Contents for ADJ MOD QA60
- Page 1 MOD QA60 User Instructions...
- Page 2 All non-ADJ Products, LLC brands and product names are trademarks or registered trademarks of their respective companies. ADJ Products, LLC and all affiliated companies hereby disclaim any and all liabilities for property, equipment, building, and electrical damages, injuries to any persons, and direct or indirect economic...
-
Page 3: Table Of Contents
Operating Instructions Master-Slave Configuration UC IR/Airstream IR Control Dimmer Curve Chart Dimensional Drawings Housing Change / Frost Filter Power Linking / Trouble Shooting / Cleaning Warranty Technical Specifications ADJ Products, LLC - www.adj.com - MOD QA60 User Manual Page 2... -
Page 4: Mod Qa60
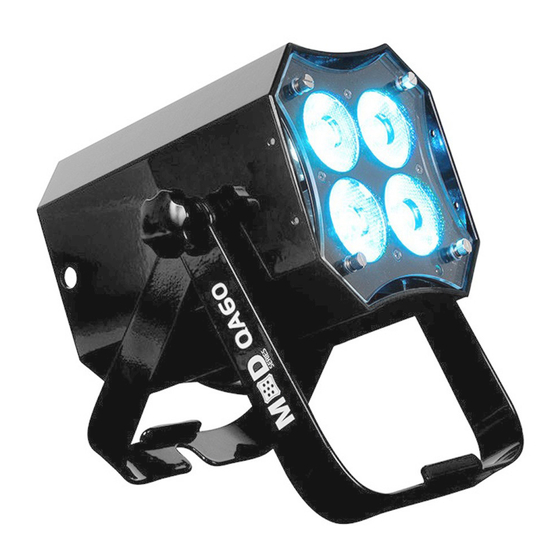
Introduction: The ADJ MOD QA60 is a DMX intelligent, high powered LED par fixture. This fixture can be used in a stand alone set up or connected in a Master/Slave set up. The MOD QA60 has seven operating modes: Sound Active mode, Auto Run mode, Color Change mode, Color Fade mode, RGBA Dimmer mode, Static Color mode, and DMX controlled. -
Page 5: Features / Warranty Registration / Installation
MOD QA60 Warranty Registration The MOD QA60 carries a 2 year limited warranty. Please fill out the enclosed warranty card to validate your purchase. All returned service items whether under warranty or not, must be freight pre-paid and accompany a return authorization (R.A.) number. The R.A. number must be clearly written on the outside of the return package. -
Page 6: Safety Precautions
C. The fixture has been exposed to rain or water. D. The fixture does not appear to operate normally or exhibits a marked change in performance. E. The fixture has fallen and/or subjected to extreme handling. ADJ Products, LLC - www.adj.com - MOD QA60 User Manual Page 5... -
Page 7: Control Panel Layout
DOWN BUTTON SET UP BUTTON DOWN SET UP POWER IN DMX IN DMX IN DMX IN POWER IN DMX OUT POWER OUT POWER OUT DMX OUT DMX OUT ADJ Products, LLC - www.adj.com - MOD QA60 User Manual Page 6... -
Page 8: Dmx Set Up
CONTROL SOUND CONTROL SOUND modes. The DMX address is set on the rear panel of the MOD QA60. Your unit and INPUT INPUT your DMX controller require a standard 3-pin XLR connector for data input and data output (Figure 1). We recommend Accu-Cable DMX cables. If you are making your own cables, be sure to use standard 110-120 Ohm shielded cable (This cable may be purchased at almost all pro lighting stores). - Page 9 Pin 1 Data Compliment (- signal) Pin 2 Pin 2 Data True (+ signal) Pin 3 Pin 3 Not Used Do Not Use Not Used Do Not Use ADJ Products, LLC - www.adj.com - MOD QA60 User Manual Page 8...
-
Page 10: Dmx Addressing
In the case of the MOD QA60, when in 10 Channel you should set the starting DMX address of the first unit to 1, the second unit to 11 (10 + 1), the third unit to 21 (11 + 10), and so on. (See chart below for more details.) - Page 11 0 - 255 0% - 100% BLUE 0 - 255 0% - 100% AMBER 0 - 255 0% - 100% MASTER DIMMER 0 - 255 0% - 100% ADJ Products, LLC - www.adj.com - MOD QA60 User Manual Page 10...
-
Page 12: Dmx Channel Modes
PULSE STROBING SLOW - FAST 160 - 191 LED ON 192 - 223 RANDOM STROBING SLOW - FAST 224 - 255 LED ON MASTER DIMMER 0 - 255 0% - 100% ADJ Products, LLC - www.adj.com - MOD QA60 User Manual Page 11... - Page 13 COLOR MACRO MODE 103 - 153 COLOR CHANGE MODE 154 - 204 COLOR FADE MODE 205 - 255 SOUND ACTIVE MODE 9 CHANNEL MODE IS CONTINUED ON THE NEXT PAGE ADJ Products, LLC - www.adj.com - MOD QA60 User Manual Page 12...
- Page 14 176 - 191 COLOR FADE 12 192 - 207 COLOR FADE 13 208 - 223 COLOR FADE 14 224 - 239 COLOR FADE 15 240 - 255 COLOR FADE 16 ADJ Products, LLC - www.adj.com - MOD QA60 User Manual Page 13...
- Page 15 Channel 9 will control the color fade speed. When Channel 7 is between the values of 205-255, Channel 8 is in Sound Active Mode, and Channel 9 will control the sound sensitivity. ADJ Products, LLC - www.adj.com - MOD QA60 User Manual Page 14...
- Page 16 COLOR MACRO MODE 103 - 153 COLOR CHANGE MODE 154 - 204 COLOR FADE MODE 205 - 255 SOUND ACTIVE MODE 10 CHANNEL MODE IS CONTINUED ON THE NEXT PAGE ADJ Products, LLC - www.adj.com - MOD QA60 User Manual Page 15...
- Page 17 176 - 191 COLOR FADE 12 192 - 207 COLOR FADE 13 208 - 223 COLOR FADE 14 224 - 239 COLOR FADE 15 240 - 255 COLOR FADE 16 ADJ Products, LLC - www.adj.com - MOD QA60 User Manual Page 16...
- Page 18 Channel 9 will control the color fade speed. When Channel 7 is between the values of 205-255, Channel 8 is in Sound Active Mode, and Channel 9 will control the sound sensitivity. ADJ Products, LLC - www.adj.com - MOD QA60 User Manual Page 17...
- Page 19 89-92 Color56 Color24 93-96 Color57 Color25 97-100 Color58 Color26 101-104 Color59 Color27 105-108 Color60 Color28 109-112 Color61 Color29 113-116 Color62 Color30 117-120 Color63 Color31 121-124 Color64 Color32 125-128 ADJ Products, LLC - www.adj.com - MOD QA60 User Manual Page 18...
- Page 20 Color51 201-204 Color52 205-208 Color53 209-212 Color54 213-216 Color55 217-220 Color56 221-224 Color57 225-228 Color58 229-232 Color59 233-236 Color60 237-240 Color61 241-244 Color62 245-248 Color63 249-252 Color64 253-255 ADJ Products, LLC - www.adj.com - MOD QA60 User Manual Page 19...
-
Page 21: System Menu
LCD backlight will be off after 20 seconds OPTION IR:ON IR remote function on OPTION IR:OFF IR remote function off OPTION SYSRESET Initialize the unit at the extra factory setting ADJ Products, LLC - www.adj.com - MOD QA60 User Manual Page 20... -
Page 22: Operating Instructions
Operating through a DMX controller gives the user the freedom to create their own programs tailored to their own individual needs. The MOD QA60 has 5 DMX modes: 4 channel mode, 5 channel mode, 6 channel mode, 9 channel mode, and 10 channel mode. See pages 10-17 for each mode’s DMX traits. - Page 23 3. Press the SET UP button and “SENS: XX” will be displayed. Use the UP and DOWN buttons to adjust the sound sensitivity. The sensitivity can be adjusted between “00” (least sensitive) to “08” (most sensitive). ADJ Products, LLC - www.adj.com - MOD QA60 User Manual Page 22...
- Page 24 • “MANUA” (Manual) - if the DMX signal is lost or interrupted, the unit will automatically go into the last color set up in manual dimmer mode. 3. Press the UP or DOWN buttons to scroll through and select your desired DMX state. ADJ Products, LLC - www.adj.com - MOD QA60 User Manual Page 23...
-
Page 25: Master-Slave Configuration
ADJ UC IR & Airstream: This function is used to activate and deactivate the infared sensor. When this function is activated the unit can be controlled using the ADJ UC IR or Airstream IR app. Please see page 25 for remote controls and functions. -
Page 26: Uc Ir/Airstream Ir Control
The UC IR infrared remote gives you control of various functions (See below). To control the fixture you must aim the remote at the front of the fixture and be no more than 30 feet away. To use the ADJ UC IR you must first activate the fixtures infrared sensor, to activate the sensor please see the instructions on page 24. -
Page 27: Dimmer Curve Chart
Down Time (ms) Rise Time (ms) Down Time (ms) Standard (default) Stage 1100 1540 1660 1180 1520 1860 1940 Architectural 1380 1730 2040 2120 Theatre 1580 1940 2230 2280 ADJ Products, LLC - www.adj.com - MOD QA60 User Manual Page 26... -
Page 28: Dimensional Drawings
MOD QA60 Dimensional Drawings 7.71”/196mm 5.5”/140mm ADJ Products, LLC - www.adj.com - MOD QA60 User Manual Page 27... -
Page 29: Housing Change / Frost Filter
MOD QA60 Frost Filter The MOD QA60 comes with 3 interchangeable frost filters. To install the frost filter unscrew the four thumb screws holding lens in place. Remove the lens and install the filter inside the unit. Line up the thumb screw holes on the edges of filter with screw holes of the unit. -
Page 30: Power Linking / Trouble Shooting / Cleaning
The maximum that can be connected is 10 fixtures @ 120V and 18 fixtures @ 240V. After the maximum connected fixtures you will need to use a new power outlet. NOTE: USE CAUTION WHEN POWER LINKING OTHER FIXTURES TO THE MOD QA60 AS THE POWER CONSUMPTION OF OTHER LIGHTING FIXTURES WILL VARY! -
Page 31: Warranty
ADJ Products, LLC concludes, after inspection, affects the reliability of the product; if the product has been repaired or serviced by anyone other than the ADJ Products, LLC factory unless prior written authorization was issued to purchaser by ADJ Products, LLC; if the product is damaged because not properly maintained as set forth in the instruction manual. -
Page 32: Technical Specifications
Warranty: 2 Year (730 days) Please Note: Specifications and improvements in the design of this unit and this manual are subject to change without any prior written notice. ADJ Products, LLC - www.adj.com - MOD QA60 User Manual Page 31...
Need help?
Do you have a question about the MOD QA60 and is the answer not in the manual?
Questions and answers