Raymarine C120 New Features Manual
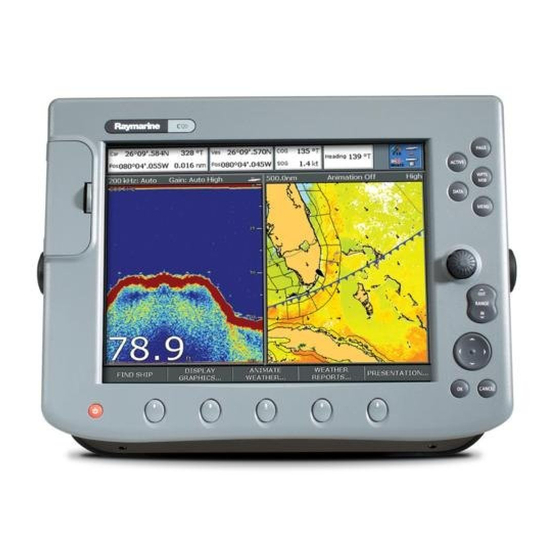
C-series display
Hide thumbs
Also See for C120:
- Installation manual (54 pages) ,
- Operating manual (20 pages) ,
- Reference manual (244 pages)
Table of Contents
Advertisement
Advertisement
Table of Contents

Related Manuals for Raymarine C120


Summary of Contents for Raymarine C120
-
Page 1: New Features
C-Series Display New Features Document number: 81298-1 Date: January 2007... -
Page 2: Trademarks And Registered Trademarks
Trademarks and registered trademarks Autohelm, HSB, Raymarine, RayTech Navigator, Sail Pilot, SeaTalk and Sportpilot are registered trademarks of Raymarine Limited. Apelco is a registered trademark of Raymarine Holdings Limited (registered in all major marketing territories). AST, Autoadapt, Auto GST, Autoseastate, Autotrim, Bidata, Marine Intelligence, Maxiview, On Board, Raychart, Raynav, Raypilot, Raystar, ST40, ST60, Seaclutter, Smart Route, Tridata and Waypoint Navigation are trademarks of Raymarine Limited. -
Page 3: Table Of Contents
Contents Chapter 1: New Features of the C-Series Display Unit ...1 1.1 Navionics support ... 1 1.2 Chart application ... 1 1.3 Graphical data ... 1 1.4 Autopilot control ... 1 1.5 Weather (US only) ... 2 1.6 Sirius Audio (US only) ... 2 Chapter 2: Chart Application Updates ...3 2.1 Animated tides and currents ... - Page 4 4.2 The autopilot control screen ... 13 4.3 Waypoint arrival ... 14 …when there are more waypoints in your route ... 14 …when you reach the last waypoint in your route ... 14 Chapter 5: Weather (US only) ...17 5.1 Overview ... 17 5.2 Disclaimer ...
- Page 5 Displaying marine watchboxes ... 30 Displaying watchbox data ... 30 5.11 Weather application setup ... 31 Selecting the Weather Setup Menu ... 31 Weather Setup options ... 31 Showing/hiding marine watchboxes and zone boundaries ... 31 5.12 Troubleshooting ... 32 Chapter 6: Sirius Audio (US only) ...33 6.1 To start using Sirius Radio ...
- Page 6 C-Series New Features...
-
Page 7: Important Information
Important Information Intended use The C-Series display unit can be used in GPS-based or marine radar-based navigation systems on non-IMO/SOLAS class leisure vessels or small workboats. This handbook tells you how to operate and maintain the C-Series display effectively. For information on system integration and how to install the unit, refer to the C-Series Installation Guide supplied with the display. - Page 8 The C-Series and its charts do not therefore exclude the user from carrying the required official charts and documents. Raymarine does not warrant that this product is error-free or that it is compatible with products manufactured by any person or entity other than Raymarine.
-
Page 9: Technical Accuracy
This product uses digital chart data, bathymetric data, three-dimensional and photographic imagery, and electronic information from the Global Positioning System (GPS) which may contain errors. Raymarine does not warrant the accuracy of such information and you are advised that errors in such information may cause the product to malfunction. - Page 10 Waste Electrical and Electronic Equipment (WEEE) Directive The WEEE Directive requires the recycling of waste electrical and electronic equipment. Whilst the WEEE Directive does not apply to some of Raymarine’s products, we support its requirements as part of our environmental policy and we ask you to be aware of how you should dispose of this product.
-
Page 11: Chapter 1: New Features Of The C-Series Display Unit
You can now set the display unit to show a compass bar along the top of the screen, and configure it to display various engine data. 1.4 Autopilot control If you have a Raymarine autopilot and pilot head installed, you can access some of its functions from the C-Series display. -
Page 12: Weather (Us Only)
The display unit does not replace the pilot head: never use autopilot functions with- Note: out a pilot head installed. 1.5 Weather (US only) The following weather features require the SR50 Sirius Receiver and separate subscrip- Note: tion. The weather application superimposes historical, live and forecasted weather graphics on a world map. -
Page 13: Chapter 2: Chart Application Updates
Chapter 2: Chart Application Updates Updates to the Chart application allow you to view tide and current animations for a 24-hour period, set the display unit to overlay range rings on the chart view, and show bathymetric data included on Navionics combined data cards. This chapter tells you how to make use of the new Chart application features. -
Page 14: Controlling The Animation
Press the ANIMATION PLAY/PAUSE softkey to start animation. Animation time and date are displayed on the status bar; the animation starts from the current time. Controlling the animation When you open the Tide/Current Animation screen, the toolbar provides softkeys to stop and start the animation;... -
Page 15: Range Rings
To set the step interval The Set Time Interval softkey gives you control over the Step Forward and Step Back functions. 1. If the animation is playing, press PAUSE. 2. Press the SET TIME INTERVAL softkey. This displays a slider with the current time interval shown. Use the rotary controller to adjust it (within the range of 15 to 120 minutes). -
Page 16: Navionics Combined Data Cards
C-Series Display New Features 3. Select RANGE RINGS ON/OFF. 2.3 Navionics combined data cards Some Navionics data cards provide detailed bathymetric information in addition to standard chart information. You can choose between the standard chart view, or the view displaying bathymetric contours. To display bathymetric information In the Chart application: 1. -
Page 17: Chapter 3: Graphical Data
Chapter 3: Graphical Data The C-Series now gives you the option to display some navigation and engine data graphically. You can configure the unit to display a compass bar, and to show additional engine and genset (engine-driven electricity generator) data. 3.1 Compass bar The compass bar gives you a continuous readout centred on your current heading or course over ground (COG). -
Page 18: Compass Bar Setup
Note: When the compass bar is displayed the transducer icons remain visible in the top-right section of the screen. Compass bar setup The compass bar is set to open in heading mode. To change this setting, press the MENU button and go to the Databar Setup menu where you can select either Heading or COG. -
Page 19: To Change The Number Of Gensets
For a list of the data you can display for each genset, see Options Table 3-2: Genset Data Options Data Speed Total hours Coolant temperature Fuel temperature Oil pressure Fuel rate Battery voltage Average line voltage Average AC frequency Status Load To change the number of gensets The default number of gensets is one. - Page 20 C-Series Display New Features...
-
Page 21: Chapter 4: Autopilot Control
Chapter 4: Autopilot Control If you have a Raymarine autopilot installed, you can access some of its functions from the C-Series display unit. WARNING:The autopilot functions available on the C-Series display unit do not replace the autopilot control head. You must have a pilot control head installed before you enable or engage the autopilot. -
Page 22: To Engage The Autopilot From The Setup Menu
When the autopilot is engaged, or you hotspot an active route or waypoint, the toolbar gives you the following options: Table 4-1: Active Navigation Toolbar STOP GOTO/FOLLOW ADVANCE WAYPOINT You can only perform individual advance waypoint operations: it is not possible to per- Note: form one track command for multiple advance waypoints. -
Page 23: Autopilot Status Indicator
Autopilot Status Indicator An indicator in the top-right corner of the display unit tells you the current status of the autopilot. Table 4-2: Autopilot status indicators Icon 4.2 The autopilot control screen The Pilot Control pop-up screen is displayed when you engage the autopilot in track mode, at waypoint arrival, or when you select it from the Setup Menu. -
Page 24: Waypoint Arrival
For a list of the softkeys available while the Autopilot Control screen is open, see 4-3, Autopilot Control Toolbar Table 4-3: Autopilot Control Toolbar AUTO ENGAGE PILOT -TRACK- STANDBY To go back to the Active Navigation screen without activating AUTO or TRACK, press OK or CANCEL. - Page 25 Chapter 4: Autopilot Control Press STANDBY to silence the alarm and disengage the autopilot. Press AUTO to silence the alarm and continue on the current locked heading with autopilot engaged.
- Page 26 C-Series Display New Features...
-
Page 27: Chapter 5: Weather (Us Only)
By using this service, you release and waive any claims against Raymarine, Sirius Satellite Radio Inc., WSI, and Navcast Incorporated with regard to this service. -
Page 28: Pre-Requisites For Using The Weather Application
Pre-requisites for using the weather application For your C-Series to display weather data, the system must be connected to an SR50 Sirius Receiver which is supplying the appropriate data. For your vessel to be displayed and for weather reports to be available at your position, you need a fix for your boat’s position and be within US coastal waters. -
Page 29: Moving Around The Weather Map
Range 2400 nm FIND SHIP 5.5 Moving around the weather map When you open the Weather application, a world map is displayed. Use the cursor to move around the map and the range button to zoom in and out. For further details, see the C-Series Reference Manual. -
Page 30: Weather Graphics
5.7 Weather graphics This section summarizes the weather symbols used within the weather application. For details of each weather type, please refer to the appropriate section. Weather symbols Storm cast Lightning Surface observation stations (pink) Storm Tracks symbols Hurricane (Category 1-5) Surface pressure High / low pressure (blue &... -
Page 31: Precipitation (Nowrad)
Precipitation (NOWRad) NOWRad displays the type and level of precipitation: Color code Light green Medium green Dark green Yellow Orange Light red Dark red Light Blue Dark blue Light pink Dark pink Storm Cast Storm cast arrows indicate the direction and speed of a storm. -
Page 32: Sea Surface Temperature (Sst)
Sea surface temperature (SST) The temperature range of the sea surface is indicated by shading. This shading ranges through blue/green/yellow/ orange/red. For details of how to view the sea surface temperature at a specific point, see page 26 Canadian radar Canadian radar shows the intensity of precipitation for Canada. -
Page 33: Lightning
Tropical storm data Tropical storm data can be displayed for a selected storm. This includes: • The storm’s name, type, date and time. • The position, direction and speed of travel of the storm. • The pressure and maximum wind speed and gusts. To display tropical storm data: OBJECT INFO Hurricane Category 2... -
Page 34: City Forecasts
To identify the station and display more associated weather data: OBJECT INFO KSUT OK for more info Move cursor over station graphic You can now select detailed live weather data for the selected observation station, if required: Station Data Time 02:36PM Wind Speed 19.4kt... -
Page 35: Wind
Wind This option displays the current wind direction and magnitude. You can choose (via the Weather Setup Menu) to display the wind symbol as either an arrow or a wind barb. Wind arrows give an indication of wind speed - the larger the arrow the stronger the wind. -
Page 36: Surface Pressure
Surface pressure This option shows surface pressure data using standard meteorological symbols: High pressure (blue) Stationary front (red-blue) Viewing data at a particular location When required you can display the sea temperature, wind speed and direction, wave height, precipitation intensity and type for a particular location. This also shows the marine zone at the cursor position: Move cursor to required... -
Page 37: Running The Animation
Running the animation Once you have set the animation type (see previous section) you can run the animation feature: The status bar indicates the time-frame displayed. The weather radar history provides up to eight images of data covering the last two hours, at 15-minute intervals. If at any time you need to pause the animation, for instance to examine the displayed weather for a particular time frame, press PAUSE. -
Page 38: Marine Warnings
Marine warnings To display a report for the current warnings (US coastal or near shore): 1. Select the MARINE WARNINGS option: WEATHER REPORTS... 2. Display the marine warnings for the zone around your cursor or boat: FORECAST AT Toggle to required report position Marine zone forecasts These forecasts cover:... -
Page 39: Watchbox Warnings
5.10 Watchbox warnings To display available watchbox warnings: WEATHER REPORTS... Watchbox warning alerts When a tornado or thunderstorm warning is received, the system will generate a watchbox alert: Use the trackpad or rotary control to scroll through the report as necessary. You can set the range for how close to your current position the watchbox must be to trigger the watchbox alert. -
Page 40: Displaying Marine Watchboxes
Displaying marine watchboxes When the marine watchboxes feature is set to ON (default), any regions for which a watchbox is valid are highlighted on the weather map as a red polygon. To show/hide watchboxes: Displaying watchbox data To display the data relating to a particular watchbox: 1. -
Page 41: Weather Application Setup
By default, the weather application displays marine zone boundaries and marine watchboxes. If required, you can hide these options: Setup Weather Setup Menu... Sirius Weather User ID 005458747775 GPS Setup... Wind Symbol Compass Setup... Marine Watchbox Alerts Highlight Weather Setup menu... -
Page 42: Troubleshooting
5.12 Troubleshooting Problem Boat symbol not displayed FIND SHIP soft key greyed-out Boat symbol drawn as a solid circle ‘No Connection’ message is displayed in the status MARINE ZONES SHOW PRESENTATION WATCHBOX Toggle as required HIDE Reason No position fix No position fix No heading or COG available No signal received from SR50;... -
Page 43: Chapter 6: Sirius Audio (Us Only)
Chapter 6: Sirius Audio (US only) If you have a Sirius data receiver installed, you can use the C-Series display unit to control satellite radio broadcasts. Refer to the SR50 documentation for installation information. The C-Series gives you access to basic and advanced audio functions. As well as listening to radio broadcasts and browsing or scanning channels, you can set up parental locks to limit access to selected channels and alerts to tell you when a favourite song is being played. -
Page 44: Tuning To A Channel
The softkeys give you access to the functions outlined in Toolbar Table 6-1: Sirius Audio Toolbar MUTE ON/OFF PRESETS… SETUP CHANNELS… ALERTS… BROWSE… 6.2 Tuning to a channel From the Sirius Control screen, you tune to channels using the trackpad on the C-Series Display (or you can enter preset numbers directly using the alphanumeric keypad if you have one). -
Page 45: Filtering Categories From The Browse
Filtering categories from the browse This feature allows you to choose a category from which to browse channels; other categories are excluded from the browse. To filter categories 1. On the Browse screen, press the FILTER BY softkey. 2. Press the SELECT CATEGORY softkey. 3. -
Page 46: Presets
6.6 Presets You can assign up to 18 channels to presets to make tuning, scanning and browsing easier. To assign a channel to a preset, use the PRESETS softkey from the main control screen or the EDIT PRESETS softkey from any of the following screens: •... -
Page 47: To Enable Blocking
To enable blocking On the Sirius Radio Control screen: 1. Press the SETUP CHANNELS softkey. 2. Press the PARENTAL LOCK ON/OFF softkey so that ON is highlighted. To set up a password On the Sirius Radio Control screen: 1. Press the SETUP CHANNELS softkey. 2. -
Page 48: To Enter A Password
To enter a password If you select a blocked channel from the channel list or want to block a channel when the parental lock is on, you will be asked to enter the password. 1. Use the rotary control or trackpad to enter the password in the entry field. 2. -
Page 49: Appendix A:list Of Abbreviations
Appendix A:List of Abbreviations Automatic Identification System Alarm °C Degrees Centigrade °F Degrees Farenheit Amperes Auto Automatic Category CCFL Cold Cathode Fluorescent Lamp Course Deviation Indicator Course Over Ground C-Up Course up orientation Closest Point of Approach Direct Current Digital Selective Calling Digital Sounder Module Electronic Bearing Line Electromagnetic Compatibility... - Page 50 Channel TCPA Time to Closest Point of True motion Time To Go Time Variable Gain Transmit Universal Time Constant Velocity Made Good Variable Range Marker WPT/ Waypoint/Waypoints Cross Track Error...
-
Page 51: Appendix B: List Of Cursor Labels
Appendix B: List of cursor labels Label MARPA TIDE VRM/EBL WIND Feature Ruler line AIS target Course Over Ground vector centre of radar Floating EBL/VRM Guard zone Heading vector MARPA target Man Over Board marker Vessel’s position Route leg Ship’s Heading Marker Tide indicator VRM and EBL, 1 or 2 Wind indicator... - Page 52 C-Series Display New Features...
- Page 53 Abbreviations 39 Alerts watchbox warnings 29 cancelling 29 Animation – tides and currents 3 weather graphics 26 running 26 setting up 26 – Autopilot control 11 disengaging 12 enabling 11 engaging 11 reaching waypoints 14 Canadian radar 22 City forecasts 24 Compass bar 7 Display weather application 18...
- Page 54 Wave height 25 at particular location 26 Weather adding application 18 animated graphic running 26 setting up 26 animated graphics 26 display 18 forecasts city 24 marine zone 28 lightning 23 marine alerts 27 zone forecasts 28 moving around map 19 NOWRad 20 overview 17 pre-requisites 17...
Need help?
Do you have a question about the C120 and is the answer not in the manual?
Questions and answers
Hello I bought a new to me boat with Raymarine E120 Chart plotter. A watch box warning keeps popping up. How do I remove it?