
Subscribe to Our Youtube Channel
Related Manuals for Harman AMX CTC-1402TX


Summary of Contents for Harman AMX CTC-1402TX
- Page 1 All manuals and user guides at all-guides.com USER MANUAL VERSION: V1.0.0 CTC-1402 Connectivity and Transport Kit - Conferencing A V FOR AN IT WORLD ®...
-
Page 2: Important Safety Instructions
All manuals and user guides at all-guides.com IMPORTANT SAFETY INSTRUCTIONS READ these instructions. KEEP these instructions. HEED all warnings. FOLLOW all instructions. DO NOT use this apparatus near water. CLEAN ONLY with dry cloth. DO NOT block any ventilation openings. Install in accordance with the manufacturer’s instructions. DO NOT install near any heat sources such as radiators, heat registers, stoves, or other apparatus (including amplifiers) that produce heat. - Page 3 All manuals and user guides at all-guides.com ESD WARNING To avoid ESD (Electrostatic Discharge) damage to sensitive components, make sure you are properly grounded before touching any internal materials. When working with any equipment manufactured with electronic devices, proper ESD grounding procedures must be followed to make sure people, products, and tools are as free of static charges as possible.
-
Page 4: Table Of Contents
All manuals and user guides at all-guides.com Table of Contents Important Safety Instructions ....................2 Overview ........................6 Features ........................6 Package Contents .......................6 Specifications .......................7 Transmitter Front Panel Description ................ 10 Transmitter Rear Panel Description................12 Receiver Front Panel Description ................13 Receiver Rear Panel Description ................ - Page 5 All manuals and user guides at all-guides.com HDCP .......................... 31 EDID ...........................32 Display ........................32 RS232 Setting ......................32 Relay ...........................33 Audio Volume ......................34 Resolution ........................34 Network ........................35 System ........................36 ICSP Parameter ......................36 Login Password ......................36 TELNET/SSH Access ....................37 TELNET Account ......................
-
Page 6: Overview
The source device with USB-B or connected with USB-C will be controlled by the USB device via video auto-detection technology • Control or upgrade via Harman NetLinx studio, Control of 3rd party devices via serial port of the CTC-1402 • Allows control of connected displays On/Off via CEC by using NetLinx studio or front panel buttons •... -
Page 7: Specifications
All manuals and user guides at all-guides.com Specifications Transmitter Technical Input 1 x HDMI IN 1 x DisplayPort IN 1 x USB-C IN 1 x VGA IN 1 x Audio IN (followed with VGA IN) Input Signal Type HDMI with 4K@60Hz 4:4:4 8bit, HDCP 2.2; DP/USB-C : DP 1.2a Input Resolution HDMI Input Resolution supported:... - Page 8 All manuals and user guides at all-guides.com Output Signal Type HDMI with 4k@60Hz 4:4:4 8-bit HDBT 2.0 Video Impedance 100 Ω Audio Format PCM 2.0 Support-ed General Operating 0°C to 50°C (32°F to 125.6°F) Temperature Storage Temperature -10°C to 60°C (14°F to 140°F) Humidity 5% to 85%, non-condensing ESD Protection...
- Page 9 All manuals and user guides at all-guides.com Power Supply DC12V 3A Power Consumption 2K: 22.8W (Maximum) 4K: 25.36W Device Dimension 220mm x 42mm x 160mm /8.66’’ x 1.65’’ x 6.30’’ (W x H x D) Product Weight 0.95kg/2.09lb ESD Protection Human-body Model: ±10kV(Air-gap 0.97kg/2.14lb...
-
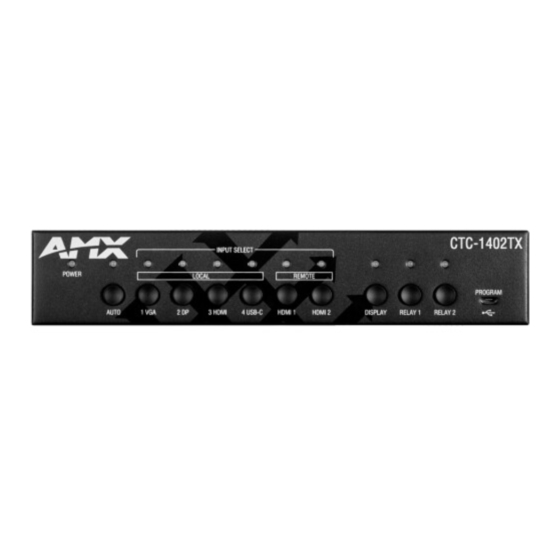
Page 10: Transmitter Front Panel Description
All manuals and user guides at all-guides.com Transmitter Front Panel Description Name Description POWER LED On: The CTC-1402 TX is powered on. Off: The CTC-1402 TX is powered off. (Green) Auto Switch Button: Press to enable/disable auto switching function. Auto LED (Blue): LED is located on the top of the button. - Page 11 All manuals and user guides at all-guides.com Name Description HDMI 2 (RX) Button: press to select RX HDMI IN 2 as input. HDMI 2 LED: LED is located on the top of the button. • Green: the input has signal and is selected. •...
-
Page 12: Transmitter Rear Panel Description
All manuals and user guides at all-guides.com Transmitter Rear Panel Description Name Description VGA IN 1 Connect to the VGA source. AUDIO IN 1 Audio input, embedded with the VGA source. DP IN 2 Connect to the DisplayPort source. HDMI IN 3 Connect to the HDMI source. -
Page 13: Receiver Front Panel Description
All manuals and user guides at all-guides.com Receiver Front Panel Description Name Description On: The CTC-1402 RX is powered on. POWER LED Off: The CTC-1402 RX is powered off. (Green) Auto Switch Button: Press to Enable/Disable auto switching function. Auto LED: LED is located on the top of the button. -
Page 14: Receiver Rear Panel Description
All manuals and user guides at all-guides.com Receiver Rear Panel Description Name Description HDBT IN Connect to the CTC-1402 transmitter via a shielded Cat 6A/7 cable. HDMI IN 1-2 Connect to an HDMI sources. HDMI OUT Connect to an HDMI display. AUDIO OUT Connect to the audio system with the Phoenix Connector. -
Page 15: Pinout Information
All manuals and user guides at all-guides.com Pinout Information The following figures show the pinouts of the Phoenix Connectors. RS232 Connects to an RS232-enabled device with the 3-pole, 3.5mm captive screw connectors. Wire as shown below: RELAY Connects to a projector screen with the 3-pole, 3.5mm captive screw connectors. Wire as shown below:. User Manual - CTC-1402... -
Page 16: Audio Out
All manuals and user guides at all-guides.com Audio Out Connect to an audio system, such as an amplifier, with the 3-pole, 3.5mm captive screw connector. Wire as shown below: User Manual - CTC-1402... -
Page 17: Installation
All manuals and user guides at all-guides.com Installation Warning: Before installation, ensure the device is disconnected from the power source. Installation: Attach the installation bracket to the enclosure using the screws provided. The bracket height can be adjusted Up/Down>The bracket can face up or down. The bracket is attached to the enclosure as shown. -
Page 18: Wiring
All manuals and user guides at all-guides.com Wiring Warning: • Before wiring, disconnect the power from all devices. • Connect and disconnect the cables with care. Connect input sources Connect HDMI/VGA/DP/USB-C sources to HDMI IN/VGA IN/DP IN/USB-C IN ports of TX or RX. Note: The CTC-1402 allows users to connect BYOD wireless systems to HDMI IN as a source. -
Page 19: Osd
All manuals and user guides at all-guides.com The CTC-1402 supports OSD (On Screen Display) to convey its IP address. Follow these steps to initiate OSD: Hold and Press the HDMI 1 and HDMI 2 buttons on the front panel of RX for at least 3 seconds. The IP address of the CTC-1402 will display on the upper right of the connected display’s screen for 15s and then disappear. -
Page 20: Input Source Switching
All manuals and user guides at all-guides.com Input Source Switching The CTP-1402 Kit supports Auto and Manual button switching between the HDBT (HDMI, VGA) and HDMI inputs. Auto Switching Press AUTO button. The Auto Switching function will be enabled immediately. If more than one input ports have active signal, the priority order is VGA 1 >... -
Page 21: Usb Control
All manuals and user guides at all-guides.com USB Control Please connect your PC and other USB devices before operation. • Connect a PC to the USB HOST ports with USB cables. • Connect USB devices to the USB DEVICE ports of TX and RX. Combining the above two steps--The PC will be followed by the source port which is under the USB HOST port. - Page 22 All manuals and user guides at all-guides.com USB-C source on TX is selected: When the USB-C input is selected, the USB devices can be connected to the PC directly. HDMI IN 1 on RX is selected: RX HDMI IN 1 and RX HOST 1 are in a group. Only if the RX HDMI IN1 is selected, the USB devices can be connected to the PC which is connected to RX USB HOST 1.
- Page 23 All manuals and user guides at all-guides.com HDMI IN 2 on RX is selected: RX HDMI IN 2 and RX HOST 2 are in a group. Only if the RX HDMI IN 2 is selected, the USB devices can be connected to the PC which is connected to RX USB HOST 2.
-
Page 24: Netlinx Studio Control
All manuals and user guides at all-guides.com NetLinx Studio Control Controlling the CTC-1402 through NetLinx studio via Ethernet port. Device Number and Ports The physical ports of the product can be mapped to NetLinx studio as follows: Transmitter: Port 1: RS-232-P Port 2: RS-232-C Port 4: IR RX Port 5: USB Device... - Page 25 All manuals and user guides at all-guides.com After configuring each port respectively, control commands can be sent to the device. User Manual - CTC-1402...
-
Page 26: Send Commands To Control A Device
All manuals and user guides at all-guides.com Send Commands to Control a Device Click “Diagnostics” on the menu bar, choose “Control a Device”. A window will display as follows, enter a command in the textbox, and click “Send To Device”. (For API commands, see the Section API Command Set.) Telnet Control via NetLinx Studio Choose the device you want to control, right click, then choose TELNET Window->Launch TELNET window via NetLinx Studio,... - Page 27 All manuals and user guides at all-guides.com At the prompt (>), type the Telnet command and press Enter. If “Launch TELNET Window via User Defined Program” is selected, it may be require to enable Telnet as follows: Go to Start/Control Panel/Programs and Features; On the left, select “Turn Windows features On or Off”;...
-
Page 28: Web Ui Control
All manuals and user guides at all-guides.com Web UI Control Choose the device to be controlled, right click, then choose Web Control Page->Launch Web Control Page via Default Browser, enter the Web UI Control Page. User Manual - CTC-1402... -
Page 29: Web Ui Control
All manuals and user guides at all-guides.com Web UI Control The Web UI designed for the CTC-1402 allows basic controls and advanced settings of the device. The Web UI page can be accessed through NetLinx Studio. Access the Web Interface To get access to Web UI: Connect your PC and the LAN port of the CTC-1402 to the same local area network. -
Page 30: Web Interface Introduction
All manuals and user guides at all-guides.com Web Interface Introduction The Interface includes 9 submenus: • AUTO SWITCH • KEY LOCK • HDCP • EDID • DISPLAY • RELAY • AUDIO VOLUME • RESOLUTION • NETWORK • SYSTEM The top of the interface includes REFRESH, FACTORY DEFAULT, REBOOT, UPGRADE STATUS and Firmware VERSION. Refresh Click to refresh the status of device in the Web UI interface. -
Page 31: Upgrade Status
All manuals and user guides at all-guides.com Upgrade Status To upgrade the firmware of the device, click , to check the upgrade status. LOGOUT , to return to the Login page. Click Firmware VERSION Click to check the current firmware version. Auto Switch: Users can enable or disable the Auto Switch function in this column. -
Page 32: Edid
All manuals and user guides at all-guides.com EDID In this column, the input EDID can be set to system requirements. Click the drop-down menu to select resolution, click Apply to take effect. Display In this column, control of the displays is available. Auto Display Control ON: Click to enable Auto Display Control. -
Page 33: Relay
All manuals and user guides at all-guides.com Relay In this column, users are able to set Relay On/Off and the Relay Mode: Latch or Momentary. RELAY CONTROLLER: Click to raise the projector screen, and click to drop the projector screen down. Latch: Level triggered. -
Page 34: Audio Volume
All manuals and user guides at all-guides.com Audio Volume Output Volume: Move the slider to set the output audio volume. Max/Min: Move the sliders at the left and right sides of the scale to set the maximum and minimum range of the audio volume. Mute: Click to mute the audio. -
Page 35: Network
All manuals and user guides at all-guides.com Network Device IP Mode: • DHCP: When enabled, the IP address of the CTC-1402 will be assigned automatically by the connected DHCP server. • Static: When the CTC-1402 fails to obtain or detect an IP address from the network it is connected to, select “Static” to set up the IP address manually. -
Page 36: System
All manuals and user guides at all-guides.com System The system section is used to set the ICSP Parameter, Login Password, Telnet/SSH On/Off, Telnet Account and SSH Account. ICSP Parameter In this column, the ICSP parameter can be set. Click “APPLY” for the settings to take effect. •... -
Page 37: Telnet/Ssh Access
All manuals and user guides at all-guides.com TELNET/SSH Access In this column, the TELNET/SSH connection can be turned On/Off. The default setting is “ON”. Click “APPLY” for the settings to take effect. Note: The device must be rebooted for the setting to take effect. TELNET Account Telnet Account is used to configure the user name and password of the account. -
Page 38: Firmware Upgrade
All manuals and user guides at all-guides.com Firmware Upgrade The CTC-1402 uses KIT files for firmware upgrade. Before Starting Verify that you have the latest version of NetLinx Studio on your PC. Download the latest firmware (KIT) file to your PC. (Place KIT files on a local drive for the fastest throughput.) Verify the following: a) Verify that an Ethernet/RJ-45 cable is connected from CTC-1402 to the same network as the control system. - Page 39 All manuals and user guides at all-guides.com Click “Send” to send the file to NetLinx Master and upgrade the firmware on the CTC-1402. Click web UI to check progress of the firmware upgrade. The device will restart automatically. Do not power cycle. Note: •...
-
Page 40: Troubleshooting
All manuals and user guides at all-guides.com Troubleshooting Power: Ensure all devices are powered on. Indicator: Ensure all LED indicators of the CTC-1402 are normal according to the user manual. Devices: Ensure picture can be shown normally when directly connecting a source a display device. Cable: Plug the HDMI/Cat X cable in and out or connect a different HDMI/Cat X cable. -
Page 41: Api Command Set
All manuals and user guides at all-guides.com API Command Set Device Port Name and Port Number: Model name Port name Port No. CTC-1402 VGA IN1(Audio in1) DP IN2 HDMI IN3 USB-C IN4 HOST 1 HOST2 USB device RS-232C RS-232P Audio in-p IR RX HDBT OUT HDBT IN... -
Page 42: Netlinx Commands
All manuals and user guides at all-guides.com NetLinx Commands Function Description Syntax Example Command: Command: VIDIN_AUTO_SELECT To set the Auto Switch SEND_COMMAND <DEV>,”’VIDIN_AUTO_ SEND_COMMAND <DEV>,”’VIDIN_AUTO_ On/Off SELECT-<ENABLE|DISABLE>’” SELECT-DISABLE’” Return: Return: VIDIN_AUTO_SELECT-<ENABLE|DISABLE> VIDIN_AUTO_SELECT-DISABLE Description: Set Auto Switch Status off Command: Command: ?VIDIN_AUTO_SELECT To verify the Auto Switch SEND_COMMAND <DEV>, “’?VIDIN_AUTO_... - Page 43 All manuals and user guides at all-guides.com NetLinx Commands (cont.) Function Description Syntax Example Command: Command: ?INPUT To verify switch status SEND_COMMAND <DEV>, “’?INPUT’” SEND_COMMAND SWITCHER,”’?INPUT’” Return: Return: SWITCH-L<sl>I<input>O<output> SWITCH-ALL,I1,OALL. Description: Description: <sl> : {ALL}. HDMI IN1 to All Outputs <input>...
- Page 44 All manuals and user guides at all-guides.com NetLinx Commands (cont.) Function Description Syntax Example Command: Command: ?CEC_DISP_AUTO To verify the display SEND_COMMAND <DEV>, “’?CEC_DISP_ SEND_COMMAND SWITCHER,”’?CEC_DISP_ control Status AUTO’” AUTO’” Return: Return: CEC_DISP_AUTO-<ON|OFF> CEC_DISP_AUTO-ON Description: Get the display control Status. The display control status is on.
- Page 45 All manuals and user guides at all-guides.com NetLinx Commands (cont.) Function Description Syntax Example Command: Command: ?VIDIN_PREF_EDID To Verify input EDID SEND_COMMAND <DEV>, “’?VIDIN_PREF_ SEND_COMMAND VIDEO_INPUT_1,”’?VIDIN_ EDID’” PREF_EDID’” Return: Return: VIDIN_PREF_EDID-<resolution> VIDIN_PREF_EDID-1920x1200,60 Description: Input port: The EDID of the Input TX_HDMI_IN is fix EDID 1920x1200@60Hz 2CH VGA_IN;...
- Page 46 All manuals and user guides at all-guides.com NetLinx Commands (cont.) Function Description Syntax Example Command: VIDOUT_RES_REF Command: To set output resolution SEND_COMMAND <DEV>,”’VIDOUT_RES_ SEND_COMMAND VIDEO_OUTPUT_1,”’VIDOUT_ REF-<horizontal>x<vertical>,<refresh- RES_REF-1280x1024,60’” rate>’” Return: Return: VIDOUT_RES_REF-1280x1024,60 NULL Description: Description: Set HDMI out resolution is 1280x1024@60. Variables: horizontal = An integer value representing the horizontal.
- Page 47 All manuals and user guides at all-guides.com NetLinx Commands (cont.) Function Description Syntax Example Command: Command: ?FWVERSION To determine the SEND_COMMAND <DEV>,”’?FWVERSION’” SEND_COMMAND dvRX,”’?FWVERSION’” system’s Application Return: Return: Code version FWVERSION <version-string> FWVERSION-SCALER_V1.5 FWVERSION-STM32_V1.4 Command: Command: VIDOUT_SCALE Sets the scaling mode SEND_COMMAND <DEV>,”’VIDOUT_SCALE- SEND_COMMAND VIDEO_OUTPUT_1,”’VIDOUT_ for the video output port...
- Page 48 All manuals and user guides at all-guides.com NetLinx Commands (cont.) Function Description Syntax Example Command: Command: AUDOUT_MUTE Sets the audio mute SEND_COMMAND <DEV>,”’AUDOUT_MUTE- SEND_COMMAND dxDev, “’?AUDOUT_MUTE’” mode for the audio <ENABLE|DISABLE>’” Return: output port Return: AUDOUT_MUTE-disable AUDOUT_MUTE-<ENABLE|DISABLE> Description: Audio mute mode is disable Command: Command: ?AUDOUT_MUTE...
- Page 49 All manuals and user guides at all-guides.com NetLinx Commands (cont.) Function Description Syntax Example Command: Command: ?AUDOUT_VOLUME Gets the audio vol for SEND_COMMAND <DEV>, “’?AUDOUT_ SEND_COMMAND AUDOUT_VOLUME_1, the audio output port VOLUME’” “’?AUDOUT_VOLUME’” Return: Return: AUDOUT_VOLUME-<value> AUDOUT_VOLUME-50 Description: Description: <value> = {0~100} Audio volume is 50 Command: Command:...
-
Page 50: Telnet/Ssh Commands
All manuals and user guides at all-guides.com Telnet/SSH Commands Command Description Example help >help Displays all of the supported commands cpu usage Displays the total CPU usage date Display the current date. dns list Show the DNS configuration of this device. get ip Show the IP configuration of this device cpu usage... - Page 51 All manuals and user guides at all-guides.com Telnet/SSH Commands (cont.) Command Description Example set time >set time Set the current time. Usage: set time [hours] [minutes] [seconds] Arguments: hours integer value of hours between 0 and 23 minutes integer value of minutes between 0 and 59 seconds integer value of seconds between 0 and 59 Example:...
- Page 52 All manuals and user guides at all-guides.com Telnet/SSH Commands (cont.) Command Description Example set dns >set dns Set DNS service --- Enter new values or keep current settings at the prompts --- -- Current DNS #1 Change the current value? Y/N ->...
- Page 53 All manuals and user guides at all-guides.com Telnet/SSH Commands (cont.) Command Description Example set telnet >set telnet password Set telnet service login password password Enter Telnet new password Would you like to set this password (y/n) Changed && Saved set ssh >set ssh username Set ssh service login username...
- Page 54 About AMX by HARMAN Founded in 1982 and acquired by HARMAN in 2014, AMX® is dedicated to providing AV solutions for an IT World. AMX solves the complexity of managing technology with reliable, consistent and scalable systems comprising control, video switching and distribution, digital signage and technology management. AMX systems are deployed worldwide in conference rooms, classrooms, network operation/command centers, homes, hotels, entertainment venues and broadcast facilities, among others.
Need help?
Do you have a question about the AMX CTC-1402TX and is the answer not in the manual?
Questions and answers