Table of Contents
Advertisement
Quick Links
Dear Imesa customer!
Welcome to the family of Imesa customers.
We hope that you will have many years of use from your new machine.
The machine has many features. To make the most of its functions, we recommend
that you read the operating instructions before using the machine. The operating
instructions include information on how you can help protect the environment.
Operating Instructions
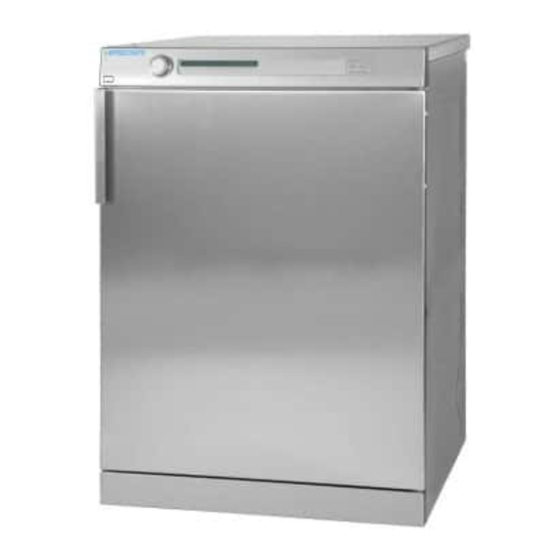
Tumble dryer
Imesa ES65PEC
WARNING: Read the instructions before using the machine.
Advertisement
Table of Contents

Subscribe to Our Youtube Channel
Related Manuals for Imesa ES65PEC


Summary of Contents for Imesa ES65PEC
- Page 1 Dear Imesa customer! Welcome to the family of Imesa customers. We hope that you will have many years of use from your new machine. The machine has many features. To make the most of its functions, we recommend that you read the operating instructions before using the machine. The operating instructions include information on how you can help protect the environment.
-
Page 2: Table Of Contents
Contents Before using your machine for the Press the Start button fi rst time Drying programme fi nished Language selection Backlighting Safety instructions Condensed water Automatic emptying Safety Transport/Winter storage Settings Packing material You can carry out the following settings Recycling How to choose the settings: Child safety... - Page 3 Contents Technical information Technical data Standard tests Service Before contacting the service division Installation Positioning the tumble dryer Condensed water Electrical installation Door hanging Follow these instructions Quick guide...
-
Page 4: Before Using Your Machine For The Fi Rst Time
Before using your machine for the fi rst time Language selection You will be prompted to select the display language when you have connected your machine and start it for the fi rst time. Do as follows: 1. Turn the programme selector to choose from: US English, English, Svenska, Dansk, Norsk, Suomi, Français, Deutsch, Italiano, Espanol, Русский, Nederlands. -
Page 5: Safety Instructions
Safety instructions • The machine is not designed to be Read the operating instructions and used by persons (even children) keep them in a safe place! that are physically or mentally handicapped or lack experience and knowledge. Such persons must receive instruction in how to use the machine from the person responsible for their safety. -
Page 6: Transport/Winter Storage
Safety instructions Installation See the section Installation. Transport/Winter storage If you need to move your machine or store it over the winter in unheated premises, make sure that you drain the condensed water container beforehand. Packing material Please sort waste materials in accordance with local guidelines. -
Page 7: Child Safety
Child safety General Activating/deactivating Child-safe start WARNING! Do as follows to open the settings menu: 1. Turn off the machine using the main Do not allow children to play with the power switch. tumble dryer. 2. Press the Stop button and switch •... -
Page 8: Description Of The Tumble Dryer
Description of the tumble dryer 1. Main power switch 5. Lint fi lter 2. Condensed water container 6. Outer door 3. Panel 7. Condenser 4. Type plate... -
Page 9: Advice And Tips Before You Tumble-Dry
Advice and tips before you tumble-dry Static electricity Here are some tips that may help you before you begin tumble-drying. To reduce the risk of static electricity in the laundry after tumble drying you can: Have the clothes been spun? •... -
Page 10: Tumble Drying
Tumble drying Below are step-by-step instructions to help you achieve the best possible tumble-drying results. Sort your fabrics You will achieve the most uniform drying results if the items are made of the same type of material. Do up zips and buttons, fasten belts, sort the items and adjust the load and temperature. -
Page 11: Select The Programme
Tumble drying Select the programme Programme selector Programme name Start Stop Select a programme by turning the programme selector. The selected programme is shown in the display window. Guidelines as to what specifi c Auto extra dry (low temperature) programmes can be used for: Energy Save. - Page 12 Tumble drying Programme chart Here we present the energy and time consumption of a few diff erent programmes. The table shows the eff ect of using diff erent spin speeds when washing the load. Consumption can vary depending on room temperature, humidity, load, variations in the power supply and selected options. For the consumption values given below, the requirements are as follows: Temperature of intake air: 23 °C...
-
Page 13: Press The Start Button
Tumble drying Press the Start button Remaining drying time An estimate of the remaining drying time will be shown on the display a few minutes after the drying programme starts. For example, 1:35 means that it will take approximately 1 hour and 35 minutes for the load to dry. -
Page 14: Drying Programme Fi Nished
Tumble drying Drying programme fi nished Once drying has fi nished The text Done appears on the display Turn off the main power switch. Remove the when the programme is fi nished. clothes and close the door to prevent small children from climbing into the machine. -
Page 15: Settings
Settings You can carry out the following Child-safe settings You can activate the Child-safe start option to • Audible Volume prevent children from starting the machine. • Language 1. Turn the programme selector and choose • Child-safe Child-safe On or Child-safe Off . •... -
Page 16: Care And Cleaning
Care and cleaning Cleaning the lint fi lter 3. Use your hand or a soft cloth to remove the The lint fi lter must be cleaned after each load. lint from all sides of the fi lter. If necessary, 1. Grasp the fi lter holder handle and pull it use a damp sponge and a small amount of towards you to open the lint fi... -
Page 17: Emptying The Condensed Water Container
Care and cleaning Emptying the condensed water container If you have not connected the machine to a separate drain the condensed water container must be emptied after each load. Remove the condensed water container, empty out the water and replace the container. If the condensed water container becomes full to overfl... -
Page 18: Cleaning The Condenser
Care and cleaning Cleaning the condenser The condenser should be cleaned at least three NOTE! times a year. If you have pets, the condenser must be cleaned more frequently. Do not clean the condenser in a dishwasher. 1. Turn off the tumble dryer with the main power 5. -
Page 19: Cleaning The Outside Of The Machine
Care and cleaning Cleaning the outside of the machine NOTE! Clean the outside of the machine and the programme panel with a mild cleaner. Do Clean the fi lters after each drying. not use solvents, as these can damage the Do not replace the fi... -
Page 20: Troubleshooting
Troubleshooting The machine will not start Drying takes too long Check: • Check that the lint fi lter is not blocked. See • that the door is properly closed. the Care and cleaning chapter. • that the main power switch is on. •... -
Page 21: Technical Information
Technical information Technical data Height: 845 mm Width: 595 mm Depth: 585 mm Weight (net): 44 kg Cylinder volume: 112 l Max. drying capacity: 7 kg Speed: 50-55 rpm Rated power: See type plate. Drum material: Stainless steel Outer casing material: Powder-coated and hot-galvanized sheet steel or stainless steel. -
Page 22: Service
Service Before contacting the service division See the Troubleshooting and Care and cleaning chapters to see whether you can rectify the problem. If you need to contact the service division, make sure that you know the model designation, type designation and serial number. -
Page 23: Installation
Installation Positioning the tumble dryer How to assemble the stack: The tumble dryer can be free-standing or 1. Remove the two tip guards from the back of in a stack. Remember that the tumble dryer the tumble dryer. Replace the screws that produces heat and should therefore not be held the tip guards in place. - Page 24 Installation Adjusting the feet 4. Attach the plastic cups for fi xing the tumble dryer’s front feet to the washing machine’s Screw the feet in or out so that the tumble dryer top cover. This is essential, as only when the is both stable and level tumble dryer’s feet are resting in the plastic cups can you be sure that the tumble dryer is...
-
Page 25: Condensed Water
Installation Condensed water Electrical installation The machine is supplied as shown in Option 1 If the machine is delivered from the factory (inset). This means that the condensed water with a plug attached it can be connected to an is pumped into the condensed water container, earthed wall socket. -
Page 26: Door Hanging
Door hanging 1. Hinge pins (top and bottom) 4. Locking hook 2. Cover plate 5. Hinges (left + right side) 3. Plastic plugs (on the upper and lower edges) 6. Plinth... -
Page 27: Follow These Instructions
Door hanging You can choose whether the door is hung on the right or the left. NOTE! Follow these instructions Be careful not to damage the appliance with the 1. Remove the plinth. screwdriver. 2. Remove the hinge, two screws. 6. -
Page 28: Quick Guide
End appears on the display when the program is fi nished. Clean the lint fi lter after each load. Turn off the main power switch and close the door. We reserve the right to make changes. TD70.C SPK ES65PEC en (11-16)
Need help?
Do you have a question about the ES65PEC and is the answer not in the manual?
Questions and answers