YouKits HB-1B - 80/30/30/20 Meter CW QRP Transceiver Manual
- Owner's manual (2 pages)
Advertisement
![]()
Operating instructions
Before using the radio for the first time, please see the connections instructions on the back cover. Improper connections may damage the transceiver.
When power is turned on, you will hear (in CW) the letter "A" if a paddle is connected or the letter "M" if a straight key is connected. (If no key is connected you will hear the letter "A").
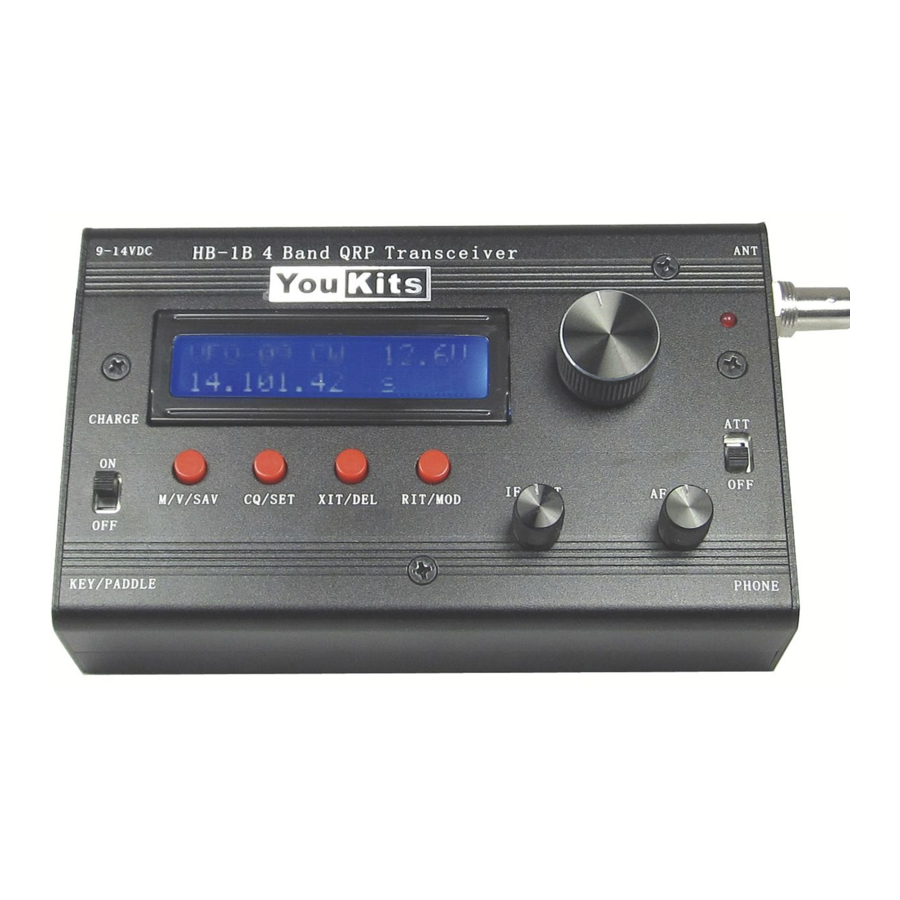
V/M/SAV Button
Click this button to alternate between Memory mode (MEM) and VFO mode, the LCD screen will show the MEM-xx or VFO-xx (xx is the memory number from 01-30). In Memory Mode the tuning knob is used to change memory locations. In VFO Mode the tuning knob is used to change the frequency. Press the V/M/SAV

Button for 2 seconds (the LCD screen will display SAVE), the current frequency and current mode will be stored in memory locations selected.
RIT/MOD Button

Click this button to enter or exit RIT function. A dash (-) will be displayed to the right of the frequency display.
When in the RIT mode, turning the tuning knob clockwise raises the frequency (as Indicated by the up arrow). Turning the tuning knob counter0clockwise will lower The frequency (as indicated by the down arrow).

To change the modes, press and hold the RIT/MOD for 2 seconds, This will allow you to change the mode from CW to USB to LSB and CW again. Press and hold the RIT/MOD for 2 second for each change. ( only change to LSB and CW on 80m)
ATT Button
Click this button to turn ON or OFF the ATT (receiver attenuation). The S in the LCD display will change to A indicating the ATT is ON.

Frequency Tuning Steps
While in receiving mode, press the tuning knob will change the tuning step to either 10Hz, 100Hz or 1KHz. As the change is made, the position the display that the step is being changed to will momentarily display an underscore (_) for verification of the change. If you press the tuning knob for 2 seconds, the tuning step will be 100KHz. In RIT Mode, press the tuning knob will change the tuning step to 10Hz or 100Hz. Out of Amateur band, step is 10Hz, 100Hz or 5KHz.
IF filter Button
Tuning for IF filter bandwidth adjustment. Clockwise increase, counter-clockwise decrease. From 400Hz - 3KHz.
Frequency Locking Function

To lock or unlock the tuning knob, simultaneously Press both V/M/SAV and the RIT/MOD for about 1 second. In lock mode the symbol(#) is displayed next to the frequency. In this mode, the tuning knob will not change the frequency.
Automatic Key Function
Automatically call CQ: Press the CQ/SET button lightly to send "CQ CQ CQ DE (your call sign three times) PSE K". If the CQ is to be cancelled press CQ/SET button for 1 second at any time during the CQ.
Change speed: Press CQ/SET button for approximately 2 second and the Morse code letter "S" will be heard, then release the button. Within 8 seconds, push the paddle to the DOT side to increase the keyer speed or to the DASH side to decrease the keyer speed. When finished, press CQ/SET lightly to exit (the letter "E" will be heard)
How to Enter Your Call sign: Press CQ/SET button and hold about 2 seconds, you can hear the Morse code "S", continue to hold down the CQ/SET button until you hear the letter "I", at this time release CQ/SET button, and then send your call sign with the paddle as usual. When done, a short click of the CQ/SET button to exit, you will hear Morse code letter "E", or wait for several seconds to exit.
Transmitting
When transmitting, the mode of operation is replaced by "TX" and letter "S" is replaced with letter "P" followed by series of vertical bars. Each 3 bars represents approximately 1 Watt of output power. If you attempt to transmit outside the 4 amateur band, "TX ERROR" will flash on display

Tune Function Using Paddles
Holding CQ/SET for 2 second, heard "S", keep holding 2 more second, heard "I", keep holding 2 more second, heard "T", release CQ/SET. Pressing "DASH" paddle cause the radio to have a continuous emission to tune an external tuner or to check SWR. Pressing "DOT" paddle to end, push CQ/SET to exit.
Specification
TX: 3.5-4.0MHz, 7.0-7.3MHz, 10.1-10.15MHz, 14.0-14.35MHZ
RX: 3.2-16MHz
Output power: 12V supply 3-4W, 13.8V 4-5W
Side tone: 700Hz
External Supply Voltage: 9-14VDC
Optional 18650 battery pack: 11.1V
Current Draw: RX about 60ma
TX 800ma (12VDC)
Automatic key: Built in with adjustable speed
Memory: 1-30
Selectivity: 4 crystal filter, 400Hz-3KHz continued adjustable
Audio Output: 8ohm load about 0.1W (Requires a stereo plug)
Size: 132x85x35mm
Weight: approx 380 grams
Connection
Internal battery power supply: Can use 14500 lithium battery x 3pcs with our battery holder or purchase our 18650 lithium battery pack. Both need to use Special charger for lithium battery, and must do a mod with the power jack connector, please check youkits.com for details.
External Power supply: Any 9-14VDC voltage or batter pack can be connected to the transceiver. It has a built in polarity protection circuit.
Antenna: Any resonant antenna can be connected directly to the antenna (ANT) with a BNC connector. If a non-resonant antenna is used an antenna tuner will be necessary.
Headphone: A stereo headset can only be connected to the headphone port (phone), impedance 8-32ohm. Do not use a mono plug.
Key/Paddle: The HB-1B has an automatic function that determines what type of key is being used and is initiated on power up. You will hear (in CW) the sound of the letter "A" if a paddle is connected or the letter "M" if a straight key is connected. Connect tip to paddle dot or straight key's contractor. Connect ring to paddle dash or straight key's ground. Connect to sleeve paddle's ground. Tie ring and sleeve together for straight key. Must plug the straight key first before power up to activity.

Documents / Resources
References

Download manual
Here you can download full pdf version of manual, it may contain additional safety instructions, warranty information, FCC rules, etc.
Download YouKits HB-1B - 80/30/30/20 Meter CW QRP Transceiver Manual
Advertisement


Need help?
Do you have a question about the HB-1B and is the answer not in the manual?
Questions and answers