ELEY 1041 Manual
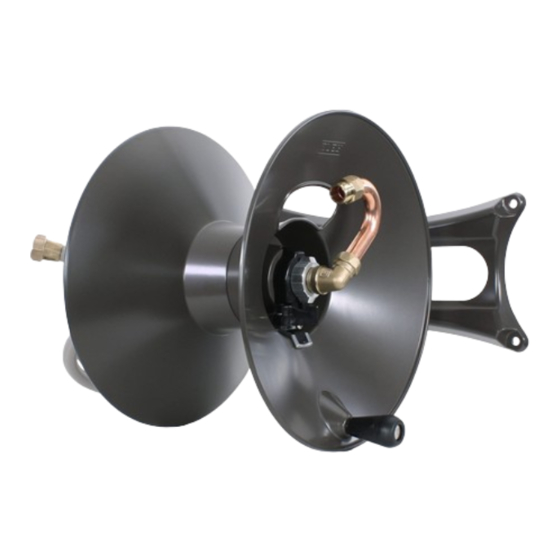
Wall mounted garden hose reel
Hide thumbs
Also See for 1041:
- Assembly/installation instructions (16 pages) ,
- Assembly/installation instructions (16 pages)
Advertisement
Quick Links
Advertisement

Related Manuals for ELEY 1041


Summary of Contents for ELEY 1041
- Page 1 WALL MOUNTED WALL MOUNTED GARDEN HOSE REEL Watering Done Right ITEM 1041...
- Page 2 We take a great deal of pride in what we do— we wouldn’t put our name on it if we didn’t. Founding brothers: Mark, Warren, and Craig Eley ...AND WE HAVE A FEELING THAT YOU ARE TOO.
-
Page 3: Specifications
WALL MOUNTED GARDEN HOSE REEL ITEM 1041 Purchase date Serial number SPECIFICATIONS 125 ft. 5⁄8 in. hose capacity 100 ft. 3⁄4 in. hose capacity Max. working pressure Drinking water safe Capacities may vary depending on hose brand and style. - Page 4 ˝ Ø — ˝ Ø — 1041 INSTALL TOOLS...
- Page 5 1041 IN THE BOX...
- Page 6 1044 1041X 1044 MANUAL 1041 Keep loose If you have an Extra-Capacity Kit, refer to that manual before this step. Connect flanges by inserting the three screws through the holes in the front flange and into the nuts in the rear flange—do not tighten screws.
- Page 7 Assembly Videos & Support Scan with your camera for access to helpful videos, tips, and FAQs. eleyhosereels.com/assembly Tighten With all three screws inserted, tighten. Avoid using power tools here— high speed can damage the threads. 1041 ASSEMBLY...
- Page 8 Remove screw from the handle post and insert post into the raised hole at the outer edge of flange. Insert screw from other side—tighten. 1041 ASSEMBLY...
- Page 9 If you have a Wood Post Kit, refer to that manual before this step. Remove the two large screws from the arm and fasten arm to base according to desired configuration: parallel, or perpendicular. Install both screws before tightening completely. 1041 ASSEMBLY...
- Page 10 Use a hammer drill and 5⁄16-inch masonry bit to drill 1-1⁄2-inch deep holes. To ensure proper depth, mark drill bit with tape 1-1⁄2 inches from the tip. Tap anchors through the base and into wall. Tighten with a 7⁄16-inch wrench or socket—avoid overtightening. 1041 MASONRY WALL INSTALL...
- Page 11 1-1⁄2-inch deep pilot holes. Fasten base to wall with the four lag screws and flat washers. If mounting to lap siding use the standoffs (2510) between the base and siding as shown. Tighten screws with a 7⁄16-inch wrench or socket—avoid overtightening. 1041 STUD WALL INSTALL...
- Page 12 Insert the male end of the inlet hose through the back of the axle tube until accessible from front. Slide the flange assembly fully onto the axle tube. 1041 ASSEMBLY...
- Page 13 Place brake onto axle—align the tab on the brake to the notch in the flange. Screw the swivel onto the inlet hose—hand tighten firmly. Push the swivel fully onto the axle and tighten screw with hex key. 1041 ASSEMBLY...
- Page 14 Feed the female end of your hose through the flexible strap and out the opening in the flange. Screw hose onto the swivel—hand tighten firmly. Use a Phillips head screwdriver to tighten the screw on the hose strap until strap is snug on the hose. 1041 INSTALLING HOSE...
- Page 15 ON so it’s ready for next use. If the hose is difficult to pull off or continues unspooling after you stop pulling, use a 3⁄8" wrench to loosen or tighten the nut on the brake 1⁄4 turn until corrected. 1041 USING YOUR REEL...
- Page 16 Eley products are backed by an industry-leading 10-Year No-Leak, No-Rust, No Break Guarantee. For complete warranty coverage details visit eleyhosereels.com/warranty Warranty Registration eleyhosereels.com/register Customer Support eleyhosereels.com/support Copyright © 2023 ELEY Corporation. All rights reserved. PO Box 22640, Lincoln, NE 68542 Patents and patents pending. 4171_REV_220927...
Need help?
Do you have a question about the 1041 and is the answer not in the manual?
Questions and answers