Table of Contents
Advertisement
Quick Links
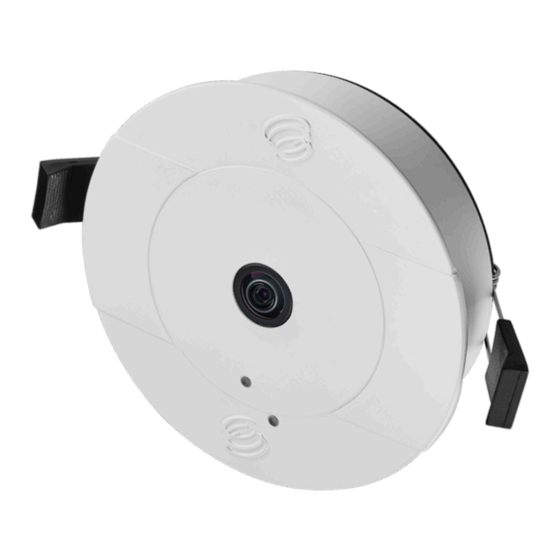
Evolution 05 Mini Recessed
QUICK START GUIDE
Important
•
Read these instructions carefully before
installing or operating this camera.
•
This camera should be installed by a qualified
service person and the installation should
conform to local and national regulations.
•
This camera conforms to UL2043, which
certifies it as suitable for installation in a wall
or ceiling used also as an air handling space.
•
Certified as FCC Class A, In a domestic
environment this camera may cause radio
interference in which case the user should
take adequate measures.
DANGER: RISK OF EXPLOSION IF
REPLACING A BATTERY WITH AN
INCORRECT BATTERY TYPE.
Welcome
The Oncam Evolution Mini Recessed 360° camera is
designed to be connected to an IP network. Configure
and operate the camera using a standard internet
browser.
Described are the installation and configuration
procedures for a standard surface mount camera
application.
Power Input
Operating
Temperature
Enclosure
Weight
Supplied Parts
EVO-05-LRD
• EVO-05 Mini Camera
• RJ45 Coupler
Technical Support
For the A&E, Specification, Installation and User Manual, Software
and Firmware visit:
https://www.oncamgrandeye.com/resources/product-downloads/
Tel:
UK +44 (0)20 7371 6640
US +1 978 735 4860
Email:
support@oncamgrandeye.com
MAC Address
Document the camera's installation location and unique
MAC address. Find the MAC address printed on the
camera label. This information may be needed during the
camera configuration.
Power over Ethernet (PoE),
IEEE standard 802.3af
0 to +40°C (-32 to +104°F)
Polymer
0.30 kg (.66 lbs)
• Quick Start Guide
• Drilling Template
Mounting & Installation
The Evolution Mini Recessed camera allows for easy
and fast internal installation from below the ceiling
line. The camera is IP40-rated and UL2043 certified
for installation in air handling spaces. The camera
provides recessed mounting in drop ceilings or walls
with a maximum cross section of 25.4 mm (1-inch).
1.
Cut a 108 mm (4¼-inch) hole in the mounting
location. A template is supplied if required.
2.
Connect the Ethernet coupler to the network
infrastructure cable. Pass any spare cable length
through the hole into the ceiling before fitting the
camera.
3.
Connect the camera and confirm the LED lights
illuminate when powered.
4.
Push both retaining springs to an upright position
and insert the camera into the hole.
5.
Release the springs and gently push the camera
into position.
6.
Carefully remove the lens protection film.
Reference the Installation and User Manual for more
information.
Advertisement
Table of Contents

Related Manuals for Oncam EVO-05-LRD


Summary of Contents for Oncam EVO-05-LRD
- Page 1 Welcome Mounting & Installation QUICK START GUIDE The Oncam Evolution Mini Recessed 360° camera is The Evolution Mini Recessed camera allows for easy designed to be connected to an IP network. Configure and fast internal installation from below the ceiling and operate the camera using a standard internet line.
- Page 2 Admin username and password to access the camera. EVO-05-L#D-04 Recessed Mini 11.2020 Rev F © Copyright 2020 ONVU Technologies AG. All rights reserved. Oncam is a trading name of ONVU Technologies AG. Specifications and configurations subject to change without notice.
Need help?
Do you have a question about the EVO-05-LRD and is the answer not in the manual?
Questions and answers