
Subscribe to Our Youtube Channel
Related Manuals for RCA RT2300


Summary of Contents for RCA RT2300
- Page 1 RT2300-rev.1 7/27/99 7:01 PM Page 1 do not output the film on this page please turn next page...
- Page 2 RT2300-rev.1 7/27/99 7:01 PM Page 2 POWER/STANDBY D I G I TA L VCR 1 VCR 2 TAPE PHONES i g i t a l Audio Video o u n d Integrated Receiver r o c e s s o r...
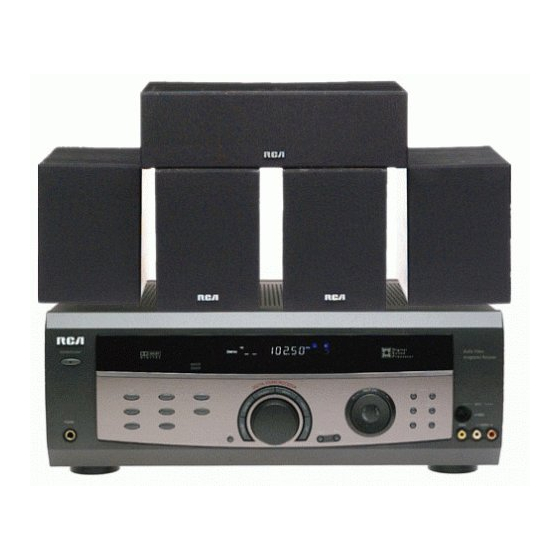
- Page 3 RT2300-rev.1 7/27/99 7:01 PM Page 3 RT2300/RT2300R RT2400/RT2400R Audio/Video Receiver...
-
Page 4: Fcc Information
RT2300-rev.1 7/27/99 7:01 PM Page 4 FCC Information This device generates and uses radio frequency (RF) energy, and if not installed and used properly, this equipment may cause interference to radio and television reception. This equipment has been type tested and found to comply with the specifications in Subpart J of Part 15 of FCC Rules. -
Page 5: Table Of Contents
Satellite Receivers ..... . .18 Audio (RCA/Dimensia only) ....18 Laserdisc Players . -
Page 6: Getting Started
RT2300-rev.1 7/27/99 7:01 PM Page 6 Getting Started Unpack the Receiver Check that you received the following items with the receiver: • one receiver unit; • one RCA Universal Remote Control (CRK76AD1); • one external FM Dipole antenna; • one external AM loop antenna;... -
Page 7: Connecting To Audio-Visual
Note: If you purchase the receiver with speaker set (i.e. RT2300, RT2400), please make sure the color- coded pins match the color of the terminals in which they are inserted. The connection cable plugs and... - Page 8 RT2300-rev.1 7/27/99 7:01 PM Page 8 Getting Started Tips: 1. If your CD player is equipped with digital optical jacks, using optical cable is preferred. What you need is just one more optical digital connecting cord(not supplied). Plug it in the digital input jack of the receiver and you can enjoy better sound quality brought you by the optical cable.
-
Page 9: Connecting The Antennas
RT2300-rev.1 7/27/99 7:01 PM Page 9 Getting Started Connecting the Antennas The AM and FM antennas connect to the AM and FM terminals on the system’s back panel. They must be hooked up in order to receive clear reception. Uncoil the antenna wires and locate the bare ends. -
Page 10: Positioning Your Speakers
RT2300-rev.1 7/27/99 7:01 PM Page 10 Getting Started Positioning your Speakers Your system is equipped with Dolby Digital, which enables you to reproduce sound effects as they were intended. However, the speakers must be properly positioned and balanced. In order to enjoy Dolby-enhanced sound quality, five... -
Page 11: Connecting For Power
RT2300-rev.1 7/27/99 7:01 PM Page 11 Getting Started Connecting for power Make sure you connect all your other electronic components and the speakers before plugging your receiver into the outlet. Plug the power cord in the wall outlet, matching the wide blade of the plug with the wide slot in the outlet. -
Page 12: How To Operate Your Receiver
RT2300-rev.1 7/27/99 7:01 PM Page 12 How to Operate your Receiver POWER/STANDBY D I G I TA L VCR 1 TAPE PHONES Receiver Controls 1. Power/Standby To turn on or stand by. When the system is turned on, the unit will go to the mode it was in before power off. -
Page 13: Your Remote Control
RT2300-rev.1 7/27/99 7:01 PM Page 13 How to Operate your Receiver Your Remote Control Please be sure you have inserted the batteries into the remote. (See "Inserting batteries into remote control" on page 3.) You can test it by pressing any button. If it works, the red LED will light. -
Page 14: The Built-In Radio
RT2300-rev.1 7/27/99 7:01 PM Page 14 How to Operate your Receiver DOLBY 3 STEREO The 3 Stereo mode uses the two main and one center speaker. The sound of the rear channel is output from the front speakers. Use this mode if your rear speakers are not connected. -
Page 15: Using The Receiver To Play Dvd
RT2300-rev.1 7/27/99 7:01 PM Page 15 How to Operate your Receiver Using the Receiver to Play After you have connected your DVD player and receiver, you can partly control the DVD play through your receiver: 1. Connect the DVD player with the receiver and other components. -
Page 16: Advanced Sound Control
If you buy this receiver with accompanied speaker package (i.e. RT2300, RT2400) then this step has been done for you. Also, to make the surround sound more effective and suit the acoustic conditions in your listening room, you need to delay the signal from some of the speakers. -
Page 17: Input Iq
RT2300-rev.1 7/27/99 7:01 PM Page 17 Advanced Sound Control Input IQ One of the smartest feature of the receiver is the ability to pre-select the best surround mode for you once you turn on the unit by pressing the Function Button (like DVD, SAT, CD) directly. -
Page 18: Care And Maintenance
Never use strong solvents. EQUIPMENT SPECIFICATIONS: AMPLIFIER SECTION: All 5 channels. Each 50W (for RT2300 and RT2300R) or 100W (for RT2400 and RT2400R) at 6 ohm. 0.9% THD @1 kHz Muting Attenuation: 65dB... -
Page 19: Remote Codes
RT2300-rev.1 7/27/99 7:01 PM Page 19 Remote Codes CABLE CODES 5002, 5003, 5004, 5005, 5006, 5009, 5053 ANTRONIX 5008, 5009 ARCHER 5008, 5009, 5010, 5011 CABLETENNA 5008 CABLEVIEW 5008 CENTURY 5011 CITIZEN 5011 COLOUR VOICE 5012, 5013 COMTRONICS 5014, 5015... -
Page 20: Tv Codes
RT2300-rev.1 7/27/99 7:01 PM Page 20 Remote Codes MEMOREX 2002, 2011, 2013, 2014, 2021, 2023, 2026, 2104, 2131 2029, 2065, 2113 MGN TECHNOLOGY 2013 MIDLAND 2053 MINOLTA 2055, 2056, 2107 MITSUBISHI 2029, 2055, 2056, 2065, 2066, 2067, 2069, 2070, 2071, 2072, 2073, 2074, 2106, 2113,... -
Page 21: Satellite Receivers
RT2300-rev.1 7/27/99 7:01 PM Page 21 Remote Codes KAWASHO 1002, 1004, 1006 KAYPANI 1175 KENWOOD 1004, 1006, 1019 KLOSS NOVABEAM 1068, 1069, 1174, 1183 1038, 1070, 1171, 1176, 1177 LOEWE 1062 LOGIK 1083 LUXMAN 1004, 1006 1000, 1006, 1049, 1062, 1071, 1072, 1073,... -
Page 22: Index
RT2300-rev.1 7/27/99 7:01 PM Page 22 Index Accessories included 3 Adjustment buttons 10 AM antenna (see Antenna) 6 AM•FM button (see Function buttons) 9, 10 Antenna AM antenna 6 FM antenna 6 ARENA button (see DSP mode) 9, 10 Audio codes 18... -
Page 23: Us Warranty
RT2300-rev.1 7/27/99 7:01 PM Page 23 US Warranty What your warranty covers: • Any defect in materials or workmanship. For how long after your purchase: • One year. (The warranty period for rental units begins with the first rental or 45 days from date of shipment to the rental firm, whichever comes first.) -
Page 24: Canadian Warranty
RT2300-rev.1 7/27/99 7:01 PM Page 24 Canadian Warranty Thomson Consumer Electronics Canada, Inc. warrants to the purchaser or gift recipient that if any manufactur- ing defect becomes apparent in this product within 1 year from the original date of purchase, it will be replaced free of charge, including return transportation.
Need help?
Do you have a question about the RT2300 and is the answer not in the manual?
Questions and answers
why does my amp kick off once it is turned on. all of the fuse's and grounds are good
The RCA RT2300 amp may turn off immediately after being powered on due to a power protection feature triggered by issues such as incorrect speaker connections, shorted speaker wires, or overheating. Ensure all speaker wires are correctly connected and not shorting, ventilation is adequate, and components are not stacked or blocking airflow.
This answer is automatically generated