
Related Manuals for WEG WEGscan 100


Summary of Contents for WEG WEGscan 100
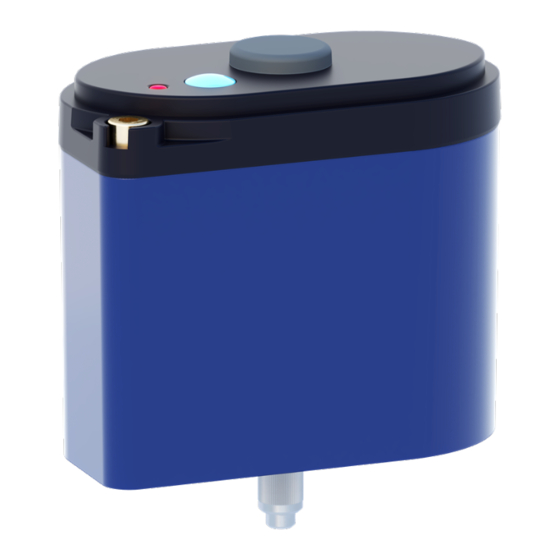
- Page 1 Motors | Automation | Energy | Transmission & Distribution | Coatings WEGscan WEGscan 100 Mechanical Installation Manual...
- Page 2 Mechanical Installation Manual Series: WEGscan 100 Language: English Document: 10010882602/00 Models: WEGscan 100 Publishing Date: 04/2023...
- Page 3 SUMMARY OF REVIEWS The information below describes the reviews made to this manual. Version Review Description V1.00 First edition...
-
Page 4: Table Of Contents
4.2 POSICIONAMENTO DO SENSOR – APLICAÇÃO: ATIVO MOTOR ELÉTRICO WEG DA LINHA W40 ..4-3 4.3 SENSOR POSITIONING – APPLICATION: WEG ELECTRIC MOTOR OF THE W60 LINE ..4-4 4.4 SENSOR POSITIONING FOR INSTALLATION ON ROLLING BEARINGS . -
Page 5: Safety Instructions
1 SAFETY INSTRUCTIONS This manual contains the necessary information for the correct use of the WEGscan 100 (smart monitoring device for assets). The following instructions are extremely important for the good performance of the product and must be strictly followed during installation, maintenance and operation. Failure to comply with the product instructions may cause operating accidents and damage to the environment, to the product and to the equipment connected to it, in addition to voiding the warranty. -
Page 6: Preliminary Recommendations
WEGscan 100 . DANGER! Only qualified people familiar with the WEGscan 100 should plan or execute the instal- lation, operation and maintenance of this device. Such personnel must follow all the safety instructions contained in this guide and/or defined by local regulations. -
Page 7: Changing The Batteries
ATTENTION! The WEGscan 100 battery is replaceable. At the end of the battery life, it must be collected as used electrical and electronic equipment. For information on the return or collection for the proper disposal and recycling of the product, contact WEG or send the sensor to one of our authorized service centers. - Page 8 - The whole device and its package are made from materials that can be recycled and at the end of its useful life must be sent to specialized recycling companies. - The horizontal bar below the garbage bin indicates the device was sold after August 13, 2005. WEGscan 100...
-
Page 9: General Information
WEG Drives & Controls - Automação Ltda offers a warranty against defects in material and workmanship for the WEGscan 100 product for 12 months, except for the batteries, which have a warranty of 3 months, counted from the date of issue of the invoice by the factory or distributor/dealer. The full text of the warranty is available on www.weg.net. -
Page 10: Tools And Materials For Installation
3.1 SENSOR MOUNTED WITH BUSHING For the correct installation of the sensor on the asset, the tools and materials indicated in Figure 3.1 are required. (a) WEGscan 100 (b) M4x45 mm screw (c) Drill bit 5,9 mm or 15/64" (d) Drilling machine... -
Page 11: Sensor Mounted Without Bushing
3.2 SENSOR MOUNTED WITHOUT BUSHING For the correct installation of the sensor on the asset, the tools and materials indicated in Figure 3.2 are required. (a) WEGscan 100 (b) M4x45 mm screw (c) Drill bit 3,3 mm (d) Drilling machine (e) Hammer (f) Thread tap M4x0.7... -
Page 12: Sensor Directly Mounted With Adhesive
3.3 SENSOR DIRECTLY MOUNTED WITH ADHESIVE For the correct installation of the sensor on the asset, directly with adhesive, the tools and materials shown in Figure 3.3 are required. (a) WEGscan 100 (b) Fine sandpaper for steel (c) Two-component epoxy adhesive Figure 3.3: Materials required to install the sensor directly with adhesive... -
Page 13: Sensor Positioning For Installation
4 SENSOR POSITIONING FOR INSTALLATION This section describes the WEGscan 100 mechanical installation on electric motors with emphasis on the central position of the motor. For installation on other assets and in other positions on the motor, see Chapter 4.4 and 5. - Page 14 CONTACT WEG Frames 160 to 200 – W22 Frame (mm) [pol.] 0.315 0.2362 0.3937 Frame 225 – W22 Frames 250 to 355 – W22 0.3937 0.3937 0.3937 0.3937 Frames 315 to 450 – W50 0.3937 0.3937 0.3937 0.3937 WEGscan 100...
-
Page 15: Posicionamento Do Sensor - Aplicação: Ativo Motor Elétrico Weg Da Linha W40
Sensor positioning for installation 4.2 POSICIONAMENTO DO SENSOR – APLICAÇÃO: ATIVO MOTOR ELÉTRICO WEG DA LINHA W40 The sensor can be installed on motors of the W40 line following the positions shown in Figure 4.3 (for frames IEC 160 to 280S/M, if the terminal box is on top, place the sensor on the side base as shown in Figure 4.3a; if the terminal box is on the side, place the sensor on top as shown in Figure 4.3b). -
Page 16: Sensor Positioning - Application: Weg Electric Motor Of The W60 Line
Sensor positioning for installation 4.3 SENSOR POSITIONING – APPLICATION: WEG ELECTRIC MOTOR OF THE W60 LINE Due to the design of W60 motors, it is recommended to mount the WEGscan on the side base (Figure 4.5). The WEGscan must be positioned at the shaft center height, centered in the motor length. If the terminal box occupies the indicated region, place the WEGscan on the opposite side to the connection box. -
Page 17: Sensor Positioning For Installation On Rolling Bearings
Figure 4.7 also shows examples of sensor mounting on bearings, using the fixation with the aid of an intermediate base. (a) Motor W22 315 S/M (b) Motor W51 355 H/G Figure 4.7: Examples of WEGscan mounting on bearings of different motors WEGscan 100... - Page 18 Sensor positioning for installation Figure 4.8: Examples of WEGscan mounting on a WEG gearbox (WCG50 WP052) ATTENTION! For the installation of the WEGscan on assets not covered in this manual and motors from other manufacturers, refer to WEG in our support channel: www.weg.net...
-
Page 19: Installation Procedure
4. Using a 3 mm Allen wrench, screw the sensor into the knurled bushing and check its tightness. The maximum tightening torque is 4.0 Nm. As per Figure 5.2 on page 5-1. Figure 5.2: Detail of screwing the sensor into the knurled bushing WEGscan 100... -
Page 20: Procedure For Installation Without Bushing - Application: Electric Motor
(b) Using an M4 tap, make the thread in the hole drilled in the previous step. 4. Using a 3 mm Allen wrench, screw the sensor into the knurled bushing and check its tightness. The maximum tightening torque is 4.0 Nm. As per Figure 5.2 on the page 5-1. WEGscan 100... -
Page 21: Procedure For Installation With Adhesive - General Guidelines
The sensor can be fixed with adhesive as an alternative to the standard screw mounting, that is, in cases where fixing the sensor to a surface is not possible by drilling it. WEG suggests the 3M two-component epoxy adhesive DP8407NS or similar product, checking if the maximum service temperature of the adhesive withstands the maximum temperature of the application surface. -
Page 22: Procedure For Installation With Adhesive - Application
Installation procedure 5.4.1 PROCEDURE FOR INSTALLATION WITH ADHESIVE – APPLICATION When installing the WEGscan 100 using adhesive, follow the steps below: 1. Before applying adhesive on the surface, remove the paint only from the area where the support will be placed.
Need help?
Do you have a question about the WEGscan 100 and is the answer not in the manual?
Questions and answers