Advertisement
2500
FLEXIO
OWNER'S MANUAL • MANUEL DE L'UTILISATEUR •
MANUAL DE USARIO
READ THIS MANUAL FOR COMPLETE INSTRUCTIONS •
LIRE CE MANUEL POUR OBTENIR DES DIRECTIVES COMPLÈTES •
LEA ESTE MANUAL PARA OBTENER LAS INSTRUCCIONES COMPLETAS
www.wagnerspraytech.com
2500 / 3500
™
2500
3500
3500
ES
EN
F
EN
P. 2
F
P. 16
ES
P. 30
0521 • Form No. 2423938C
Advertisement
Table of Contents

Related Manuals for WAGNER FLEXIO 2500


Summary of Contents for WAGNER FLEXIO 2500
- Page 1 2500 3500 2500 3500 FLEXIO 2500 / 3500 ™ OWNER‘S MANUAL • MANUEL DE L‘UTILISATEUR • MANUAL DE USARIO READ THIS MANUAL FOR COMPLETE INSTRUCTIONS • P. 2 LIRE CE MANUEL POUR OBTENIR DES DIRECTIVES COMPLÈTES • P. 16 LEA ESTE MANUAL PARA OBTENER LAS INSTRUCCIONES COMPLETAS P.
-
Page 2: Table Of Contents
IMPORTANT SAFETY INFORMATION TABLE OF CONTENTS GROUNDING INSTRUCTIONS IMPORTANT SAFETY INFORMATION ..........2-3 This product must be grounded. In the event of an electrical short circuit, grounding reduces the risk of electric shock by CONTROLS AND FUNCTIONS ............4-5 providing an escape wire for the electric current. This product SETUP ...................... -
Page 3: Important Safety Information
IMPORTANT SAFETY INFORMATION SAFETY HAZARDS HAZARD: EXPLOSION OR FIRE HAZARD: ELECTRIC SHOCK Flammable vapors, such as solvent and paint This product can cause injury due to electric shock. vapors, in work area can ignite or explode. PREVENTION: • Power cord must be connected to a grounded circuit. •... -
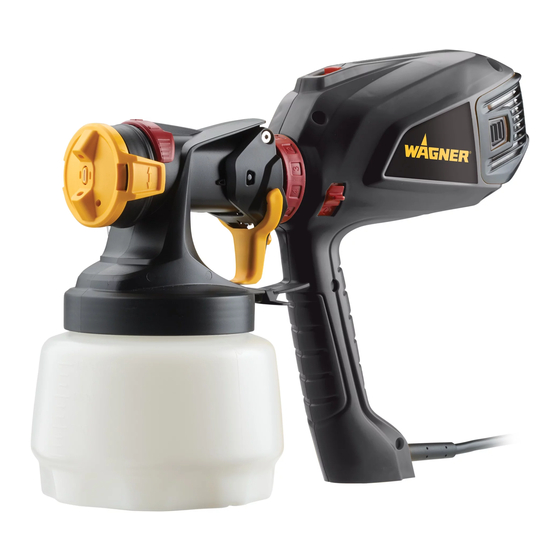
Page 4: Controls And Functions
CONTROLS AND FUNCTIONS 2500 only X-Boost™ Turbine 2-speed X-Boost™ power switch (2500) Variable speed X-Boost™ power dial (3500) Spray width lever Filter housing 3500 only Air cap Material flow control Trigger 1.5 qt (1300 ml) Filter container iSpray® Nozzle Detail Finish Nozzle iSPRAY NOZZLE DETAIL FINISH NOZZLE FLEXiO sprayer model 2500 / 3500... - Page 5 CONTROLS AND FUNCTIONS 2500 X-BOOST™ POWER DIAL / SWITCH The X-Boost power dial / switch adjusts the level of air power produced by the turbine. The FLEXiO sprayer model 3500 is equipped with a variable speed air power control (1 - 12). The FLEXiO sprayer model 2500 is equipped with a 2-speed air power control (HI / LO).
-
Page 6: Setup
SETUP For a video showing how to set up the FLEXiO 2500/3500, visit: www.wagnerspraytech.com/flexio2500support www.wagnerspraytech.com/flexio3500support SPRAYABLE MATERIALS (WATER AND OIL-BASED) • Latex and oil-based paints • Decorative paints • Semi-Transparent stain • Solid stains • Water-based lacquers • Urethanes MATERIAL PREPARATION Material to be sprayed may need to be strained to remove any impurities in the paint which may enter and clog the system. - Page 7 SETUP ASSEMBLY NEVER point the spray gun at any part of the body. Make sure the power cord is unplugged. Stir the spraying material thoroughly. Fill the container. Use a strainer to remove any particles. (see Thinning the Material, previous page, if thinning is required).
-
Page 8: Sprayer Controls
SPRAYER CONTROLS Spray performance will depend upon a number of factors: material thickness, air power, spray pattern selected, and material flow. Testing different variations of the control settings will help you achieve the desired results. See descriptions and suggested Power and Material Settings Guide below to help with your project. X-BOOST™... - Page 9 SPRAYER CONTROLS ADJUST SPRAY SHAPE AIR CAP EARS AIR CAP Adjust the spray pattern by turning the air cap ears. The air cap position will determine the movement direction of the spray gun. The positions of the air cap and the corresponding spray pattern shapes are illustrated below.
-
Page 10: Proper Spraying Technique
PROPER SPRAYING TECHNIQUE SPRAY POSTER The room or area you are spraying must A spray poster is included with your unit. The spray poster can STOP be properly masked in order to prevent be adhered to a spraying surface and can be used for practice. overspray from covering woodwork, floors Follow the guidelines on the poster. - Page 11 PROPER SPRAYING TECHNIQUE Use the images and guidelines below in order to assist you in achieving the desired spray pattern for your project. These are meant to be general starting points - you may have to slightly modify certain controls on the system in order to get the exact performance you need.
-
Page 12: Cleanup
CLEANUP When cleaning, use the appropriate cleaning solution (warm, soapy water for latex materials; mineral spirits for oil-based materials). FLUSHING THE UNIT PULL Special cleanup instructions for use with flammable solvents (must have a flashpoint above 100ºF (38ºC): • Always flush spray gun outside. •... - Page 13 CLEANUP (CONTINUED) CLEANING THE NOZZLE Make sure power cord is unplugged. Push the tab below the trigger, twist and separate the nozzle from the turbine. Wipe the exterior of the cup and nozzle until clean. iSpray Nozzle only - a. Remove the air cap (a) by prying it off the connecting nut (inset). Loosen the connecting nut (b).
-
Page 14: Maintenance
MAINTENANCE REPLACING THE FILTER PRESS Before every use, you should inspect the air filter in the turbine to see if it is excessively dirty. If it is dirty, follow these steps to replace it. Attention Never operate your unit without the air filters. Dirt could be sucked in and interfere with the function of the unit. -
Page 15: Troubleshooting
TROUBLESHOOTING PROBLEM CAUSE SOLUTION Problem A: Little or no material flow 1. Nozzle clogged. 1. Clean. 2. Suction tube clogged. 2. Clean. 3. Material flow setting too low. 3. Increase material flow setting. 4. Suction tube loose. 4. Remove and replace as tightly as possible. 5. -
Page 16: Parts List
PARTS LIST • LISTE DE PIÈCES • LISTA DE PIEZAS X-BOOST™ TURBINE • TURBINE DE X-BOOST™ • TURBINA DE X-BOOST™ 3500 2500 Part No. English Français Español Qty. Nº de piéce Description Description Descripción Qte. Pieza No. Cant. ------- Turbine Turbine Turbina 2382954A... - Page 17 PARTS LIST • LISTE DE PIÈCES • LISTA DE PIEZAS ISPRAY NOZZLE • BUSE DE ISPRAY • BOQUILLA DE ISPRAY Part No. English Français Español Qty. Nº de piéce Description Description Descripción Qte. Pieza No. Cant. 0520006 Spray gun assembly (includes Ensemble de pistolet (inclut Ensamblaje de pistola (incluye items 1-7)
- Page 18 PARTS LIST • LISTE DE PIÈCES • LISTA DE PIEZAS DETAIL FINISH NOZZLE • BUSE DE DETAIL FINISH • BOQUILLA DE DETAIL FINISH Part No. English Français Español Qty. Nº de piéce Description Description Descripción Qte. Pieza No. Cant. 529013 Kit, Detail Front End (includes Ensemble de buse (inclut des Ensamblaje de boquilla...
- Page 19 PARTS LIST • LISTE DE PIÈCES • LISTA DE PIEZAS COMPATIBLE ACCESSORIES • ACCESSOIRES COMPATIBLES • ACCESORIOS COMPATIBLES Part No. English Français Español Nº de piéce Description Description Descripción Pieza No. Detail Finish nozzle Buse de Detail Finish Boquilla de Detail Finish 529013 •...
- Page 20 Este producto, fabricado por la Wagner Spray Tech Corporation (Wagner), está garantizado contra defectos de materiales y de mano de obra por un año a partir de la fecha de compra siempre y cuando se utilice de acuerdo con las recomendaciones e intrucciones impresas de Wagner. Esta garantía no cubre daños ocasionados por el uso incorrecto, accidentes, negligencia por parte del usario o el desgaste normal.
Need help?
Do you have a question about the FLEXIO 2500 and is the answer not in the manual?
Questions and answers