Table of Contents
Advertisement
Quick Links
Advertisement
Table of Contents

Subscribe to Our Youtube Channel
Related Manuals for Gaggenau DF250560


Summary of Contents for Gaggenau DF250560
- Page 1 Instruction manual Dishwasher DF250560...
- Page 2 (08@HPX`h)")*)2 1"1*121:1B1J1R1Z1b1j9"9*92...
-
Page 3: Table Of Contents
Table of contents a u s I n s t r u c t i o n ma n ua l Intended use Additional functions Power Safety instructions Half load hygienePlus (HygienePlus) Before you switch ON the appliance intensiveZone Delivery extraDry Installation Shine and Dry... - Page 4 Customer service Installation and connection Contents of package Safety instructions Delivery Technical specifications Installation Drainage connection Drinking water connection Warm water connection Electrical connection Removal Transporting Protection against frost (Emptying the appliance)
-
Page 5: Intended Use
Intended use Intended use Safety instructions This appliance is intended for use in the T his appliance may be used by children over ▯ I n t e nded us e Sa f e t y i n s t r u c t i o ns home and domestic environments. -
Page 6: Installation
Safety instructions Installation Install built-under or integratable appliances ▯ only under continuous worktops which have Following installation, ensure that the back ▯ been screwed to adjacent cupboards to of the dishwasher is not freely accessible ensure stability. (protection against contact due to hot Do not install the appliance near heat surface). -
Page 7: Disposal
Safety instructions Disposal Warning – Risk to children! If fitted, use the childproof lock. ▯ Make redundant appliances unusable to prevent subsequent accidents. Do not allow children to play with or operate ▯ Dispose of the appliance in an the appliance. environmentally friendly manner. - Page 8 Safety instructions Activate the child-proof lock (door lock) as Deactivate the child-proof lock (door lock) follows: as follows: Pull the catch of the child-proof lock Press the catch of the child-proof lock to towards yourself (1). the right (1). Close the door (2). Press the catch of the child-proof lock backwards (2).
-
Page 9: Environmental Protection
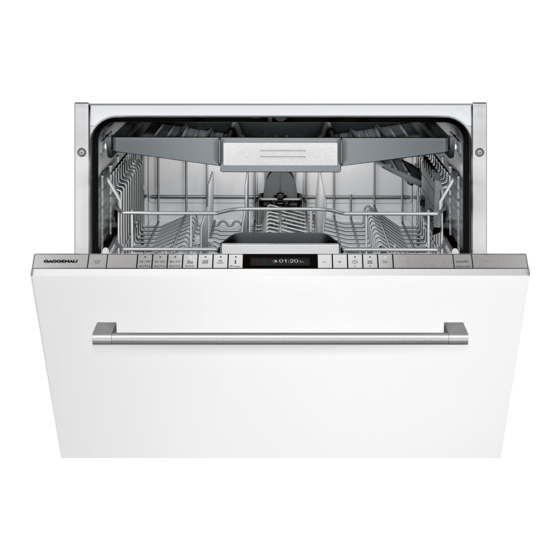
Environmental protection Environmental protection Getting to know your appliance B oth the packaging of new appliances and the old Diagrams of the control panel and the interior of the Env i r o nment a l pr o t e c t i o n Get t i n g t o k n ow y o ur a p pl i a n c e appliances themselves contain valuable raw materials appliance can be found at the front of the manual. -
Page 10: Info Button
Getting to know your appliance Info button { Time setting T he Info button { can be used to display additional When the appliance is switched on the for the first I n f o but t o n Ti m e s e t t i n g programme information. -
Page 11: Settings
Getting to know your appliance Settings The dishwasher has been preset with certain settings Leave with Setup 3 sec. for your convenience. You can change this factory Keep pressing button > )" until the required setting setting. is displayed. Change the setting as follows: Make the setting with setting buttons + - P. -
Page 12: Rinse Aid
Rinse aid Setting amount of rinse aid Rinse aid The amount of rinse aid to be dispensed can be set from 0 to 6. Set the amount of rinse aid to be dispensed to 5 As soon as the low rinse-aid indicator H is lit on the Ri n s e a i d to obtain a very good drying result. -
Page 13: Utensils
Utensils Upper basket Utensils Arrange cups and glasses in the upper basket 12. N ot suitable Ut e ns i l s Cutlery and utensils made of wood. ▯ Delicate decorative glasses, craft and antique ▯ utensils. These decors are not dishwasher-proof. Plastic parts not resistant to heat. -
Page 14: Lower Basket
Utensils Lower basket Cutlery drawer * A rrange the cutlery in the cutlery drawer 1* as Arrange pots and plates in the lower basket 1b. Cut l e r y dr a w er illustrated. Separately arranged utensils are easier to remove after washing. -
Page 15: Etagere
Utensils Etagere * Small items holder * T he etagere and the space underneath can be used for * Depending on the features of your dishwasher, the Et a g er e Sma l l i t e ms hol d er small cups and glasses or for larger items of cutlery, upper basket is fitted with small items holders. -
Page 16: Baking Sheet Spray Head
Utensils Baking sheet spray head * Gastronorm insert * * depending on the features of your dishwasher H elps you stack several Gastronorm drawers, trays Ba k i n g s h eet s p r a y hea d Ga s t r o nor m i n s e r t or similar large flat utensils at an angle in the bottom Large trays or grilles as well as large plates (gourmet... -
Page 17: Adjusting The Height Of The Basket
Utensils Adjusting the height of the basket * Upper basket with side levers * depending on the features of your dishwasher Adj u s t i n g t h e hei g ht of t h e ba s k e t Pull out upper basket 12. -
Page 18: Detergent
Detergent Close cover on the detergent dispenser. Detergent Cover “clicks” into position. Y ou can use tablets as well as powder or liquid Det e r g ent detergents for dishwashers, but never use washing- CLICK up liquid. The dosage can be individually adjusted with powder or a liquid detergent according to the degree of soiling. -
Page 19: Overview Of Programmes
Detergent Overview of programmes The max. possible number of programmes is illustrated in this overview. The corresponding programmes for your appliance can be found on the fascia. The programme data has been measured in the laboratory according to AS/ NSZ 2007. Note: The consumption figures depend on the selected programme and additional functions. -
Page 20: Programme Selection
Additional functions Programme selection Additional functions You can select a suitable programme according to the type of utensils and type of soiling. * Depending on the features of your dishwasher, you Addi t i o na l f u nc t i o ns can select different additional functions `. -
Page 21: Extradry
Operating the appliance ½ extraDry * Operating the appliance A n increased temperature during the final rinse and an ex t r a D r y extended drying phase ensure that even plastic parts Changing the settings dry better. There is a slight increase in the energy Oper a t i n g t h e a p pl i a n c e consumption. -
Page 22: Time Display
Operating the appliance Time display AutoPowerOff (Switching off automatically after the The running time is determined during the programme end of the programme) by the water temperature, the number of utensils as well as the degree of soiling and may vary (depending on the T o save energy, the dishwasher is switched off 1 minute selected programme). -
Page 23: Infolight
Operating the appliance Infolight * Switching on the appliance * depending on the features of your dishwasher i n f o Li g ht Turn tap fully on. While the programme is running, a light spot shines Switch on ON/OFF switch (. on the floor under the appliance door. -
Page 24: Switching Off The Appliance
Operating the appliance Switching off the appliance Terminating the programme (Reset) Open the door. Ter m i n a t i n g t h e pr o gr a m me Short time after the end of the programme: Press the START button h and hold for 3 seconds Open the door. -
Page 25: Cleaning And Maintenance
Cleaning and maintenance Rinse aid Cleaning and maintenance As soon as the refill indicator are lit on the fascia H or there is a request in the display window * )2, rinse aid A regular inspection and maintenance of your machine Cl e a n i n g a n d ma i n t e na n c e should be topped up. -
Page 26: Spray Arms
Cleaning and maintenance Spray arms Limescale and contaminants in the rinsing water may block nozzles and bearings on the spray arms 1: and Check outlet nozzles on the spray arms for blockages. Unscrew the upper spray arm 1: (1) and remove downwards (2). -
Page 27: Fault, What To Do
Fault, what to do? Waste water pump Fault, what to do? Large food remnants or foreign objects which were not captured by the filters may block the waste water pump. E xperience has shown that you can rectify most faults Fa u l t , wha t t o do? The rinsing water will then be above the filter. -
Page 28: Fault Table
Fault, what to do? Fault table Fault Cause Remedial action Error code “:‹ˆ is lit. Intake opening (on right inside of Arrange utensils so that the intake opening appliance) covered by utensils. is not obstructed. Error code “:‚ƒ is lit. Heating element calcified or soiled. - Page 29 Fault, what to do? Fault Cause Remedial action Utensils not dry. No or too little rinse aid in the Refill rinse aid. dispenser. Programme selected without drying. Select programme with drying. Water collecting in depressions on Arrange utensils in a sloping position, the utensils and cutlery.
- Page 30 Fault, what to do? Fault Cause Remedial action Detergent dispenser cover 9" Detergent residue. Utensils must not be placed above the tablet collecting tray 1B. These may block the lid blocked by utensils and therefore does not open fully. of the detergent dispenser and prevent it from opening fully.
- Page 31 Fault, what to do? Fault Cause Remedial action Plastic parts discoloured. Too low rinsing temperature. Select programme with higher washing temperature. Utensils precleaned too intensely; Do not prerinse utensils. Remove only large sensors therefore decide on weak food remnants. programme sequence. Stubborn Increase sensitivity of the sensors.
- Page 32 Fault, what to do? Fault Cause Remedial action Appliance stops in the Door not closed properly. Close the door. programme or programme is Do not place utensils or fragrance Check whether rear panel is being pressed interrupted. dispenser in the tablet collecting tray. in, e.g.
-
Page 33: Customer Service
Customer service Customer service Installation and connection I f you are unable to rectify the fault, please contact your The dishwasher must be connected correctly, Cus t o mer s e r v i c e I n s t a l l a t i o n a n d c o nnec t i o n customer service. -
Page 34: Technical Specifications
Installation and connection Technical specifications Installation The required installation dimensions can be Weight: ▯ found in the installation instructions. Level up to 60 kg the appliance with the aid of the height-adjustable feet. Ensure that the appliance is situated Voltage: ▯... -
Page 35: Warm Water Connection
Installation and connection Warm water connection * Electrical connection * depending on the features of your dishwasher Wa r m wa t e r c o nnec t i o n Connect the appliance to an alternating current only, ▯ ranging from 220 V to 240 V and 50 Hz or 60 Hz via The dishwasher can be connected to cold or hot water a correctly installed socket with protective earth... -
Page 36: Transporting
Installation and connection Transporting Protection against frost I f the appliance is in a room where there is a risk of Empty the dishwasher and secure loose parts. Pr o t e c t i o n a g a i n s t f r o s t ( E mpt y i n g t h e a p pl i a n c e ) frost (e.g. - Page 38 *9001331527* 9001331527 (9709) 642 TW...
Need help?
Do you have a question about the DF250560 and is the answer not in the manual?
Questions and answers