Gaggenau DF250 Operating Instructions Manual
Hide thumbs
Also See for DF250:
- Operating instructions manual (108 pages) ,
- User manual (68 pages) ,
- Instruction manual (44 pages)
Table of Contents
Advertisement
Quick Links
Advertisement
Table of Contents

Subscribe to Our Youtube Channel
Related Manuals for Gaggenau DF250


Summary of Contents for Gaggenau DF250
- Page 1 DF250 DF260...
-
Page 3: Table Of Contents
en Table of contents Intended use Additional options Express Wash/ Safety instructions Speed Perfect (VarioSpeed) Half load Before you switch ON the appliance Hygiene Delivery Intensive zone Installation Extra drying In daily use Energy Save Door lock Damage Operating the appliance Disposal Programme data Protection of the environment... -
Page 4: Intended Use
Intended use Intended use Safety instructions ▯ This appliance is intended for use in the This appliance may be used by children over home and domestic environments. the age of 8 years old and by persons with reduced physical, sensory or mental ▯... -
Page 5: Installation
Safety instructions ▯ If you cannot obtain any information from Installation the manufacturer, you must not install ▯ Following installation, ensure that the dishwasher above or below these the back of the dishwasher is not freely appliances. accessible (protection against contact ▯... -
Page 6: In Daily Use
Safety instructions In daily use Warning Read and observe the safety information Risk of injury! and instructions for use on the packaging ▯ To prevent injuries, e.g. caused by for cleaning and rinsing agents. stumbling, open the dishwasher only briefly in order to load and unload the dishwasher. -
Page 7: Protection Of The Environment
Protection of the environment Protection of the environment Warning Risks to children! Both the packaging of new appliances and the old ▯ If fitted, use the childproof lock. An exact appliances themselves contain valuable raw materials description can be and recyclable materials. found in the back of the envelope. -
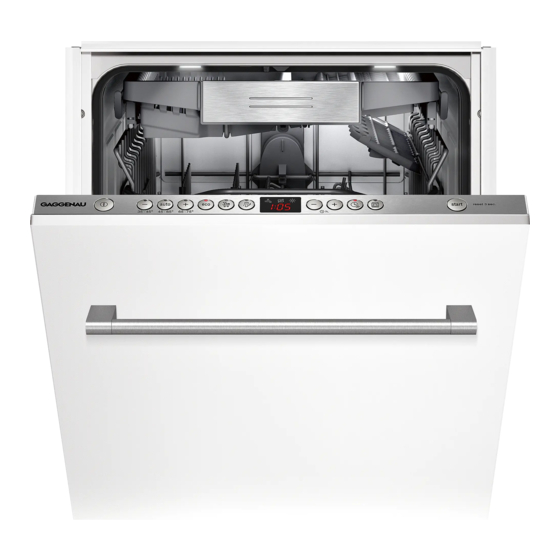
Page 8: Getting To Know Your Appliance
Getting to know your appliance Appliance interior Getting to know your appliance 1" Interior light * 1* Cutlery drawer Diagrams of the control panel and the interior of the 12 Top basket appliance can be found in the envelope at the front. 1: Upper spray arms Individual positions are referred to in the text. -
Page 9: Water Softening System/Special Salt
Water softening system/Special salt Water hardness table Water softening system/Special salt To ensure good washing results, the dishwasher requires soft water, i.e. containing low amounts of lime, otherwise white limescale will be deposited on the utensils and inner container. Tap water above 1.2 mmol/l must be softened. The water is softened with special salt (regeneration salt) in the water softening system of the dishwasher. -
Page 10: Detergents With Salt Component
Rinse aid Using detergents with salt component Rinse aid D e t e r g e n t s w i t h s a l t c o m p o n e n t If combined detergents with a salt component are used, salt can usually be omitted up to a water As soon as the rinse-aid refill indicator H is lit on hardness of 21°... -
Page 11: Setting Amount Of Rinse Aid
Utensils Setting amount of rinse aid Utensils The amount of rinse aid can be set from §:‹‹ to §:‹‡. Please set rinse aid on §:‹… to obtain very good drying results (§:‹… is already set in factory). Not suitable Do not change the amount of rinse aid unless streaks ▯... -
Page 12: Loading The Dishwasher
Utensils Loading the dishwasher Note Utensils must not be placed above the tablet Remove large food remnants. It is not necessary collecting tray 1B. These may block the lid of the to prerinse utensils under running water. detergent dispenser and prevent it from opening fully. Place the utensils so that ‒... -
Page 13: Cutlery Basket
Utensils Cutlery basket F olding spikes * F o l d i n g s p i k e s You should always place cutlery unsorted with * depending on model the points downwards. The spikes can be folded down to improve To prevent injuries, place long, pointed implements arrangement of pans, bowls and glasses. -
Page 14: Adjusting The Height Of The Basket
Detergent Adjusting the height of the basket Detergent The height of the upper utensils basket 12 can be adjusted in 3 stages to create more space either in the You can use tablets as well as powder or liquid upper or lower basket. detergents for dishwashers, but never use washing- up liquid. -
Page 15: Adding Detergent
Detergent Adding detergent Combination detergent If the detergent dispenser 9* is still closed, Apart from conventional detergents (Solo), a number press the lock 92 to open the detergent of products are offered with additional functions. dispenser. These products contain not only the detergent but also rinse-aid and salt replacement substances (3in1) Pour detergent into the dry detergent and, depending on the combination (4in1, 5in1, etc.),... -
Page 16: Overview Of Programmes
Overview of programmes Overview of programmes The max. possible number of programmes is illustrated in this overview. The corresponding programmes for your appliance can be found on the fascia. Type of utensils Type of soiling Programme Possible additional Programme sequence options pots and pans, non-sensi- Is optimised according to... -
Page 17: Additional Options
Additional options Additional options Operating the appliance * depending on model Programme data Additional options can be set with the buttons X. The programme data (consumption values) can be found in the summary of instructions. They refer to Ÿ normal conditions and the water hardness set value •:‹…. -
Page 18: Switching On The Appliance
Operating the appliance Switching on the appliance Optical display while the programme is running * Turn on the tap fully. O p t i c a l d i s p l a y w h i l e t h e p r o g r a m m e i s r u n n i n g * depending on model Open the door. -
Page 19: Remaining Running Time Display
Operating the appliance Remaining running time display End of programme The end of the programme O / ‹:‹‹ is displayed on When the programme is selected, the programme running time is indicated on the digital display h. the floor – provided the optical display is switched on When the programme has started, the remaining and is visible. -
Page 20: Automatic Switch Off / Interior Light
Operating the appliance Automatic switch off after end of Switching off the appliance programme or interior light* Short time after the end of the programme: A u t o m a t i c s w i t c h o f f / i n t e r i o r l i g h t * depending on model Open the door. -
Page 21: Changing The Programme
Cleaning and maintenance Changing the programme Cleaning and maintenance When the START button ` has been pressed, the programme cannot be changed. A regular inspection and maintenance of your machine The only way a programme can be changed is by will help to prevent faults. -
Page 22: Special Salt And Rinse Aid
Cleaning and maintenance Special salt and rinse aid Spray arms ▯ Check the refill indicators @ and H. If Limescale and contaminants in the rinsing water may block nozzles and bearings on the spray arms 1: required, refill salt and/or rinse aid. and 1J. -
Page 23: Fault, What To Do
Fault, what to do? In this case: Fault, what to do? First always disconnect the appliance from the power supply. Experience has shown that you can rectify most faults Take out top basket 12 and bottom basket 1j. which occur in daily operation yourself. This ensures that the machine is quickly available to you again. -
Page 24: Fault Table
Fault, what to do? Fault table Fault Cause Remedial action “Check water supply” display 8 Supply hose kinked. Install supply hose without kinks. lights up. Tap turned off. Turn the tap on. Tap jammed or calcified. Turn the tap on. Flow rate must be min. - Page 25 Fault, what to do? Fault Cause Remedial action Refill indicator for salt @ and/or Refill indicator switched off. Activation/deactivation (see chapter Water sof- rinse-aid H is not lit. tening system/Special salt or Rinse aid). There is still enough special salt/rinse Check refill indicator, levels.
- Page 26 Fault, what to do? Fault Cause Remedial action Food remnants on the utensils. Utensils placed too closely together, Arrange utensils with adequate clearance utensils basket overfilled. between them ensuring that the spray jets can reach the surface of the utensils. Prevent con- tact points.
- Page 27 Fault, what to do? Fault Cause Remedial action White, stubborn coatings; limes- Detergent substances are deposited. Change detergent brand. cale on the utensils, container or These coatings cannot usually be Clean appliance mechanically. door. removed with chemicals (appliance cleaner, ...). Hardness range incorrectly set or water Set water softening system according to hardness greater than 8.9 mmol/l.
- Page 28 Fault, what to do? Fault Cause Remedial action Rust spots on the cutlery. Cutlery not adequately rust-resistant. Use corrosion-resistant cutlery. Knife blades are frequently more severely affected. Cutlery will also rust if rusting parts are Do not wash rusting parts. rinsed at the same time (pan handles, damaged utensil baskets, etc.).
-
Page 29: Customer Service
Customer service Customer service Installation and connection If you are unable to rectify the fault, please contact The dishwasher must be connected correctly, your customer service. We always find a suitable otherwise it will not function properly. solution, even to avoid unnecessary visits The specifications for the inlet and outlet as well as by technicians. -
Page 30: Delivery
Installation and connection Delivery Installation Your dishwasher has been checked thoroughly in the The required installation dimensions can be found in factory to ensure that it is in working order. This may the installation instructions. Level the appliance with cause small water stains. These will disappear after the aid of the height-adjustable feet. -
Page 31: Drinking Water Connection
Installation and connection Drinking water connection Warm water connection * W a r m w a t e r c o n n e c t i o n Fasten the drinking water connection to the tap * depending on model according to the installation instructions using The dishwasher can be connected to cold or hot water the enclosed parts. -
Page 32: Electrical Connection
Installation and connection Electrical connection Transportation ▯ Empty the dishwasher and secure loose parts. Connect the appliance to an alternating current only, ranging from 220 V to 240 V and 50 Drain the appliance according to the following Hz or 60 Hz via a correctly installed socket with steps: protective earth conductor. - Page 34 *9001097299* 9001097299 (9804) 440MV...
Need help?
Do you have a question about the DF250 and is the answer not in the manual?
Questions and answers