
Related Manuals for Delta 22-470


Summary of Contents for Delta 22-470
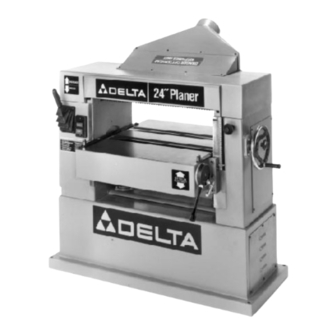
- Page 1 24" Planer (Model 22-470, Three Phase) DATED 6-28-99 PART NO. 1342457 ©Delta International Machinery Corp. 1999...
-
Page 2: Table Of Contents
Two Year Limited Warranty Delta Machinery Delta will repair or replace, at its expense and at its option, any Delta machine, machine part, or machine accessory which in normal use has proven to be defective in workmanship or material, provided that the... -
Page 3: Safety Rules
If you have any questions relative to a particular applica- tion, DO NOT use the machine until you have first contacted Delta to determine if it can or should be performed on the product. -
Page 4: Additional Safety Rules For Planers
ADDITIONAL SAFETY RULES FOR PLANERS 1. IF YOU ARE NOT thoroughly familiar with the oper- before turning on power. ation of planers, obtain advice from your supervisor, instructor or other qualified person. 15. ALWAYS allow the cutterhead to reach full speed before using. -
Page 5: Unpacking And Cleaning
UNPACKING AND CLEANING 1. The 24 planer is shipped complete in one container mounted to a shipping skid. Remove the wooden crate from around the machine. The planer is shipped with the motor, motor pulleys and belts assembled to the machine. -
Page 6: Assembly
2. Remove the bolts that fasten the machine to the shipping skid. 3. Two lifting lugs are built into the machine, one of which is shown at (A) Fig. 3. These lugs can be used to mechanically lift the machine using a forklift and lifting straps. -
Page 7: Assembling Cutterhead Guard
ASSEMBLING CUTTERHEAD GUARD Position cutterhead guard (A) Fig. 7, on top cover of machine. Align holes in cutterhead guard (A) Fig. 7, with holes in top cover and fasten with six 12mm button head screws (B) and flat washers, five of which are shown. Fig. -
Page 8: Electrical Connections
ELECTRICAL CONNECTIONS The 24 Planer is wired as specified for 200-220 or 440 volt operation. Before connecting your machine to an electrical power system, make certain the motor rating agrees with the electrical system it is to be connected to. NOTE: Power cord and plug are not shipped with the Fig. -
Page 9: Locking Switch In The "Off" Position
LOCKING SWITCH IN THE “OFF” POSITION IMPORTANT: We suggest that when the machine is not in use, the switch be locked in the “OFF” position using a padlock (C) Fig. 14, through the two holes in the start button (A) as shown. Fig. -
Page 10: Feed Roll Speeds
FEED ROLL SPEEDS Your planer is equipped with feed roll speeds of 20 feet per minute and 30 feet per minute depending on belt placement on the pulleys. As a rule, a faster feed rate is used for general planing operations, while a slower feed rate (because it provides more cuts per inch of stock) gives a finer and smoother finish to the workpiece. - Page 11 6. Reposition drive belt (E) Fig. 19, on pulleys (F) and (G). When belt (E) Fig. 19, is on the smallest step of motor pulley (G) and the largest step of the gear box pulley (F), the feed roll speed will be 20 feet per minute. When belt (E) Fig.
-
Page 12: Checking And Adjusting Table Roll Height
CHECKING AND ADJUSTING TABLE ROLL HEIGHT It is not possible to give exact dimensions on the proper height setting of the table rolls because each type of wood has different behavioral patterns. As a general rule, when planing rough stock, the table rolls should be set high (.003 to .005 ) above the table surface. -
Page 13: Anti-Kickback Fingers
7. If an adjustment to the outfeed table roll is necessary, loosen locknut (G) Fig. 26, which is located under the table and below the outfeed table roll (F), and rotate adjustment nuts (H) as necessary, to raise or lower the height of the outfeed roll (F). -
Page 14: Checking And Adjusting Feed Roll Belt Tension
3. Loosen and tighten two adjustment nuts (C) Fig. 29, to move motor plate up or down as necessary to increase or decrease drive belt tension.Tighten both adjustment nuts (C) against plate (D) Fig. 29, after adjustment is made. 4. Close both side panels. Fig. -
Page 15: Checking, Resetting And Replacing Knives
CHECKING, RESETTING AND REPLACING KNIVES When checking, resetting and replacing knives, proceed as follows: 1. DISCONNECT THE MACHINE FROM THE POWER SOURCE. 2. Remove locking screw and raise top cover (A) Fig. 33, to expose cutterhead (B). 3. Carefully place knife setting gage (C) Figs. 34 and 35, so the gage is positioned on the radiused section of cut- terhead (B). -
Page 16: Constructing Gage Block
12. Carefully replace the springs (not shown), knives (D) CROSS-SECTIONAL Fig. 35, and knife locking bars (G) into the three slots in the VIEW OF cutterhead (B). IMPORTANT: WHEN REPLACING KNIFE .070 CUTTERHEAD LOCKING BARS (G) FIG. 35, AGAINST KNIVES (D) AS SHOWN IN THE CROSS SECTIONAL ILLUSTRATION, MAKE CERTAIN KNIFE LOCKING BARS (G) ARE INSTALLED AS SHOWN, WITH LOCKING SCREWS (F) -
Page 17: Adjusting Pressure Bar
4. Move gage block (B) Fig. 39, directly under chipbreakers (A) as shown. The bottom of chipbreakers (A) Fig. 39, should just touch gage block (B). 5. If an adjustment to the chipbreakers is necessary, loosen two hex nuts (E) Fig. 37, and turn adjustment screws (F) until chipbreakers (A) touch gage block (B) at both sides of the table. -
Page 18: Adjusting Outfeed Roll
ADJUSTING OUTFEED ROLL The outfeed roll continues to feed the stock out of the machine after the planing operation has been completed and should be set at .030 below the cutting circle. To check and adjust the setting of the outfeed roll, proceed as follows: 1. -
Page 19: Leveling The Table
4. Place gage block (A) Fig. 47, under infeed roll (D). The bottom of roller (D) should just touch gage block (A). 5. If an adjustment is necessary, loosen locknut (E) Fig. 48, and turn adjustment screw (F) until the infeed roll just touches the top of gage block (A). -
Page 20: Adjusting Table Height Scale
5. If the table is not parallel to the cutterhead, lower boot (B) Fig. 51, which is located underneath the table. NOTE: Table elevating handwheel must be unlocked when making this adjustment. 6. Loosen lock screw (C) Fig. 51, and with large pliers (D) turn adjustment sleeve (E) as necessary until table is para- lell with the cutterhead.
Need help?
Do you have a question about the 22-470 and is the answer not in the manual?
Questions and answers