Milwaukee 5263-20 Operator's Manual
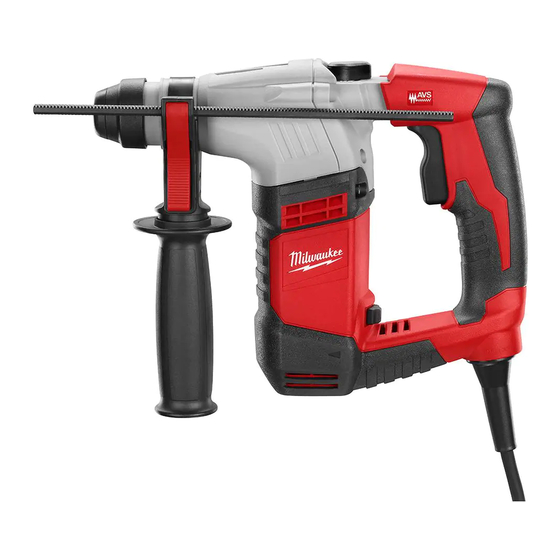
5/8" sds plus rotary hammer
Hide thumbs
Also See for 5263-20:
- Operator's manual (21 pages) ,
- Operator's manual (18 pages) ,
- Operator's manual (11 pages)
Table of Contents
Advertisement
Available languages
Available languages
Quick Links
Cat. No. / No de cat.
SDS
5263-20
PLUS
5/8" SDS PLUS ROTARY HAMMER
MARTEAU ROTATIF 16 mm (5/8")
16 mm (5/8") ROTOMARTILLOS
WARNING
AVERTISSEMENT
comprendre le manuel.
ADVERTENCIA
To reduce the risk of injury, user must read and understand operator's manual.
Afin de réduire le risque de blessures, l'utilisateur doit lire et bien
Para reducir el riesgo de lesiones, el usuario debe leer y entender el manual.
OPERATOR'S MANUAL
MANUEL de L'UTILISATEUR
MANUAL del OPERADOR
Advertisement
Table of Contents

Related Manuals for Milwaukee 5263-20


Summary of Contents for Milwaukee 5263-20
- Page 1 OPERATOR'S MANUAL MANUEL de L'UTILISATEUR MANUAL del OPERADOR Cat. No. / No de cat. 5263-20 PLUS 5/8" SDS PLUS ROTARY HAMMER MARTEAU ROTATIF 16 mm (5/8") 16 mm (5/8") ROTOMARTILLOS WARNING To reduce the risk of injury, user must read and understand operator's manual.
-
Page 2: General Power Tool Safety Warnings
GENERAL POWER TOOL • Dress properly. Do not wear loose clothing or jewelry. Keep your hair and clothing away from SAFETY WARNINGS moving parts. Loose clothes, jewelry or long hair can Read all safety warnings, instruc- WARNING be caught in moving parts. tions, illustrations and specifica- •... -
Page 3: Specifications
Do not use this tool if you do not understand these operating instructions or you feel the work is beyond your capability; contact Milwaukee Tool or a trained professional for additional information or training. 1. Side handle •... -
Page 4: Operation
1. Insert the bit or chisel into the nose of the tool. cord or plug is damaged. If damaged, have it 2. Rotate bit slowly until it aligns with the locking repaired by a MILWAUKEE service facility before mechanism. use. If the plug will not fit the outlet, have a 3. -
Page 5: Maintenance
Return the tool 1. To start the tool, grasp the handle(s) firmly and to a MILWAUKEE service facility for repair. After six pull the trigger. months to one year, depending on use, return the 2. -
Page 6: Sécurité Électrique
Subject to certain exceptions, MILWAUKEE will repair or replace any part on this power tool which, • S’assurer que les enfants et les curieux se trouvent à une after examination, is determined by MILWAUKEE to be defective bonne distance au moment d’utiliser un outil électrique. -
Page 7: Utilisation Et Entretien De L'outil Électrique
; bien affûtés risquent moins de se bloquer et sont plus veuillez contacter Milwaukee Tool ou un professionnel faciles à contrôler. formé pour recevoir plus d’information ou formation. -
Page 8: Description Fonctionnelle
état. Si tel est le cas, faites-les réparer dans un centre-service MILWAUKEE accrédité avant de vous en servir. Si la fiche du cordon ne s’adapte pas à la prise, faites remplacer la prise par un électricien. -
Page 9: Montage De L'outil
1. Desserrez la poignée latérale en dévissant son Choix du mode d'action attache jusqu’à ce que la poignée pivote librement. Les perceuses à percussion MILWAUKEE sont 2. Faites tourner la poignée latérale à la position pourvues de deux réglages: rotation seulement et désirée. - Page 10 Retournez votre outil à un centre de service de rotation commence à diminuer, retirez partielle- MILWAUKEE accrédité pour obtenir le service. Après ment le foret pendant qu’il tourne pour que les débris une période pouvant aller de 6 mois à un an, selon de forage soient éjectés.
-
Page 11: Seguridad Eléctrica
Il faudra retourner l’outil eléctrica o por medio de una batería (inalámbrica). électrique à un centre de service en usine MILWAUKEE ou à un poste d’entretien agréé MILWAUKEE, en port prépayé et assuré. Une copie SEGURIDAD EN EL ÁREA... -
Page 12: Uso Y Cuidado De Las Herramientas Eléctricas
Muchos accidentes son ocasionados por trabajo a realizar supera sus capacidades, comuníquese herramientas eléctricas con mantenimiento deficiente. con Milwaukee Tool o con un profesional capacitado • Mantenga las herramientas de corte afiladas y para recibir capacitación o información adicional. -
Page 13: Descripcion Funcional
Si está dañado antes de usarlo, llévelo a un centro Volts de servicio MILWAUKEE para que lo reparen. Si el enchufe no se acopla al tomacorriente, haga Corriente alterna que un electricista certificado instale un toma- corriente adecuado. - Page 14 Cómo seleccionar la acción libremente. El taladro de martillo de MILWAUKEE tiene dos 2. Gire el mango lateral a la posición deseada. posiciones: perforación y perforación con efecto 3. Apriete el agarre del mango lateral de forma segura.
- Page 15 Operación imiento. Nunca desarme la herramienta. Acuda Coloque la unidad en posición, tome los mangos a un Centro de Servicio MILWAUKEE para TODAS firmemente y accione el gatillo. Siempre mantenga las reparaciones. firme la herramienta usando ambas manos y man- teniendo el control.
- Page 16 Al devolver la herramienta cualquier pieza o componente defectuoso se reemplazará sin costo eléctrica a un centro de servicio de fábrica de MILWAUKEE o a una para usted. Cubriremos todos los costos de flete con relación a este estación de servicio autorizada de MILWAUKEE, es necesario que la...
Need help?
Do you have a question about the 5263-20 and is the answer not in the manual?
Questions and answers