Pro-Team GoCartVac User Manual
Pro-team gocartvac: user guide
Hide thumbs
Also See for GoCartVac:
- Service manual (50 pages) ,
- Brochure (44 pages) ,
- Quick manual (2 pages)
Table of Contents
Advertisement
Quick Links
Advertisement
Table of Contents

Related Manuals for Pro-Team GoCartVac


Summary of Contents for Pro-Team GoCartVac
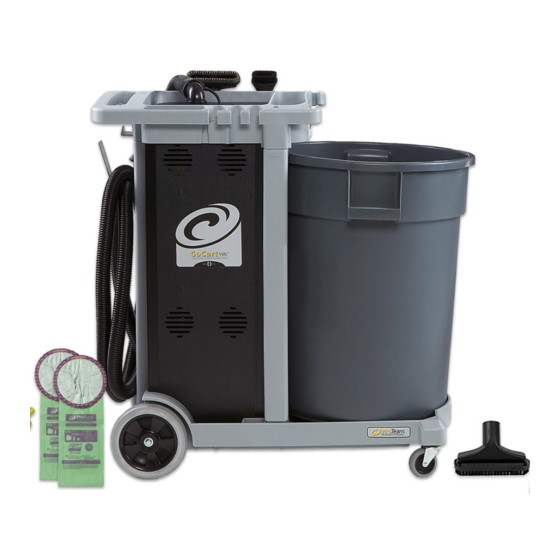
- Page 1 O W N E R ’ S M A N U A L ™ G O C A R T VA C *Trash can not included...
-
Page 2: Table Of Contents
Vacuum Assembly ........10... -
Page 3: Vacuum Safety
RECOVERY only. Do not vacuum liquids. Do not use outdoors or on wet surfaces. Do not expose the vacuum to rain or water. Do not allow the vacuum to be used as a toy. Pay close attention when using the vacuum near children. -
Page 4: Battery Safety
(vented) or diffused through the container walls. The VRLA batteries specified for this equipment are designed to minimize gas produced. The gasses released or diffused must not be allowed to accumulate. The GoCartVac enclosure has been designed to ensure proper ventilation of battery gasses. -
Page 5: Grounding Instructions
GROUNDING INSTRUCTIONS WHEN CONNECTED TO AC POWER OUTLET This GoCartVac must be grounded for AC operation and Battery recharging. If it should malfunction or break down, grounding provides a path of least resistance for electric current to reduce the risk of electric shock. -
Page 6: Carton Contents
CARTON CONTENTS WHEN REMOVING THE GOCARTVAC FROM PACKAGING, TAKE CARE NOT TO LAY THE UNIT ON ITS SIDE. THE VACUUM MUST REMAIN UPRIGHT. Handle and Hose GoCartVac Telescoping Wand Multi Surface Floor Tool Crevice Tool Tool Kit Dust Brush Upholstery... -
Page 7: Preparing The Vacuum For Operation
1. Lift the cover off of the cart ( 2. Set cover in tray on cart ( 3. Unscrew the cap on the top of the vacuum unit ( 3. Check to make sure the filters have not shifted during shipping ( Figure A 4. -
Page 8: Charging The Batteries
1. When the vacuum is not in use, it should be stored in a dry place. 2. Plug the GoCartVac into the wall outlet so it is recharged for the next use. 3. Place the switch on the cart in the ON (I) position, or the batteries will not recharge. -
Page 9: Filter Maintenance
A clogged and dirty filter restricts airflow and results in reduced suction and overheating and damage to the vacuum (Figure A). While vacuuming stop periodically or as needed to shake out the Intercept Micro Filter (Figure B). Replace with a new filter when necessary. -
Page 10: Preventive Maintenance
PREVENTATIVE MAINTENANCE 1. Power Cord: Check all cords before each use for cuts or nicks. Repair or replace as required. 2. Battery: Have the batteries inspected every three months by a qualified service technician for any leakage or changes in shape; if observed replace batteries. -
Page 11: Limited Warranty
This warranty is extended only to the original purchaser of the vacuum cleaner. If the vacuum cleaner is found to be defective during the warranty period, it will be ProTeam’s option to replace or repair it,... -
Page 12: Vacuum Assembly
VACUUM ProTeam... -
Page 13: Vacuum Parts List
High Filtration Disk (Optional) (2 pack) 103623 Electrified Hose, 1 102715 Replacement Swivel Elbow Cuff, Black 106550 Alternating Switch 106284 Kit, Vacuum Attachment Hardware for Cart 103476 Thermal Protector ProTeam VACUUM " x 20' Long, 2-Wire QUANTITY 1 each 10/pack... - Page 14 CART ProTeam...
-
Page 15: Cart Assembly
ORDER # 106219 Kit, Power Receptacle Cord 106211 Box, Sound w/Corner Rails 106213 Cart Assembly 106214 Kit, Mounting Hardware 103718 Hose Wrap, Blk 106241 Kit, Receptacle for Box Assembly 106215 Kit, Box Assembly 106277 Harness, Charging w/Connectors 106216 Kit, Battery Wiring Harness 106280 Lead, Wire, Battery, Fusible Link, Replacement #8AWG, w/Terminals... - Page 16 FOR MORE INFORMATION ABOUT OUR COMPLETE LINE OF VACUUMS CALL 800.541.1456 OR VISIT www.pro-team.com Headquarters 5118 N Sawyer Ave Boise, Idaho 83714 Mailing Address PO Box 7385 Boise, Idaho 83707 103754/ Printed 11-07...
Need help?
Do you have a question about the GoCartVac and is the answer not in the manual?
Questions and answers