Table of Contents
Advertisement
Quick Links
Advertisement
Table of Contents

Related Manuals for Garmin GPSMAP 67


Summary of Contents for Garmin GPSMAP 67
- Page 1 GPSMAP ® Owner’s Manual...
- Page 2 © 2022 Garmin Ltd. or its subsidiaries All rights reserved. Under the copyright laws, this manual may not be copied, in whole or in part, without the written consent of Garmin. Garmin reserves the right to change or improve its products and to make changes in the content of this manual without obligation to notify any person or organization of such changes or improvements. Go to www.garmin.com...
-
Page 3: Table Of Contents
Deleting a Waypoint......11 Introduction........1 Waypoint Averaging......11 GPSMAP 67 Device Overview....1 Projecting a Waypoint....... 11 Charging the GPSMAP 67 Device..2 Moving a Waypoint on the Map..11 Turning On the Device......2 Finding a Location Near a Buttons............. 3 Waypoint.......... - Page 4 Customizing the Device....27 Using Your Computer......20 Customizing the Data Fields....27 Viewing Connect IQ Widgets.... 20 Setup Menu........... 27 Garmin Explore........20 System Settings........ 28 Main Menu Tools......20 Satellite Settings......28 Serial Interface Settings....28 BirdsEye Imagery........21 Display Settings.........
- Page 5 Resetting Data and Settings..... 33 Restoring Default Page Settings.. 33 Device Information......34 Product Updates........34 Setting Up Garmin Express....34 Attaching the Carabiner Clip....34 Removing the Carabiner Clip.... 34 Attaching the Wrist Strap..... 35 Device Care..........35 Cleaning the Device......35 Data Management........
-
Page 7: Introduction
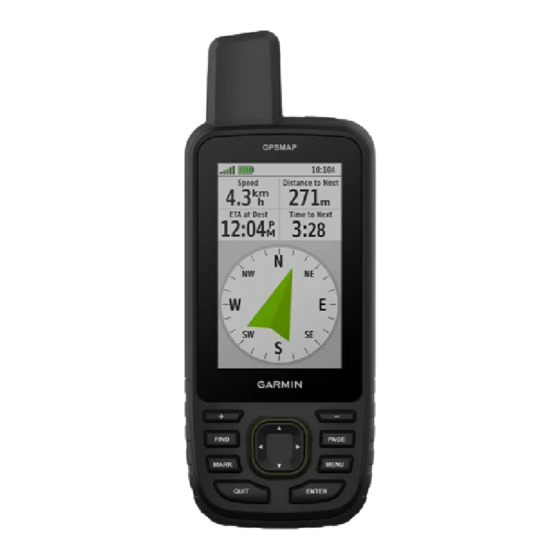
Introduction WARNING See the Important Safety and Product Information guide in the product box for product warnings and other important information. GPSMAP 67 Device Overview GNSS antenna Status LED Power button Buttons USB port (under weather cap) Flashlight microSD ®... -
Page 8: Charging The Gpsmap 67 Device
Charging the GPSMAP 67 Device NOTICE To prevent corrosion, thoroughly dry the USB port, the weather cap, and the surrounding area before charging or connecting to a computer. NOTE: The device does not charge when it is outside the approved temperature range (Specifications, page 37). -
Page 9: Buttons
Buttons Press to open the search menu. FIND Hold to mark your current location as a man overboard (MOB) location and activate navigation. MARK Press to save your current location as a waypoint. Press to cancel or return to the previous menu or page. QUIT Press to scroll through the main pages. -
Page 10: Adjusting The Backlight
Adjusting the Backlight 1 Press to open the status page. 2 Use to adjust the brightness. NOTE: To maximize battery life, the screen turns off automatically when the backlight times out. You can select Setup > Display to customize the backlight and battery save settings. Turning On Battery Save Mode You can use battery save mode to prolong the battery life. -
Page 11: Gps And Other Satellite Systems
GPS and Other Satellite Systems Using GPS and another satellite system together offers increased performance in challenging environments and faster position acquisition than using GPS only. However, using multiple systems can reduce battery life more quickly than using GPS only. Your device can use these Global Navigation Satellite Systems (GNSS). Multi-band systems use multiple frequency bands and allow for more consistent track logs, improved positioning, improved multi-path errors, and fewer atmospheric errors when using the device in challenging environments. -
Page 12: Map Page Settings
Map Page Settings From the map, select MENU. Stop Navigation: Stops navigating the current route. Map Setup: Enables you to open additional map settings (Map Settings, page 6). Measure Distance: Allows you to measure the distance between multiple locations (Measuring Distance on the Map, page 5). -
Page 13: Course Pointer
Course Pointer The course pointer is most useful when you are navigating on water or where there are no major obstacles in your path. It can also help you avoid hazards near the course, such as shoals or submerged rocks. To enable the course pointer, from the compass, select MENU >... -
Page 14: Calibrating The Compass
Calibrating the Compass Before you can calibrate the electronic compass, you must be outdoors, away from objects that influence magnetic fields, such as cars, buildings, or overhead power lines. The device has a 3-axis electronic compass. You should calibrate the compass after moving long distances or experiencing temperature changes. -
Page 15: Altimeter Plot Settings
Altimeter Plot Settings From the altimeter, select MENU. Reset: Resets the altimeter data, including waypoint, track, and trip data. Altimeter Setup: Access additional altimeter settings (Altimeter Settings, page 9). Adjust Zoom Ranges: Adjusts the zoom ranges shown on the altimeter page. Change Data Fields: Allows you to customize the altimeter data fields. -
Page 16: Navigating To A Destination
Navigating to a Destination 1 Select FIND. 2 Select a category. 3 Select a destination. 4 Select Go. Your route appears as a magenta line on the map. 5 Navigate using the map (Navigating with the Map, page 10) or compass (Navigating with the Compass, page 10). -
Page 17: Editing A Waypoint
Editing a Waypoint 1 Select Waypoint Manager. 2 Select a waypoint. 3 Select an item to edit, such as the name. 4 Enter the new information, and select Done. Deleting a Waypoint 1 Select Waypoint Manager. 2 Select a waypoint. 3 Select MENU >... -
Page 18: Setting A Waypoint Proximity Alarm
Setting a Waypoint Proximity Alarm You can add a proximity alarm for a waypoint. Proximity alarms alert you when you are within a specified range of a particular location. 1 Select Waypoint Manager. 2 Select a waypoint. 3 Select MENU > Set Proximity. 4 Enter the radius. -
Page 19: Editing A Route
Editing a Route You can add, remove, or rearrange points on a route. 1 Select Route Planner. 2 Select a route. 3 Select MENU > Edit Route. 4 Select a point. 5 Select an option: • To view the point on the map, select Review. •... -
Page 20: Recording Settings
Output Format: Sets the device to save the recording as a FIT or a GPX/FIT file (File Types, page 35). The FIT option records your activity with fitness information that is tailored for the Garmin Connect ™ application and can be used for navigation. The FIT and GPX option records your activity as both a traditional track that can be viewed on the map and used for navigation, and as an activity with fitness information. -
Page 21: Navigating A Saved Activity
3 Select MENU > Copy Reversed. Creating a Track from a Saved Activity You can create a track from a saved activity. This allows you to share your track wirelessly with other compatible Garmin devices. ® 1 Select Recorded Activities. -
Page 22: Navigating A Saved Course
Navigating a Saved Course 1 Select FIND > Courses. 2 Select a course. 3 Select Go. By default, your route appears as a straight, colored line on the map. Editing a Course 1 Select Course Planner. 2 Select a course. 3 Select MENU >... -
Page 23: Reversing A Course
3 Select MENU > Reverse Course. Creating a Track or Route from a Saved Course You can create a track or route from a saved course. The tracks or routes can be navigated using Garmin devices that do not support course navigation. -
Page 24: Connected Features
EPO Downloads: Allows you to download an extended prediction orbit file to quickly locate GPS satellites and reduce the time it takes to get an initial GPS fix using the Garmin Explore app or when connected to a Wi‑Fi ®... -
Page 25: Phone Notifications
Apps: Add interactive features to your device, such as new outdoor and fitness activity types. Downloading Connect IQ Features Before you can download features from the Connect IQ app, you must pair your GPSMAP 67 device with your smartphone (Pairing a Smartphone with Your Device, page 18). -
Page 26: Downloading Connect Iq Features Using Your Computer
Garmin Explore The Garmin Explore website and mobile app allow you to plan trips and use cloud storage for your waypoints, routes, and tracks. They offer advanced planning both online and offline, allowing you to share and sync data with your compatible Garmin device. -
Page 27: Birdseye Imagery
Satellite: Displays your current GPS satellite information (Satellite Page, page 26). Collections Manager: Displays collections synced from your Garmin Explore account. Course Planner: Displays a list of saved courses and allows you to create new courses (Courses, page 15). BirdsEye Imagery BirdsEye imagery provides downloadable, high-resolution map imagery, including detailed satellite imagery and raster-based topographical maps. -
Page 28: Connecting To Geocaching.com
After you register, you can view geocaches from www.geocaching.com on your device while connected wirelessly. • Connect to the Garmin Connect app. • Connect to a Wi‑Fi network. Downloading Geocaches Using a Computer You can load geocaches manually onto your device using a computer (Transferring Files to Your Device, page 36). -
Page 29: Searching For A Geocache On The Map
Searching for a Geocache on the Map 1 Select Geocaching. 2 Select 3 Select MENU > Download Geocaches to search for and download nearby geocaches on the map. 4 Select MENU > Filter to filter the search results (optional). 5 Select a geocache. The geocache details appear. -
Page 30: Using Hints And Clues To Find A Geocache
A chirp is a small Garmin accessory that is programmed and left in a geocache. You can use your device to find a chirp in a geocache. Enabling chirp Searching 1 Select Setup > Geocaching. 2 Select chirp™ Searching > On. -
Page 31: Setting A Proximity Alarm
• To delete the alarm, select Delete. Sending and Receiving Data Wirelessly Before you can share data wirelessly, you must be within 3 m (10 ft.) of a compatible Garmin device. Your device can send and receive data wirelessly when connected with a compatible Garmin device using ANT+ ®... -
Page 32: Using The Virb Remote
NOTE: Wi‑Fi, Bluetooth, and ANT+ connections are disabled in SOS mode. Using the inReach Remote The inReach remote function allows you to control your inReach device using your GPSMAP 67 device. 1 Turn on the inReach device. 2 On your GPSMAP 67 device, select inReach Remote. -
Page 33: Gps Satellite Settings
Single Color: Allows you to select whether the satellite page is displayed in multicolor or single color. Set Location On Map: Allows you to mark your current location on the map. You can use this location to create routes or search for saved locations. AutoLocate Position: Calculates your GPS position using the Garmin AutoLocate ® feature. -
Page 34: System Settings
Garmin Spanner: Allows you to use the device USB port with most NMEA 0183-compliant mapping programs by creating a virtual serial port. Garmin Serial: Sets the device to use a Garmin proprietary format to exchange waypoint, route, and track data with a computer. -
Page 35: Display Settings
Display Settings Select Setup > Display. Backlight Timeout: Adjusts the length of time before the backlight turns off. Battery Save: Saves the battery power and prolongs the battery life by turning off the screen when the backlight times out. Appearance: Changes the appearance of the display background and selection highlight (Changing the Color Mode, page 29). -
Page 36: Advanced Routing Settings
Wireless Sensors Your device can be used with wireless ANT+ or Bluetooth sensors. For more information about compatibility and purchasing optional sensors, go to buy.garmin.com. Pairing Your Wireless Sensors Before you can pair, you must put on the heart rate monitor or install the sensor. -
Page 37: Marking Laps By Distance
Marking Laps by Distance You can use Auto Lap to automatically mark the lap at a specific distance. This feature is helpful for comparing ® your performance over different parts of an activity. 1 Select Setup > Fitness > Auto Lap. 2 Enter a value, and select Done. -
Page 38: Changing The Page Sequence
Changing the Page Sequence 1 Select Setup > Menus > Page Sequence > Edit Page Sequence. 2 Select a page. 3 Select an option: • To move the page up or down in the list, select Move. • To add a new page to the page sequence, select Insert, and select a category. •... -
Page 39: Profiles
Profiles Profiles are a collection of settings that optimize your device based on how you are using it. For example, the settings and views are different when you use the device for hunting than when geocaching. When you are using a profile and you change settings, such as data fields or units of measurement, the changes are saved automatically as part of the profile. -
Page 40: Device Information
On your computer, install Garmin Express (www.garmin.com/express). On your phone, install the Garmin ™ Explore app. This provides easy access to these services for Garmin devices: • Software updates • Map updates • Data uploads to Garmin Explore • Product registration Setting Up Garmin Express 1 Connect the device to your computer using a USB cable. -
Page 41: Attaching The Wrist Strap
• GPX route, track, and waypoint files. • GPX geocache files (Downloading Geocaches Using a Computer, page 22). • JPEG photo files. • GPI custom POI files from the Garmin POI Loader. Go to www.garmin.com/products/poiloader. • FIT files for exporting to Garmin Connect. Device Information... -
Page 42: Installing A Memory Card
Installing a Memory Card You can install a microSD memory card, up to 32 GB, for additional storage or pre-loaded maps. 1 Lift the weather cap on the side of the device 2 Insert the memory card with the gold contacts facing the front of the device. Connecting the Device to Your Computer NOTICE To prevent corrosion, thoroughly dry the USB port, the weather cap, and the surrounding area before charging or... -
Page 43: Deleting Files
FCC or regional compliance markings, as well as applicable product and licensing information. 1 Select Setup. 2 Select About. The device withstands incidental exposure to water of up to 1 m for up to 30 min. For more information, go to www.garmin.com/waterrating. Device Information... -
Page 44: Appendix
Appendix Data Fields Some data fields require you to be navigating or require wireless accessories to display data. 24 hr. Max. Temperature: The maximum temperature recorded in the last 24 hours from a compatible temperature sensor. 24 hr. Min. Temperature: The minimum temperature recorded in the last 24 hours from a compatible temperature sensor. - Page 45 Elevation - Minimum: The lowest elevation reached since the last reset. ETA at Destination: The estimated time of day when you will reach the final destination (adjusted to the local time of the destination). You must be navigating for this data to appear. ETA at Next: The estimated time of day when you will reach the next waypoint on the route (adjusted to the local time of the waypoint).
-
Page 46: Getting More Information
• Go to support.garmin.com for additional manuals, articles, and software updates. • Go to buy.garmin.com, or contact your Garmin dealer for information about optional accessories and replacement parts. Optional Accessories Optional accessories, such as mounts, maps, fitness accessories, and replacement parts, are available at http://buy.garmin.com... -
Page 47: Tempe
Tips for Pairing ANT+ Accessories with Your Garmin Device • Verify that the ANT+ accessory is compatible with your Garmin device. • Before you pair the ANT+ accessory with your Garmin device, move 10 m (33 ft.) away from other ANT+ accessories. -
Page 48: Heart Rate Zone Calculations
Heart Rate Zone Calculations % of Maximum Heart Zone Perceived Exertion Benefits Rate Beginning-level aerobic training, 50–60% Relaxed, easy pace, rhythmic breathing reduces stress Comfortable pace, slightly deeper Basic cardiovascular training, good 60–70% breathing, conversation possible recovery pace Moderate pace, more difficult to hold Improved aerobic capacity, optimal 70–80% conversation... - Page 50 November 2022 GUID-5724F4C0-7557-4C51-BF07-54A567FA4600 v1...
Need help?
Do you have a question about the GPSMAP 67 and is the answer not in the manual?
Questions and answers