Advertisement
Quick Links
Read all instructions BEFORE assembly and USE of product.
IMPORTANT! KEEP FOR FUTURE REFERENCE.
Lea todas las instrucciones ANTES de armar y USAR el producto.
¡IMPORTANTE! CONSÉRVELO PARA REFERENCIA FUTURA.
Lire toutes les instructions AVANT d'assembler et d'UTILISER ce produit.
Die Anleitung VOR dem Zusammenbau und GEBRAUCH des Produkts bitte sorgfältig durchlesen.
WICHTIG! ZUM SPÄTEREN NACHSCHLAGEN AUFBEWAHREN.
Leia todas as instruções ANTES da montagem e UTILIZAÇÃO do produto.
IMPORTANTE! GUARDE PARA REFERÊNCIA FUTURA.
Прочтите все инструкции ПЕРЕД сборкой и ИСПОЛЬЗОВАНИЕМ изделия.
ВАЖНО! СОХРАНИТЕ ИНСТРУКЦИИ ДЛЯ ДАЛЬНЕЙШЕГО ИСПОЛЬЗОВАНИЯ.
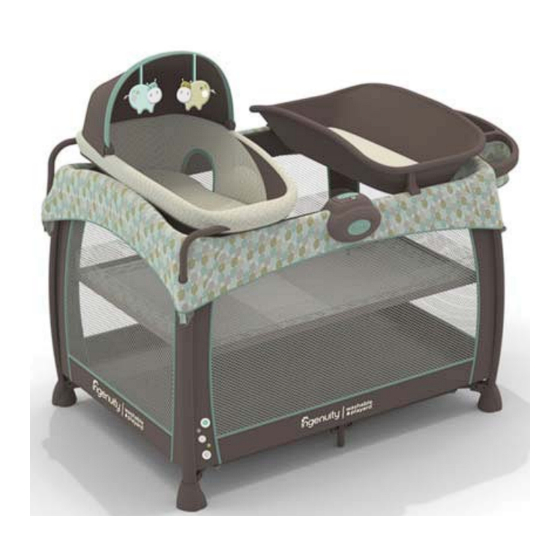
Washable Playard Deluxe with Dream Cent e r ™
Video
Vídeo
Vidéo
Video
Vídeo
Ingenuity
™
60286-NA
Playard
Corral
Parc de jeu
Laufstall
Chiqueirinho
Игровой манеж
Advertisement

Related Manuals for ingenuity Washable Playard Deluxe with Dream Centre


Summary of Contents for ingenuity Washable Playard Deluxe with Dream Centre
- Page 1 Leia todas as instruções ANTES da montagem e UTILIZAÇÃO do produto. IMPORTANTE! GUARDE PARA REFERÊNCIA FUTURA. Прочтите все инструкции ПЕРЕД сборкой и ИСПОЛЬЗОВАНИЕМ изделия. ВАЖНО! СОХРАНИТЕ ИНСТРУКЦИИ ДЛЯ ДАЛЬНЕЙШЕГО ИСПОЛЬЗОВАНИЯ. Ingenuity ™ Washable Playard Deluxe with Dream Cent e r ™ 60286-NA...
-
Page 2: Fall Hazard
WARNING ENGLISH Failure to follow these warnings and the instructions could result in serious injury or death. • Always provide the supervision necessary for the continued safety of your child. When used for playing, never leave child unattended. • Only use the product with one child at a time. •... - Page 3 STRANGULATION HAZARD: • Toy Bar and toys – Possible entanglement or strangulation injury. Remove toy when baby begins to push up on hands and knees. Recommended use from birth to 5 months. • Strings can cause strangulation! Never place items with a string around a child’s neck such as hood strings or paci er cords.
- Page 4 ADVERTENCIA ESPAÑOL No seguir estas advertencias y las instrucciones puede ocasionar lesiones graves o la muerte. • Es necesario que siempre supervise al niño por su seguridad. Cuando se utilice para jugar, nunca deje al niño sin atención. • Utilice el producto con un solo niño por vez. •...
- Page 5 • Siempre mantenga al niño al alcance de la mano cuando use el cambiador. • Siempre asegure correctamente el cambiador a las barandas del corral. • No use el cambiador como área para dormir o jugar. Dream Centre: • Para ayudar a evitar caídas, no use el Dream Centre™ cuando el bebé comience a levantarse con las manos y las rodillas, o cuando haya alcanzado un peso de 6.8 kg (15 lb), lo que ocurra primero.
- Page 6 NO lo utilice si se extravía, daña o rompe alguna pieza. De ser necesario, contacte a Kids II para obtener piezas de repuesto e instrucciones. Nunca sustituya las piezas. Veri fique que este producto no tenga accesorios dañados, uniones flojas, piezas faltantes ni bordes filosos antes de armarlo y luego, periódica- mente, durante el uso.
- Page 7 Lit d’appoint : • Ne plus utiliser ce lit d’appoint à compter du moment où l’enfant commence à se mettre à quatre pattes, ou bien dès lors qu’il pèse plus de 6,8 kg. Table à langer : • Le poids limite de la table à langer est de 11 kg. •...
- Page 8 ce dernier. • NE JAMAIS utiliser de sacs d’expédition en plastique ou autre lm plastique en tant que couvertures de matelas qui ne sont pas vendus pour cette utilisation ou destinés à cette utilisation. Ils peuvent provoquer une suffocation. IMPORTANT •...
- Page 9 weisungen nicht genau befolgen können. • Verändern Sie am Laufstall nichts bzw. fügen Sie keine Teile hinzu, die nicht in der Gebrauchsanleitung aufgeführt sind. • Den Tragebeutel vom Kind fernhalten. • Nicht im Freien verwenden. • Niemals ein Kind unter den Babykorb legen. •...
- Page 10 • Lassen Sie den Wickeltisch niemals aufgestellt, wenn sich das Kind im Laufstall be ndet. • Verwenden Sie das Dream Centre™ nicht, sofern es nicht gemäß den An- weisungen des Herstellers am Laufstall angebracht ist. Niemals aufgestellt lassen, wenn sich das Kind im Bassinette oder Laufstall be ndet. ERSTICKUNGSGEFAHR: •...
- Page 11 ADVERTÊNCIA PORTUGUÊS A não observância desses avisos e instruções pode resultar em ferimento grave ou morte. • Providencie sempre a supervisão necessária para manter a segurança do seu lho. Nunca deixe a criança sozinha quando usar o produto para atividades de brincadeira. •...
- Page 12 Cercado-berço: • Pare de usar o cercado-berço quando a criança começar a se erguer usando as mãos e os joelhos ou pesar mais que 6,8 kg, o que acontecer antes. Trocador: • O limite de peso para uso do trocador é de 11 kg. •...
- Page 13 • Não use o colchão sem que as placas estejam corretamente instaladas. • Não coloque o cercado-berço no chiqueirinho quando este estiver sendo usado. • NUNCA use sacos plásticos ou outros materiais de lme plástico para cobrir o colchão que não sejam comercializados e projetados para esta nalidade.
- Page 14 • • • • • • 13,5 , • 6,8 , • - 11 . • • • Dream Centre: • Dream Centre™, 6,8 , • • • • • – 14 –...
- Page 15 • • Dream Centre™, • • • • • Kids II. • • • • • • • • • Kids II. • – 15 –...
- Page 16 60286 Parts List and Drawing • Lista de partes y dibujo Liste de pièces et dessin • Teileliste und Montagezeichnung • Lista de peças e desenho • Qty. Cant. Description Descripción Description N° Qté Playard assembly Armado del corral Montage du parc Mattress for playard Colchón para el corral Matelas pour parc...
- Page 17 Qty. Cant. Description Descripción Description N° Qté Zusammenbau des Montagem do chiqueirinho Laufstalls Matratze für Laufstall Colchão para chiqueirinho Babykorb Cercado-berço Wickeltisch Trocador Zubehörfach Bandeja para acessórios Dream Centre Dream Centre Dream Centre Dream Centre Capa do Dream Centre Dream Abdeckung Centre Dream Centre...
- Page 18 Setting up the Playard • Instalar el corral Montage du parc à jeu • Aufbau des Laufstalls • Montagem do chiqueirinho • Unwrap the mattress from the playard and set the mattress aside. Desenvuelva el colchón del corral y colóquelo a un lado. Séparer le matelas du parc en le déroulant et le mettre de côté.
- Page 19 Puxe para cima a barra superior de cada lado do chiqueirinho. Solte para travar cada barra em uma posição rme. OBSERVAÇÃO: caso uma barra superior não tenha cado presa, empurre o centro da base um pouco mais para cima e volte a tentar. Click •...
- Page 20 Lift up one end of the playard and push downward on the center of the oor. Levante un extremo del corral y presione el centro del piso hacia abajo. Soulever un côté du parc et pousser vers le bas le fond du parc en son milieu. Heben Sie ein Ende des Laufstalls an und drücken Sie es in Richtung der Bodenmitte nach unten.
- Page 21 Lay the mattress on the bassinet with its soft side facing up. Press each corner of the mattress to engage the patch underneath and secure the mattress in place. Apoye el colchón sobre el moisés con el lado blando hacia arriba. Presione cada esquina del colchón para enganchar los parches de sujeción que se encuentran debajo y para sujetar el colchón en su lugar.
- Page 22 CAUTION: Be sure that the playard setup is complete before use. Verify that all four top rails are locked in horizontal position. PRECAUCIÓN: Asegúrese de que se haya completado la instalación del corral antes de usar. Veri que que las cuatro barandas superiores estén trabadas en posición horizontal.
- Page 23 Playard Setup Without Bassinet • Instalar el corral sin moisés Installation du parc sans lit d’appoint • Aufbau des Laufstalls ohne Babykorb • Instalação do chiqueirinho sem o cercado-berço • Lift up one end of the playard and push downward on the center of the oor. Levante un extremo del corral y presione el centro del piso hacia abajo.
- Page 24 Lay the mattress on the oor of the playard. Locate the hook-and-loop straps on the underside of the mattress and run them through the slots on the bottom of the playard. Apoye el colchón en el piso del corral, con el lado blando hacia arriba. Busque las cintas con abrojo en el lado inferior del colchón y páselas por las ranuras en el fondo del corral.
- Page 25 Changing Table Assembly • Ensamblaje del cambiador Ensemble de la table à langer • Wickeltisch-Montage Montagem do trocador • Clamps • Prensas de sujeción • Pinces Click • Clic • Clic • Klicken Klemmen • Presilhas • • Clique • Labels •...
- Page 26 Click • Clic • Clic • Klicken Click • Clic • Clic • Klicken • Clique • • Clique • – 26 –...
- Page 27 Dream Centre Assembly • Ensamblaje del Dream Centre Montage du Dream Centre • Zusammenbau des Dream Centre • Montagem do Dream Centre • Dream Centre Slip on the Dream Centre fabric on to the Frame as shown. Coloque la tela del Dream Centre en el armazón como se muestra en la gura. Positionner la housse en tissus du Dream Centre sur le cadre comme indiqué.
- Page 28 Click • Clic • Clic • Klicken • Clique • – 28 –...
- Page 29 Remove the top cover strap to expose the plastic receiver. Retire la tira de la cubierta superior para dejar expuesto el receptor de plástico. Retirer la sangle de la housse pour mettre à nu le réceptacle en plastique. Entfernen Sie den Riemen der oberen Abdeckung, so dass das Plastik-Gegenstück frei ist. Remova a tira da capa superior para expor o encaixe de plástico.
- Page 30 Canopy Assembly • Ensamblaje del Capota Montage du Capote • Zusammenbau des Abdeckhimmels Montagem do dossel • Install canopy over the patch on the Dream Centre. Instale la capota sobre el parche en el Dream Centre. Installer la capote au-dessus du berceau sur le Dream Centre. Bringen Sie den Abdeckhimmel auf der Seite mit den Netzeinsätzen am Dream Centre an.
- Page 31 Using the Accessory Tray • Uso de la bandeja para accesorios Utilisation du bac accessoires • Verwendung des Zubehörfachs Uso da bandeja para acessórios • Attach the accessory tray to the top rail on either end of the playard. NOTE: Do not attach the accessory tray to the clamp guides for the changing table.
- Page 32 Battery Installation • Instalación de las Baterias Installation de Piles • Einlegen der Batterien Instalação das pilhas • The Electronic unit requires (3) size AA/LR6 (1.5V) batteries for normal operation (not included). CAUTION: Follow the battery guidelines in this section. Otherwise, battery life may be shortened or the batteries may leak or rupture.
- Page 33 • Retire las baterías antes de almacenar un producto durante un período pro- longado. • Las baterías débiles hacen que el producto funcione en forma errática, es decir, con distorsión del sonido, pérdida de intensidad o falla de las luces y funciona- miento lento o ruptura de las piezas motorizadas.
- Page 34 • Batterien nicht kurzschließen. • Nur vom Hersteller empfohlene oder vergleichbare Batterien verwenden. • Batterien nicht in Bereichen mit extremen Temperaturbedingungen aufbewahren (z. B. Dachkammern, Garagen oder Autos). • Verbrauchte Batterien aus dem Batteriefach entfernen. • Neue Batterien nicht zusammen mit alten verwenden. •...
- Page 35 • Não descarte o produto nem as pilhas no fogo; as pilhas podem explodir ou vazar. Este símbolo indica que o produto não deve ser descartado em lixo doméstico, uma vez que as pilhas contêm substâncias que podem causar danos ao meio ambiente e à...
- Page 36 1.5V AA/LR6 Installing the Electronic unit Instalar la Unidad de Control Installation du module de contrôle Einsetzen der elektronischen Einheit Como instalar o aparelho eletrônico – 36 –...
- Page 37 Using the Electronic unit • Uso de la Unidad de Control Utilisation du module de contrôle • Benutzung der elek- tronischen Einheit • Como usar o aparelho eletrônico • High Nature Sounds Button Power Button Music Button Botón de Sonidos de la Naturaleza botón de encendido Botón de Música Bouton Sons de la nature...
- Page 38 Folding the Playard • Plegar el corral • Replier le parc à jeu • Zusammenklappen des Laufstalls • Como dobrar o chiqueirinho • Lift the center of the oor. Levantar el centro del piso. Soulevez le centre du fond. Heben Sie die Bodenmitte höher. Levante a parte central da base.
- Page 39 To unlock each rail, lift up and lower the center of the rail while pressing the locking mechanism. NOTE: If top rail does not unlock, DO NOT force it. Lift the center of the oor higher and try again. Para destrabar cada baranda, levante y baje el centro de la baranda mientras presiona el mecanismo de bloqueo.
- Page 40 – 40 –...
- Page 41 Removing the Bassinet • Retirar el moisés Retrait du lit d’appoint • Herausnehmen des Babykorbs • Retirada do cercado-berço • Unzip the zipper around all four sides of the bassinet until the halves of the zipper are separated. Abra el cierre que recorre los cuatro lados del moisés hasta separar las mitades del cierre. Ouvrir la fermeture à...
- Page 42 Installing the Bassinet • Instalar el moisés Installation du lit d’appoint • Einsetzen des Babykorbs • Instalação do cercado-berço • – 42 –...
- Page 43 Lay the mattress on the bassinet with its soft side facing up. Press each corner of the mattress to engage the hook-and-loop patch underneath and secure the mattress in place. Apoye el colchón sobre el moisés con el lado blando hacia arriba. Presione cada esquina del colchón para enganchar los parches de sujeción que se encuentran debajo y para sujetar el colchón en su lugar.
- Page 44 Care and Cleaning • Cuidado y limpieza Entretien et nettoyage • Manutenzione e pulizia • Cuidados e limpeza • Playard and Bassinet – Remove from frame. Fasten all hook-and-loop tabs. Machine wash in cold water, gentle cycle. Air dry at. No bleach. Spot clean with a soft, clean cloth and mild soap.
- Page 45 Parc à jeu et lit d’appoint – Les retirer du cadre. Attacher toutes les attaches auto- agrippantes. Lavage en machine à l’eau froide, cycle délicat. Laisser sécher à l’air libre, à plat. Javel interdite. Nettoyez les taches à l’aide d’un chiffon doux, propre et d’un détergent ordinaire.
- Page 46 Chiqueirinho e Moisés - Remova da armação. Prenda todas as linguetas de engate. Lave na máquina com água fria no ciclo delicado. Seque ao ar livre. Não use alvejantes. Limpe manchas com um pano macio e limpo, umedecido com sabão neutro. Colchão - Remova as placas estruturais.
- Page 47 Removing the Dream Centre Washable Fabrics Cómo retirar las telas lavables del Dream Centre Retrait des tissus lavables du Dream Centre Abnehmen der waschbaren Stoffe des Dream Centre Remoção dos tecidos laváveis do Dream Centre Dream Centre Remove the top cover strap to expose the plastic receiver. Push the button on the playard receiver to disengage the dream centre support tubes.
- Page 48 Use a tool such as screw driver to push the spring pin. Then remove the support tubes from the Dream Centre frame. Use una herramienta, como un destornillador, para empujar la clavija del resorte. Posteriormente retire los tubos de soporte del armazón del Dream Centre. Desabroche la tira de cada lado y quite la tela del Dream Centre del armazón.
- Page 49 NOTE: To reinstall the dream centre, reverse the above steps. Ensure that the head side tubes and feet side tubes are installed in the correct locations. NOTA: Para reinstalar el Dream Centre, repita los pasos anteriores en el orden inverso. Asegúrese de que los tubos del lado de la cabeza y los tubos del lado de los pies estén instalados en los lugares correctos.
- Page 50 Removing the Mattress Cover • Cómo retirar el cobertor del colchón • Retrait du protège-matelas • Abnehmen des Matratzenbezugs • Remoção da capa do colchão • To reinstall matress reverse the above steps Para volver a instalar colchón invierta los pasos anteriores Pour réinstaller matelas inverser les étapes ci-dessus Um die Matratze wieder einzusetzen, die oben beschriebenen Schritte in umgekehrter Reihenfolge ausführen.
- Page 51 Removing the W Undo all straps. Please repeat 4 times. Desabroche las tiras de sujeción. S’il vous plaît répéter 4 fois. Démonter les pattes auto-agrippantes. Por favor, repita 4 veces. Lösen Sie alle Gurte. Bitte 4 Mal wiederholen. Solte todas as tiras. Repita 4 vezes. –...
- Page 52 Flip top rail cover over, exposing all 4 top rail edges, unzip washable zipper. Voltee la funda de la baranda superior para dejar expuestos los 4 bordes de la baranda superior y abra el cierre lavable. Retourner la protection du rail supérieur pour exposer les quatre coins du rail supérieur, et ouvrir la fermeture éclair de la protection lavable.
- Page 53 Locate the red spring-loaded button at the top inside of each of the four legs of the playard. Press down on the button to disconnect the inner leg from the outer leg. Ubique el botón rojo de resorte ubicado en la parte superior interna de cada una de las cuatro patas del corral.
- Page 54 – 54 –...
- Page 55 FCC Statement / CAN ICES-3 (B) / NMB-3(B) This device complies with Part 15 of the FCC rules. Operation is subject to the following two conditions: 1 this device may not cause harmful interference, and 2 this device must accept any interference received, including interference that may cause undesired operation.
- Page 56 MANUFACTURED FOR • FABRIQUÉ POUR ™ • ©2014 KIDS II, INC. • www.kidsii.com/customerservice KIDS II, INC., ATLANTA, GA USA 30305 • 1-800-230-8190 KIDS II CANADA CO. TORONTO, ONTARIO CANADA M2J 5C2 • 1-800-230-8190 KIDS II AUSTRALIA PTY LIMITED CASTLE HILL, NSW AUSTRALIA 2154 • (02) 9894-1855 KIDS II JAPAN K.K.
Need help?
Do you have a question about the Washable Playard Deluxe with Dream Centre and is the answer not in the manual?
Questions and answers