Table of Contents
Advertisement
Available languages
Available languages
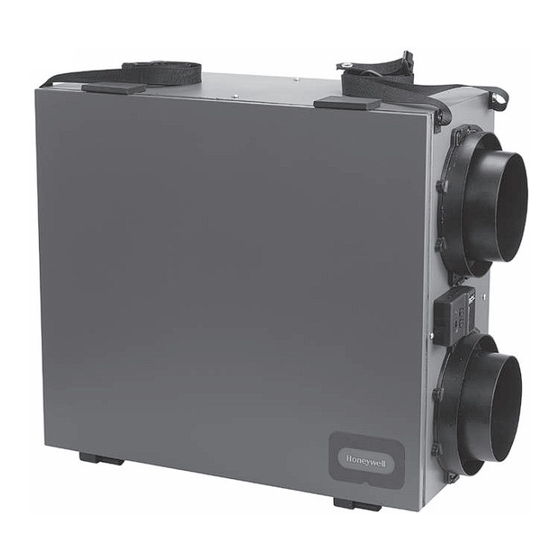
ERV/HRV Ventilation Systems
INCLUDED IN THIS BOX
A
1
D
E
ERV/HRV Ventilation Systems
PROFESSIONAL INSTALLATION
GUIDE.
GUIDE D'INSTALLATION
PROFESSIONNELLE.
INCLUDED IN THIS BOX
A
A
B
C
1
2
G
1
G
2
G
3
D
E
F
ERV/HRV Ventilation Systems
GUIDE D'INSTALLATION
PROFESSIONAL INSTALLATION
PROFESSIONNELLE.
GUIDE.
INCLUDED IN THIS BOX
1
A
2
A
B
C
G
G
G
D
E
F
1
G
G
2
G
3
4
5
6
G
4
OPTIONAL CONTROLS SOLD SEPARATELY
G
5
6
G
Tools required to install ERV/HRV
Aluminum foil tape (UL181B)
Standard screwdriver
Crescent wrench
A
B
A
2
1
ERV/HRV VNT5200H1000 or VNT5200E1000
Filter (2)
ERV/HRV VNT5150H1000 or VNT5150E1000 or
Heat/Energy Recovery Core (1)
Hex driver (1/4 in.)
Two 6 in. diameter weather hoods
Accessories (not included)
6 in. diameter duct
6 in. diameter insulated duct
E
F
D
C
Duct Collars (4)
Installation Kit
Professional Installation Guide
G
3 - Dehumidistat H8908D, 4 - Prestige IAQ,
6 - W8150 Ventilation Control
5 - 20/40/60 Minute Boost Control, and
Optional Controls: 1- Vision Pro IAQ, 2 - True IAQ,
69-2480EF-01
OPTIONAL CONTROLS SOLD SEPARATELY
Tools required to install ERV/HRV
A
ERV/HRV VNT5150H1000 or VNT5150E1000 or
1
Aluminum foil tape (UL181B)
A
ERV/HRV VNT5200H1000 or VNT5200E1000
Standard screwdriver
2
Heat/Energy Recovery Core (1)
B
Crescent wrench
C
Filter (2)
Hex driver (1/4 in.)
Accessories (not included)
D
Professional Installation Guide
6 in. diameter insulated duct
E
Duct Collars (4)
6 in. diameter duct
F
Installation Kit
Two 6 in. diameter weather hoods
Optional Controls: 1- Vision Pro IAQ, 2 - True IAQ,
G
3 - Dehumidistat H8908D, 4 - Prestige IAQ,
5 - 20/40/60 Minute Boost Control, and
6 - W8150 Ventilation Control
69-2480EF-01
Tools required to install ERV/HRV
Aluminum foil tape (UL181B)
Standard screwdriver
Crescent wrench
Hex driver (1/4 in.)
Accessories (not included)
6 in. diameter insulated duct
6 in. diameter duct
Two 6 in. diameter weather hoods
GUIDE D'INSTALLATION
A
2
F
ERV/HRV VNT5150H1000 or VNT5150E1000 or
A
1
ERV/HRV VNT5200H1000 or VNT5200E1000
A
2
Heat/Energy Recovery Core (1)
B
Filter (2)
C
Professional Installation Guide
D
Duct Collars (4)
E
Installation Kit
F
Optional Controls: 1- Vision Pro IAQ, 2 - True IAQ,
G
3 - Dehumidistat H8908D, 4 - Prestige IAQ,
5 - 20/40/60 Minute Boost Control, and
6 - W8150 Ventilation Control
PROFESSIONAL INSTALLATION
B
G
G
1
2
G
G
4
5
OPTIONAL CONTROLS SOLD SEPARATELY
GUIDE.
PROFESSIONNELLE.
C
G
3
G
6
69-2480EF-01
Advertisement
Chapters
Table of Contents

Related Manuals for Honeywell VNT5150H1000


Summary of Contents for Honeywell VNT5150H1000
- Page 1 INCLUDED IN THIS BOX OPTIONAL CONTROLS SOLD SEPARATELY Tools required to install ERV/HRV Aluminum foil tape (UL181B) Standard screwdriver Crescent wrench ERV/HRV VNT5150H1000 or VNT5150E1000 or ERV/HRV VNT5200H1000 or VNT5200E1000 Heat/Energy Recovery Core (1) Filter (2) Hex driver (1/4 in.) Accessories (not included) 6 in.
- Page 2 Installation Checklist Liste de vérification pour l’installation Included in This Box A1 ERV/HRV VNT5150H1000 or VNT5150E1000 or Contenu A2 ERV/HRV VNT5200H1000 or VNT5200E1000 A1 VRÉ/VRC VNT5150H1000 ou VNT5150E1000 ou B Heat/Energy Recovery Core A2 VRÉ/VRC VNT5200H1000 ou VNT5200E1000 C Filter (2) B Noyau de récupération de chaleur et d’énergie D Installation Guide C Filtre (2) E Duct Collars (4) D Guide d’installation F Installation Kit E Raccords de conduit (4) F Trousse de quincaillerie Control Options (Sold separately) G1 - Vision Pro IAQ Commandes en option (vendues séparément)
-
Page 3: Table Of Contents
Forced Air System ..........22 TrueIAQ (DG115EZIQ) Wiring ......22 • Prior to installing, serious consideration must be taken to ensure this ventilation system will operate properly if integrated to any other type of mechanical system, i.e. a forced air system, or an air handling unit. To ensure proper operation and compatibility of both systems, it is required that the unit’s airflows (intake and exhaust) be balanced, by following the procedures found in this manual • Install the unit with space to access the front panel controls and the side access panel for maintenance and service. • To ensure quiet operation, do not place the device directly on the structural supports of the home. • The product is for residential applications only. Must be installed in accordance with all national and local regulations, building and safety codes NEED HELP? For assistance with this product please visit http://yourhome.honeywell.com or call Honeywell Customer Care toll-free at 1-800-468-1502. Read and save these instructions. ® U.S. Registered Trademark. Patents pending. Copyright © 2010 Honeywell International Inc. All rights reserved. ERV/HRV Ventilation Systems 69-2480EF—01... -
Page 4: Benefits
About the ERV/HRV Ventilation System The Honeywell ERV/HRV Ventilation System provides improved indoor air quality through its high performance and efficiency. Benefits • Ventilation with sensible heat recovery (ERV and HRV) • Ventilation with latent heat recovery (ERV only) • Simplified mounting (hanging) • Removable duct collars for easy ducting to the unit • Intuitive balancing via two variable speed motors and a speed control CAUTION: Electrical shock and fire hazard. Can cause personal and equipment damage. -
Page 5: Determining Your Ventilation Needs
Determining Your Ventilation Needs How much fresh air do you need? Good air quality is based in part on the capacity of the home’s ventilation system. Usually, the unit’s capacity is measured in CFM (Cubic Feet per Minute) or L/s (Liters per second) of fresh air being distributed in the living space. Use the ASHRAE 62.2 Ventilation Standard, the Room Count Calculation Method, or the Air Change Per Hour (ACH) Method to determine your ventilation needs. ASHRAE 62.2 Ventilation Standard ASHRAE 62.2 CFM Sizing Chart Number of Bedrooms / CFM Floor Area (ft >7 < 1500 1501 - 3000 75 3001 - 4500 4501 - 6000 6001 - 7500 105 120 135 > 7500 ANSI/ASHRAE STANDARD 62.2-2007 - Ventilation Air Requirements; values in cfm The above chart outlines the minimum requirements for continuous ventilation. Room Count Calculation Method Living Space Number of Rooms x CFM (or L/s) CFM Required Master Bedroom x 20 cfm (or 10 L/s) -
Page 6: Specifications
6 IN. (150 MM). VNT5150H1000 or VNT5150E1000: H = 22 1/2 in. (572 mm), W = 11 1/2 in. (295 mm), L = 29 1/2 in. (749 mm) VNT5200H1000 or VNT5200E1000: H = 22 1/2 in. (572 mm), W = 16 1/2 in. (422 mm), L = 29 1/2 in. (749 mm) - Page 7 Specifications (continued) VNT5150H1000 Ventilation Performance Gross Air Flow External Static Pressure Net Supply Air Flow Supply Exhaust in. W.C. VNT5150H1000 AIR FLOW (L/S) EXTERNAL EXTERNAL STATIC STATIC PRESSURE PRESSURE (IN. W. C) (PA) NET SUPPLY AIR FLOW AIR FLOW (CFM) M32358 VNT5150H1000 Energy Performance Average...
- Page 8 Specifications (continued) VNT5200H1000 Ventilation Performance Gross Air Flow External Static Net Supply Air Flow Pressure Supply Exhaust in. W.C. VNT5200H1000 AIR FLOW (L/S) EXTERNAL EXTERNAL STATIC STATIC PRESSURE PRESSURE (IN. W. C) (PA) NET SUPPLY AIR FLOW AIR FLOW (CFM) M32354 VNT5200H1000 Energy Performance Average Sensible Apparent Supply Temperature...
- Page 9 Specifications (continued) VNT5150E1000 Ventilation Performance Gross Air Flow External Static Pressure Net Supply Air Flow Supply Exhaust in. W.C. VNT5150E1000 AIR FLOW (L/S) EXTERNAL EXTERNAL STATIC STATIC PRESSURE PRESSURE (IN. W. C) (PA) NET SUPPLY AIR FLOW M32370 AIR FLOW (CFM) VNT5150E1000 Energy Performance Average Sensible Apparent Supply Temperature...
- Page 10 Specifications (continued) VNT5200E1000 Ventilation Performance Gross Air Flow External Static Net Supply Air Flow Pressure Supply Exhaust in. W.C. VNT5200E1000 AIR FLOW (L/S) EXTERNAL EXTERNAL STATIC STATIC PRESSURE PRESSURE (PA) (IN. W. C) NET SUPPLY AIR FLOW M32369 AIR FLOW (CFM) VNT5200E1000 Energy Performance Average Sensible Apparent Supply Temperature...
-
Page 11: External Control Options
External Control Options The ERV/HRV unit may be used with one of the following external controls: Prestige™ (YTHX9321R5012) and Prestige™ IAQ Comfort System (YTHX9421R5028) • Controls both heating/cooling and ventilation. • Wireless sensor for displaying outdoor temperature and humidity. • Advanced ventilation programming includes economizing and extreme condition shutdown. • Maintenance and service reminders. • High definition color display. VisionPRO (TH8321U1097)and VisionPRO IAQ Total Comfort System (YTH9421C1010) • Controls both heating/cooling and ventilation. • Sensor included for displaying outdoor temperature. • Intuitive user interface for easy 7-day temperature programming. • Easy-to-read backlit digital display. • Maintenance and service reminders. • Controls other indoor air quality equipment. TrueIAQ Digital Control (DG115EZIAQ) • Automatic adjustments maintain fresh air in home. -
Page 12: Install To Fit Your Application
Install to Fit Your Application NOTE: Prior to installing, serious consideration must be taken to insure this ventilation system will operate properly if integrated with any other type of mechanical system, i.e. a forced air system, or an air handling unit. To insure proper operation & compatibilities of both system, it is required that the airflows of ventilation systems be balanced, by following the procedures found in this manual. Limitations: The product is for residential applications only. Must be installed in accordance with all national and local regulations, building and safety codes. Flex duct is recommended for connecting to the ERV/HRV collars to reduce vibration noise. Electrical Requirements: 120 VAC outlet. Ground fault interrupter (GFI) and dedicated circuit recommended. M24745 Independent System M28983 This application uses a devoted duct system for the supply and the exhausting of stale air accumulated in the home. Honeywell recommends installing fresh air grilles in all bedrooms and living areas and to exhaust the stale air from the bathroom, kitchen, and laundry room. ERV/HRV Ventilation Systems 69-2480EF—01... - Page 13 Exhaust at the Source and Supply in the Return STALE AIR FROM LIVING SPACE, SUCH AS FROM BATHROOM OR KITCHEN TO LIVING SPACE FORCED AIR HRV / ERV SYSTEM M28984 This application uses a devoted duct system for the exhausting of stale air accumulated in the home. The fresh air is introduced into the return air duct and is distributed through the home by the existing supply air ductwork of the forced air system. Make sure when using this application that your fresh air duct connection to the forced air system return air duct is at least 3 feet from the forced air system. You should check with your local code or the forced air system’s manufacturer. The forced air system’s blower does not have to run when the unit is operating, but is recommended for maximum effectiveness. NOTE: For the minimum distance between the fresh air connection and the forced air system, check with your local building codes and forced air system manufacturer. NOTE: For dwellings with multiple forced air systems, Honeywell recommends one ERV/HRV unit per system. NOTE: Refer to the Wiring section (beginning on page 18) for instructions to connect the unit to operate the forced air system with the ERV/HRV unit. ERV/HRV Ventilation Systems 69-2480EF—01...
- Page 14 Install to Fit Your Application (continued) Exhaust and Supply in the Return TO LIVING SPACE FORCED AIR SYSTEM HRV / ERV M28985 When using this application make sure that there is a minimum of 6 feet between the fresh air and exhaust air connections of the ERV/HRV unit in the return air duct. Supply air from the ERV/HRV unit must be at least 3 feet from the forced air system. These distances can be different from one region to another; you should check with your local code or the forced air system’s manufacturer. NOTE: For minimum distance between return and forced air system, check with your local building codes and forced air system manufacturer. NOTE: Fresh air must always be down-stream from the exhaust air in the return air duct of the forced air system. NOTE: Furnace blower is required to operate when ventilation is required. Set the furnace blower to run continuously, or interlock electrically (low voltage). ERV/HRV Ventilation Systems 69-2480EF—01...
-
Page 15: Installation Steps
Installation Steps Installation Kit Ensure that you have all of the following installation items: 4 Duct Collars Installation Kit: • 2 Flexible 6 in. Vinyl Ducts • 1 Condensation Drain Line (10 in.) • 1 Drain Adapter with Nut • 4 Tie Wraps (30 in.) • 16 Hex-head screws (1/4 x 5/8 in.) • 4 Hex-head screws (1/4 x 1 in.) • 4 Washers • 1 Drain cap (VNT5250E100 and VNT5200E1000 only) • 1 power cord, 120 Vac (not shown) Installation Area The ERV/HRV unit should be installed in a mechanical room or as close to an outside wall as possible. The ERV/HRV unit must always be installed in an area where the air is conditioned to avoid freezing the condensate line. The contractor should install the unit in an area that allows the homeowner easy access for maintenance. It is very important to install an electric receptacle (120 Vac) near the unit, a separate circuit breaker is also recommended. It is best to have access to a condensate drain near the ERV/HRV unit to avoid having to use a condensate pump. NOTE: Installation is not recommended in unconditioned areas such as an attic or crawl space where the temperature can fall below 32 ºF (0 ºC). NOTE: Ducting in unconditioned areas must be fully sealed and insulated. ERV/HRV Ventilation Systems 69-2480EF—01... - Page 16 Installation Steps (continued) Hanging the ERV/HRV The ERV/HRV unit enables you to save time and effort by offering a simplified hanging system. TIP: Removing the core unit makes installation easier since the unit weighs less without the core inside. 1. Attach straps to joist using the supplied 2. Pull on middle of strap while gently lifting unit washers and four 1 in. hex-head hanging upward to raise the unit. screws. 3. Make final adjustments to ensure that the HRV/ERV is level. NOTE: If the unit is not level, improper drainage will occur and could lead to moisture and leakage problems. ERV/HRV Ventilation Systems 69-2480EF—01...
- Page 17 Installation Steps (continued) Installing the flex duct to the ERV/HRV TIP: Honeywell recommends using approximately 16 inches of flexible duct (supplied in kit) between the unit and the rigid duct for noise dampening. The flex duct is mounted to the unit the same way as the insulated flex. 1. Insert the vinyl duct over the hooks on the 2. Insert insulation inside the outer ring of the duct duct collar and seal with a supplied 30 inch collar. tie wrap. 3. Finish by taping the duct on the collar. 4. Slide collar onto unit. IMPORTANT: Always fix and secure each collar using four of the 5/8 in. screws supplied. This step is critical in order to prevent condensation accumulation. TIP: Attach the flex duct to the collar first, and then attach the collar to the unit. 5. Secure collar with the supplied 5/8 in. hex-head screws. ERV/HRV Ventilation Systems 69-2480EF—01...
- Page 18 Installation Steps (continued) Installing the condensation drain line Insert the threaded drain adapter through the bottom of the unit and hand tighten the plastic nut supplied with the drain kit. Use a wrench to tighten the nut another half turn to ensure a complete seal. Install the condensate tubing by pushing the clear plastic tubing over the drain adapter. Make a condensate trap by looping the clear plastic tubing. This loop will prevent foul odors from entering the unit. Use a condensate pump if you don’t have access to the floor drain. Drainless Application NOTE: If installing an ERV unit (VNT5150E1000 or VNT5200E1000) in a region where the outdoor temperature does not drop below freezing, the condensate drain line does not need to be installed and the unit may be installed as a drainless application. 1. Insert the threaded drain adapter through the bottom of the ERV with the drain connection inside of the unit as shown in the figure. 2. Fit the rubber washer over the drain adapter and then attach the plastic nut. 3. Hand tighten the plastic nut supplied with the drain kit. 4. Use a wrench to tighten the nut another half turn to ensure a complete seal. 5. Attach the drain cap to the drain adapter inside the unit. ERV/HRV Ventilation Systems 69-2480EF—01...
- Page 19 Installation Steps (continued) Connecting the power cord ERV/HRV Power Cord Insert the power cord on top of the unit. Press firmly to make sure the power cord is secure. IMPORTANT: Do not plug the power cord into the wall receptacle at this time. Electric Wall Outlet Honeywell recommends that the unit has a dedicated receptacle with 120 VAC. Avoid connecting the unit to the wall receptacle with an extension cord. Honeywell does not recommend the use of an extension cord. Ensure that the receptacle’s polarization is correct. NOTE: If the LED light on the ERV/HRV control panel remains green, the motors do not energize, and the controls do not operate; this can indicate that the polarization in the main AC outlet is inverted. IMPORTANT: Always consult a qualified technician to ensure proper installation of main power. Installing outside hoods for the fresh air and the exhaust Locate the outside hoods at least 18 inches (0.46 m) above grade and at least 72 inches (1.83 m) apart.
-
Page 20: Automatic Defrost
Automated Defrost The ERV and HRV units are equipped with an automatic defrost feature to eliminate any ice build up on the core. • Automatic defrost is initiated once every hour when the fresh air supply temperature drops to 23°F (-5°C) or colder. • The defrost cycle operates by turning off the supply fan while continuing to operate the exhaust fan. • The exhaust fan speed is adjusted proportionally based on the outdoor temperature, initially operating at low speed. • As the outdoor temperature continues to drop, the exhaust fan speed will increase, and will operate at maximum speed when the outdoor temperature is -4°F (-20°C) or less. • Defrost cycle runs for 4 minutes with the supply fan off, followed by 40 minutes of continuous normal operation. • Defrost cycles will continue to repeat as long as the temperature is 23°F (-5°C) or less. Wiring CAUTION: Voltage hazard. Can cause equipment damage. Disconnect power from the unit before beginning installation. Terminal Description M28986 The wiring terminal block is located behind the control module door on the side of the unit. To access the terminal block, open the control panel door by swinging it open and to the right as shown above. ERV/HRV Ventilation Systems 69-2480EF—01... -
Page 21: Prestige™ 2-Wire Iaq And Rf Eim Wiring
Wiring (continued) Wiring with Remote Controls CONT mode - Ventilator runs continuously on low speed. A ventilation call from a control boosts the ventilator into high speed. INT mode - The ventilator is OFF until a ventilation call from a wall control turns it on in high speed.. Controls Wiring THM5421R (24 VAC) THERMOSTAT CONV Follow this diagram if using a Prestige™ 2-wire IAQ and RF EIM. EQUIPMENT CONTROL IAQ DEVICE 24 V POWER SENSORS SENSOR TYPE M28987 ERV/HRV Ventilation Systems 69-2480EF—01... -
Page 22: Prestige™ Thermostat Wiring
Wiring (continued) Follow this diagram if using a Prestige™ Thermostat (Interlock PRESTIGE not shown). POWERED THEROMSTAT VENTILATOR USED USED U1/U1 Configurable IAQ relay for humidifier, dehumidifier, or vent U2/U2 Configurable IAQ relay for humidifier, dehumidifier, or vent M28988 VisionPRO IAQ Equipment Interface Module Follow this diagram if using a... -
Page 23: General Ventilator Wiring
Wiring (continued) Follow this diagram General Ventilator Wiring POWERED THERMOSTAT VENTILATOR VENTILATION CONTACTS FURNACE 24-VOLT TERMINAL BLOCK M28990 ERV/HRV is used in conjunction with a conventional HEAT/COOL thermostat or other wall control. Follow this diagram Standard Furnace POWERED VENTILATOR Interlock Wiring with Forced Air System THERMOSTAT VENTILATION CONTACTS FURNACE 24-VOLT TERMINAL BLOCK M28991 ERV/HRV is interlocked with the forced air system and is used in conjunction with a conventional HEAT/ COOL thermostat with ventilation contacts (could use a different wall control for ventilator). -
Page 24: Forced Air System
Wiring (continued) Follow this diagram Alternate Interlock Wiring with Forced Air System FAN TIMER OR OTHER POWERED WALL VENTILATOR CONTROL FORCED AIR SYSTEM OLDER -STYLE (FURNACE) THERMOSTAT 24-VOLT FAN (G) & COOL (Y) TERMINAL BLOCK ARE COUPLED M28992 The ERV/HRV is interlocked with the forced air system and is used in conjunction with older-style thermostats where the G and Y terminals are coupled together in the thermostat (fan and cool are simultaneously energized). This wiring method will prevent turning on the cooling system when the ventilator turns on the furnace fan. -
Page 25: Installation (Continued) Dehumidistat Wiring
Wiring (continued) Follow this diagram if using a Dehumidistat. M28994 EARD-6 AT120 Follow this diagram if using a W8150 Ventilation Control XFMR W8150A FAN TIMER M28995 Follow this diagram if using Honeywell 20/40/60 Minute Boost Control Timer. M28996 ERV/HRV Ventilation Systems 69-2480EF—01... -
Page 26: Control Panel
Control Panel The control panel has a 3-position selector switch Speed – and “ ” and “ ” buttons for speed control. The Control color of the LED indicator indicates the current function of the selector switch. Open for • GREEN LED = Mode Control (normal operating Instructions mode) • YELLOW LED = Balancing Control 3-POSITION SPEED CONTROL SELECTOR SWITCH BUTTONS (+ AND -) M32371 Speed Control used as a Mode Control When the LED indicator is green, the selector switch functions as a Mode Selector. The selections are: • INTER (Intermittent): When the selector switch is in the intermittent position the unit will run only when there is a call for ventilation by any external control. At that time the unit will run on high speed until the condition is satisfied. • CONT (Continuous): When the selector switch is in the continuous position the unit will run continuously on low speed except when there is a call for override by any control. •... -
Page 27: Balancing Steps
Balancing Steps NOTE: Perform the balancing steps with the HVAC equipment fan turned ON if the ERV/HRV unit is ducted into an HVAC system. a. Ensure that the speed control selector switch is in either the INTER or CONT position. b. Press the (+) and (–) buttons simultaneously for 5 seconds until the LED indicator light turns yellow, which indicates that you are in balancing mode. When in balancing mode, the selector switch becomes the motor selector switch. The switch positions become: INTER = Right motor (exhaust air), CONT = Both motors, and OFF = Left motor (fresh air). a. Use a pitot tube or flow station to measure the FRESH AIR DUCT STALE AIR DUCT (LEFT) (RIGHT) air flow in the fresh air duct and exhaust air duct. b. Move the mode selector switch to adjust the air flow in the duct with the higher reading. INTER: Exhaust air (right) OFF: Fresh air (left) c. Press the (+) or (–) buttons to adjust the air flow to the desired high speed setting. d. Move the mode selector switch to the CONT position (to proportionally adjust the speed of both motors at the same time. a. Press the (+) and (–) buttons simultaneously to exit balancing mode . Speed Control b. Indicator light turns green. c. Continuous speed will be 50% of measured CFM. Open for Instructions 3-POSITION SPEED CONTROL SELECTOR SWITCH BUTTONS (+ AND -) -
Page 28: Balancing Reset
Balancing Reset NOTE: Once balancing is completed, balancing cannot be changed without resetting the unit. To reset: Speed 1. Press the (+) and (–) buttons simultaneously for 10 seconds. Control 2. Indicator light will turn yellow at 5 seconds. Open for Instructions 3. Indicator light will turn green at 10 seconds. 4. Release both buttons. 5. Unit has been reset and can be put into balancing mode again. 3-POSITION SPEED CONTROL SELECTOR SWITCH BUTTONS (+ AND -) M32371 Checkout • Apply power to the unit. Move the selector switch to the CONT position to verify that the unit turns on in continuous speed. • Initiate a ventilation call from each of the external controls. Verify that the ERV/HRV unit turns on in high speed. • Return the selector switch to the desired position and the external controls to the desired settings. • Inspect the ducting to ensure that there are no kinks and correct as necessary. ERV/HRV Ventilation Systems 69-2480EF—01... -
Page 29: Maintenance
Maintenance Quarterly or as Needed Filters. Four times per year or as needed, vacuum the filters. Replace filters as needed. Annually or as Needed Inside the Unit. Once a year or as needed, clean the interior of the unit (walls and drain pan) with a mild and non abrasive soap. It is recommended to use products that are environmentally-friendly. Energy Recovery Core Unit (VNT5150E1000 and VNT5200E1000) Once a year or as needed, vacuum the four surfaces, let soak in warm water and mild soap for 15 minutes, then spray rinse and let dry. Heat Recovery Core Unit (VNT5150H1000 and VNT5200H1000) Once a year or as needed, vacuum the four surfaces, let soak in warm water and mild soap for 15 minutes, then spray rinse and let dry. NOTE: See Cleaning Steps on page 28 for the above maintenance items. ERV/HRV Ventilation Systems 69-2480EF—01... -
Page 30: Cleaning
Cleaning Steps 2. Open the side door panel by opening the two latches on the top of the side panel and lowering the panel to its fully open position Remove both 1. Disconnect the AC power from the unit or the filters from the top left and right sides of the wall. Core, then vacuum both filters. Slide out the Core, and clean according to the instructions on the previous page. 3. Clean inside of unit with a damp cloth and wipe 4. Replace the Core and the two filters, re-latch the dry when finished. side panel, then reconnect the AC power to the unit. ERV/HRV Ventilation Systems 69-2480EF—01... -
Page 31: Troubleshooting
Troubleshooting CAUTION: Servicing the ERV/HRV unit with its electrical circuitry can cause personal injury. Always make sure that power to the unit is disconnected prior to making any connections. Failure to disconnect the power could result in electrical shock. Service should only be performed by a qualified service technician. -
Page 32: Parts List
Honeywell OS and Parts List Honeywell OS List Honeywell OS Number Controls Ventilator Type VNT5150H1000 VNT5150E1000 VNT5200H1000 VNT5200E1000 Parts List (see illustration on page 31 for figure number references) Figure Number Honeywell Part Number Description 50053952-001 Polypropylene 10" HRV Core - VNT5150H1000 50053952-002 Polypropylene 15" HRV Core - VNT5200H1000 50053952-003 Enthalpy 10" ERV Core - VNT5150E1000 50053952-004 Enthalpy 15" ERV Core - VNT5200E1000 50053952-005 Replacement Filter Kit VNT5150 (Kit quantity 2) 50053952-006 Replacement Filter Kit VNT5200 (Kit quantity 2) 50053952-010 Replacement Motor 50053952-014 Latch & Hinge Kit 50053952-011 Condensation Drain Fitting Kit 50053952-009 Adjustable Hanging Straps (set) 50053952-008 6" diameter Plastic Keeper... - Page 33 Parts Illustration See the Parts List table on page 30 for items referenced by figure numbers 1 through 11 in the exploded illustration below. M28997 ERV/HRV Ventilation Systems 69-2480EF—01...
-
Page 34: 5-Year Limited Warranty
5-Year Limited Warranty Honeywell warrants this product to be free from defects in the workmanship or materials, under normal use and service, for a period of five (5) years from the date of purchase by the consumer. If at any time during the warranty period the product is determined to be defective or malfunctions, Honeywell shall repair or replace it (at Honeywell’s option). If the product is defective, (i) return it, with a bill of sale or other dated proof of purchase, to the place from which you purchased it; or (ii) call Honeywell Customer Care at 1-800-468-1502. Customer Care will make the determination whether the product should be returned to the following address: Honeywell Return Goods, Dock 4 MN10-3860, 1885 Douglas Dr. N., Golden Valley, MN 55422, or whether a replacement product can be sent to you. This warranty does not cover removal or reinstallation costs. This warranty shall not apply if it is shown by Honeywell that the defect or malfunction was caused by damage which occurred while the product was in the possession of a consumer. Honeywell’s sole responsibility shall be to repair or replace the product within the terms stated above. HONEYWELL SHALL NOT BE LIABLE FOR ANY LOSS OR DAMAGE OF ANY KIND, INCLUDING ANY INCIDENTAL OR CONSEQUENTIAL DAMAGES RESULTING, DIRECTLY OR INDIRECTLY, FROM ANY BREACH OF ANY WARRANTY, EXPRESS OR IMPLIED, OR ANY OTHER FAILURE OF THIS PRODUCT. Some states do not allow the exclusion or limitation of incidental or consequential damages, so this limitation may not apply to you. THIS WARRANTY IS THE ONLY EXPRESS WARRANTY HONEYWELL MAKES ON THIS PRODUCT. THE DURATION OF ANY IMPLIED WARRANTIES, INCLUDING THE WARRANTIES OF MERCHANTABILITY AND FITNESS FOR A PARTICULAR PURPOSE, IS HEREBY LIMITED TO THE FIVE-YEAR DURATION OF THIS WARRANTY. Some states do not allow limitations on how long an implied warranty lasts, so the above limitation may not apply to you. This warranty gives you specific legal rights, and you may have other rights which vary from state to state. If you have any questions concerning this warranty, please write Honeywell Customer Relations, 1985 Douglas Drive, Golden Valley, MN 55422 or call 1-800-468-1502. In Canada, write Retail Products ON15-02H, Honeywell Limited/Honeywell Limitée, 35 Dynamic Drive, Toronto, Ontario M1V4Z9. Automation and Control Solutions Honeywell International Inc. 1985 Douglas Drive North Golden Valley, MN 55422 Honeywell Limited-Honeywell Limitée 35 Dynamic Drive Toronto, Ontario M1V 4Z9 ® U.S. Registered Trademark. © 2010 Honeywell International Inc. - Page 35 • Avant l’installation, plusieurs éléments doivent être pris en compte afin de s’assurer que ce système de ventilation fonctionne adéquatement s’il est intégré à tout autre type de système mécanique (comme un système à air pulsé ou tout autre appareil de traitement de l’air). Pour assurer le fonctionnement adéquat et la compatibilité des deux systèmes, le débit d’air (prise d’air et sortie d’air) de l’unité doit être équilibré selon les consignes incluses dans le présent manuel. • Installez l’appareil de sorte que le panneau de commande avant et le panneau latéral soient accessibles lors des opérations d’entretien et de réparation. • Pour un fonctionnement silencieux, assurez-vous de ne pas installer l’appareil directement sur les supports de structure de la maison. • Ce produit ne convient qu’à un usage résidentiel. Il doit être installé conformément aux règlements, aux codes du bâtiment et aux codes de sécurité nationaux et locaux. BESOIN D’AIDE? Pour obtenir de l’aide, visitez le http://yourhome.honeywell.com ou appelez sans frais le service à la clientèle de Honeywell au 1 800 468-1502. Lisez et conservez ces instructions. ® Marque déposée américaine. Brevets en instance. Copyright © 2010 Honeywell International Inc. Tous droits réservés. Système de ventilation VRÉ/VRC 69-2480EF—01...
-
Page 36: Avantages
À propos du système de ventilation VRÉ/VRC Offrant une grande efficacité et un rendement élevé, le système de ventilation VRÉ/VRC de Honeywell améliore la qualité de l’air à l’intérieur. Avantages • Ventilation avec récupération de la chaleur sensible (VRÉ et VRC) • Ventilation avec récupération de la chaleur latente (VRÉ seulement) • Montage simplifié (suspension) • Raccords de conduit amovibles pour un raccordement facile à l’appareil • Équilibrage intuitif par l’intermédiaire de deux moteurs à vitesse variable et d’une commande de vitesse MISE EN GARDE : Risque d’incendie et de décharge électrique. Pourrait causer des blessures et endommager l’appareil. -
Page 37: Établissement De Vos Besoins En Matière De Ventilation
Établissement de vos besoins en matière de ventilation De quelle quantité d’air frais avez-vous besoin? Une bonne qualité d’air dépend en partie de la capacité du système de ventilation de la maison. On mesure habituellement la capacité d’un appareil en pi /min (pieds cubes par minute) ou en l/s (litres par seconde) d’air frais redistribué dans les espaces habités. Utilisez la norme de ventilation résidentielle ASHRAE 62.2, la méthode d’évaluation des besoins en matière de ventilation selon le nombre de pièces, ou le changement d’air à l’heure (CAH) afin de déterminer vos besoins en matière de ventilation. Norme de ventilation résidentielle ASHRAE 62.2 Tableau de dimensions en pi /min ASHRAE 62.2 Capacité nécessaire (en pi /min) selon le nombre de pièces Superficie (pi >7 < 1500 1501 - 3000 75 3001 - 4500 4501 - 6000 6001 - 7500 105 120 135 > 7500 NORME ANSI/ASHRAE 62.2-2007 – Besoins en ventilation exprimés en pi /min Le tableau ci-dessus indique les besoins minimaux en matière de débit de ventilation continue. -
Page 38: Caractéristiques
DE 150 MM (6 PO). VNT5150H1000 ou VNT5150E1000: H = 572 mm (22,50 po), W = 295 mm (11,50 po), L = 749 mm (29,50 po) VNT5200H1000 ou VNT5200E1000: H = 572 mm (22,50 po), W = 422 mm (16,50 po), L = 749 mm (29,50 po) MF28919 Caractéristiques physiques :... - Page 39 Caractéristiques (suite) Performance du VNT5150H1000 en matière de ventilation Débit d’air brut Pression statique Débit d’air fourni net externe Débit d’air fourni Sortie po c.e. /min /min /min VNT5150H1000 DÉBIT D’AIR (l/s) PRESSION PRESSION STATQUE STATQUE EXTERNE EXTERNE (po c.e) (Pa) DÉBIT D’AIR FOURNI NET DÉBIT D’AIR (pi...
- Page 40 Caractéristiques (suite) Performance du VNT5200H1000 en matière de ventilation Débit d’air brut Pression statique Débit d’air fourni net externe Débit d’air fourni Sortie po c.e. /min /min /min VNT5200H1000 DÉBIT D’AIR (l/s) PRESSION PRESSION STATQUE STATQUE EXTERNE EXTERNE (po c.e) (Pa) DÉBIT D’AIR FOURNI NET DÉBIT D’AIR (pi /min) MF32354 Performance du VNT5200H1000 en matière d’énergie...
- Page 41 Caractéristiques (suite) Performance du VNT5150E1000 en matière de ventilation Débit d’air brut Pression statique Débit d’air fourni net externe Débit d’air fourni Sortie po c.e. /min /min /min VNT5150E1000 DÉBIT D’AIR (l/s) PRESSION PRESSION STATQUE STATQUE EXTERNE EXTERNE (po c.e) (Pa) DÉBIT D’AIR FOURNI NET DÉBIT D’AIR (pi /min) MF32370 Performance du VNT5150E1000 en matière d’énergie...
- Page 42 Caractéristiques (suite) Performance du VNT5200E1000 en matière de ventilation Débit d’air brut Pression statique Débit d’air fourni net externe Débit d’air fourni Sortie po c.e. /min /min /min VNT5200E1000 DÉBIT D’AIR (l/s) PRESSION PRESSION STATQUE STATQUE EXTERNE EXTERNE (po c.e) (Pa) DÉBIT D’AIR FOURNI NET DÉBIT D’AIR (pi /min) MF32369 Performance du VNT5200E1000 en matière d’énergie...
-
Page 43: Commandes Externes En Option
Commandes externes en option Le VRÉ/VRC peut être utilisé avec l’une des commandes externes suivantes : Prestige™ (YTHX9321R5012) et système de régulation d’ambiance Prestige™ IAQ (YTHX9421R5028) • Règle à la fois le chauffage-refroidissement et la ventilation. • Capteur sans fil pour l’affichage de la température et du taux d’humidité extérieurs. • Programme de ventilation évolué qui comprend un cycle économiseur et l’interruption en cas de conditions extrêmes. • Rappels de maintenance et de réparation. • Écran couleur haute définition. VisionPRO (TH8321U1097) et système de régulation d’ambiance VisionPRO IAQ (YTH9421C1010) • Règle à la fois le chauffage-refroidissement et la ventilation. • Capteur inclus pour l’affichage de la température extérieure. • Interface utilisateur intuitive pour la programmation simple de la température sur sept jours. -
Page 44: Installation Selon Votre Utilisation
Installation selon votre utilisation REMARQUE : Avant l’installation du système de ventilation, il est important de s’assurer qu’il fonctionnera adéquatement s’il est intégré à un autre type de système mécanique (p. ex., un système à air pulsé ou un appareil de traitement de l’air). Dans le but d’assurer la compatibilité des systèmes et leur fonctionnement adéquat, leurs débits doivent être équilibrés selon les procédures décrites dans le présent manuel. Limitations : Ce produit ne convient qu’à un usage résidentiel. Il doit être installé conformément aux règlements, aux codes du bâtiment et aux codes de sécurité nationaux et locaux. Il est recommandé de fixer des gaines flexibles aux raccords de conduit du VRÉ/VRC afin de réduire le bruit causé par les vibrations. Exigences relatives au système électrique : Prise V c.a. Un disjoncteur différentiel et un circuit réservé sont recommandés. M24745 Système indépendant M28983 Cette application est fondée sur l’utilisation d’un système de conduits destiné à l’apport d’air frais et à l’évacuation de l’air vicié de la maison. Honeywell recommande l’installation de grilles à air frais dans tous les espaces habités (dont les chambres à coucher) et d’évacuer l’air vicié des salles de bain, de la cuisine et de la salle de lavage. Systèmes de ventilation VRÉ/VRC 69-2480EF—01... - Page 45 AIR VICIÉ DES ESPACES HABITÉS (COMME LES SALLES DE BAIN ET LA CUISINE) VERS LES ESPACES HABITÉS SYSTÈME VRC / VRÉ À AIR PULSÉ MF28984 Cette application est fondée sur l’utilisation d’un système de conduits destiné à l’évacuation de l’air vicié de la maison. L’air frais est intégré par le conduit de retour d’air et il est distribué dans toute la maison par le réseau de conduits d’alimentation en air du système à air pulsé. Si vous choisissez cette configuration, assurez-vous que le raccord du conduit d’air frais au conduit de retour du système à air pulsé est situé à au moins 91,44 cm (3 pi) du système à air pulsé. Consultez le code local applicable ou informez-vous auprès du fabricant du système à air pulsé. Pour une efficacité maximale, il est recommandé de faire fonctionner la soufflante du système à air pulsé en même temps que le VRÉ/VRC. REMARQUE : Pour connaître la distance minimale nécessaire entre le raccord d’air frais et le système à air pulsé, consultez les codes du bâtiment locaux et le fabricant du système à air pulsé. REMARQUE : Dans les habitations comportant plusieurs systèmes à air pulsé, Honeywell recommande l’utilisation d’un VRÉ/VRC par système. REMARQUE : Pour savoir comment raccorder l’appareil VRÉ/VRC à un système à air pulsé, reportez-vous à la section Câblage (commençant à la page 18). Systèmes de ventilation VRÉ/VRC 69-2480EF—01...
- Page 46 Installation selon votre utilisation (suite) Installation selon votre utilisation (suite) VERS LES ESPACES HABITÉS SYSTÈME À AIR PULSÉ VRC / VRÉ MF28985 Si vous choisissez cette configuration, assurez-vous que les raccords des conduits d’air frais et d’air vicié du VRÉ/VRC au conduit de retour d’air sont situés à au moins 1,83 m (6 pi) l’un de l’autre. L’alimentation en air du VRÉ/VRC doit se trouver à au moins 91,44 cm (3 pi) du système à air pulsé. Ces distances peuvent varier d’une région à l’autre; consultez le code local applicable ou informez-vous auprès du fabricant du système à air pulsé. REMARQUE : Pour connaître la distance minimale nécessaire entre le conduit de retour d’air et le système à air pulsé, consultez les codes du bâtiment locaux et le fabricant du système à air pulsé. REMARQUE : L’apport d’air doit toujours être en aval de l’air vicié dans le conduit de retour d’air du système à air pulsé. REMARQUE : La soufflante de l’appareil de chauffage doit fonctionner en même temps que le système de ventilation. Réglez la soufflante de l’appareil de chauffage de sorte qu’elle fonctionne continuellement, ou munissez-la d’un enclenchement électrique (à basse tension). Systèmes de ventilation VRÉ/VRC 69-2480EF—01...
-
Page 47: Procédure D'installation
Procédure d’installation Trousse de quincaillerie Assurez-vous d’avoir les articles suivants en main avant d’installer le produit : 4 raccords de conduit Trousse de quincaillerie : • 2 gaines flexibles en vinyle de 6 po • 1 tuyau d’évacuation des condensats (10 po) • 1 adaptateur de tuyau d’évacuation avec écrou • 4 attaches autobloquantes (76,20 cm [30 po]) • 16 vis à tête hexagonale (1/4 x 5/8 po) • 4 vis à tête hexagonale (1/4 x 1 po) • 4 rondelles • 1 bouchon de vidange (VNT5250E100 et VNT5200E1000 seulement) • 1 cordon d’alimentation de 120 V c.a. (non illustré) Zone d’installation Le VRÉ/VRC doit être installé dans une pièce réservée aux systèmes du bâtiment ou aussi près que possible d’un mur extérieur. La zone où est installé le VRÉ/VRC doit être climatisée en permanence afin d’éviter que le tuyau d’évacuation des condensats ne gèle. L’entrepreneur doit installer l’appareil dans un endroit où il sera facile d’y accéder afin d’en effectuer l’entretien. Il est très important d’installer une prise de courant (120 V c.a.) à proximité de l’appareil, et il est préférable que ce dernier soit protégé par un disjoncteur séparé. Il est préférable d’installer le VRÉ/ VRC à proximité d’un tuyau d’évacuation de condensat, de sorte que vous n’ayez pas à recourir à une pompe à condensat. REMARQUE : Il n’est pas recommandé d’installer l’appareil dans un endroit non climatisé (comme un grenier ou un vide sanitaire), où la température peut descendre sous 0 ºC (32 ºF). REMARQUE : Dans les endroits non climatisés, les conduits doivent être parfaitement scellés et isolés. Systèmes de ventilation VRÉ/VRC 69-2480EF—01... - Page 48 Procédure d’installation (suite) Suspension du VRÉ/VRC Le système de suspension simplifié du VRÉ/VRC permet une installation rapide et facile. CONSEIL : Le fait de retirer le noyau allège l’appareil et facilite l’installation de ce dernier. 1. Fixez les courroies aux solives à l’aide 2. Tirez le milieu de la courroie tout en soulevant des rondelles fournies et de quatre vis de doucement l’appareil. suspension de 1 po à tête hexagonale. 3. Pour terminer, effectuez les ajustements nécessaires pour mettre l’appareil de niveau. REMARQUE : Si l’appareil n’est pas de niveau, son drainage pourrait ne pas être adéquat, ce qui entraînerait des fuites et des problèmes liés à l’humidité. Systèmes de ventilation VRÉ/VRC 69-2480EF—01...
- Page 49 Procédure d’installation (suite) Installation de la gaine flexible au VRÉ/VRC CONSEIL : Honeywell recommande d’utiliser 40,64 cm (16 po) de gaine flexible (fournie dans la trousse) entre l’appareil et le conduit rigide afin d’atténuer le bruit. La gaine flexible se fixe à l’appareil de la même manière que la gaine flexible isolée. 1. Insérez la gaine flexible par-dessus les crochets 2. Insérez l’isolant à l’intérieur de l’anneau extérieur du raccord de conduit et scellez le tout à l’aide du raccord de conduit. de l’une des attaches autobloquantes de 76,20 cm (30 po) fournies. 3. Pour terminer, fixez la gaine au 4. Glissez le raccord sur l’appareil. raccord à l’aide de ruban à conduits. IMPORTANT: Fixez solidement chaque raccord de conduit à l’aide de quatre des vis de 5/8 po fournies. Cette étape est très importante, car elle permet d’éviter l’accumulation de condensats. CONSEIL : Fixez d’abord la gaine flexible au raccord de conduit, puis le raccord à l’appareil. 5. Fixez le raccord à l’aide des vis hexagonales de 5/8 po fournies. Systèmes de ventilation VRÉ/VRC 69-2480EF—01...
- Page 50 Procédure d’installation (suite) Installation du tuyau d’évacuation des condensats Insérez l’adaptateur de tuyau d’évacuation fileté sous l’appareil et resserrez à la main l’écrou en plastique fourni dans l’ensemble du tuyau d’évacuation. Utilisez une clé pour serrer l’écrou d’un demi-tour supplémentaire afin d’assurer l’étanchéité du raccord. Installez le tuyau d’évacuation des condensats en poussant le tube de plastique transparent autour de l’adaptateur de tuyau. Faites une boucle avec le tube de plastique transparent afin que les condensats s’y accumulent, afin d’éviter l’entrée d’odeurs nauséabondes dans l’appareil. Si vous n’avez pas accès au siphon de sol, utilisez une pompe à condensat. Application sans vidange REMARQUE : Si vous installez un VRÉ (VNT5150E1000 ou VNT5200E1000) dans une région ou la température extérieure n’est jamais inférieure au point de congélation, il est inutile d’installer un tuyau d’évacuation des condensats; l’appareil peut donc être installé sans vidange. 1. Insérez l’adaptateur de tuyau d’évacuation fileté sous le VRÉ en plaçant le raccord du tuyau vers l’intérieur de l’appareil, comme le montre l’illustration. 2. Ajustez la rondelle en caoutchouc autour de l’adaptateur de tuyau d’évacuation, puis fixez-y l’écrou en plastique 3. Serrez à la main l’écrou en plastique fourni avec l’ensemble du tuyau d’évacuation. 4. Utilisez une clé pour serrer l’écrou d’un demi-tour supplémentaire afin d’assurer l’étanchéité du raccord. 5. Fixez le bouchon de vidange à l’adaptateur de tuyau d’évacuation, à l’intérieur de l’appareil. Systèmes de ventilation VRÉ/VRC 69-2480EF—01...
- Page 51 Procédure d’installation (suite) Branchement du cordon d’alimentation Cordon d’alimentation du VRÉ/VRC Insérez le cordon d’alimentation sur le dessus de l’appareil. Appuyez fermement afin de vous assurer que la connexion est solide. IMPORTANT : Ne branchez pas encore le cordon d’alimentation dans le mur. Prise murale Honeywell recommande que l’appareil soit branché à une prise réservée de 120 V c.a. Évitez d’utiliser une rallonge électrique pour brancher l’appareil à une prise murale. Honeywell ne recommande pas l’utilisation d’une rallonge électrique. Assurez-vous que la polarité de la prise est adéquate. REMARQUE : Si le voyant DEL du panneau de commande du VRÉ/VRC demeure vert, les moteurs ne se chargent pas et les commandes ne fonctionnent pas; cette situation pourrait être causée par une inversion de la polarité de la prise c.a. IMPORTANT : Pour une installation adéquate de l’alimentation électrique principale, faites appel à un technicien qualifié. Installation de hottes extérieures pour l’entrée et la sortie d’air Installez les hottes extérieures à 0,47 m (18 po)
-
Page 52: Dégivrage Automatique
Dégivrage automatique Les appareils VRÉ et VRC sont munis d’une fonction de dégivrage automatique afin d’éliminer la glace susceptible de se former sur le noyau. • Lorsque la température de l’air frais qui entre dans le système est inférieure à -5 °C (23 °F) ou moins, la fonction de dégivrage automatique se met en marche une fois l’heure. • Cette fonction éteint le ventilateur d’arrivée tout en maintenant allumé le ventilateur d’évacuation. • La vitesse du ventilateur d’évacuation, lente au départ, s’ajuste en fonction de la température extérieure. • À mesure que la température baisse, la vitesse du ventilateur augmente, atteignant sa rapidité maximale lorsque la température extérieure est de -20 °C (-4 °F) ou moins. • Le cycle de dégivrage dure 4 minutes (pendant lesquelles le ventilateur d’arrivée est éteint) et est suivi de 40 minutes de ventilation continue. • La fonction de dégivrage continuera de se mettre en marche périodiquement tant que la température extérieure sera de -5 °C (23 °F) ou moins. Câblage MISE EN GARDE : Haute tension présentant un danger et pouvant endommager l’appareil. Coupez l’alimentation électrique de l’appareil avant son installation. Description du bloc de raccord M28986 La bloc de raccord est situé derrière la porte du module de commande, sur le côté de l’appareil. -
Page 53: Prestige™ À Deux Fils
Câblage (suite) Câblage pour un fonctionnement avec commande à distance Mode CONT (continu) : le ventilateur fonctionne en continu à basse vitesse; une commande augmente ensuite la vitesse. Mode INTER (intermittent) : le ventilateur est éteint jusqu’à ce qu’on le mette en marche en haute vitesse, à partir d’une commande murale. Câblage des commandes à distance THM5421R (24 VAC) THERMOSTAT CONV Suivez ce schéma si vous utilisez un module d’interface d’équipement RF et un régulateur IAQ Prestige™ à deux fils. EQUIPMENT CONTROL IAQ DEVICE 24 V POWER SENSORS SENSOR TYPE MF28987 Systèmes de ventilation VRÉ/VRC 69-2480EF—01... -
Page 54: Câblage Du Thermostat Prestige
Câblage (suite) Suivez ce schéma si vous utilisez un ALIMENTATION thermostat Prestige™ DU VENTILATEUR (verrouillage non THERMOSTAT PRESTIGE représenté). USED USED U1/U1 RELAIS IAQ (QUALITÉ DE L’AIR AMBIANT) CONFIGURABLE POUR HUMIDIFICATEUR, DÉSHUMIDIFICATEUR OU ÉVENT U2/U2 RELAIS IAQ (QUALITÉ DE L’AIR AMBIANT) CONFIGURABLE POUR HUMIDIFICATEUR, DÉSHUMIDIFICATEUR OU ÉVENT MF28988 Module d’interface... -
Page 55: Câblage Général Pour Ventilateur
Câblage (suite) Suivez ce schéma pour ALIMENTATION câblage général du DU VENTILATEUR ventilateur. THERMOSTAT CONTACTS DE VENTILATION BLOC DE RACCORD 24 VOLTS POUR L’APPAREIL DE CHAUFFAGE MF28990 Le VRÉ/VRC est utilisé de concert avec un thermostat à commande de chauffage et de refroidissement classique ou un autre type de commande murale. Suivez ce schéma pour le raccord standard d’un ALIMENTATION DU VENTILATEUR VRÉ/VRC à un système à air pulsé... -
Page 56: Autre Option De Câblage Pour Le Raccord À Un Système À Air Pulsé
Câblage (suite) Suivez ce schéma pour l’autre option de raccord au système à ALIMENTATION MINUTERIE pulsé. DU VENTILATEUR DU VENTILATEUR ET AUTRES COMMANDES MURALES BLOC DE RACCORD L’ANCIEN MODÈLE DE VENTILATEUR 24 VOLTS DU SYSTÈME AVEC THERMOSTAT (G) ET LE SYSTÈME DE CHAUFFAGE À... -
Page 57: Installation (Suite) Câblage Du Déshumidistat H8908D
M28994 EARD-6 Suivez ce schéma si vous utilisez un régulateur W8150. AT120 XFMR W8150A MINUTERIE MF28995 Suivez ce schéma si vous utilisez la minuterie Honeywell pour la ventilation à haute vitesse (20, 40 ou 60 minutes). M28996 Systèmes de ventilation VRÉ/VRC 69-2480EF—01... -
Page 58: Panneau De Commande
Panneau de commande Le panneau de commande dispose d’un sélecteur Speed à trois positions et de boutons « + » et « – » pour Control régler la vitesse. La couleur du voyant DEL indique à quelle fonction est réglé le sélecteur. Open for • DEL VERTE = mode de fonctionnement normal Instructions • DEL JAUNE = Mode équilibrage SÉLECTEUR BOUTONS DE RÉGLAGE À TROIS POSITIONS DE LA VITESSE (+ ET –) MF32371 Mode de fonctionnement normal et réglage de la vitesse Lorsque le voyant DEL est vert, le sélecteur permet de choisir un mode de fonctionnement parmi les trois suivant : • INTER (Intermittent): Lorsque le sélecteur est à la position INTER, l’appareil fonctionnera uniquement lorsqu’une commande externe démarrera la ventilation. L’appareil fonctionnera au régime haute vitesse jusqu’à ce que change la condition ayant déclenché la ventilation. • CONT (continu): Lorsque le sélecteur est à la position INTER, l’appareil fonctionne de façon continue à basse vitesse jusqu’à ce qu’il soit interrompu par une autre commande. •... -
Page 59: Procédure D'équilibrage
Procédure d’équilibrage REMARQUE : Avant l’équilibrage, assurez-vous que le ventilateur du système CVCA est en marche (si l’appareil VRÉ/VRC est connecté à un tel système). a. Assurez-vous que le sélecteur de vitesse est à la position INTER ou CONT. b. Appuyez simultanément sur les boutons + et – simultanément pendant 5 secondes jusqu’à ce que le voyant DEL vire au jaune, ce qui indique que vous êtes au mode équilibrage. Au mode équilibrage, le sélecteur permet de choisir le moteur, le moteur droit (air vicié) lorsqu’il est à la position INTER, les deux moteurs à la fois à la position CONT, et le moteur gauche (air frais) à la position OFF. a. Utilisez un tube de Pitot ou un manomètre CONDUIT D’AIR FRAIS CONDUIT D’AIR VICIÉ (GAUCHE) (DROIT) pour mesurer le débit d’air dans le conduit d’air frais et le conduit d’évacuation de l’air. b. Déplacer le sélecteur pour régler le débit dans le conduit présentant le résultat le plus élevé. INTER : air vicié (droit) OFF (arrêt) : air frais (gauche) c. Appuyez sur les boutons + ou – pour régler le débit d’air à la valeur souhaitée pour le régime haute vitesse. d. Déplacez le sélecteur à la position CONT (pour régler la vitesse relative des deux moteurs). a. Appuyez simultanément sur les touches + et – pour quitter le mode équilibrage. b. Le voyant passe au vert. c. Le débit d’air au mode de fonctionnement continu sera Speed de 50 % celui qui a été mesuré. Control Open for Instructions SÉLECTEUR BOUTONS DE RÉGLAGE À... -
Page 60: Réinitialisation De L'équilibrage
Réinitialisation de l’équilibrage REMARQUE : L’appareil doit être réinitialisé avant chaque nouvelle procédure d’équilibrage. Réinitialisation : 1. Appuyez simultanément sur les touches + et – pendant Speed 10 secondes. Control 2. Le voyant deviendra jaune après 5 secondes. Open for Instructions 3. Le voyant deviendra vert après 10 secondes. 4. Relâchez les deux boutons. 5. L’appareil est réinitialisé et peut être mis de nouveau au mode équilibrage. SÉLECTEUR BOUTONS DE RÉGLAGE À TROIS POSITIONS DE LA VITESSE (+ ET –) MF32371 Vérification • Mettre l’appareil sous tension. Déplacez le sélecteur à la position CONT pour vous assurer que l’appareil fonctionne au mode continu. • Déclenchez la ventilation à partir de chaque commande externe. Vérifiez que l’appareil VRÉ/VRC fonctionne au régime haute vitesse. • Replacez le sélecteur à la position désirée et réglez les commandes externes aux paramètres souhaités. • Assurez-vous qu’aucun conduit n’est entortillé. Systèmes de ventilation VRÉ/VRC 69-2480EF—01... -
Page 61: Entretien
Entretien Aux trois mois (ou selon le besoin) Filtres. Nettoyez les filtres à l’aide d’un aspirateur (quatre fois par année, ou au besoin). Remplacez les filtres au besoin. Tous les ans (ou selon le besoin) Intérieur de l’appareil. Une fois par an ou au besoin, nettoyez l’intérieur de l’appareil (parois et bac à récupération) avec un savon doux non abrasif. L’utilisation de produits respectueux de l’environnement est recommandée. Système de ventilation à récupération d’énergie (VNT5150E1000 et VNT5200E1000) Une fois par an ou au besoin, nettoyez les quatre surfaces à l’aide d’un aspirateur; laissez-les tremper pendant 15 minutes dans de l’eau tiède et du savon doux; puis rincez-les à jet d’eau et laissez-les sécher. Système de ventilation à récupération de chaleur (VNT5150H1000 et VNT5200H1000) Une fois par an ou au besoin, nettoyez les quatre surfaces à l’aide d’un aspirateur; laissez-les tremper pendant 15 minutes dans de l’eau tiède et du savon doux; puis rincez-les à jet d’eau et laissez-les sécher. REMARQUE : Reportez-vous à la page 28 connaître la procédure à suivre pour l’entretien des éléments mentionnés ci-dessus. Systèmes de ventilation VRÉ/VRC 69-2480EF—01... -
Page 62: Nettoyage
Procédure d’entretien 2. Ouvrez le panneau de porte latérale en ouvrant les deux loquets situés en haut et en abaissant le panneau jusqu’à ce qu’il soit complètement 1. Coupez l’alimentation en c.a. en retirant la fiche ouvert. Retirez les deux filtres situés en haut, à enfoncée dans l’appareil ou celle qui est gauche et à droite du noyau, puis nettoyez-les à branchée sur la prise de courant. l’aide d’un aspirateur. Faites glisser le noyau vers l’extérieur, et nettoyez-le en suivant les directives des pages précédentes. 3. Nettoyez l’intérieur de l’appareil avec un linge 4. Replacez le noyau et les deux filtres, reverrouillez humide et essuyez-le une fois que vous avez le panneau latéral, puis rétablissez l’alimentation terminé. en c.a. de l’appareil. Systèmes de ventilation VRÉ/VRC 69-2480EF—01... -
Page 63: Dépannage
Dépannage MISE EN GARDE : L’entretien du VRÉ/VRC et de son système électrique peut entraîner des blessures. Assurez-vous que l’alimentation électrique est débranchée avant d’effectuer toute connexion. Le non-respect de cette directive peut causer une décharge électrique. L’entretien doit être effectué seulement par un technicien qualifié. Problème Recommandations pour le dépannage L’appareil VRÉ/VRC ne fonctionne... -
Page 64: Liste Des Pièces
Honeywell : listes de modèles et de pièces Honeywell : liste de modèles Honeywell : numéro Numéro de Type de de produit contrôle ventilateur VNT5150H1000 VNT5150E1000 VRÉ VNT5200H1000 VNT5200E1000 VRÉ Liste des pièces (reportez-vous à l’illustration de la page 31 pour obtenir la référence visuelle associée à chaque numéro) Numéro Numéro de pièce Description (illustration) Honeywell 50053952-001 Noyau VRC 25,4 cm en polypropylène –VNT5150H1000 50053952-002 Noyau VRC 38,1 cm en polypropylène – VNT5200H1000 50053952-003 Noyau enthalpique VRÉ 25,4 cm –VNT5150E1000 50053952-004 Noyau enthalpique 38,1 cm VRÉ –VNT5200E1000 50053952-005 Trousse pour remplacement de filtres VNT5150 (2 filtres) 50053952-006... - Page 65 Illustration des pièces Voir le tableau Liste des pièces à la page 30 : les articles sont référencés par numéros (1 à 11) correspondant aux numéros de la vue éclatée ci-dessous. M28997 Systèmes de ventilation VRÉ/VRC 69-2480EF—01...
- Page 66 Systèmes de ventilation VRÉ/VRC 69-2480EF—01...
- Page 67 Systèmes de ventilation VRÉ/VRC 69-2480EF—01...
-
Page 68: Garantie Limitée De 5 Ans
Garantie limitée de 5 ans Honeywell garantit que ce produit ne présentera aucun défaut de matériaux ou de fabrication dans des conditions normales d’utilisation et d’entretien pour une période de cinq (5) ans à compter de la date de l’achat par le consommateur. Honeywell choisira de réparer ou de remplacer ce produit si celui-ci présente un défaut ou un problème de fonctionnement pendant la période de garantie. Si ce produit se révèle défectueux, (i) veuillez le retourner, accompagné de la facture ou d’une autre preuve d’achat avec date, à l’emplacement où vous l’avez acheté; ou (ii) veuillez communiquer avec notre service à la clientèle au 1 800 468-1502. Le service à la clientèle décidera si un produit de remplacement peut vous être envoyé ou si le produit défectueux doit être retourné à l’adresse suivante : Honeywell Return Goods, Dock 4 MN10-3860, 1885 Douglas Dr. N., Golden Valley, MN 55422. La présente garantie ne couvre pas les frais de désinstallation ni de réinstallation. Elle ne s’applique pas s’il est démontré par Honeywell que la défectuosité a été causée par un dommage survenu pendant que le produit était en la possession d’un consommateur. La responsabilité de Honeywell se limite à réparer ou à remplacer le produit sous réserve des conditions énoncées ci-dessus. HONEYWELL NE SAURAIT EN AUCUN CAS ÊTRE TENUE RESPONSABLE DES PERTES NI DES DOMMAGES, Y COMPRIS LES DOMMAGES ACCESSOIRES OU CONSÉCUTIFS DÉCOULANT DIRECTEMENT OU INDIRECTEMENT D’UN MANQUEMENT À TOUTE GARANTIE EXPLICITE OU IMPLICITE OU DE TOUT AUTRE DÉFAUT DE CE PRODUIT. Certains États ou certaines provinces ne permettent pas l’exclusion ou la limitation des dommages accessoires ou consécutifs, de sorte que les exclusions ou les limitations mentionnées ci-dessus peuvent ne pas s’appliquer à vous. CETTE GARANTIE EST LA SEULE GARANTIE EXPRESSE QUE HONEYWELL OFFRE POUR CE PRODUIT. TOUTE PROTECTION DE GARANTIE IMPLICITE, Y COMPRIS LA GARANTIE IMPLICITE DE QUALITÉ MARCHANDE OU D’ADAPTATION À UN BUT PARTICULIER, EST PAR LA PRÉSENTE LIMITÉE À LA DURÉE DE CINQ ANS DE LA PRÉSENTE GARANTIE. Certains États ou certaines provinces ne permettent pas de restrictions quant à la durée de la garantie, de sorte que les restrictions indiquées ci-dessus pourraient ne pas s’appliquer à vous. Cette garantie vous confère des droits précis. Il est possible que vous disposiez également d’autres droits, qui varient d’un État ou d’une province à l’autre. Si vous avez des questions concernant la présente garantie, écrivez à Honeywell Customer Relations, 1985 Douglas Drive, Golden Valley, MN 55422, ou appelez au 1-800-468-1502. Au Canada, écrivez à Retail Products ON15-02H, Honeywell Limited, 35 Dynamic Drive, Toronto (Ontario) M1V 4Z9. Automation and Control Solutions Honeywell International Inc. 1985 Douglas Drive North Golden Valley, MN 55422 Honeywell Limited-Honeywell Limitée...
Need help?
Do you have a question about the VNT5150H1000 and is the answer not in the manual?
Questions and answers