Advertisement
- 1 Device Оverview
- 2 Installation
- 3 Battery Back Up
- 4 Power Up Reception and Signal Strength Display
- 5 Successful reception or failed reception
- 6 Automatic Reception and Manual Reception
- 7 To Set Time and Alarm Time
- 8 TO SET TIME
- 9 TO SET ALARM 1 TIME
- 10 TO SET ALARM 2 TIME
- 11 TO TURN ON/OFF ALARM 1 or/and ALARM 2
- 12 TO USE THE SNOOZE ALARM
- 13 TO STOP THE ALARM
- 14 TO TURN OFF ALARM 1 AND/OR ALARM 2 PERMANENTLY
- 15 TO SET SNOOZE DURATION (from 5 to 60 minutes)
- 16 TO READ MAXIMUM-MINUMUM INDOOR-OUTDOOR TEMPERATURES
- 17 IF YOU LOSE THE OUTDOOR TEMPERATURE
- 18 USING THE WEATHER FORECASTER AND BAROMETER
- 19 TROUBLE SHOOTING
- 20 TO USE THE HI-LO DIMMER SWITCH
- 21 CARE OF YOUR CLOCK
- 22 Documents / Resources
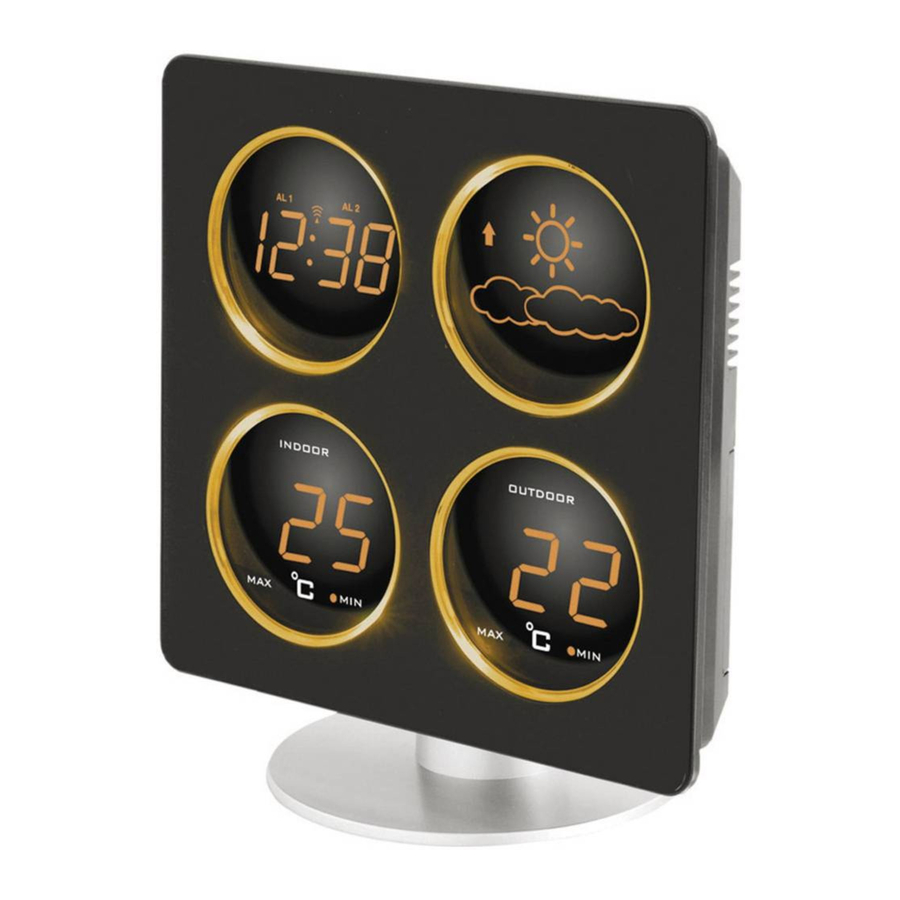
Device Оverview
Front

Rear

Outdoor Remot Temperature Sensor

AC/DС ADAPTOR

Installation

- Insert the round base to the back pole (as indicated) of your LED weather station, turn the base to the right to secure it in position.
- Plug the AC/DC adaptor into any 230V European AC household outlet. Plug the DC jack into the lower back of the clock. The top front of the clock will show
![]() and the indoor-outdoor temperatures and weather forecast display will appear. Your LED weather station is ready to work for you.
and the indoor-outdoor temperatures and weather forecast display will appear. Your LED weather station is ready to work for you.
 and the indoor-outdoor temperatures and weather forecast display will appear. Your LED weather station is ready to work for you.
Battery Back Up
- Slide the battery door at the back case, insert 3 x AAA batteries with correct + and - polarity signs inside the battery compartment. Replace the battery cover.
- When AC power is off, the batteries will power t he clock to keep track of the time and alarm time.
- When only the back-up batteries is used, the LED panel is off.
Power Up Reception and Signal Strength Display
- After plug in AC power, the clock starts to receive DCF signal.
![]() Icon blinks. Display shows
Icon blinks. Display shows ![]()
![]()
- When strong DCF signal is detected, display shows with 3 bars
![]()
![]()
- Strong DCF signal is detected,
- Minute digits may start counting 01,02,03...60,00,01,02.... trying to match with the correct seconds DfJJY signal
 Icon blinks. Display shows


When weak or no DCF signal is detected, display shows with 1 bar  or
or  . You will need to place the clock to another area for better reception, or unplug the AC/DC jack to start over reception again. During reception, the signal strength may move from 1 bar to 2 bars to 3 bars. This is normal since the clock is detecting DCF signal and other signals in the air at the same time.
- If the clock does not catch DCF time signal for 7 minutes, it will go back to normal time display
![]()
- During reception, press TIME button once will go to normal time display.
Press HR again will return to reception mode and signal strength indication.

Successful reception or failed reception
![]() Icon becomes static on (stop blinking) when reception is successful
Icon becomes static on (stop blinking) when reception is successful  Icon disappears when reception is failed

Weak or no RC signal Is detected

Successful Reception

Failed Reception
Automatic Reception and Manual Reception
Automatic reception: this clock starts reception automatically everyday at 1:00am. If auto recpetion fails at 1:00 am, it will start again at 2:00 am. If fails at 2:00 am, it will start again at 3:00 am.
If auto recpetion fails at 3:00 am still fails, it will start reception every 3 hours until it succeeds to catch correct DCF time.
Manual reception: press HR button once anytime to start manual reception of DCF time signal. The LED time display will go to radio controlled reception mode ![]()
To Set Time and Alarm Time
After power up, if press TIME button once, time digits go to 0:00 am (default start-up time). The clock continues to receive DCF signal. The ![]() icon is still blinking.
icon is still blinking.

Press HR button once will go back to radio controlled reception mode (as above)
TO SET TIME
Press and hold TIME button and at the same time press HR button once at a time to SET ALARM 1 to set hour.
Press and hold TIME button and at the same time press MIN button once at a time to set minute.
TO SET ALARM 1 TIME

SET ALARM 1
- Slide the Alarm Switch to ALM 1.
- Press and hold ALM button and at the same time press HR button once at a time to set hour.
- Press and hold ALM button and at the same time press MIN button once at a time to set minute.
TO SET ALARM 2 TIME

SET ALARM 2
- Slide the Alarm Switch to ALM 2.
- Press and hold ALM button and at the same time press HR button once at a time to set hour.
- Press and hold ALM button and at the same time press MIN button once at a time to set minute.
TO TURN ON/OFF ALARM 1 or/and ALARM 2
- To turn on Alarm 1 only, slide the alarm switch to ALM 1, ALM 1 LED lights up on upper left of the hour digits.
- To turn on Alarm 2 only, slide the alarm switch to ALM 2, ALM 2 LED lights up on lower left of the hour digits.
- To turn on both Alarm 1 and 2, slide the alarm switch to ALM 1 + 2, both ALM 1 and ALM 2 LED light up.
- To in-activate both Alarm 1 and 2 permanently, slide to ALM OFF. Both ALM 1 and ALM 2 LED turn off.
TO USE THE SNOOZE ALARM
When time reaches the set ALARM 1 and/or ALARM 2 time, the clock will beep with the ALM 1 and/or ALM 2 LED blinking.
Press the SNOOZE button once, the alarm sound will stop and ALM 1 or ALM 2 LED keep blinking. Alarm will sound againin 5 minutes.
TO STOP THE ALARM
When time reaches the set ALARM 1 and/or ALARM 2 time, the clock will beep with the ALM 1 and/or ALM 2 LED blinking.
Press and hold the SNOOZE button for 2 seconds, the alarm sound will stop and ALM 1 or ALM 2 LED becomes static. Alarm 1 and/or Alarm 2 will sound again same time next day.
TO TURN OFF ALARM 1 AND/OR ALARM 2 PERMANENTLY
Slide the alarm switch to ALM OFF. Alarm sound will stop and both ALM 1 and ALM 2 LED's turn off.
TO SET SNOOZE DURATION (from 5 to 60 minutes)
Press and hold SNOOZE and time display will show "05" (default snooze duration) and then press MINUTE button to set your desired snooze duration.
TO READ MAXIMUM-MINUMUM INDOOR-OUTDOOR TEMPERATURES
Simply press the  button to view the maximum indoor and outdoor temperatures. Press MAXCLEAR to reset the Max readings. The readout will now appear as — and will start to record the maximums again.
Then press the ![]() button to view the minimum indoor and outdoor temperatures. Press MAXMINCLEAR to reset the Min readings. The readout will now appear as — and will start to record the minimums again.
button to view the minimum indoor and outdoor temperatures. Press MAXMINCLEAR to reset the Min readings. The readout will now appear as — and will start to record the minimums again.
IF YOU LOSE THE OUTDOOR TEMPERATURE
When the outdoor temperature digits show '—--", the wireless transmission is either interrupted or lost. Press the CLEAR button at the back of your LED weather station, then press RESET button at the back of the outdoor transmitter. If you continue to lose the outdoor temperature display, try placing the transmitter in a different location until you have smooth transmission of temperature data.
USING THE WEATHER FORECASTER AND BAROMETER
Your LED weather station has a built-in barometer which measures the barometric pressure. After power up, the display shows Sunny & Cloudy icons. Your LED weather station takes around 24 hours to gather data of barometric pressure changes and predicts next 12-24 hours weather conditions.
There are four types of weather display of the predicted weather condition:

SUNNY

SUNNY & CLOUDY

CLOUDY

RAINY
Your weather forecaster also has weather tendency indicator, when the air pressure is going up (the weather will improve) the UP arrow will appear, when the air pressure is going down (the weather will go worse) the DOWN arrow will appear.
Remarks:
Moving your weather station around your house or your building will affect its accuracy because the sudden change of temperature or height/altitude will affect the accuracy of your weather station. It will take 24 hours to get stable again to predict next 12-24 hours weather condition.
Your weather station predicts next 12 - 24 hours weather conditions. It may not match with the current weather condition outside.
TROUBLE SHOOTING
Press the RESET button on the back of the base thermometer and then press RESET button located on the back of the outdoor transmitter. Once you do this, your clock will be reset to default setting and needs to be up-dated by DCF time signal again.
TO USE THE HI-LO DIMMER SWITCH
Simply slide the LO-HI DIMMER switch at the back of the clock to adjust the LED brightness to a comfortable level to you in the dark.
CARE OF YOUR CLOCK
- Do not expose your clock to extreme temperatures, water or direct sunlight.
- Avoid contact with any corrosive materials.
- Do not subject the clock to excessive force, dust or humidity
- Do not open the inner back case or tamper with any components of this clock
- Do not plug in any other AC/DC adaptor with incorrect specifications or voltage
- Do not place your clock in range strong interferences. (TV, Microwave...)

Documents / ResourcesDownload manual
Here you can download full pdf version of manual, it may contain additional safety instructions, warranty information, FCC rules, etc.
Advertisement


Need help?
Do you have a question about the WS 6830 and is the answer not in the manual?
Questions and answers