Table of Contents
Advertisement
Quick Links
WS6850 Desktop Weather Station
Instruction Manual
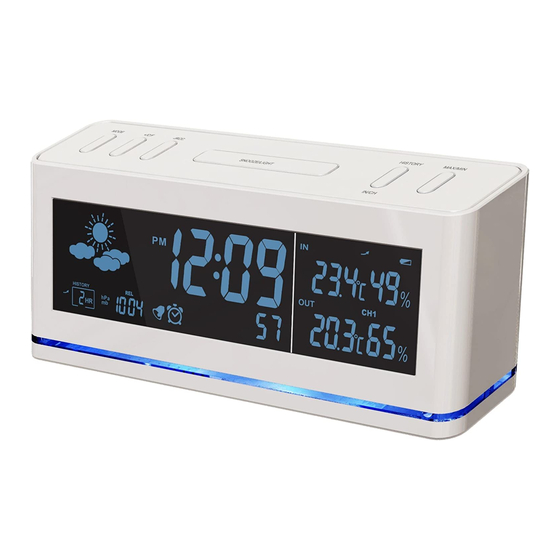
Introduction
This desktop weather station comes with barometric weather prediction, clock, calendar,
indoor and outdoor temperature and humidity display. It is battery powered with AC
charger. It is recommended to use the AC charger at all times.
Fig. 1 Front view
1. MODE button
°
°
2. +/
C/
F button
3. -/ RCC button
4. SNOOZE/ LIGHT button
5. HISTORY button
6. CHANNEL button
7. MAX/ MIN button
8. DC line in jack
9. Battery compartment
General notes:
1. It is recommended to set up the remote temperature sensor before setting up the
weather station/ clock. See "Configuring Remote Temperature Sensor(s)"
for more information. Batteries and AC adapter should be used together.
2. Please note all other clock/ weather station settings seize to function when the
clock is in RCC synchronization mode. See "RCC Synchronization" for
additional information.
3. During initial installation, the temperature and humidity sensor may take up to an
hour or more to acclimatize to current conditions.
4. Press SNOOZE/ LIGHT (4) to change LCD screen backlight brightness from OFF,
LOW and HIGH.
Getting started:
Installing AC adapter
Fig. 2 Back view
Advertisement
Table of Contents

Related Manuals for Techno Line WS6850


Summary of Contents for Techno Line WS6850
- Page 1 WS6850 Desktop Weather Station Instruction Manual Introduction This desktop weather station comes with barometric weather prediction, clock, calendar, indoor and outdoor temperature and humidity display. It is battery powered with AC charger. It is recommended to use the AC charger at all times.
- Page 2 1. Plug in AC/DC adapter at DC input jack (8) (see fig. 2). Use only approved adapters. Batteries installation 1. Open battery compartment (9) on the back of the unit (see fig. 2). 2. Install/ replace 2 x AAA size batteries in the compartment. It is recommended that only alkaline batteries are used.
- Page 3 4. Press HISTORY button (5) to confirm weather pattern. Interpreting the weather forecast symbols The weather station requires at least 24 hours on acclimatizing to local weather conditions. The weather station process and analyze the weather patterns for the past 24 hours in order to determine the future weather.
- Page 4 Note: It is only possible to measure the barometric pressure trend properly when the unit remains at the same altitude. When moving around at different altitudes within a short period of time, the air pressure and the barometric pressure will change. The pressure trend will only be correct and regulate the has remain at a constant altitude for 24 hours or more.
- Page 5 RCC Zone Offset This clock is equipped with radio controlled time adjustment. The user will need to work out the time zone signal they receive at their current location and make (any) adjustment as required. This function also allows for daylight saving adjustment. Contact your local weather bureaus or authorities for more information.
- Page 6 time. Configuring the Thermometer This weather station is equipped to synchronize up to 3 remote temperature sensors. One remote temperature sensor is included. Additional remote temperature sensor is available for purchase separately. Please contact your local distributor for purchase. Remote temperature sensors Fig.
- Page 7 extreme or harsh weather, including but not limited to hurricane, typhoon, and cyclones seasons. Do not place the unit in area of high winds. 3. Do not place the remote temperature sensor more than 30 meters (98 feet) from the receiving weather station. The remote temperature sensor is most effective if there are no obstruction and interference between the remote temperature sensor and the weather station.
- Page 8 4. When is shown, the display will automatically show through all the remote sensors channel. Press CHANNEL button (6) to cancel. Celsius / Fahrenheit 1. Press +/°C/°F button (2) to toggle between displaying the temperature in Celsius and Fahrenheit. Temperature Trend indicates the temperature is in a increasing trend.
Need help?
Do you have a question about the WS6850 and is the answer not in the manual?
Questions and answers