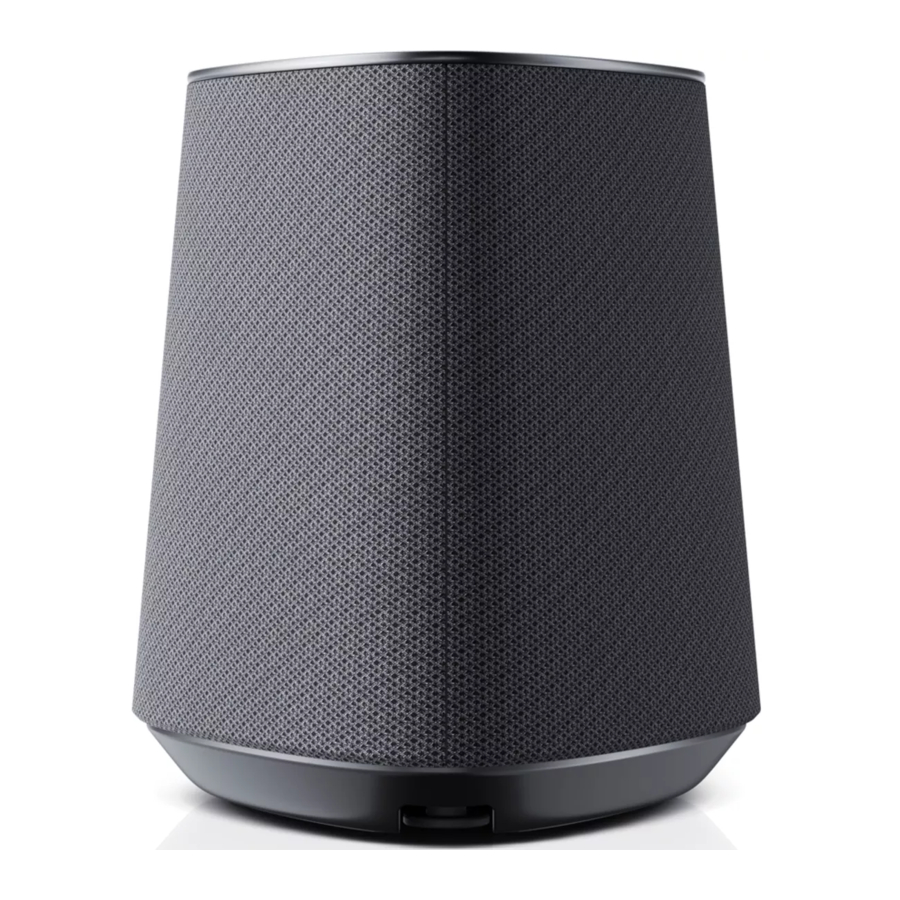
Loewe klang mr1 / klang mr3 / klang mr5 - Bluetooth Speaker Manual
- Comprehensive user's manual (246 pages)
Advertisement
- 1 Important safety instructions
- 2 Main unit Components
- 3 Connecting the speaker
- 4 Basic Operation
- 5 Multiroom operation
- 6 Bluetooth operation
- 7 Connecting to WDAL2.0 compatible audio system
- 8 Factory reset
- 9 Software update
- 10 Spotify
- 11 Operating modes
- 12 Mounting klang mr1 speaker on the wall
- 13 Remote control Assist Audio 1 (optional accessory)
- 14 Troubleshooting
- 15 Disposal
- 16 Technical data
- 17 Documents / Resources
Important safety instructions

Read this page carefully to ensure safe operation of the device.
Follow all safety and operating instructions when using this product.
You should keep the safety and operating instructions for future reference.
You should strictly follow all warnings provided on the product and listed in the operating instructions.
Explanation of symbols
![]()
Double Insulated (Class II) Equipment. This electrical appliance has been designed in such a way that it does not require a safety connection to electrical earth (ground).

This symbol indicates risks caused by high voltages.

This symbol is to alert the user to other, more specific risks.

This symbol indicates dangers caused by the development of fire.
Installation
Placement
Place the unit on a stable, even surface.
Do not place this unit close to strong magnetic fields.
To ensure optimum acoustic performance and safe cable routing, please place the unit at least 5 cm away from the wall.
Cables
Lay the speaker and power cables in such a way that they cannot be damaged. The power cable may not be kinked or laid over sharp edges, stood on or exposed to chemicals. A power cable with damaged insulation can cause electric shocks and poses a fire risk. As such, it must be changed before the unit is used again
Do not use this device near water
The device should never be exposed to water droplets or water splashes, such as those found near a bathtub, wash basin, kitchen sink, washing machine, wet basement or swimming pool. Never place containers filled with liquids, such as e.g. flower vases, on the device.
Ventilation
![]()
Slots and openings in the housing are used to ventilate the device to ensure reliable operation and to protect the device from overheating. Install the device according to the manufacturer's instructions. Never block the ventilation by placing the device on a bed, sofa, rug, or similar soft surfaces. This device should not be installed in a bookshelf or built-in wardrobe unless adequate ventilation is ensured.
Heat
Do not install the device near hot surfaces, such as radiators, fan heaters, stoves or other devices that can be hot. Never place objects with open flame, such as candles or lanterns, on or near the device.
Accessories
Use only the accessories specified by the manufacturer.
Usage
Overload
![]()
Never overload mains sockets, extension cords or multiple sockets, otherwise there is a risk of fire or electric shock.
Thunderstorm
The device should be disconnected from the mains during thunderstorms and if it is not used for a long time.
Penetration of foreign material and liquid
Be careful not to allow foreign material or liquid to enter this device through ventilation holes, otherwise it may come into contact with high voltage components or short circuit resulting in a fire or electric shock. Never spill liquids of any kind on this device.
Risks associated with high volume
The device is not designed for listening with headphones. To prevent possible hearing damage, do not listen at high volume for long periods.
Disconnection from power supply
The power button does not disconnect the power supply from the mains. To completely disconnect the device from the mains, unplug the mains cable from the socket.
The mains plug must be easily accessible so that the unit can be disconnected from the mains at any time.
Maintenance
Cleaning and care
Unplug the mains adapter of this device from the mains socket before cleaning this product. Clean the speakers with a soft, moist, clean and colour-neutral cloth only, without any aggressive or scouring cleaning agents. Speaker grills are textile covered. Due to electrostatic charging, dust may accumulate on the speaker cover. You can remove this by carefully using a vacuum cleaner with a soft brush attachment if required.
In case of dirt or stains:
Moisten a soft, colour-neutral cloth with detergent or normal stain remover and gently rub away the stain. You can also treat the mark/stain directly with normal dry stain remover spray (vacuum up powder). Do not moisten the fabric cover directly with detergent or stain remover (risk of encrustation). Do not use any solvents to clean the fabric.
Follow the manufacturer's instructions when using stain removers.
Repair
Damages requiring repair
Maintenance and repair work should only be carried out by a qualified customer service. Maintenance/repair is required if the device has been damaged, if liquid has entered the device, if objects have entered the device, if the device has been exposed to rain or moisture, when it stops working properly or has fallen down.
To minimize the risk of electric shock, fire, etc.
Do not remove screws, covers or body parts.
Declaration of Conformity
Hereby, Loewe Technology GmbH declares that the radio equipment type Loewe klang mr complies with Directive 2014/53/EU. The full text of the EU declaration of conformity is available at the following Internet address: https://www.loewe.tv/int/support
This product can be used across all EU member states.
Due to the 5 GHz frequency range of the built-in WLAN module, use in the following countries is only permitted inside buildings:
| AT | BE | BG | CZ | DK | EE | FR | DE | IS | IE | IT |
| EL | ES | CY | LV | LI | LT | LU | HU | MT | NL | NO |
| PL | PT | RO | SL | SK | TR | FI | SE | CH | UK | HR |
FCC regulatory conformance
This device complies with Part 15 of the FCC Rules. Operation is subject to the following two conditions:
- This device may not cause harmful interference.
- This device must accept any interference received, including interference that may cause undesired operation.
NOTE:
This equipment has been tested and found to comply with the limits for a Class B digital device, pursuant to part 15 of the FCC Rules. These limits are designed to provide reasonable protection against harmful interference in a residential installation.
This equipment generates uses and can radiate radio frequency energy and, if not installed and used in accordance with the instructions, may cause harmful interference to radio communications. However, there is no guarantee that interference will not occur in a particular installation. If this equipment does cause harmful interference to radio or television reception, which can be determined by turning the equipment off and on, the user is encouraged to try to correct the interference by one or more of the following measures:
- Reorient or relocate the receiving antenna.
- Increase the separation between the equipment and receiver.
- Connect the equipment into an outlet on a circuit different from that to which the receiver is connected.
- Consult the dealer or an experienced radio/ TV technician for help.
NOTE:
The manufacturer is not responsible for any radio or TV interference caused by unauthorized modifications to this equipment. Such modifications could void the user's authority to operate the equipment.
RF Exposure
This equipment complies with FCC radiation exposure limits set forth for an uncontrolled environment. This equipment should be installed and operated with minimum distance of 20 cm between the radiator and your body. This transmitter must not be co-located or operating in conjunction with any other antenna or transmitter.
IC regulatory conformance
This device complies with CAN ICES-003 (B)/ NMB-003(B).
This device contains licence-exempt transmitter(s)/receiver(s) that comply with Innovation, Science and Economic Development Canada's licence-exempt RSS(s). Operation is subject to the following two conditions:
- This device may not cause interference.
- This device must accept any interference, including interference that may cause undesired operation of the device.
RF Exposure
This equipment complies with IC radiation exposure limits set forth for an uncontrolled environment. This equipment should be installed and operated with minimum distance of 20 cm between the radiator and your body. This transmitter must not be co-located or operating in conjunction with any other antenna or transmitter.
Main unit Components
Top panel

- LED centre button
| LED indicator state | Status |
| Blue LED breathing | Bluetooth pairing mode/pause/mute |
| Blue LED is on | Bluetooth mode |
| Teal LED breathing | WDAL2.0 pairing mode |
| Teal LED is on | WDAL2.0 mode |
| Orange LED is on | Multiroom mode |
| Orange LED breathing | Multiroom mode is paused/muted |
| Green LED is on | LINE IN mode |
| Green LED breathing | LINE IN mode is paused |
| LED is off | Speaker is turned off |
- Touch sensitive area
- 5 LED buttons
Bottom panel
A magnetic cover is attached to the bottom of the speaker. Remove this cover to gain access to the buttons and rating label. Replace the cover if you no longer need access to the buttons.


- USB port – for software update only.
- PAIRING button - for WDAL 2.0 pairing.
- WPS (Wi-Fi Protected Setup) button/ indicator – Triggers Wi-Fi setup for Play-Fi. Press and hold the button for 3 seconds to activate the WPS mode.
Press and hold the button for 8 seconds to activate the AP mode. In AP mode, all DTS Play-Fi / Multiroom settings are restored.
| LED indicator state | Status |
| LED slowly pulsing | Wi-Fi Access Point (AP) mode |
| LED flashes twice | Wi-Fi Protected Setup (WPS) mode |
| LED is on | Connected / Pairing successful |
- LAN – connect to the router via LAN cable.
- LINE IN – connect to the audio source via 3.5mm audio cable.
- AC IN – connect to an electrical outlet.
Connecting the speaker
Connecting the power
Note
- Risk of product damage! Ensure that the power supply voltage corresponds to the voltage printed on the rating label. Remove the magnetic cover from the bottom to find the rating label.
Connect the mains cable to the AC IN Socket of the speaker and then into a mains socket.
When connected to the power, the speaker starts automatically. You should see the LED light up at the top.
Connecting to Wi-Fi
Airplay setup
Use AirPlay to set up the Wi-Fi connection of iOS device (iOS7 or later) and speaker.
- Press and hold the WPS button located on the bottom of the speaker for 8 seconds to trigger the Wi-Fi connection until the speaker makes a second tone, and then release the button.
- Wait until the Wi-Fi light indicator turns from a fast blink to a slow pulse. A slow pulse indicates that the speaker is entering the Wi-Fi setup mode.
- On your iOS device go toSettings > Wi-Fi > select network [Play-Fi device (xxxxxx)]
- Speaker will be automatically recognized as Airplay device. Tap on [Set up new AirPlay speaker].
- Tap on [Show Other Networks...] and select your home network to which you want speaker to connect.
- After a successful Wi-Fi connection, the WiFi light indicator stops pulsing and stays on. After setting up this product on your Wi-Fi network, you can control it from any smartphone or tablet on the same network.
Google Home setup
- Download the Google Home app on your mobile device.
- iPhone/iPad only: Turn on your mobile device's Bluetooth.
- Press and hold the WPS button located on the bottom of the speaker for 8 seconds to trigger the Wi-Fi connection until the speaker makes a second tone, and then release the button.
- Wait until the Wi-Fi light indicator turns from a fast blink to a slow pulse. A slow pulse indicates that the speaker is entering the Wi-Fi setup mode.
- Open the Google Home app.
- Follow the steps to set up your device.
If you can't find the steps to set up your speaker:
- At the top left of the Google Home app home screen, tap Add + > Set up device > New device.
- Follow the setup steps.
WPS mode
If your router has Wi-Fi Protected Setup (WPS), you can set up the connection without entering a password.
- Press and hold the WPS button for 3 seconds. You will hear a tone and the Wi-Fi indicator will flash twice continuously.
- Press the WPS button on your router. The button is usually marked with the WPS logo.
Note
- WPS is not a standard feature of all routers. If your router does not have WPS, follow standard Wi-Fi setup.
- Press the WPS button once if you want to exit the WPS mode or it will automatically exit after 2 minutes.
LAN cable connection
Connect your speaker and router with Cat 5 LAN cable.
Basic Operation
Volume control
Swipe from bottom up on the touch area to increase the volume once.
Swipe from top to bottom, to decrease the volume once.

Swipe from bottom up and keep the finger on the touch area to increase the volume continuously.
Swipe from top to bottom and keep the finger on the touch area to decrease the volume continuously.

Pause / Mute
Tap on the touch area once, the track will be paused or muted depending on the current source.
Wi-Fi/multiroom, Bluetooth – Pause
LINE IN, Internet radio – Mute
Tap again on the touch are to resume playback or unmute.
Changing the track
In the Bluetooth or multiroom mode, swipe to right / left on the touch area to change to the next / previous track.

Favourites
In Wi-Fi/multiroom mode, up to 5 stations or playlists can be saved as favourites. Tap and hold one of the buttons at the bottom for 3 seconds. Current station0 or playlist will be stored to this button. All 5 LEDs light up briefly to confirm that the favourites have been saved successfully.

To call up a saved track or playlist, simply tap on the corresponding LED.
Note:
- The buttons where the favourites are stored light up in white.
Multiroom operation
This speaker can be used as part of multiroom speaker setup. This means that the same music can be played from your speaker and other compatible speakers simultaneously throughout your home.
To use this feature, make sure the speaker and your smartphone / tablet are on the same network. You can use Google Home, AirPlay 2 or DTS Play-Fi app to control compatible multiroom speakers. You can then play the music on multiple speakers at the same time, assign speakers to different groups, control the volume individually, or use master volume to change the volume on all speakers at the same time.
Chromecast built-in
This speaker supports Chromecast built-in feature that allows you to cast music from Chromecast compatible apps to your audio device. To use this feature, make sure the speaker and your smartphone / tablet are on the same network. Start playing music on a Chromecast-enabled app and cast it to your speaker or multiroom speaker group simply by tapping the ![]() (cast) button and selecting the speaker/group.
(cast) button and selecting the speaker/group.
AirPlay 2
If you have an iOS device, you can use AirPlay 2 for multiroom streaming.
- Connect your iOS device to the same Wi-Fi network as your speaker.
- Swipe into Control Centre on your iOS device and tap the AirPlay
![]() icon within the music control.
icon within the music control. - From the list of available AirPlay devices, select your multiroom speaker by tapping the empty circle next to its name. If there are multiple AirPlay 2-enabled speakers on the same network, you can select those as well.
DTS Play-Fi app
Another option for playing music with the multiroom function is to use the DTS Play-Fi app..
In addition to the standard multiroom functions, this app allows software updates to the multiroom function and also access to internet radio.
- Download and install the DTS Play-Fi app on your mobile device.
- Connect your mobile device to the same network as your speaker.
- Launch the DTS Play-Fi app.
- The speaker can perform a software update. The first time the device is set up, it will update to the latest software. It may take a few minutes for the software to update. Do not unplug your speaker, turn off the device, or disconnect the USB stick or network during the update. These actions can potentially destroy your speaker!
- In the app, select the speaker or speaker group.
- Select one of the available music streaming services and choose an audio track. Playback starts from the speaker or speaker group.
Bluetooth operation
Connect the speaker to a Bluetooth device (such as an iPad, iPhone, iPod touch, Android phone, or laptop) via Bluetooth, and then you can listen to audio files stored on the device through the speaker.
Pairing with the phone/ tablet
To activate Bluetooth pairing when no Bluetooth device is paired with the speaker:
- Tap and hold your finger on the top touch area for 3 seconds to enter Bluetooth pairing.
- The LED will breathe blue as confirmation.
To activate Bluetooth pairing to pair additional Bluetooth device:
- Tap and hold your finger on the top touch area for 3 seconds to enter Bluetooth mode.
- Tap and hold your finger on the top touch area for 3 seconds again to enter Bluetooth pairing mode. The LED will breathe blue as confirmation.
Continuation of pairing steps:
- Turn on Bluetooth on your phone/tablet, search for and select "Play-Fi device (xxxxxx)" to connect. For information on enabling Bluetooth, please refer to your phone/ tablet's user guide.
- After successful pairing, the centre LED will glow blue.
- Select and play audio files or music on your Bluetooth device.
If a call is made during playback, the music pauses. When the call is completed, playback resumes.
Connecting to a paired device
- Tap and hold your finger on the top touch area for 3 seconds to enter Bluetooth mode.
- The previously paired phone/tablet is automatically connected to the speaker.
Note
- The speaker stays in paring mode for only 45 seconds. If no device is paired with it during this time, it switches back to the last active source.
- The maximum operating range between the speaker and a Bluetooth device is approximately 10 meters.
- Compatibility with all Bluetooth devices is not guaranteed.
Connecting to WDAL2.0 compatible audio system
If you own a Loewe audio system with WDAL2.0 function, this speaker can be integrated into this system and will be used to play one of the available audio channels. Up to 5 speakers and one subwoofer can be connected to the WDAL2.0 audio system. A complete set of speakers properly set up in your room will create true surround sound.
Pairing to the WDAL2.0 audio system
- Press and hold the PAIRING button on the bottom of the speaker for 3 seconds to enter WDAL2.0 pairing mode. As confirmation, the LED on the top will breathe teal. The speaker stays in paring mode for only 45 seconds.
- Press the pairing button on your WDAL2.0 audio system. For information on enabling WDAL2.0 pairing, see the user guide of the audio system. After successful pairing, the centre LED of the speaker will be solid teal.
- Set which audio channel the speaker should play. Options: Surround left, Front left, Centre, Front right, Surround right. To do this, press and hold one of the 5 buttons on the top of the speaker. Each button represents different channel.

SL – surround left channel
FL – front left channel
C – centre channel
FR – front right channel
SR – surround right channel
- Set WDAL2.0 switch of the audio system to "SMALL" for the corresponding channel. See the audio system user guide for more information.
Note:
- If pairing and channel selection were successful, the LEDs on the top will turn off in 10 seconds.
- If pairing or channel selection fails, the speaker will return to the previous source.
- WDAL2.0 mode has the highest priority and it is not possible to switch the speaker to another source, unless the master audio system is turned off/in standby.
- When WDAL2.0 master audio system is turned on, the paired speaker automatically switches to WDAL2.0 mode.
- When the speaker is in WDAL2.0 mode, it is not possible to change the volume or mute the sound using the speaker. This can only be done using the master audio system.
- When WDAL2.0 is connected, the speaker's LED is teal. However, the LED will turn off after 60 seconds so as not to disturb when watching TV in a dark room. With a single tap, the light turns back on.
Changing the audio channel
If the speaker is already paired via WDAL2.0 and you want to use it to play another channel, follow these steps:
- Press the PAIRING button on the bottom of the speaker. The LED on the top lights up teal.
- The LED representing the current channel will also light up.
- Press and hold the button corresponding to the new channel for 3 seconds.
- Previous LED will turn off and new channel LED will light up.
- Set WDAL2.0 switch of the audio system to "SMALL" for the corresponding channel.
Factory reset
Resets the device to the default settings. Press and hold the WPS and PAIRING buttons on the bottom of the speaker until you hear sound and all the LEDs light up. The speaker will then turn off and restart. Wait until the speaker turns on completely (solid white light on top). You can now safely disconnect the speaker from the mains.

Do not disconnect the speaker from the mains before it has fully booted up after the factory reset process, otherwise you may damage the speaker!
Software update
To upgrade speaker firmware:
The latest software can be found at: www.loewe.tv/int/support
Follow the installation steps in the document supplied with the software.
To upgrade the multiroom function of your speaker:
- Download and install the DTS Play-Fi app on your mobile device.
- Connect the speaker to the app.
- If new Play-Fi software is available, the application notifies you.
- Follow the instructions in the application to run the multiroom feature update.
It may take a few minutes for the software to update. Do not unplug your speaker, turn off the device, or disconnect the USB stick or network during the update. These actions can potentially destroy your speaker!
Spotify
Use your phone, tablet or computer as a remote control for Spotify. Go to spotify.com/connect to learn how.
Operating modes

Mounting klang mr1 speaker on the wall
You can place klang mr1 on furniture or shelves, but there is also the option of mounting it on the wall.
Installation must be carried out by qualified personnel only. Incorrect assembly can result in severe personal injury and property damage. It is the installer's responsibility to verify that the wall will safely support the total load of the unit and wall brackets.
When drilling holes in walls it is essential to avoid contact with electrical cables and water or gas pipes contained within. Use of a good quality live wire detector and hidden object locator is therefore recommended. Only drill into structures when you are sure it is safe to do so.
If the speaker is wall mounted, you will not have access to the buttons on the bottom, so you'll need to make any necessary connections first.
Additional tools and hardware (not included) are required for the installation.
Please refer to the last pages of this manual for an illustration of the wall installation.
- Carefully check the package contents before starting the installation. The following wall mounting parts are supplied with your klang mr1:
![]()

- Wall bracket
- Magnetic cover for the wall bracket
- Bottom cover for the speaker
- 1x Screw
- Place the wall bracket on the wall and mark the two holes location with a pencil.
Drill two holes in the wall at the marked locations. If necessary, insert one dowel (not supplied) into each hole. Fix the wall bracket to the wall using two self-tapping screws (not supplied). Loosen lower screw for level adjustment - tighten when finished.
The end user is responsible for selecting the correct type of screw and dowel depending on the wall type.
![]()
- Place the magnetic cover on the wall bracket so that it covers the screw heads.
![]()
- Route the power cord and all other cables through the hole in the corner of the wall bracket.
![]()
- Connect them to the speaker.
![]()
- Install the bottom cover on the speaker.
![]()
- Secure the speaker to the wall mount with the supplied screw.
![]()


Remote control Assist Audio 1 (optional accessory)
You can control your speaker with the Assist Audio 1 remote control. This is an optional accessory that may not be available in the package. It can be supplied with other Loewe audio products.
The remote control is programmed by default for use with the audio system. If you want to use it with a multiroom speaker, you will need to reprogram it. Press  (Night mode) and
 ![]() (Play/Pause) at the same time.
(Play/Pause) at the same time.
To use this remote control with the audio system again, repeat the above step or replace the batteries.


Sound Mute / Unmute.

Switches the speaker on or switches to standby mode.

No function

No function

No function

No function

Skip to the previous audio track in Bluetooth / PLAY-Fi mode.

Skip to the next audio track in Bluetooth / PLAY-Fi mode.
Press and hold to activate Bluetooth mode.

Play/pause audio track in Bluetooth / PLAY-Fi mode.

Reduces the volume level.

Increases the volume level.
treble
Adjusts the treble level.
bass
Adjusts the bass level.
Troubleshooting
In the event of a device failure, we recommend that you check the list below before calling the helpline.
| Problem | Possible cause | Remedy/notes |
| The system does not respond to touchpad/button press. | A software error may have caused the device to stop receiving commands, and the device must be restarted by unplugging it. | Unplug the unit from the power supply for a few minutes, then plug it in again. |
| No sound from the speaker. | a) The speaker is muted or track is paused. | a) Tap on touch area once to unmute or resume playback. |
| b) A software error may have caused this problem. | b) Reset the unit to factory settings (see chapter "Factory Reset"). | |
| A Bluetooth device cannot connect to the speaker. | a) The device does not support compatible profiles required for the speaker. | a) Only devices with Bluetooth profile A2DP, AVRCP are compatible. |
| b) You have not enabled the Bluetooth function of the device. | b) For information on enabling this function, see the device user guide. | |
| c) The speaker is already connected to another Bluetooth device. | c) Disconnect the connected device, then try again. | |
| The audio playback quality of the connected Bluetooth device is poor. | Bluetooth reception is poor. | Move the device closer to the speaker or remove obstacles between the device and the speaker. |
| Wi-Fi connection cannot be established. | a) Wi-Fi network may be unavailable. | a) Check the availability of WLAN network on the router. |
| b) Wi-Fi signal is very weak. | b) Place the Wi-Fi router closer to the unit. | |
| c) You are entering an incorrect password. | c) Make sure that the password is correct. | |
| Cannot discover the Play-Fi supported device from the app. | Device may be disconnected from Wi-Fi. | Make sure the device is connected to the Wi-Fi. |
| Cannot play Play-Fi music. | a) Service or content has been terminated. | a) Certain network services or content available through the device may not be accessible in case the service provider terminates its service. |
| b) First setup of speaker failed. | b) If the first setting is not successful, close the DTS Play-Fi Application. Restart the application. | |
| c) You have used the speaker previously as Stereo Pairs or Surround Sound in the Play-Fi app. | c) If the speaker is set as Stereo Pairs or Surround Sound, it must be disconnected in the app before being used | |
| Cannot play music from Bluetooth/LINE IN/ Multiroom source | Speaker is in active WDAL2.0 mode, which has higher priority than other modes | You must put master audio system into standby mode or disconnect speaker from WDAL2.0 network (set corresponding switch on master audio system to "OFF"). |
Disposal
Disposal of used electrical and electronic equipment and batteries.

The crossed-out wheeled bin symbol on the product or its packaging indicates that this product must not be treated as normal household waste, but must be returned to a collection point for the recycling of electrical and electronic equipment and batteries. By helping to properly dispose of this product, you are protecting the environment and the health of your fellow human beings. Improper or incorrect disposal endangers the environment and health. For more information about the recycling of this product, please contact your local authority or your municipal waste disposal service.
Technical data
| Loewe device type: | klang mr1 | klang mr3 | klang mr5 |
| Part number: | 60604D10 | 60605D10 | 60606D10 |
| Power supply: | AC 100 V – 240 V ~ 50/60 Hz | ||
| Audio output power: | 15W (RMS) | 75W (RMS) | 90W (RMS) |
| Music power: | 30W | 150W | 180W |
| Power consumption in standby mode: | 0,3 W | 0,3 W | 0,3 W |
| Power consumption in network Standby Mode: | 4,0 W – 7,0 W | 4,0 W – 7,0 W | 4,0 W – 7,0 W |
| Frequency response: | 75 Hz – 20 kHz | 41 Hz – 20 kHz | 36 Hz – 20 kHz |
| WLAN supported Standards: | IEEE 802.11a/b/g/n/ac | ||
| WLAN power/frequency range: | Maximum power <100 mW at 2400 – 2483,5 MHz Maximum power <100 mW at 5150 - 5350 MHz Maximum power <100 mW at 5470 - 5725 MHz Maximum power <100 mW at 5725 - 5850 MHz | ||
| Bluetooth version: | V4.2 | ||
| Bluetooth power/frequency range: | Maximum power <10 mW at 2402 - 2480 MHz | ||
| Bluetooth protocols: | A2DP, AVRCP | ||
| Device dimensions (W x H x D): | 160 x 188 x 154 mm | 196 x 321 x 187 mm | 225 x 401 x 215 mm |
| Device weight: | 1,2 kg | 3,2 kg | 4,4 kg |
| Ambient temperature: | 5°C – 35°C | ||
| Relative humidity (noncondensing): | 20 – 80% | ||

Documents / Resources
References
Download manual
Here you can download full pdf version of manual, it may contain additional safety instructions, warranty information, FCC rules, etc.
Download Loewe klang mr1 / klang mr3 / klang mr5 - Bluetooth Speaker Manual
Advertisement


Need help?
Do you have a question about the klang mr1 and is the answer not in the manual?
Questions and answers