
Related Manuals for Plextor PX-755SA


Summary of Contents for Plextor PX-755SA
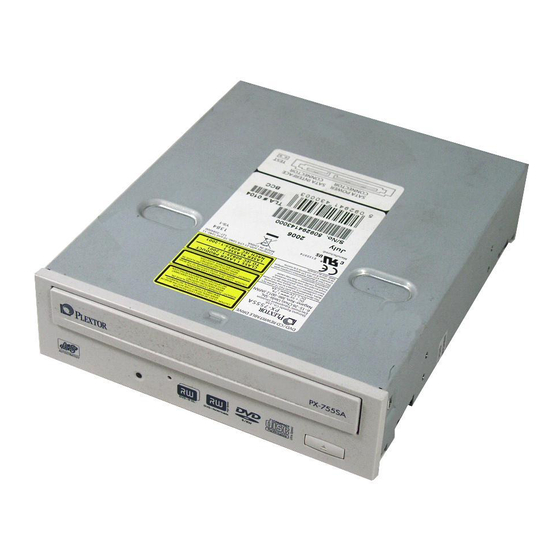
- Page 1 Model PX-755SA Internal SATA Drive DVD±R DL (DOUBLE LAYER/DUAL LAYER), DVD±R/RW, CD-R/RW DRIVE INSTALLATION AND USERS MANUAL MARCH 2006...
-
Page 2: Record Your Serial Number
Plextor’s prior permission. Manual copyright ©2006, Plextor Corp. Plextor, PlexTools, and the Plextor logo are registered trademarks of Plextor Corp. All other licenses and trademarks are property of their respective owners. Record Your Serial Number For future reference, record the serial number and the TLA code (found on your drive’s label) in the space provided below. - Page 3 The laser beam emitted from the optical pickup is visible and invisible. Accordingly: • Do not open the optical pickup housing. • Obtain service only from Plextor-authorized personnel. CAUTION: To disconnect the internal DVD/CD drive from an electrical current, pull out the computer’s power plug. PX-755SA Installation and Users Manual...
- Page 4 Top View of Internal Drive, Showing Caution Label Location Detail of PX-755SA Laser Caution Labels PX-755SA Installation and Users Manual...
-
Page 5: Table Of Contents
2. Installing the PX-755SA Internal SATA Drive...9 PX-755SA Drive Features and Controls ...9 Front Panel—PX-755SA Internal Drive...10 Rear Panel—PX-755SA Internal SATA Drive ...11 What Else Is In the PX-755SA Box ...12 Save Your Box!...12 Set the PX-755SA DMA Jumper (If Needed) ...13 Mount the PX-755SA Drive...14 Record the Serial Number ...14... - Page 6 Changing the Front-Panel Color ... 30 Troubleshooting ... 34 Make Sure the Drive Is Recognized... 34 Using the PX-755SA Self-Test Diagnostics ... 36 5. Frequently Asked Questions ... 39 Appendix A: PX-755SA Specifications... 43 Appendix B: Technical Support ... 55 How to Contact Plextor Technical Support...
-
Page 7: Getting Started
Please read this manual carefully and keep it handy for easy reference. Use the manual for installation, operation and troubleshooting. If your drive needs service, see your dealer or call Plextor’s Technical Support Department. In this manual you should find all the information you need to successfully install, operate and troubleshoot your drive. -
Page 8: Meet Your Px-755Sa
Section 1: Getting Started Meet Your PX-755SA The PX-755SA is a DVD ReWritable/CD ReWritable drive that provides professional quality DVD and CD performance for writing, rewriting and reading. What the PX-755SA Does For DVDs, the PX-755SA: • Writes DVD+R (recordable DVD, “plus” format) media at up to 16X speed. -
Page 9: Features Of The Px-755Sa
Features of the PX-755SA • Serial ATA interface: The PX-755SA takes advantage of the benefits of the Serial Advanced Technology Attachment interface, with its smaller, more flexible cables and faster interface speed. • High speed transfers: The PX-755SA supports next-generation high speed transfers via the Serial ATA 1.0 interface. - Page 10 Q-Check features to check laser operation or measure and display characteristics of the media you’re using. • Q-Check TA (Time Analyzer): The PX-755SA supports time interval analysis that shows a histogram of a disc’s lands and pits, a valuable aid in assessing disc quality.
- Page 11 III. • OPC and ROPC: Optimum Power Control and Running Optimum Power Control, which adjust the laser power for the optimum write strategy. • CD-TEXT, CD+G: Supports CD-TEXT and CD+G writing. Section 1: Getting Started PX-755SA Installation and Users Manual...
-
Page 12: Minimum Configuration To Use The Px-755Sa
99 minutes 59 seconds in length, or a data disc up to 875 megabytes in capacity. Minimum Configuration to Use the PX-755SA Here’s what you’ll need in order to install and use the PX-755SA drive. • Computer: Pentium 4, 1.4-GHz or faster CPU. • Minimum RAM: 256 MB. -
Page 13: What You Can Do With The Px-755Sa
What You Can Do with the PX-755SA Just look at some of the things you can do with your PX-755SA: • Record slide shows or digital video onto DVD+R DL, DVD-R DL, DVD+R, DVD-R, DVD+RW and DVD-RW discs. • Play DVD-ROM, DVD+R DL, DVD-R DL, DVD+R, DVD+RW, DVD-R, and DVD-RW discs. -
Page 14: Precautions
Section 1: Getting Started Precautions Like the rest of your computer system, your PX-755SA requires reasonable care in its installation and use. • Keep the area around your drive clean from dust, smoke, and other contaminants. • Do not allow moisture or liquids, including water or cleaning fluids, to touch the drive. -
Page 15: Installing The Px-755Sa Internal Sata Drive
BIOS settings. And check the Plextor PX-755SA motherboard compatibility listing at http://www.plextor.com/english/support/support_compatability.html PX-755SA Drive Features and Controls Before proceeding, become familiar with the controls and features of your Plextor drive. Match the parts of your drive to the illustrations below. PX-755SA Installation and Users Manual... -
Page 16: Front Panel-Px-755Sa Internal Drive
• Tray front door: Attached to tray drawer. • Eject button: Push once to eject tray. Push again to insert the tray back into the PX-755SA. To prevent wear on the drive, always use the eject button to insert the tray. -
Page 17: Rear Panel-Px-755Sa Internal Sata Drive
7-pin SATA interface cable. • Power connector: Connects to your computer’s 15-pin SATA power cable to provide DC +5 volts and +12 volts to the PX-755SA. NOTE: If your computer has only 4-pin power connectors, use the SATA power cable adapter to connect to the 15-pin power connector on the PX-755SA. -
Page 18: What Else Is In The Px-755Sa Box
If you have to ship your drive back to Plextor, you’ll want to send it in the original box. (For more details about returning your drive to Plextor, see page 57.) -
Page 19: Set The Px-755Sa Dma Jumper (If Needed)
DMA mode by installing the spare jumper across the two DMA jumper pins. Figure 3: Add the PX-755SA DMA jumper if you need to change from Ultra DMA (default) to multiword DMA Adding the jumper also configures the PX-755SA for self-test. See “Using the PX-755SA Self-Test Diagnostics”... -
Page 20: Mount The Px-755Sa Drive
If you don’t have an empty bay, remove the existing DVD-ROM or CD- ROM drive and install the PX-755SA. You must make two cable connections to your PX-755SA. The two cable connections that you must make are: • SATA cable •... - Page 21 Section 2. Installing the PX-755SA Internal SATA Drive Figure 4: Removing a typical computer's cover 3. Remove the cover panel from the bay that will hold the drive. To remove the cover panel, pop it out by pressing outward lightly. (In some older computers, you may have to remove screws that hold the panel in place.)
- Page 22 The drive can be mounted directly into your computer. Go to step 6. NOTE: Plextor does not provide rails. If you need rails, you can obtain them from the computer manufacturer or from a computer supply retail or mail-order store.
- Page 23 BIOS settings to enable IDE/ATAPI functions. If you are unsure, consult your motherboard manual or vendor web site for compatibility, BIOS versions, and BIOS settings. And check the Plextor PX-755SA motherboard compatibility listing at http://www.plextor.com/english/support/support_compatability.html...
- Page 24 Do not force the power connector into the drive, or the drive and/or the computer could be damaged. 9. Mount the PX-755SA drive in the computer using the four screws that were supplied with your drive. Use only these screws.
-
Page 25: Using Your Px-755Sa
3. Using Your PX-755SA This section explains how to use your PX-755SA drive and how to load, handle and care for your DVDs and CDs. What Media to Use Use the right media! Your PX-755SA drive's capabilities change depending on which type of compact disc you use. -
Page 26: Cd-Rom Media
You can write to Ultra Speed CD-RW discs only on drives that support this media. Drives that are capable of writing to Ultra Speed ReWritable media, such as the Plextor PX-755SA, are identified by a “Compact Disc ReWritable Ultra Speed” logo. -
Page 27: Tray Loading And Operation
Sharpie pen, that conforms to the ASTM D-4236 standard. Some permanent markers will damage the media. Also, do not press too hard when writing on the disc. Section 3. Using Your PX-755SA Figure 10: Loading the tray PX-755SA Installation and Users Manual... -
Page 28: Cleaning Discs
Section 3. Using Your PX-755SA NOTE: We do not recommend placing self-sticking CD-R labels on the disc. The weight of the label may unbalance the disc and cause write errors during recording or read errors during reading. Also, attempting to remove the label may permanently damage the disc. -
Page 29: Mounting Position
Section 3. Using Your PX-755SA Mounting Position You can operate your PX-755SA drive in either a horizontal or a vertical position. Playing DVDs To play a digital video disc, insert the DVD as you would any other disc. The drive plays both single layer and double layer discs. -
Page 30: Writing To Cd-R And Cd-Rw Media
In conjunction with your drive, mastering and packet writing software allows you to write audio, video, data, or other information to writable (CD-R) or rewritable (CD-RW) media. The PX-755SA writes to all types of CD-RW media. Using the LED Indicator The color and blink rate of the front-panel LED indicator give you information about the drive’s operation. -
Page 31: Switching To Speedread For Video Playback
Playback When you are playing a DVD-Video disc that has CSS (copy protection via the Content Scrambling System), the PX-755SA normally plays at a slow speed with a maximum of 2X CLV speed to reduce drive noise. You can speed up DVD playback by turning on SpeedRead with PlexTools Professional software. - Page 32 Section 3. Using Your PX-755SA This page intentionally left blank. PX-755SA Installation and Users Manual...
-
Page 33: Px-755Sa Installation And Users Manual
Plextor representative. Cleaning the PX-755SA Drive Plextor drives are sealed against external contamination, so in a normal computer environment and with normal use, your drive should not require internal cleaning. However, if your drive has been in use for some time and has just recently started to exhibit read/write problems, it is possible that dust has accumulated on the laser lens. -
Page 34: Upgrading Firmware
Before troubleshooting a possible problem with your PX- 755SA drive please visit our web site at www.plextor.com to check if you have the latest firmware. To obtain new firmware for your drive: 1. -
Page 35: Emergency Eject
3. Push the tool or other object straight in, until the disc tray clicks open. 4. Carefully continue to slide the disc tray open. 5. Remove the CD from the disc tray. 6. Carefully push the disc tray shut. Section 4. Maintenance and Troubleshooting Figure 12: Emergency eject PX-755SA Installation and Users Manual... -
Page 36: Changing The Front-Panel Color
To install a different bezel and disc tray face plate: 1. If the PX-755SA is already installed in a computer, turn the computer power OFF and open the computer case. 2. If necessary, remove cables from the rear of the PX-755SA and remove the drive. - Page 37 Figure 14: Unhook the tray mask and push to release it 6. Locate the four bezel hooks. Two are on the bottom of the drive, and one is on each side. Figure 15: Locate the four bezel hooks Section 4. Maintenance and Troubleshooting PX-755SA Installation and Users Manual...
- Page 38 Do this only for the two bezel hooks on the sides. (You don’t have to do this for the hooks on the bottom.) Figure 17: Press in with the angled portion of the eject tool to release the two side bezel hooks PX-755SA Installation and Users Manual...
- Page 39 Ensure that the top clip and all four bezel hooks lock into place. Figure 19: Slide the new bezel into position and make sure all four Section 4. Maintenance and Troubleshooting bezel hooks snap into place PX-755SA Installation and Users Manual...
-
Page 40: Troubleshooting
2. Open Windows Explorer or My Computer and ensure there is an icon for the Plextor drive, the hard disk, and another DVD or CD- ROM drive, if present. The Plextor icon may be D: or E: or another designator. - Page 41 3. If the PX-755SA drive is not recognized in Windows, reboot the computer and use your computer’s setup program to program the BIOS to recognize it. NOTE: Refer to the computer’s documentation for information on how to run the motherboard BIOS setup program.
-
Page 42: Using The Px-755Sa Self-Test Diagnostics
To perform the self-test: 1. Turn the computer’s power OFF, unplug it from its power source, and open the computer to gain access to the rear of the PX-755SA drive. Typically, this involves loosening or removing several screws on the back panel of your computer and sliding off the cover. (See Figure 4 for an example.) - Page 43 Leave the SATA power cable attached to the drive. 3. Note the self-test/DMA jumper at the rear of the PX-755SA. If no jumper is installed, place a jumper across the two pins.
- Page 44 10. Turn off the computer power. 11. Reset the self-test/DMA jumper at the rear of the PX-755SA to its original setting as noted in Step 3 above. 12. Reconnect the SATA interface cable to the PX-755SA drive. If you removed the drive to gain access to the cable or jumpers, replace the drive in the computer.
-
Page 45: Frequently Asked Questions
The results are listed as “recommended media,” and are also assembled into a media catalog and stored in firmware in Plextor drives. (See the Plextor web site at www.plextor.com for the latest list of recommended media for the PX-755SA.) - Page 46 DVD+RW Alliance) stands for DVD+R Double Layer. DVD-R DL (from the DVD Forum) stands for DVD-R Dual Layer. Whether your DL media is labeled "double layer" or "dual layer," the PX-755SA can handle it. PX-755SA Installation and Users Manual...
- Page 47 For example, 8X-rated media listed as “12X writing recommended” and “16X compatible” indicates the manufacturer believes this 8X-rated media can be written at 16X. Plextor factory testing has determined you will achieve the highest quality write at 12X. Plextor’s testing also indicates you can write this media at 16X and still achieve good quality, although perhaps not as high as at the recommended speed.
- Page 48 Section 5. Frequently Asked Questions This page intentionally left blank. PX-755SA Installation and Users Manual...
-
Page 49: Appendix A: Px-755Sa Specifications
Appendix A: PX-755SA Specifications This appendix shows specifications for the PX-755SA. Minimum System Requirements, PX-755SA Internal SATA Drive Computer Pentium 4, 1.4-GHz CPU or equivalent NOTE: For real-time MPEG-2 capture and burning, Roxio Easy Media Creator 7 requires a 1.6-GHz Pentium 4 or equivalent. - Page 50 Typical write current (CD-R 48X) Typical pause current Peak current Power Average 20.4W for DVD read/write Consumption Dimensions and Weight, PX-755SA Internal SATA Drive Dimensions 5.75" x 1.63" x 6.69" (W/H/D) 146 mm x 41.3 mm x 170 mm (excluding front panel) Weight <...
- Page 51 DVD-R DL: Sequential write. Layer jump write with Write Track-at-once (TAO), DAO, packet write (variable and Methods, fixed), session-at-once (SAO); CD-MRW with future CD-R/RW firmware upgrade Appendix A: PX-755SA Specifications incremental recording recording recording incremental recording, restricted overwriting, DRT-DM future firmware upgrade PX-755SA Installation and Users Manual...
- Page 52 CD-R: Orange Book Pt II-compliant discs (Type 74, CD-RW: Orange Book Pt III-compliant discs Supported CD: 12 cm Media Size DVD: 12 cm, 8cm (DVD-R/RW) PX-755SA Installation and Users Manual Version 2.1 Version 1.1/1.2 Version 1.0 Specification Version 1.3; Part 1 Volume 2 Basic Format Specification Version 1.0...
- Page 53 Recommended Media You can use virtually any media in your PX-755SA and be assured of the best possible write quality. However, Plextor-recommended media are recordable or rewritable CD and DVD media that have been tested by Plextor and found to operate well consistently, from one manufacturing lot to another.
- Page 54 2X CLV NOTES: SL = Single layer disc, DL = Double layer disc. When a DVD-Video with CSS (copy protection via the Content Scrambling System) is loaded, the PX-755SA slows its playback speed to reduce drive noise. Read Speed, Speed...
- Page 55 – – – – – CD-R Ultra Speed CD-RW Media – – – – – – – – PX-755SA Installation and Users Manual –R –RW – – – – – – – High Normal Speed Speed CD-RW CD-RW Media Media –...
- Page 56 Access Time Time measured from command phase until bus free (no disconnect): DVD: < 150 msec. (typical), < 180 msec (max.) CD: < 100 msec. (typical), < 130 msec (max.) PX-755SA Installation and Users Manual Write (KB/s) 9280-22160 (CAV) 8310-16620 (PCAV)
- Page 57 CD-R write: 0.15G CD-RW rewrite: 0.10G DVD write: 0.10G Vibration, Non- Sine sweep 5 minutes: 2.0G Operating (Power off, without disc) Appendix A: PX-755SA Specifications (5-300Hz) 0-Pk (5-300Hz 0-Pk (5-300Hz) 0-Pk (5-300Hz) 0-Pk (5-300Hz) 0-Pk PX-755SA Installation and Users Manual...
- Page 58 Both with no hard errors, no damage Reliability MTBF 60,000 hours Tray Loading 50,000 load/unload cycles Read Error CD-ROM Mode 1: 1 block/10 Rate CD-ROM Mode 2: 1 block/10 PX-755SA Installation and Users Manual (5-300Hz) 0-Pk (5-300Hz) 0-Pk (5-300Hz) 0-Pk (5-300Hz) 0-Pk (5-300Hz)
- Page 59 Modes 0-4 Multiword Modes 0-2 Transfers Ultra DMA Modes 0-4 (Ultra DMA66) Transfers Inquiry string PLEXTOR sp DVDR sp sp sp PX-755A sp sp (where “sp” is one space) Safety, Laser, and EMC Standards Country/ Type Region Safety Laser Canada...
- Page 60 Appendix A: PX-755SA Specifications This page intentionally left blank. PX-755SA Installation and Users Manual...
-
Page 61: Appendix B: Technical Support
If you have not been successful in your quest, our Technical Support Department will help you solve problems that relate specifically to your PX-755SA drive. In many cases, a problem that appears to be caused by your Plextor drive actually originates in another part of your computer. -
Page 62: How To Contact Plextor Technical Support
Appendix B: Technical Support How to Contact Plextor Technical Support There are several ways for you to contact Plextor’s Technical Support Department: • Visit our web site (www.plextor.com) for answers to Frequently Asked Questions. • Send us e-mail (techsupport@plextor.com). Include your telephone number and the hours during which you can be reached. -
Page 63: Returns
Returns In the unlikely event that you need to return a drive to Plextor, you need an RMA (Returned Materials Authorization) number. You will need this number before any Plextor drive can be returned for replacement. Here’s how you get an RMA number and return your drive: 1. -
Page 64: Shipping Your Drive To Plextor
Be sure to write the RMA number on the outside of the shipping box. Any drive sent to Plextor without an RMA number will not be accepted. NOTE: The RMA number must be clearly visible on the outside of the shipping box. -
Page 65: Appendix C: Warranty
In the event this product is found to be defective within the warranty period, PLEXTOR will, at its option, repair or replace the defective unit. -
Page 66: If You're Outside The U.s. Or Canada
All drives returned to PLEXTOR must be securely packaged and shipped postage prepaid. The drive will be returned to the customer at Plextor’s expense when originating within the United States. For a drive originating outside of the United States, the customer is responsible for shipping costs in both directions. -
Page 67: Index
· 5 LED indicator and · 10, 43 cable power · 14 SATA · 14 cable connections, PX-755SA · 17 formats supported · 45 reading speed · 48 recording modes · 5, 45 write methods · 5, 45 CD cleaning disc, don’t use · 8, 27 CD reading speed ·... - Page 68 · 39 editing · 4 media · 19 writing · 23 writing speed · 49 DVD±R DL PX-755SA Installation and Users Manual media · 19 DVD-R · 39 drive capabilities · 19 writing speed · 2, 49 DVD-R DL writing speed ·...
- Page 69 GigaRec · 6 hard disk size · 6, 43 high speed CD-RW media · 20 write speed · 49 host interface, PX-755SA · 53 humidity specification · 51 storage · 51 initialization time · 50 inquiry string, PX-755SA · 53 installation, PX-755SA ·...
- Page 70 · 44 rear-panel connectors · 11, 44 self-test diagnostics · 36 system requirements · 43 weight · 44 PX-755SA Installation and Users Manual Q-Check · 4 time analyzer · 4 questions, frequently asked · 39 rails · 16 RAM, minimum ·...
- Page 71 · 10 loading and unloading · 21 loading specification · 52 troubleshooting · 34 ultra DMA PX-755SA set to · 13 support · 3, 53 ultra speed CD-RW media · 20 write speed · 20, 49 upgrading firmware · 3, 28, 39 VariRec ·...
- Page 72 CD-RW · 20 recommended media and · 41 ultra speed CD-RW · 20 VariRec and · 3 PX-755SA Installation and Users Manual writing to CD-R · 24 writing to CD-RW · 24 writing to DVD+R · 23 writing to DVD+RW · 23 yellow book ·...
-
Page 73: Notes
Notes PX-755SA Installation and Users Manual... - Page 74 PLEXTOR CORP. 48383 Fremont Blvd. Suite 120 Fremont CA 94538-6509 www.plextor.com Phone: 510-440-2000 Fax: 510-651-9755 E-mail: info@plextor.com...
Need help?
Do you have a question about the PX-755SA and is the answer not in the manual?
Questions and answers