
Related Manuals for Plextor PX-740UF


Summary of Contents for Plextor PX-740UF
- Page 1 Model PX-740UF External USB/FireWire Drive DVD±R DL (DOUBLE LAYER/DUAL LAYER), DVD±R/RW, CD-R/RW DRIVE INSTALLATION AND USERS MANUAL JULY 2005...
-
Page 2: Record Your Serial Number
Plextor’s prior permission. Manual copyright ©2005 Plextor Corp. Plextor and the Plextor logo are registered trademarks of Plextor Corp. All other licenses and trademarks are property of their respective owners. Record Your Serial Number For future reference, record the serial number and the TLA code (found on your drive’s label) in the space provided below. - Page 3 The laser beam emitted from the optical pickup is visible and invisible. Accordingly: • Do not open the optical pickup housing. • Obtain service only from Plextor-authorized personnel. CAUTION: To disconnect the external DVD/CD drive from an electrical current, pull out the AC adapter power plug. PX-740UF Installation and Users Manual...
- Page 4 Bottom View of External Drive, Showing Caution Label Location Detail of PX-740UF Laser Caution Label PX-740UF Installation and Users Manual...
-
Page 5: Table Of Contents
2. Installing the PX-740UF External USB/FireWire Drive...9 PX-740UF Drive Features and Controls ...9 Front Panel—PX-740UF External Drive ...9 Rear Panel—PX-740UF External Drive...11 What Else Is In the PX-740UF Box ...13 Save Your Box!...13 Mount the PX-740UF Drive...14 Determine Your Computer’s Operating System ...15 Determine What Interface to Use ...15... - Page 6 Table of Contents 3. Using Your PX-740UF ... 21 What Media to Use ... 21 DVD Media... 21 CD-ROM Media ... 22 Tray Loading and Operation ... 23 Handling DVD and CD Media... 23 Cleaning Discs ... 24 Mounting Position... 25 Playing DVDs ...
-
Page 7: Getting Started
About this Manual Please read this manual carefully and keep it handy for easy reference. Use the manual for installation, operation and troubleshooting. If your drive needs service, see your dealer or call Plextor’s Technical Support Department. What’s In This Manual In this manual you should find all the information you need to successfully install, operate and troubleshoot your drive. -
Page 8: Meet Your Px-740Uf
• Reads DVD-Video discs with CSS at up to 4X CAV. NOTE: Depending on the USB chipset used in your computer, the PX-740UF’s DVD read speed may be limited to 14X maximum with USB 2.0 only. Maximum IEEE 1394/FireWire read speed remains 16X. -
Page 9: Features Of The Px-740Uf
USB 2.0 (480 megabits per second) and Full-Speed USB 1.1 (12 megabits per second). • MMC compliance: Supports the MMC-4 command set. • Flash memory: Allows upgrading the PX-740UF to the latest firmware revision (available free from the Plextor web site) without opening the computer or physically accessing the drive. - Page 10 • Orange Book compatibility: Compatible with Orange Book, Parts II and III. • OPC and ROPC: Optimum Power Control and Running Optimum Power Control, which adjust the laser power for the optimum write strategy. • CD-TEXT, CD+G: Supports CD-TEXT and CD+G reading. PX-740UF Installation and Users Manual...
-
Page 11: Minimum Configuration To Use The Px-740Uf
Minimum Configuration to Use the PX-740UF Here’s what you’ll need in order to install and use the PX-740UF drive. • Computer: PC: Pentium 4, 1.6-GHz or faster CPU. Macintosh: Power Macintosh G3 or later (G4 or higher recommended) • Minimum RAM: 256 MB. -
Page 12: What You Can Do With The Px-740Uf
CD or DVD. One component of Nero is InCD 4, which makes the Plextor PX-740UF drive as easy to use as a hard disk drive. (For more information about Nero, install this application and examine the help files.) -
Page 13: Precautions
Precautions Like the rest of your computer system, your PX-740UF requires reasonable care in its installation and use. • Keep the area around your drive clean from dust, smoke, and other contaminants. • Do not allow moisture or liquids, including water or cleaning fluids, to touch the drive. - Page 14 Section 1. Getting Started This page intentionally left blank. PX-740UF Installation and Users Manual...
-
Page 15: Installing The Px-740Uf External Usb/Firewire Drive
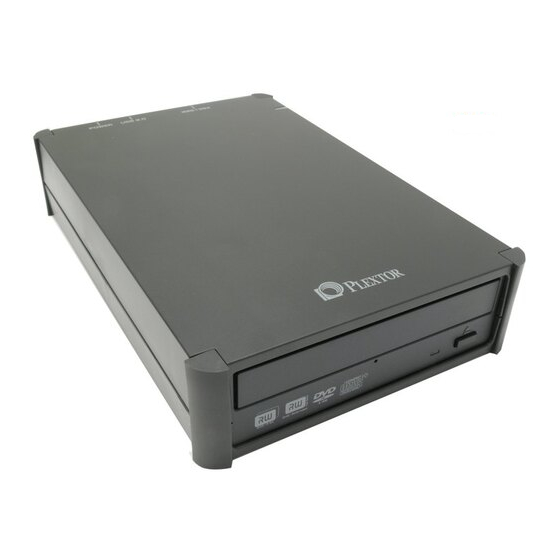
USB/FireWire drive to your computer. PX-740UF Drive Features and Controls Before proceeding, become familiar with the controls and features of your Plextor drive. Match the parts of your drive to the illustrations below. Front Panel—PX-740UF External Drive Figure 1: Front panel of the PX-740UF external drive... - Page 16 • Eject button: Push once to eject the tray. Push again to load the tray back into the PX-740UF. To prevent wear on the drive, always use the eject button to load the tray. • Power indicator: (On top and right side of enclosure.) Illuminated blue when power is on.
-
Page 17: Rear Panel-Px-740Uf External Drive
• IEEE 1394 4-pin connector: Connect an IEEE 1394 (also known as FireWire) cable with a 4-pin connector here. NOTE: The PX-740UF does not include an IEEE 1394 cable. To use IEEE 1394 (FireWire), you must purchase this cable separately. - Page 18 Section 2. Installing the PX-740UF External USB/FireWire Drive CAUTION: If using the PX-740UF with other IEEE 1394 devices in a daisy-chain configuration, do not connect or disconnect devices while operating the PX-740UF. PX-740UF performance cannot be guaranteed if the drive is connected in an IEEE 1394 daisy chain.
-
Page 19: What Else Is In The Px-740Uf Box
If you have to ship your drive back to Plextor, you’ll want to send it in the original box. (For more details about returning your drive to Plextor, see page 53.) -
Page 20: Mount The Px-740Uf Drive
USB. 3. Set the PX-740UF interface switch for IEEE 1394 or USB. 4. Connect the AC adapter to an electrical outlet and to the PX-740UF. 5. Turn the drive’s power switch ON (the “1” position). 6. Connect the USB cable or a FireWire cable (corresponding to the setting of the interface switch) from your PX-740UF drive to the computer. -
Page 21: Determine Your Computer's Operating System
NOTE: Your computer must be running Windows 2000, Windows Me or Windows XP (or Mac OS X). If you are not running one of these operating systems you cannot use the PX-740UF. You cannot use the PX-740UF with Windows 98 or Mac OS 9. -
Page 22: Connect The Px-740Uf Drive
To install the PX-740UF drive in a Windows-based computer: 1. Turn ON your computer system. 2. Set the interface switch at the rear of the PX-740UF drive to USB (switch to the right) if you are using a USB cable; or to 1394 (switch to the left) if you are using IEEE 1394 (FireWire). - Page 23 Section 2. Installing the PX-740UF External USB/FireWire Drive Figure 3: Connecting the AC adapter and USB or FireWire cable The drive should be automatically recognized by the computer. In some cases, you may have to reboot (turn the computer off, then on again) for the PX-740UF to be recognized.
-
Page 24: Identifying Cables And Ports
Section 2. Installing the PX-740UF External USB/FireWire Drive CAUTION FOR USB: If possible, always connect the PX-740UF directly to the computer’s USB port. Connecting the PX-740UF to a USB hub is not recommended. Connecting through a USB hub may reduce the drive’s performance. -
Page 25: Switching Between Usb And Ieee 1394 Interfaces
1. Ensure an interface cable for the desired USB or IEEE 1394 interface is attached to the PX-740UF and to the computer. 2. At the rear of the PX-740UF, set the interface switch to the desired interface. 3. Cycle the PX-740UF power. (That is, turn the PX-740UF’s power switch off, then on again.) -
Page 26: If You Have A Macintosh
5. Turn the drive’s power switch ON (the “1” is depressed). The power indicator is illuminated when power is applied. 6. Connect the USB cable or an IEEE 1394 cable from your PX-740UF drive to the Macintosh computer. The Macintosh automatically recognizes the PX-740UF (if the base extensions are loaded), and you should be ready to use the drive as a CD-ROM. -
Page 27: Using Your Px-740Uf
3. Using Your PX-740UF This section explains how to use your PX-740UF drive and how to load, handle and care for your DVDs and CDs. What Media to Use Use the right media! Your PX-740UF drive's capabilities change depending on which type of compact disc you use. -
Page 28: Cd-Rom Media
Figure 6: The logo also identifies the type of CD-RW media See “Recommended Media” on page 40 for a list of Plextor-approved media at the time this manual was printed, and see the Plextor web site at www.plextor.com for an updated list. -
Page 29: Tray Loading And Operation
Sharpie pen, that conforms to the ASTM D-4236 standard. Some permanent markers will damage the media. Also, do not press too hard when writing on the disc. Section 3. Using Your PX-740UF Figure 7: Loading the tray PX-740UF Installation and Users Manual... -
Page 30: Cleaning Discs
Section 3. Using Your PX-740UF NOTE: We do not recommend placing self-sticking CD-R labels on the disc. The weight of the label may unbalance the disc and cause write errors during recording or read errors during reading. Also, attempting to remove the label may permanently damage the disc. -
Page 31: Mounting Position
Section 3. Using Your PX-740UF Mounting Position You can operate your PX-740UF drive in either a horizontal or a vertical position. Figure 9: Operate the PX-740UF either horizontally or vertically CAUTION: In the vertical position, the PX-740UF is more susceptible to shock. -
Page 32: Writing To Dvd Media
Ahead Software’s Nero or Roxio Easy Media Creator 7 allows you to write audio, video, data, or other information to writable (CD-R) or rewritable (CD-RW) media. The PX-740UF writes to all types of CD- RW media. PX-740UF Installation and Users Manual... -
Page 33: Using The Disc/Busy Indicator
Read or verify activity CD/DVD write Test write CD/DVD Tray locked and eject button pushed (during write/read) Tray locked and eject button pushed Section 3. Using Your PX-740UF Disc/busy On/Off/Blink indicator color – Green On until ready – – Green Green... - Page 34 Section 3. Using Your PX-740UF This page intentionally left blank. PX-740UF Installation and Users Manual...
-
Page 35: Maintenance And Troubleshooting
Plextor representative. Cleaning the PX-740UF Drive Plextor drives are sealed against external contamination, so in a normal computer environment and with normal use, your drive should not require internal cleaning. However, if your drive has been in use for some time and has just recently started to exhibit read/write problems, it is possible that dust has accumulated on the laser lens. -
Page 36: Upgrading Firmware
Before troubleshooting a possible problem with your PX- 740UF drive please visit our web site at www.plextor.com to check if you have the latest firmware. To obtain new firmware for your drive: 1. -
Page 37: Emergency Eject
3. Push the tool or other object straight in, until the disc tray clicks open. 4. Carefully continue to slide the disc tray open. 5. Remove the CD from the disc tray. 6. Carefully push the disc tray shut. Section 4. Maintenance and Troubleshooting Figure 10: Emergency eject PX-740UF Installation and Users Manual... -
Page 38: Troubleshooting
Windows display. 2. Open Windows Explorer or My Computer and ensure there is an icon for the Plextor drive. The Plextor icon may be D: or E: or another designator. 3. In Windows XP or 2000, right-click on the My Computer icon and select Properties. - Page 39 4. If you have a PX-740UF drive that is not recognized in Windows: a) If your USB or IEEE 1394 controller has a yellow diamond with an exclamation point (!), contact your PC or motherboard manufacturer for help, and to troubleshoot your controller for driver compatibility or conflicts.
- Page 40 Section 4. Maintenance and Troubleshooting This page intentionally left blank. PX-740UF Installation and Users Manual...
-
Page 41: Frequently Asked Questions
“recommended media,” and are also assembled into a media catalog and stored in firmware in Plextor drives. (See page 40 for a list of recommended media for the PX-740UF at the time this manual was printed, and see the Plextor web site at www.plextor.com for an updated list.) From time to time, the media catalog is updated with new manufacturers and part numbers as Plextor tests additional media. - Page 42 “Recommended” is the Plextor-recommended speed for ensuring top-quality writing using this media. Plextor tests media and enters the “compatible” and “recommended” speeds into the drive’s media catalog. For example, 8X-rated media listed as “12X writing recommended” and “16X compatible”...
-
Page 43: Appendix A: Px-740Uf Specifications
Interface USB 1.1 or 2.0 supported IEEE 1394/FireWire supported (On-board USB 2.0 or IEEE 1394/FireWire controller suggested) PC: Windows XP, XP 64-bit, 2000 or Me Operating System Macintosh: Mac OS X PX-740UF Installation and Users Manual... - Page 44 DVD-R: DAO, Multi-Border Recording Methods, DVD-RW: DAO, Multi-Border Recording, Restricted DVD-R/RW, DVD-R DL DVD-R DL: Sequential Write, Layer Jump Write Write Track-At-Once (TAO), Disk-At-Once (DAO), Packet Methods, Write (variable and fixed), Session-At-Once (SAO) CD-R/RW PX-740UF Installation and Users Manual Overwrite...
- Page 45 CD: 12 cm. Media Size DVD±R/RW: 12 cm, 8cm Appendix A: PX-740UF Specifications Version 2.1 Version 1.1/1.2 manual was published. See www.plextor.com for updates. Specification Version 1.3 Version 1.0 Specification Version 1.3; Part 1 Volume 2 Basic Format Specification Version 1.0...
- Page 46 Appendix A: PX-740UF Specifications Recommended Media Recommended media are recordable or rewritable CD and DVD media that have been tested by Plextor. For the latest updated list of recommended media for the PX-740UF, see the Plextor web site at www.plextor.com.
- Page 47 Maxell 74min, 80 min TDK 80 min Taiyo Yuden 80 min 40X recommended CD-R media: Ricoh 80 min (16X max write speed recommended) 32X recommended CD-R media: Taiyo Yuden 80 min Appendix A: PX-740UF Specifications PX-740UF Installation and Users Manual...
- Page 48 NOTE: SL = Single layer disc, DL = Double layer disc. NOTE: Depending on the USB chipset used in your computer, the PX-740UF’s DVD read speed may be limited to 14X maximum with USB 2.0 only. Maximum IEEE 1394/FireWire read speed remains 16X.
- Page 49 Stamp,R, Stamp,R, Stamp,R, Stamp,R, –R – – – – – – – – – – – – – – PX-740UF Installation and Users Manual CD-DA Discs Stamp,R Stamp,R, Stamp,R, Stamp,R, Stamp,R, Stamp,R, –R –RW – – – – – –...
- Page 50 Write Speed Speed, CD-R/RW 48X CAV 40X CAV PCAV PCAV ZCAV ZCAV ZCAV 4X ZCAV Speed Transfer Rate 2.4x PX-740UF Installation and Users Manual CD-R Ultra Ultra Speed Speed Plus Media Media – – – – – – – –...
- Page 51 Write (KB/s) 7200 (CAV) 6000 (CAV) 4800 (PCAV) 3600 (PCAV) 2400 (ZCAV) 1800 (ZCAV) 1500 (ZCAV) 600 (ZCAV) PX-740UF Installation and Users Manual Read (KB/s) 7200 (CAV) 6000 (CAV) 4800 (CAV 3600 (CAV) 2400 (CAV) 1800 (CAV) 1500 (CAV) –...
- Page 52 CD/DVD read: 0.15G CD-R write: 0.15G CD-RW rewrite: 0.10G DVD write: 0.10G Vibration, Transportation vibration test specification Non-operating PX-740UF Installation and Users Manual Eject button up +5/-0 degrees tilt Eject button down +0/-5 degrees tilt 0-Pk (5-300Hz 0-Pk 0-Pk (5-300Hz)
- Page 53 Eject button; manual emergency eject; software eject. Disc/Busy Steady green when reading disc Indicator Blinking green when writing to disc Disc Loading Auto Appendix A: PX-740UF Specifications 0-Pk 0-Pk 0-Pk bits bits bits PX-740UF Installation and Users Manual 0-Pk 0-Pk 0-Pk 0-Pk...
- Page 54 4-pin and 6-pin connectors for attaching an IEEE Connectors 1394 (FireWire) cable. Connector for attaching USB cable. Use only the USB Connector cable shipped with your PX-740UF You can connect to a USB 2.0 or USB 1.1 interface. PX-740UF Installation and Users Manual IEEE 1394 400 mA 400 mA 1.6 A...
- Page 55 Transfers IEEE 1394 IEEE Std 1394-1995, IEEE 1394a-2000 Transfers 400 Mbps (max) Inquiry String PLEXTOR sp DVDR sp sp sp PX-740A sp sp (where “sp” is one space) ATAPI Refer to Plextor ATAPI command manual Commands Appendix A: PX-740UF Specifications...
- Page 56 Country/ Type Region Safety Laser Canada Safety Europe Safety Laser PX-740UF Installation and Users Manual Agency Standard UL 60950-1 (AC adapter and drive in enclosure) CDRH Class 1 FCC Part 15 Class B UL (C-UL) CSA 22.2 No. 60950-1 (AC...
-
Page 57: Appendix B: Technical Support
If you have not been successful in your quest, our Technical Support Department will help you solve problems that relate specifically to your PX-740UF drive. In many cases, a problem that appears to be caused by your Plextor drive actually originates in another part of your computer. -
Page 58: How To Contact Plextor Technical Support
Appendix B: Technical Support How to Contact Plextor Technical Support There are several ways for you to contact Plextor’s Technical Support Department: • Visit our web site (www.plextor.com) for answers to Frequently Asked Questions. • Send us e-mail (techsupport@plextor.com). Include your telephone number and the hours during which you can be reached. -
Page 59: Returns
Returns In the unlikely event that you need to return a drive to Plextor, you need an RMA (Returned Materials Authorization) number. You will need this number before any Plextor drive can be returned for replacement. Here’s how you get an RMA number and return your drive: 1. -
Page 60: Shipping Your Drive To Plextor
Be sure to write the RMA number on the outside of the shipping box. Any drive sent to Plextor without an RMA number will not be accepted. NOTE: The RMA number must be clearly visible on the outside of the shipping box. -
Page 61: Appendix C: Warranty
In the event this product is found to be defective within the warranty period, PLEXTOR will, at its option, repair or replace the defective unit. -
Page 62: If You're Outside The U.s. Or Canada
All drives returned to PLEXTOR must be securely packaged and shipped postage prepaid. The drive will be returned to the customer at Plextor’s expense when originating within the United States. For a drive originating outside of the United States, the customer is responsible for shipping costs in both directions. -
Page 63: Index
· 13 connecting · 12, 16 using with PX-740UF · 12 access time · 45 black tray · 3 blue book · 39 box contents, PX-740UF · 13 buffer · 4, 50 Buffer Underrun Proof Technology · 4 cable identifying ·... - Page 64 DVD+RW compatibility · 35 editing · 3 media · 21, 41 software · 6 writing · 26 PX-740UF Installation and Users Manual writing speed · 43 DVD-R · 35 drive capabilities · 21 writing speed · 2, 43 DVD-R DL writing speed ·...
- Page 65 · 35 front panel controls · 9, 47 hard disk size · 5, 37 high speed CD-RW media · 22 write speed · 44 host interface, PX-740UF · 49 humidity specification · 46 storage · 46 IEEE 1394 cable · 18 connector ·...
- Page 66 Index OPC · See optimum power control operating system · 5 requirement for PX-740UF · 37 optimum power control · 4 orange book · 4, 39 packing for shipment · 53 PC, minimum · 5 playing DVD · 25 plug and play, support for · 3 position, mounting ·...
- Page 67 · 45 warranty · 55 web site, Plextor · 51 weight, PX-740UF · 49 white book · 39 write methods CD · 4, 38 DVD · 4, 38 writing a CD image · 5, 37 PX-740UF Installation and Users Manual Index...
- Page 68 · 27 normal speed CD-RW · 22 recommended media and · 36 ultra speed CD-RW · 22 PX-740UF Installation and Users Manual ultra speed plus CD-RW · 22 writing to CD-R · 26 writing to CD-RW · 26 writing to DVD+R · 26 writing to DVD+RW ·...
-
Page 69: Notes
Notes PX-740UF Installation and Users Manual... - Page 70 PLEXTOR CORP. 48383 Fremont Blvd. Suite 120 Fremont CA 94538-6509 www.plextor.com Phone: 510-440-2000 Fax: 510-651-9755 E-mail: info@plextor.com...
Need help?
Do you have a question about the PX-740UF and is the answer not in the manual?
Questions and answers