
Related Manuals for Plextor PX-708A


Summary of Contents for Plextor PX-708A
- Page 1 Model PX-708A Internal ATAPI DVD±R/RW, CD-R/RW DRIVE INSTALLATION AND USERS MANUAL OCTOBER 2003...
-
Page 2: Record Your Serial Number
Plextor’s prior permission. Manual copyright ©2003 Plextor Corp. Fourth edition, October 2003. Licenses and Trademarks Plextor and the Plextor logo are registered trademarks of Plextor Corp. All other licenses and trademarks are property of their respective owners. Record Your Serial Number For future reference, record the serial number and the TLA code (found on your drive’s label) in the space provided below. -
Page 3: Declaration Of Conformity
DECLARATION OF CONFORMITY Model Number: PX-708A Trade Name: PLEXTOR Responsible Party: PLEXTOR Co., Ltd. Address: 48383 Fremont Blvd, Suite 120, Fremont, CA 94538-6509, USA Telephone Number: 510-440-2000 This device complies with Part 15 of the FCC Rules. Operation is subject to the following... - Page 4 The laser beam emitted from the optical pickup is visible and invisible. Accordingly: • Do not open the optical pickup housing. • Obtain service only from Plextor-authorized personnel. CAUTION: To disconnect the DVD/CD drive from an electrical current, pull out the computer’s power plug.
-
Page 5: Table Of Contents
Open the Computer and Prepare for Installation ...12 Determine Your Existing IDE Configuration...12 Set the Drive’s Mode Jumper ...13 Changing the Mode Jumper on Your PX-708A Drive ...14 Select an IDE Configuration...16 About Cable Select ...21 Identifying Whether Your System Uses Cable Select ...22 Locating the Master Position on a Cable Select Cable ...22... - Page 6 Changing the VariRec Setting... 42 When You Write with VariRec... 42 Advantages of Overburn ... 42 4. Maintenance and Troubleshooting ... 43 Cleaning the PX-708A Drive ... 43 Upgrading Firmware ... 44 Troubleshooting ... 44 Emergency Eject ... 44 Using the Self-Test Diagnostics... 45 Performing the Self-Test ...
-
Page 7: Getting Started
Please read this manual carefully and keep it handy for easy reference. Use the manual for installation, operation and troubleshooting. If your drive needs service, see your dealer or call Plextor’s Technical Support Department. In this manual you should find all the information you need to successfully install, operate and troubleshoot your drive. -
Page 8: Meet Your Px-708A
Section 1. Getting Started Meet Your PX-708A The PX-708A is a DVD ReWritable/CD ReWritable drive that provides professional quality DVD and CD performance for writing, rewriting and reading. What the PX-708A Does For DVDs, the PX-708A: • Writes DVD+R (recordable DVD, “plus” format) media at up to 8X speed. -
Page 9: Features Of The Px-708A
You can enable and disable PoweRec. • MMC compliance: Supports the MMC-4 command set. • Flash memory: Allows upgrading the PX-708A to the latest firmware revision (available from the Plextor web site) without opening the computer or physically accessing the drive. - Page 10 This adjustment lets you customize the optimum laser power to your own needs. • CD-TEXT, CD+G: Supports CD-TEXT and CD+G writing. PX-708A Installation and Users Manual...
-
Page 11: Minimum Configuration To Use The Px-708A
99 minutes 59 seconds in length, or a data disc up to 875 MB in capacity. Minimum Configuration to Use the PX-708A Here’s what you’ll need in order to install and use the PX-708A drive. • Computer: Pentium III 700-MHz CPU or faster. • Minimum RAM: 128 MB. -
Page 12: What's In The Box
Section 1. Getting Started What’s In the Box What you find in your Plextor box depends on what the company that sold you the box put in—or took out—while the Plextor drive was in their possession. Plextor currently sells the PX-708A drive in this configuration: •... -
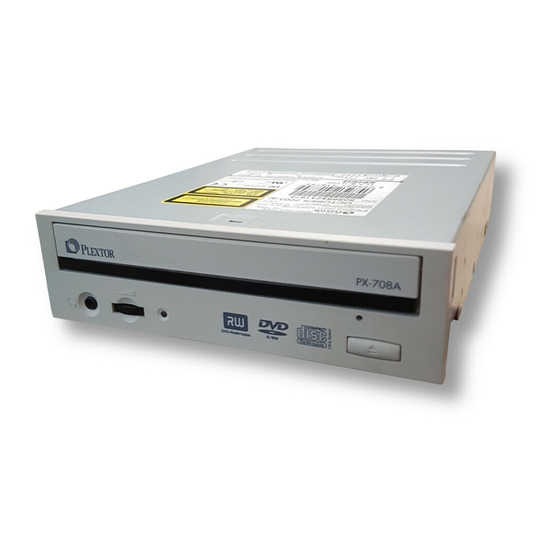
Page 13: Px-708A Drive Features And Controls
PX-708A Drive Features and Controls Before proceeding, you should become familiar with the controls and features of your Plextor drive. Match the parts of your drive to the illustrations below. Front Panel—PX-708A Internal Drive Figure 1: Front panel of the PX-708A internal ATAPI drive •... -
Page 14: Rear Panel-Px-708A Internal Drive
• Eject button: Push once to eject tray. Push again to insert the tray back into the PX-708A. To prevent wear on the drive, always use the eject button to insert the tray. -
Page 15: About Software
CD or DVD. One component of Easy CD Creator is DirectCD, which makes the Plextor PX-708A drive as easy to use as a hard disk drive. You can drag and drop files, rename files, delete files, and create new directories right on the recordable CD or DVD disc. -
Page 16: Precautions
A list of various software packages that you can use with your Plextor drive can be found in the Support/Compatibility section of www.plextor.com. -
Page 17: Installing Your Px-708A Internal Drive
Windows 98SE, Me, XP, or 2000, and you have nothing installed on the secondary IDE port. What to do: Leave the PX-708A’s jumper set to Master, attach it to the secondary IDE port, and go. Windows will recognize the drive automatically. -
Page 18: Open The Computer And Prepare For Installation
Section 2. Installing Your PX-708A Internal Drive Open the Computer and Prepare for Installation To determine whether your PX-708A will be a Master or a Slave, open your computer and examine the IDE connections to the motherboard. To open the computer: 1. -
Page 19: Set The Drive's Mode Jumper
Your drive ships from our factory with its mode jumper set to operate the PX-708A as a Master. This will work in most custom system configurations. If your computer is from a large OEM system... -
Page 20: Changing The Mode Jumper On Your Px-708A Drive
Section 2. Installing Your PX-708A Internal Drive Changing the Mode Jumper on Your PX-708A Drive The drive arrives from the factory with its mode jumper set to Master. (A function is ON if the jumper is installed and OFF if the jumper is removed.) - Page 21 Section 2. Installing Your PX-708A Internal Drive Changing to a Master, Slave, or Cable Select The Master/Slave/Cable Select setting for the drive is determined by the mode jumper. The jumper is placed over one of the sets of mode pins.
-
Page 22: Select An Ide Configuration
IDE port that is not connected to the hard disk drive or to a CD-ROM drive. In most cases, this will be the secondary IDE port. NOTE: For best results, set the PX-708A to be the Master, if possible. Before PX-708A Installation... - Page 23 System configuration and performance will make a big difference. Depending on how fast the CD-ROM drive can stream data to the PX-708A, it may not be fast enough to keep the buffer full. In this case, the buffer may become empty and a buffer underrun error may occur.
- Page 24 ROM drive connected as Slave on the primary IDE port; nothing connected to secondary IDE port. Figure 7. How to install the PX-708A if your computer is originally set up in configuration B PX-708A Installation and Users Manual How to Install the PX-708A...
- Page 25 C Hard disk connected as Master device on primary IDE port; nothing connected to secondary IDE port. Figure 8. How to install the PX-708A if your computer is originally set up in configuration C PX-708A Installation and Users Manual How to Install the PX-708A...
- Page 26 D System uses special Cable Select cables; all devices are jumpered for Cable Select. Figure 9: How to install the PX-708A if your computer is originally set up in configuration D PX-708A Installation and Users Manual How to Install the PX-708A Set the PX-708A’s mode...
-
Page 27: About Cable Select
Section 2. Installing Your PX-708A Internal Drive About Cable Select The Cable Select jumper position sets the PX-708A drive to use the CSEL signal from the IDE interface for configuration purposes. This signal automatically selects the correct Master/Slave setting for the drive. -
Page 28: Identifying Whether Your System Uses Cable Select
With some (generally older) personal computers that do not have an Ultra DMA IDE chipset, the computer may “hang” or crash with the PX-708A set to the default Ultra DMA setting. If this happens, change the PX-708A to Multiword DMA mode by installing the spare jumper across the two DMA jumper pins just to the left of the mode jumper pins. - Page 29 Section 2. Installing Your PX-708A Internal Drive Figure 11: Add the DMA jumper if you need to change to Multiword DMA PX-708A Installation and Users Manual...
-
Page 30: Install The Px-708A Drive
If you don’t have an empty bay, remove the existing IDE CD-ROM drive and install the PX-708A. You must make a minimum of two cable connections to your PX-708A. The two cable connections that you must make are: • IDE cable •... - Page 31 Section 2. Installing Your PX-708A Internal Drive You may need to install another IDE ribbon cable in your computer. You can use the extra IDE cable supplied with your Plextor drive. (Just remember, if you want to use CSEL and Cable Select settings, this Plextor-supplied cable won’t work—you’ll have to purchase a special...
- Page 32 Section 2. Installing Your PX-708A Internal Drive To mount the PX-708A drive: 1. Make sure the power to your computer and any external peripherals is turned OFF and your computer is UNPLUGGED from its power source. 2. If you haven't already removed the cover from your computer, remove it now, following the directions provided by your computer’s...
- Page 33 The drive can be mounted directly into your computer. Go to step 6. NOTE: Plextor does not provide rails. If you need rails, you can obtain them from the computer manufacturer or from a computer supply retail or mail-order store.
- Page 34 “key” in the middle. This key should fit into a slot in the middle of each connector of the motherboard, your PX-708A drive, and any other internal IDE peripherals. 8. Double-check your work. You must ensure the side of the IDE cable with the red stripe is matched to Pin 1 on the interface board and on the drive.
- Page 35 Section 2. Installing Your PX-708A Internal Drive 9. Connect a power cable from the computer to the power connector (DC INPUT) of the drive. In most computers, you will find free power connectors that are ready for your use. CAUTION: The power connector on the cable and the receptacle on the drive are keyed.
-
Page 36: Using Sound Boards And Audio Cables
(This cable is not supplied by Plextor.) 12. Mount the PX-708A drive in the computer using the four screws that were supplied with your drive. Use only these screws. CAUTION: Do not mount your drive in your computer using screws other than those supplied by Plextor. -
Page 37: Make Sure The Drive Is Recognized
2. Open Windows Explorer or My Computer and ensure there is an icon for the Plextor drive, the hard disk, and another CD-ROM drive, if present. The Plextor icon may be D: or E: or another designator. PX-708A Installation and Users Manual... - Page 38 Section 2. Installing Your PX-708A Internal Drive 3. If the PX-708A drive is not recognized in Windows, reboot the computer and use your computer’s setup program to program the BIOS to recognize it. NOTE: Refer to the computer’s documentation for information on how to run the motherboard BIOS setup program.
-
Page 39: Using Your Px-708A
• DVD+R and DVD+RW • DVD-R and DVD-RW Your PX-708A can read and write either media format. That is, it supports all these types of DVD media: • Digital Video Discs: You can immediately play pre-recorded DVD discs, including movies and other DVDs. - Page 40 Figure 18: The logo identifies the type of CD-RW media See “Recommended Media” on page 49 for a list of Plextor-approved media at the time this manual was printed, and see the Plextor web site at www.plextor.com for an updated list.
-
Page 41: Tray Loading And Operation
CAUTION: We recommend using a “non-toxic” marker, such as a Sharpie pen, that conforms to the ASTM D-4236 standard. Some permanent markers will damage the media. Also, do not press too hard when writing on the disc. PX-708A Installation and Users Manual Section 3. Using Your PX-708A... -
Page 42: Cleaning Discs
HINT: Keep your frequently used discs in jewel cases at all times to prevent them from becoming dirty or damaged. Mounting Position You can operate your internal PX-708A drive in either a horizontal or a vertical position. PX-708A Installation and Users Manual... -
Page 43: Playing Dvds
Writing to DVD Media You need special software that supports writing to DVD+R and DVD+RW discs: or to DVD-R and DVD-RW discs. The Roxio Easy CD Creator DVD Edition on the CD that accompanies your PX-708A contains this software. Specifying +R/RW or -R/RW You don’t need to specify whether to write to +R/RW or -R/RW. -
Page 44: Writing To Cd-R And Cd-Rw Media
DVD+RW formats are supported by Plextor, Philips, Sony, Hewlett- Packard, Dell, Ricoh, Yamaha and other manufacturers. DVD-R, DVD- RW and DVD-RAM are also supported by Plextor, as well as Panasonic, Toshiba, Apple Computer, Hitachi, NEC, Pioneer, Samsung and Sharp. No matter which format a DVD disc is recorded in, it can be read by most commercial DVD-ROM players. -
Page 45: Led Blink Rate
To manually enable SpeedRead and speed up DVD playback: 1. Ensure the PX-708A disc tray is closed and empty. 2. Press and hold the PX-708A’s eject button for at least 3 seconds. The LED indicator blinks green three times to indicate SpeedRead will be active for DVD-Video discs with CSS copy protection. -
Page 46: Advantages Of Buffer Underrun Proof Technology
• Turn off power to the drive. Advantages of Buffer Underrun Proof Technology The PX-708A incorporates Buffer Underrun Proof Technology, which guarantees that you can write CD-R and CD-RW discs at high speed, and still use your computer for other tasks while you’re writing. -
Page 47: Advantages Of Varirec Technology
Advantages of VariRec Technology This drive is equipped with VariRec (Variable Recording) technology, a feature offered by Plextor that allows you to manually adjust the drive's laser power during the recording process. The drive supports VariRec for 4X and 8X CD-DA (audio) writing and data writing with CD-R discs. -
Page 48: Changing The Varirec Setting
Section 3. Using Your PX-708A Changing the VariRec Setting VariRec lets you increase or decrease the laser power by up to 2 degrees in either the positive or negative direction from this default. You can change the laser power to do comparison testing with your CD player (home, auto, or CD-ROM drives) to find the power setting that best suits you. -
Page 49: Maintenance And Troubleshooting
Plextor representative. Cleaning the PX-708A Drive Plextor drives are sealed against external contamination, so in a normal computer environment and with normal use, your drive should not require internal cleaning. However, if your drive has been in use for some time and has just recently started to exhibit read/write problems, it is possible that dust has accumulated on the laser lens. -
Page 50: Upgrading Firmware
However, we advise that our customers always update drives with the latest available firmware. Before troubleshooting a possible problem with your PX-708A drive please visit our web site at www.plextor.com to check if you have the latest firmware. To obtain new firmware for your drive: 1. -
Page 51: Using The Self-Test Diagnostics
6. Carefully push the disc tray shut. Using the Self-Test Diagnostics The PX-708A contains a set of self-test diagnostics that can help isolate trouble and determine if a problem is in the drive or elsewhere. NOTE: Using the self-test diagnostics requires opening the computer and removing a cable from the drive, then replacing the cable at the end of the test. -
Page 52: Performing The Self-Test
PX-708A drive. Carefully remove the ATAPI cable from the drive by pulling the cable gently rearward. 4. Note the position of the mode jumper at the rear of the PX-708A. A jumper will be installed on either the CABLE SELECT, SLAVE, or MASTER position. - Page 53 Be aware of the danger of electric shock and do not touch any components inside the computer. 8. While pressing the eject button on the PX-708A, turn the computer power on. The LED indicator blinks ejects.
-
Page 54: What The Self-Test Results Indicate
11. If the disc was not ejected automatically, press the eject button to eject the disc. 12. Turn off the computer power. 13. Reset the mode jumper at the rear of the PX-708A to its original setting as noted in Step 4 above. Also, remove the extra jumper you installed. -
Page 55: Appendix A: Px-708A Specifications
Appendix A: PX-708A Specifications Minimum System Requirements—PX-708A Internal ATAPI Drive Computer Pentium III 700 MHz CPU or faster. Minimum RAM 128 MB Hard Disk Size 1 GB of free space to write to a CD in image mode, or 6 GB of free space to create DVD images. (For more accurate guidelines, see the help files or documentation for the recording software you’re... - Page 56 NOTE: You can disable PoweRec. With PoweRec disabled, you can write at any speed (although your results may be poor). CD-RW: 24X Mitsubishi Chemical/Verbatim CD-RW: Ricoh, Mitsubishi Chemical/Verbatim 10X-4X NOTE: All CD-RW media are rewritable up to 1,000 times. PX-708A Installation and Users Manual...
- Page 57 Yes (Single or dual-layer disc) NOTE: When a DVD-Video with CSS (copy protection via the Content Scrambling System) is loaded, the PX-708A slows its playback speed to reduce drive noise. PX-708A Installation and Users Manual Appendix A: PX-708A Specifications DVD+R,...
- Page 58 4X CLV 2.4X CLV 2X CLV 1X CLV Write Speed, Speed DVD-R/RW 8X Z CLV 4X CLV 2.4X CLV 2X CLV 1X CLV PX-708A Installation and Users Manual Mode-2 CD-DA Discs Discs Stamp,R, Stamp,R Stamp,R, Stamp,R, Stamp,R, Stamp,R, Stamp,R, Stamp,R,...
- Page 59 1350 (CLV) CD Transfer Speed Write (Kbps) Rate 3000~6000 (PCAV) 3000~4800 (PCAV) 3000~3600 (PCAV) 2400 (CLV) 1500 (CLV) 1200 (CLV) 600 (CLV) PX-708A Installation and Users Manual Appendix A: PX-708A Specifications Ultra High Normal Speed Speed Speed CD-RW CD-RW CD-RW Media...
- Page 60 Modes 0-2 Transfers Ultra DMA Modes 0-2 (Ultra DMA33) Transfers ATAPI Refer to the Plextor ATAPI command manual. Command Set Inquiry string PLEXTOR sp DVDR sp sp sp PX-708A sp sp (where “sp” is one space) PX-708A Installation and Users Manual...
- Page 61 Dynamic range: Typically 75dB (1kHz) Channel separation: Typically 50dB (1kHz) Frequency response: 20Hz to 20kHz (+1/-5dB)) Headphone Wheel knob controls audio output level at front panel Volume headphone jack only. Control PX-708A Installation and Users Manual Appendix A: PX-708A Specifications...
- Page 62 Master (default), slave, cable select (CSEL) DMA Jumper Open (no jumper): Ultra DMA mode 0-2 (default) Short (jumper installed): Multiword DMA mode 0-2 Other Features Data Buffer 2 MB PX-708A Installation and Users Manual DC +12V, DC +5V, ±10% ±5% 100 mA 300 mA...
- Page 63 11msec half sine, 10 sec interval: Operating CD read: 5.0G 0-Pk DVD read: 5.0G 0-Pk CD-R write: 1.5G 0-Pk CD-RW rewrite: 0.5G DVD+R/RW write: 0.5G PX-708A Installation and Users Manual Appendix A: PX-708A Specifications (5-300Hz) 0-Pk (5-300Hz 0-Pk (5-300Hz) 0-Pk (5-300Hz) 0-Pk...
- Page 64 Laser Canada Safety UL (C-UL) Europe Safety Laser Taiwan BSMI Korea Australia/NZ C-Tick PX-708A Installation and Users Manual bits bits Standard UL 1950 FDA 21 CFR 1040.10 and 1040.11 FCC Part15B-Class B CSA 22.2 No. 950 EN60950 EN60825-1 EN55024, EN50022 Class B...
-
Page 65: Appendix B: Technical Support
If you have not been successful in your quest, our Technical Support Department will help you solve problems that relate specifically to your PX-708A drive. In many cases, a problem that appears to be caused by your Plextor drive actually originates in another part of your computer. -
Page 66: How To Contact Plextor Technical Support
Appendix B: Technical Support How to Contact Plextor Technical Support There are several ways for you to contact Plextor’s Technical Support Department: • Visit our web site (www.plextor.com) for answers to Frequently Asked Questions. • Send us e-mail at support@plextor.com. Include your telephone number and the hours during which you can be reached. -
Page 67: Returns
Returns In the unlikely event that you need to return a drive to Plextor, you need an RMA (Returned Materials Authorization) number. You need this number before any Plextor drive can be returned for repair or replacement. Here’s how you get an RMA number and return your drive: 1. -
Page 68: Packing Your Drive
Be sure to write the RMA number on the outside of the shipping box. Any drive sent to Plextor without an RMA number will not be accepted. NOTE: The RMA number must be clearly visible on the outside of the shipping box. -
Page 69: Appendix C: Warranty
In the event this product is found to be defective within the warranty period, PLEXTOR will, at its option, repair or replace the defective unit. -
Page 70: If You're Outside The U.s. Or Canada
All drives returned to PLEXTOR must be securely packaged and shipped postage prepaid. The drive will be returned to the customer at Plextor’s expense when originating within the United States. For a drive originating outside of the United States, the customer is responsible for shipping costs in both directions. -
Page 71: Index
IDE · 24, 25, 28 MPC · 31 power · 24 power for drive · 25 Sound Blaster · 31 PX-708A Installation and Users Manual SPDIF · 31 cable connections · 29 cable select · 13, 20, 21, 56 cable for · 21, 25 configuring PX-708A for ·... - Page 72 · 4, 40, 56 diagnostics · 3, 45, 46 digital audio output · 56 connector · 8, 30, 31, 56 PX-708A Installation and Users Manual Digital-In connector · 8, 30, 31, 56 dimensions · 58 disc cleaning · 36 labels ·...
- Page 73 · 3, 44 flash memory · 3, 44 formats · 51 CD · 4, 51 DVD · 4, 37, 51 PX-708A Installation and Users Manual Index front-panel controls · 7, 55 hard disk size · 5, 49 headphone jack · 7, 55 headphone volume control ·...
- Page 74 RAM · 5, 49 MMC-4 command set · 3 mode jumper · 9, 56 changing · 14, 15 setting · 13 PX-708A Installation and Users Manual motherboard BIOS setup program · Mount Rainier CD · 4, 51 DVD · 4, 51 mounting position ·...
- Page 75 · 2, 39 DVD · 2 DVD-Video · 2, 4, 39, 51 single layer disc · 2, 39 SpeedRead and · 39 PX-708A Installation and Users Manual Index rear-panel connectors · 8, 56 recognizing the PX-708A drive in Windows · 31 recording length, extending ·...
- Page 76 · 61 technical support · 59, 60 temperature performance guarantee · 57 specification · 57 storage · 57 PX-708A Installation and Users Manual ticket number, tech support · 61 TLA code · 24 transfer rate CD · 53 DVD · 53 tray closing ·...
- Page 77 · 5, 49 writing speed achieving · 34 CD-R · 2, 53 CD-RW · 2, 53 DVD+R · 2, 52 PX-708A Installation and Users Manual Index DVD+RW · 52 DVD-R · 2, 52 DVD-RW · 52 monitoring · 38 VariRec and ·...
- Page 78 Index This page intentionally left blank. PX-708A Installation and Users Manual...
- Page 79 Notes PX-708A Installation and Users Manual...
- Page 80 PLEXTOR CORP. 48383 Fremont Blvd. Suite 120 Fremont CA 94538-6509 www.plextor.com P/N 127-2789-02 Phone: 510-440-2000 800-886-3935 Fax: 510-651-9755 E-mail: info@plextor.com...
Need help?
Do you have a question about the PX-708A and is the answer not in the manual?
Questions and answers