
Related Manuals for Denver TR-53


Summary of Contents for Denver TR-53
- Page 1 DENVER DENVER TR-53 TR-53 RADIO RADIO OPERATION OPERATION INSTRUCTION INSTRUCTION DENVER DENVER TR-53 TR-53 RADIO RADIO OPERATION OPERATION INSTRUCTION INSTRUCTION...
- Page 2 If you dispose of it, do so having regard to any recycling regulations in your area. CONTENTS The carton should contain: 1 x TR-53 radio Operating Manual LOCATION Place the unit on a dry stable surface away from heat and damp and where it is unlikely to fall or be knocked over.
-
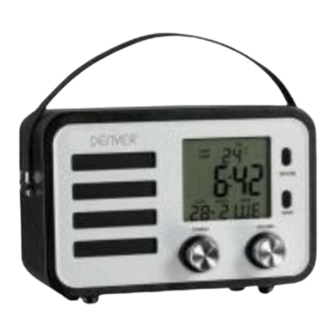
Page 3: Controls And Connectors
CONTROLS AND CONNECTORS CONTROLS FM/AM Tuning control A U X A UT O O F F / A L 24HR TEMP Y E A R Volume control SNOOZE Radio band selector SL EE P DATE MONTH WEE K BAND Snooze button 5. - Page 4 PREPARATION FOR USE CONNECTING MAINS POWER Ensure that the mains wall socket is switched OFF and connect the mains power adaptor. Insert the AC power jack into the input on the rear of the unit (13). Switch the wall socket to the ON position. FITTING OR REPLACING AA BATTERIES (portable use) At the top of the battery cover, pull down the catch and pull...
-
Page 5: Getting Started
GETTING STARTED SETTING THE TIME & DATE O F F / A L 24HR T E M P Y E A R D AT E M O N T H W E E K 1. Press the SET button (8), the hour digit(s) will flash.Press the /buttons (9, 10) to cycle through the digits to set the HOUR. -
Page 6: General Operation
GENERAL OPERATION SETTING THE ALARM O F F / A L 24HR T E M P D AT E M O N T H W E E K To set the alarm to wake you with a buzzer: • Set the STANDBY MODE button to OFF/AL. On the left of display, this symbol will appear when alarm (buzzer) is active. - Page 7 Setting the alarm time: Press the MODE button (7) to enter the ALARM setting mode. Press the SET button (8), the HOUR digit(s) will flash. Press the / buttons (9, 10) to cycle through the digits to set the HOUR. Press the SET button again to proceed to the MINUTE setting.
-
Page 8: Sleep Mode
GENERAL OPERATION SLEEP MODE Sleep mode will play the radio for the set duration. • Set the STANDBY MODE button to AUTO. • Press the MODE button twice. 10 will be displayed. • Press the SET button. The display will flash. Press the /... -
Page 9: Aux Input
AUX INPUT External audio sources such as iPods & MP3 players can be connected using a 3.5mm to 3.5mm audio cable (not supplied). MODE AL/OFF AUTO AUX IN AC 230-240V • Connect one end of the cable to the MP3 player’s headphone /Line output and the other end to the AUX input (12) on the back of the unit. -
Page 10: Specifications
SPECIFICATIONS Supply Voltage, Mains: ..................230-240V~50Hz Max. Power Consumption: ......................4W Speaker Power: .......................... 1W Standby Power Consumption < 1W AM: ..........................522-1620KHz FM: ..........................87-108.5 MHz Net Weight: ..........................0.9 kg CARE AND MAINTENANCE AFTER USING YOUR RADIO Switch the unit off at the mains and unplug it if you areleaving it unattended for a long period (holidays etc).
Need help?
Do you have a question about the TR-53 and is the answer not in the manual?
Questions and answers